Creative uses for Twine

How do you use twine on a card? I’ll admit, I mostly criss-cross it on my pieces – it’s one of my signatures. So when I saw the challenge over at Happy Little Stampers this month uses twine – I thought no problem…wrong! I didn’t just want to do a criss-cross – I always do that….so I really racked my brain to come up with a creative use of twine for you.

I looked at my stash, and I’ll be honest – I don’t get crazy with purchases like these – I mostly like neutrals like browns, white and black. But I remembered that I had some red/white bakers twine from back in my Stampin Up days. My first idea didn’t pan out, but it was perfect for a candy cane…so the card came together from there – with a little inspiration from a card online. Mind you, my card looks nothing at all like the muse, It was a giant strip of white with red flanking the sides that cemented the idea in my head.

How to use Twine on Cards

Candy Cane Twine Tutorial:

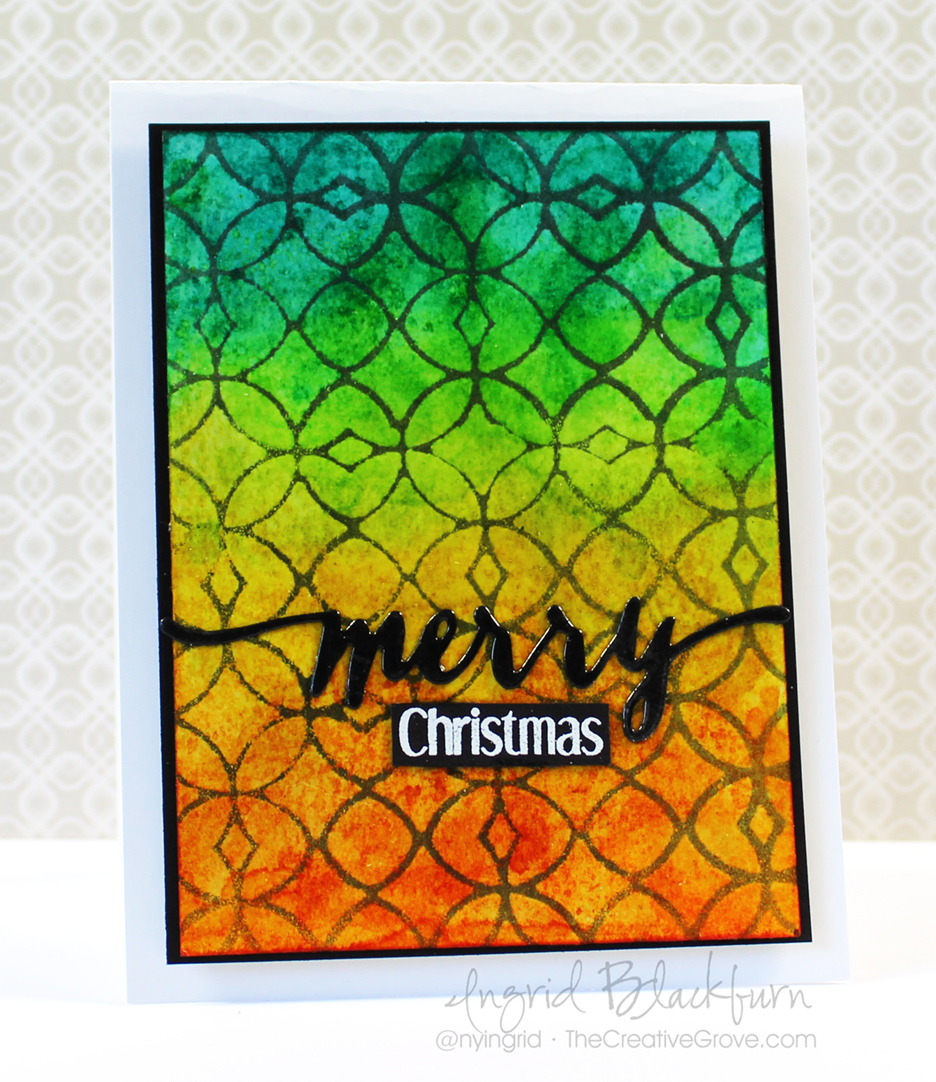
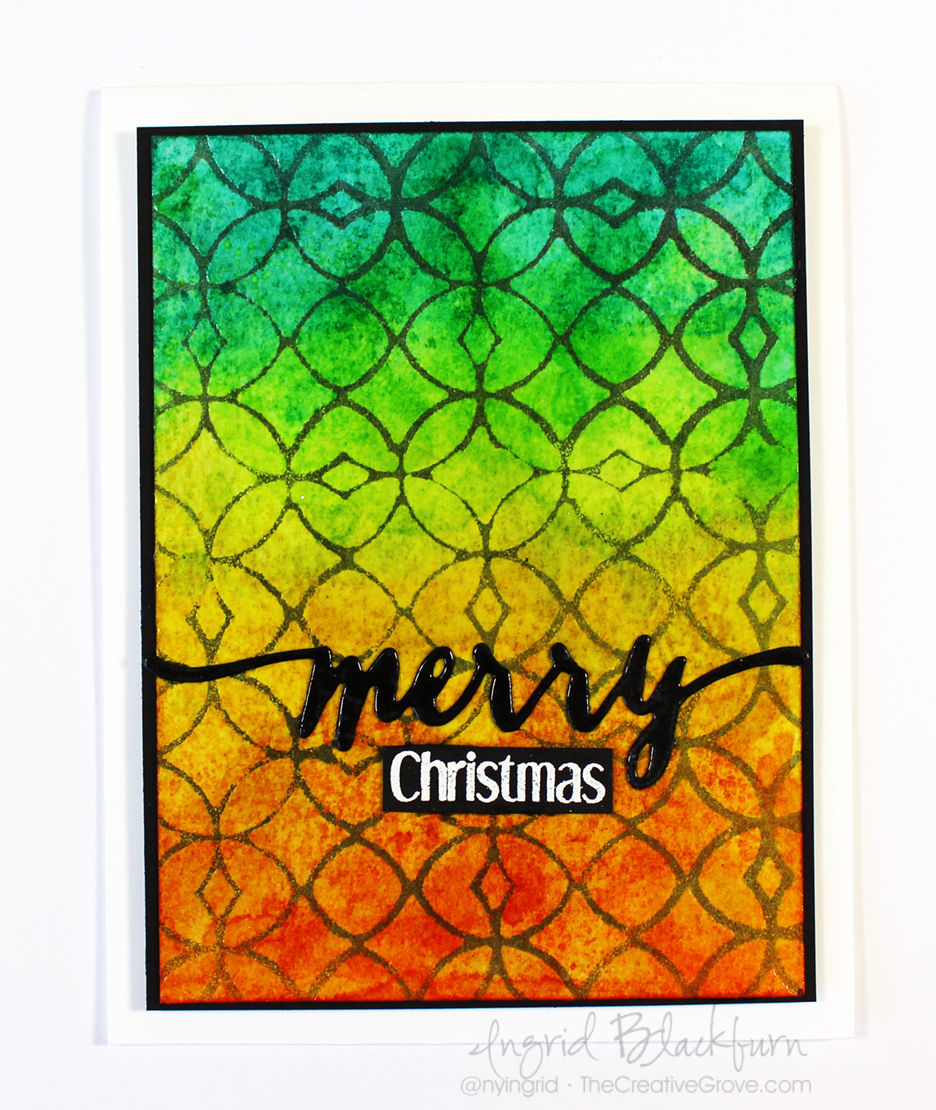
  • Sponge the Merry Go Round Stencil by ARTplorations in Barn Door and Festive Berries Distress Ink onto White Card Stock – 3 7/8 x 5 1/8″
  • Round the corners of a Real Red rectangle – 2 1/3 x 3 1/2″
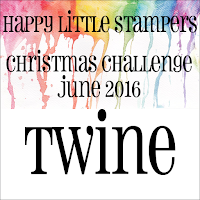
  • Wrap some red/white twine around the top being sure to criss-cross it at the edges and tie a bow with some long tails. Tip – to get my loops to stay to the top and tails downward, I tie like a kindergartner would with bunny ears and upside down, so the top is toward me. I over-exaggerate the loops and make them smaller after by pulling on the tails.

Candy Cane Christmas Cards with Twine

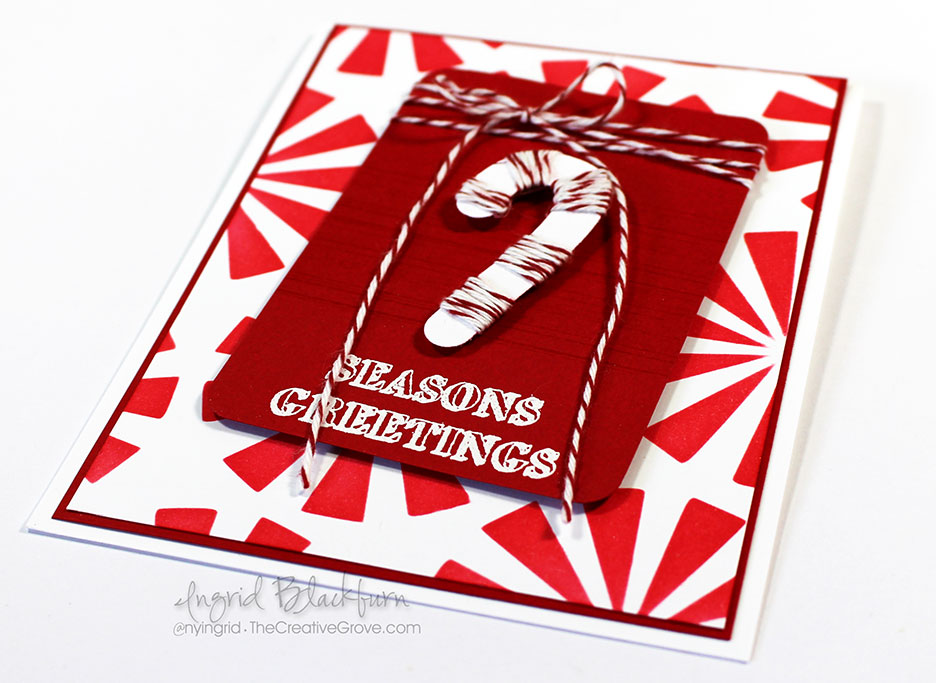
  • Emboss a greeting at the opposite end in white. I used White EP by Brutus Monroe and the stamp set Mixed Christmas Sentiments by Happy Little Stampers
  • In the middle, stamp some lines in Barn Door using my favorite stamp from the Gorgeous Grunge stamp set by Stampin Up. It’s that little something that really helps to make this piece – I stamped it twice and left lots of space top and bottom.
  • Die cut or hand cut a candy cane image. Mine came from a retired SU die cut set. If you don’t have a die like this, stamp a candy cane on scrap paper, cut out and use that as a guide on the back of your card stock.

Peppermint Christmas Cards - Bakers Twine

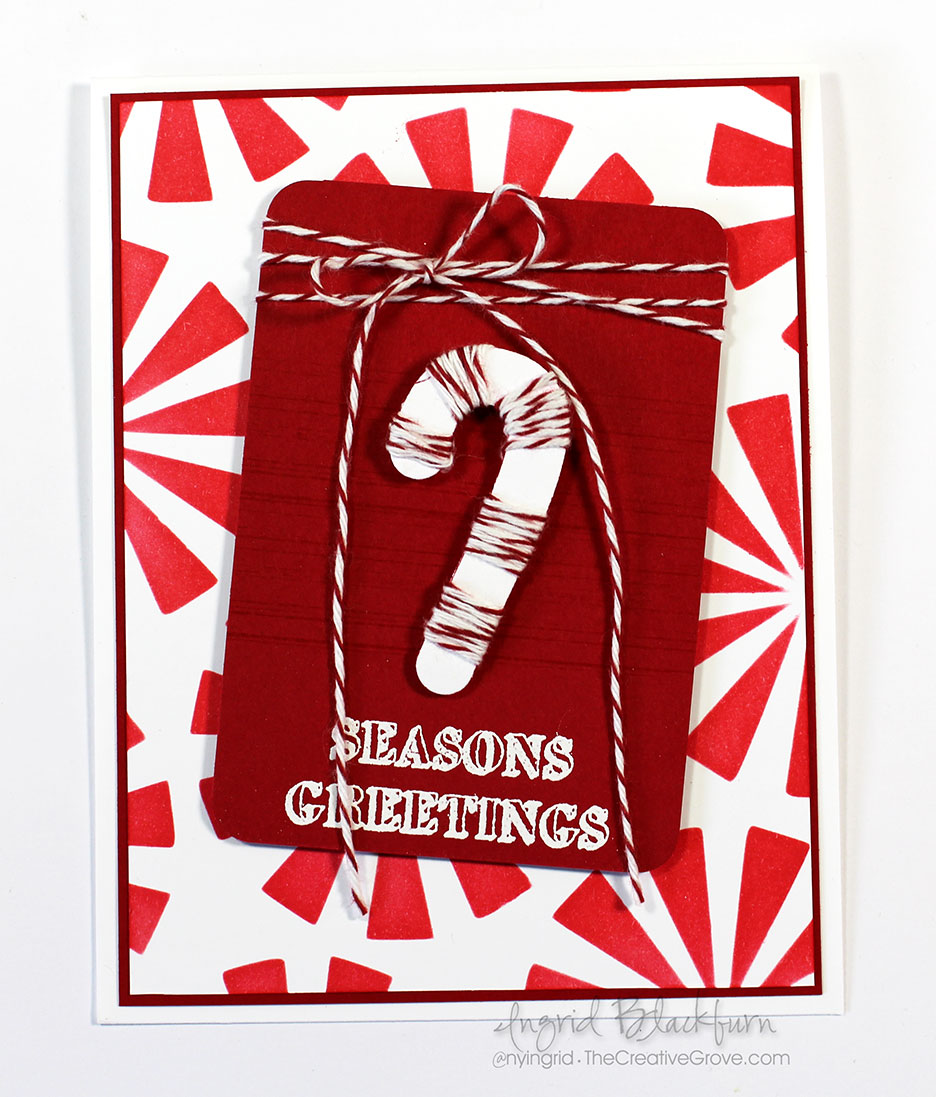
  • Wrap the red/white twine spaced out to reflect the red parts of the candy cane. TIP – I never cut my twine. On the back, it connects to the upper pieces. I secured them down with glue and double sided tabs before popping it up on mini foam squares.
  • Attach the tag to your card front with fun foam or foam strips. The height helps to add drama to your card.

Creative Bakers Twine Uses Bakers Twine Tutorial - Ingrid Blackburn

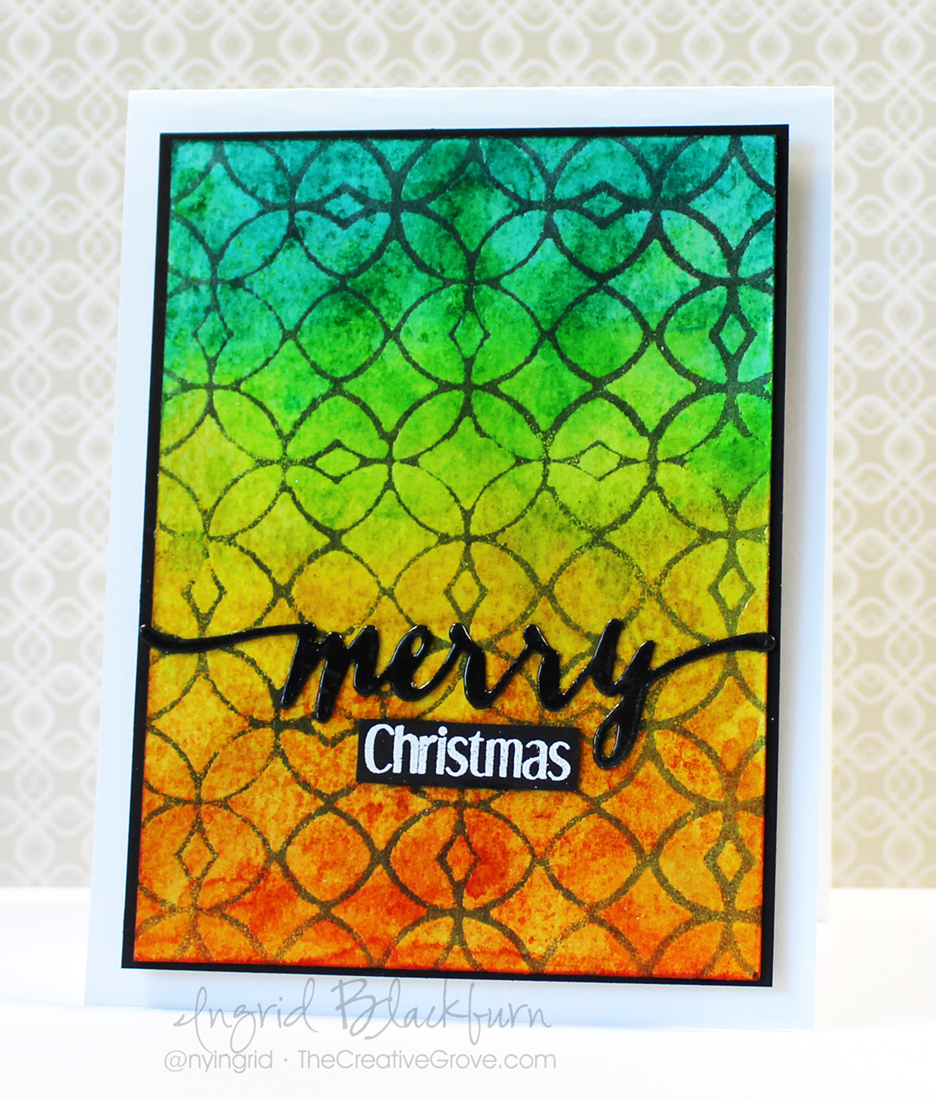
  • Adhere your peppermint background to a real red matte that is 1/16″ larger – 4 x 5 1/4″
  • Attach to a white A2 card base – 4 1/4 x 5 1/2 for a 1/8″ matte and you’re done!

It’s a fun, cute card, right?!!! Now it’s your turn – grab some Twine and jump on into the Twine Challenge over at Happy Little Stampers. And while you’re there – check out all the other great challenges going on!

DIY Christmas Cards - Ingrid Blackburn

Of course, I do like to play along with multiple challenges, and two other’s in mind when I made this card. First up, my inspiration for the red/white – this week’s Muse Christmas Visions. The crazy talented muse this week is Kimberly Weiner – I love everything she creates. Kimberly created a beautiful red/white cardinal creation and that helped me to zero in on my candy cane idea for today’s twine card.

And of course, you know I just LOVE to play along with the CAS Mix it Up challenge as well. This month they’re featuring Die Cuts, so jump on into that fun one too!

Hope to see you in all the challenges! See you in a few days for yet another great project!

Now go get those fingers inky –

Signature

[optin_box style=”12″ alignment=”center” email_field=”email” email_default=”Enter your email address” integration_type=”aweber” double_optin=”Y” list=”3846012″ name_field=”name” name_default=”Enter your first name” name_required=”Y” opm_packages=””][optin_box_field name=”headline”]Learn more with our exclusive FREE video series:[/optin_box_field][optin_box_field name=”paragraph”]PHA+UGx1cyB5b3XigJlsbCBiZSBhZGRlZCB0byBteSBGUkVFIENyZWF0aXZlIFRpcHMgRS1sZXR0ZXIgd2hlcmUgSSBzaGFyZSBleGNsdXNpdmUgcHJvamVjdHMsIHZpZGVvcyAmYW1wOyB0aGUgMTIgRGF5cyBvZiBDaHJpc3RtYXMgUHJvamVjdCBTZXJpZXM8L3A+Cg==[/optin_box_field][optin_box_field name=”privacy”][/optin_box_field][optin_box_field name=”top_color”]undefined[/optin_box_field][optin_box_button type=”0″ button_below=”Y”]Get Instant Access![/optin_box_button] [/optin_box]

How to Get Inks to Shine

Mixed-Media-Stained-Glass-Window-001

All you really wanted from your card was a little shine, right? Have you ever created a stunning background, but hours later your ink colors are flat and faded? Well, this technique is for you then! I’m playing along with the new Mixed Media Challenge over at Happy Little Stampers – Shine.

HLS Mixed Media challenge May 2016

I LOVE to create backgrounds – have you noticed? All to often in card making, we create these amazing colorful backgrounds on cards and then the colors settle as the project fully dries and we’re left with something that is a bit flat and has no vibrant nature left. At least I do! I’m always thinking where did the shine go? Okay, not all of it is shiny, but you know what I mean.

I have a video and step by step tutorial for you, so grab a drink, learn how to create amazing depth first, then a stain glass window that captures the true nature of those amazing colors by trapping the shine element of your card. Here’s the video:

Watch in HD on YouTube

So what did you think? Not that difficut really. What did you think about stretching your stencil for better coverage? Have you ever done that? Here’s the step by step tutorial, and if you really loved this, be sure to sign up for the Creative Tips E Letter for an exclusive video series and more…

[optin_box style=”12″ alignment=”center” email_field=”email” email_default=”Enter your email address” email_order=”2″ integration_type=”aweber” double_optin=”Y” list=”3846012″ name_field=”name” name_default=”Enter your first name” name_order=”1″ name_required=”Y” opm_packages=””][optin_box_field name=”headline”]Learn more with our exclusive FREE video series:[/optin_box_field][optin_box_field name=”paragraph”]PHA+UGx1cyB5b3XigJlsbCBiZSBhZGRlZCB0byBteSBGUkVFIENyZWF0aXZlIFRpcHMgRS1sZXR0ZXIgd2hlcmUgSSBzaGFyZSBleGNsdXNpdmUgcHJvamVjdHMsIHZpZGVvcyAmYW1wOyB0aGUgMTIgRGF5cyBvZiBDaHJpc3RtYXMgUHJvamVjdCBTZXJpZXM8L3A+Cg==[/optin_box_field][optin_box_field name=”privacy”][/optin_box_field][optin_box_field name=”top_color”]undefined[/optin_box_field][optin_box_button type=”0″ button_below=”Y”]Get Instant Access![/optin_box_button] [/optin_box]

Creative Tips on Shine, Texture and Stretching your Stencils

  • Create an in depth textured piece by using the wrinkle free distress technique on a piece of 140# cold pressed watercolor paper and dye based inks. (shown in detail in the video) Tip – For the most vibrant results, try Ranger’s Distress Inks.

Mixed-Media-Stained-Glass-Window-003


  • This project uses Distress Mustard Seed, Spiced Marmalade, Twisted Citron and Peacock Feathers
  • Once your project is totally dry, lightly buff over it with a de-static tool to remove any oils.
  • Smoosh Versamark through the Latticeworks stencil by Tim Holtz or your favorite one for a detailed design as in the video. Since this stencil didn’t cover my watercolor paper, I had to do this in two parts and overlap my design for a seamless flow.

Vibrant Mixed Media Cards

  • Emboss in Clear Embossing Powder – I used Brutus Monroe – and if you’ve never tried it – do so…it rocks!
  • Once your embossed stencil has fully dried, sponge over with Soot Black distress ink.
  • Wipe off your stenciled design with light pressure and a slightly damp cloth or paper towel to pick up the resisted ink.
  • Emboss your die cut greeting in clear for a shiny look. I used Handlettered Holiday by WPlus9. Adhere with Ranger Multi Medium Matte.

using distress inks in mixed media

  • Stamp and emboss the Christmas greeting from HLS Everyday Sentiments in white on black card stock – trim and adhere.
  • Adhere your watercolor paper with glue to a black matte with a 1/16″ border.
  • Pop up Mixed Media Panel with Fun Foam and adhere to a White card base with a 1/4″ border all around.

That’s it! Simple and striking Mixed Media card. I’m also going to play along with this months challenge over at CAS Mix it Up….it’s heat embossing – we definitely fit there!

may

So hop on over to the HLS Mixed Media Challenge and check out all the amazing projects my teammates have created for this challenge.  Plus you’ll want to stop by our Guest Designer Kalina’s blog – she’s SUPER talented when it comes to Mixed Media and her projects are out of this world!

Then get those fingers inky….I can’t wait to see what you do to let your creations shine!

Signature

[optin_box style=”12″ alignment=”center” email_field=”email” email_default=”Enter your email address” email_order=”2″ integration_type=”aweber” double_optin=”Y” list=”3846012″ name_field=”name” name_default=”Enter your first name” name_order=”1″ name_required=”Y” opm_packages=””][optin_box_field name=”headline”]Learn more with our exclusive FREE video series:[/optin_box_field][optin_box_field name=”paragraph”]PHA+UGx1cyB5b3XigJlsbCBiZSBhZGRlZCB0byBteSBGUkVFIENyZWF0aXZlIFRpcHMgRS1sZXR0ZXIgd2hlcmUgSSBzaGFyZSBleGNsdXNpdmUgcHJvamVjdHMsIHZpZGVvcyAmYW1wOyB0aGUgMTIgRGF5cyBvZiBDaHJpc3RtYXMgUHJvamVjdCBTZXJpZXM8L3A+Cg==[/optin_box_field][optin_box_field name=”privacy”][/optin_box_field][optin_box_field name=”top_color”]undefined[/optin_box_field][optin_box_button type=”0″ button_below=”Y”]Get Instant Access![/optin_box_button] [/optin_box]