I love creating backgrounds for cards – it’s probably one of my favorite things to do…and in the past year, I’ve grown quite addicted to Stencil Backgrounds! This card takes stencils to a whole other level. This month over at Happy Little Stampers Mixed Media Challenge we’re playing around with Stencils. If you’ve taken any class with me in the past year online or watched any of my YouTube Videos – then you KNOW I love stencils.
I’m still getting my feet wet in the Mixed Media world, but this Gelli Plate has quickly given me the ability to create some amazing pieces of art. And let’s be honest – that’s exactly what it is – art! I used to spend a crazy amount of money on papers that look like this….now I can create them myself…what? That’s insame!!! Don’t worry – some videos will definitely appear in the future, but for now – just enjoy one of my latest goofing off pieces (I wish every goofing off piece turned out like this!).
Of course for the Mixed Media Challenge, you don’t need a Gelli Plate – just a trusty ol stencil. Use your favorite way to add a medium – gel, embossing paste, ink, sponging, gelli, you name it – they are a tool not just every Mixed Media gal and guy needs – but every stamper!
Creative Tips on How to Create Stencil Backgrounds using a Gelli Plate
- Add some acrylic paint to your Gelli Plate – start off with your darkest shade. I used Phylo Blue. Use a brayer to spread your acrylic paint covering it edge to edge.
- Roll off on a piece of scrap paper and pull off some paint leaving a blue layer around the edge of your Gelli. It took me a bit to get the hang of this.
- Allow the blue to completely dry, then add some Raw Sienna and cover in the same manner. Remove a bit of it toward the middle, then place a stencil over – I used My Favorite Things Scallop stencil.
- Place a piece of copy paper over and lightly tap with your fingers to remove a bit here and there. Remove your stencil and allow to completely dry.
- If you want to get a feel for what it’s starting to look like, lift your Gelli Plate and see it from the bottom. Of course, don’t place your finger in your creation!
- Next, add a layer of white. Now, I have white acrylic paint – but it’s lost somewhere in my craft room – would you believe that! I knocked my paint box over and now I can’t find that one all important tube…maybe the cat took it away…yeah – I’ll go with that! Of course, that prompted me to clean my work area today – I think Bria still has my tube…lol! So I used the next best thing – white gesso.
- Lay a sheet of small bubble wrap over the white to get a stamped impression in white. Tap it lightly in random places to create a slightly stamped circular pattern.
- Quickly place your piece of paper over – I used 138 lb Canson Mixed Media paper. Firmly rub the back of your paper with your fingers. I didn’t quite do this quick enough and a little of my paint didn’t lift properly around the perimeter, but that was okay because it created this gorgeous distressed look. I bet I couldn’t duplicate that if I tried!
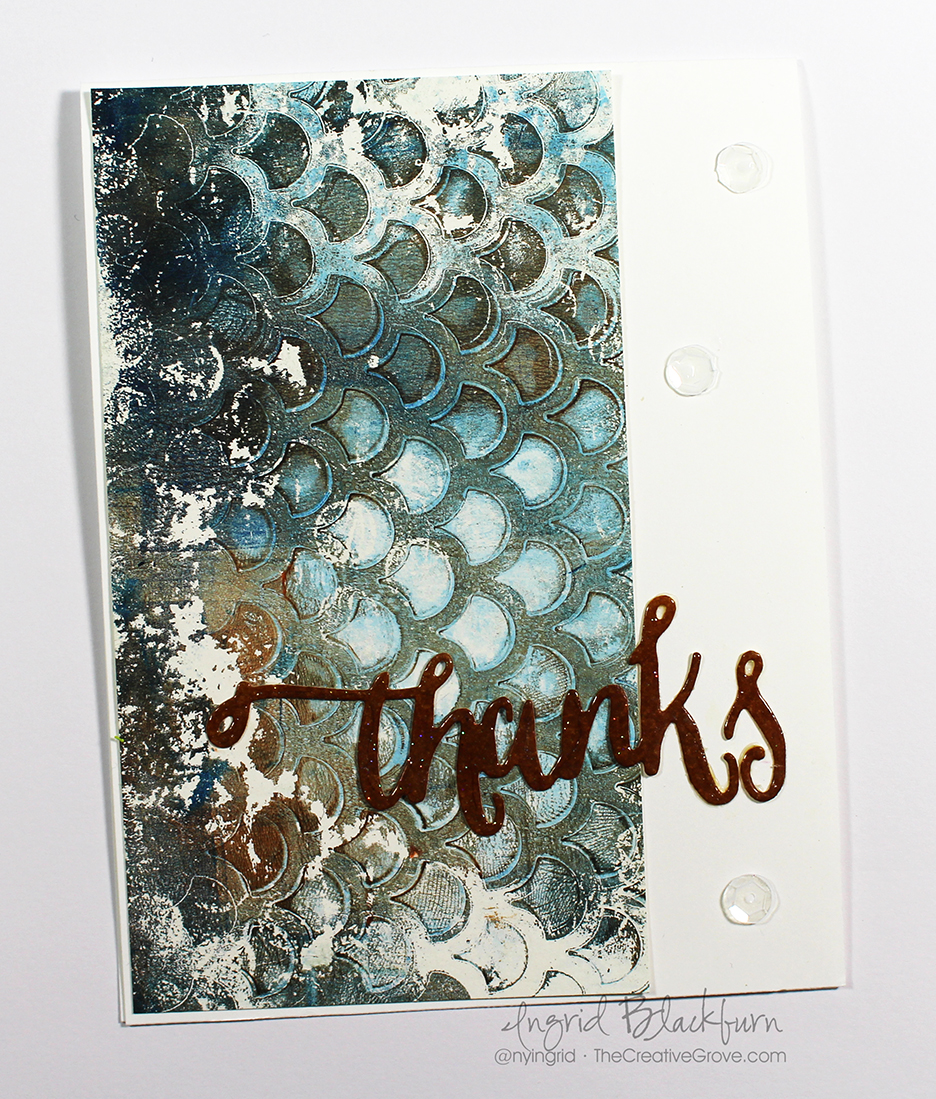
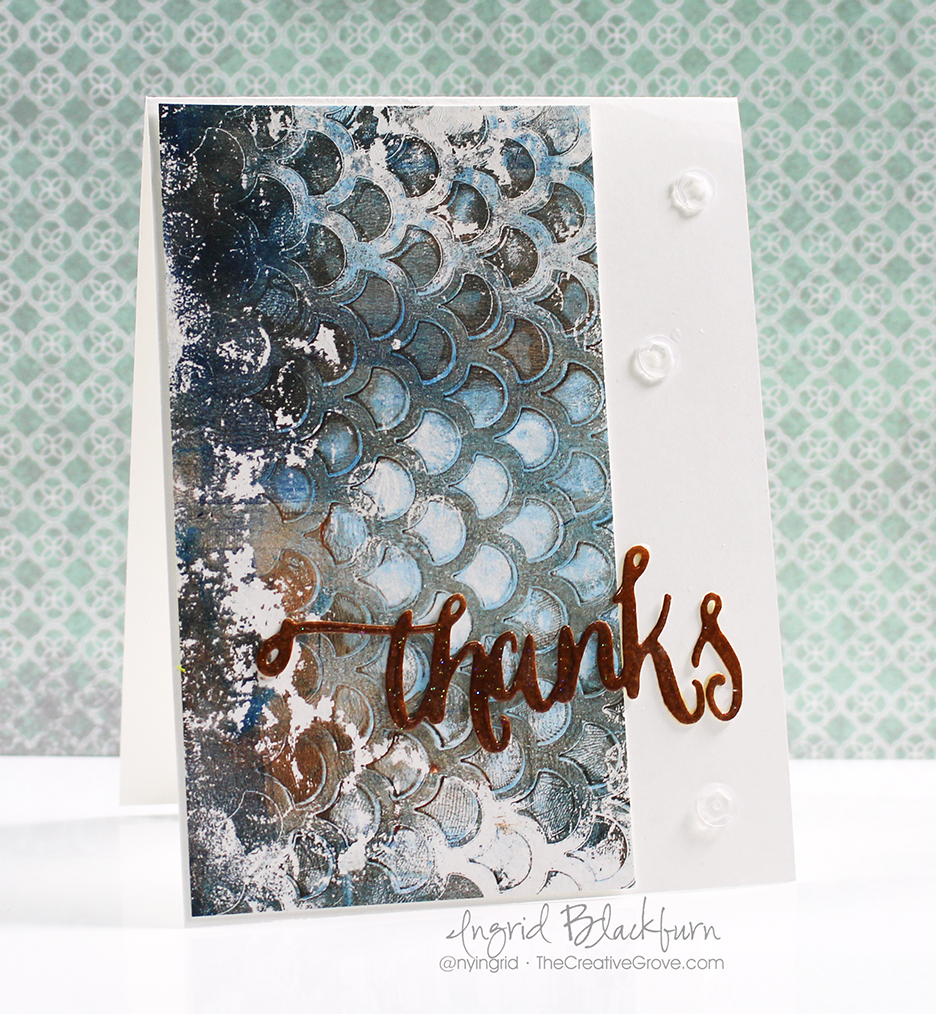
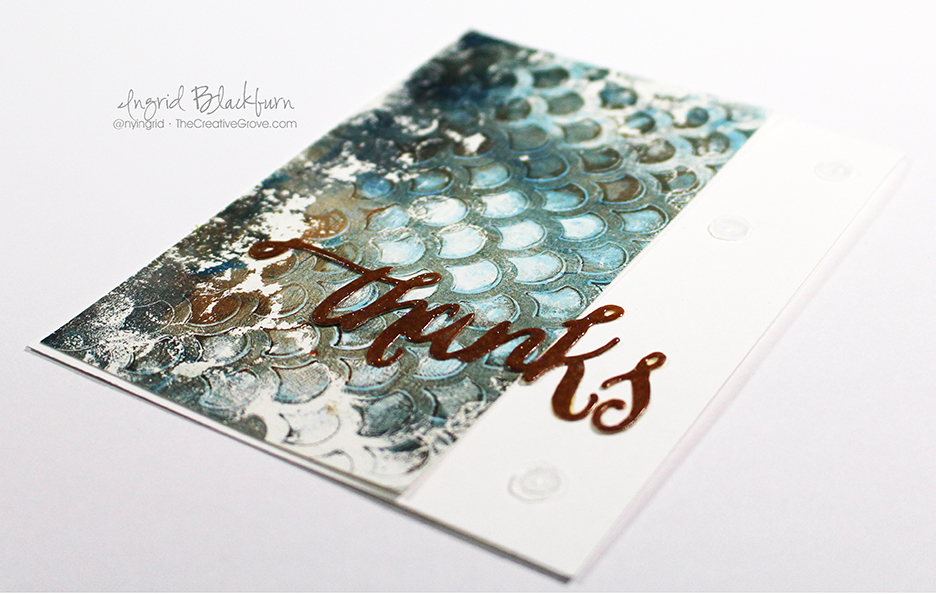
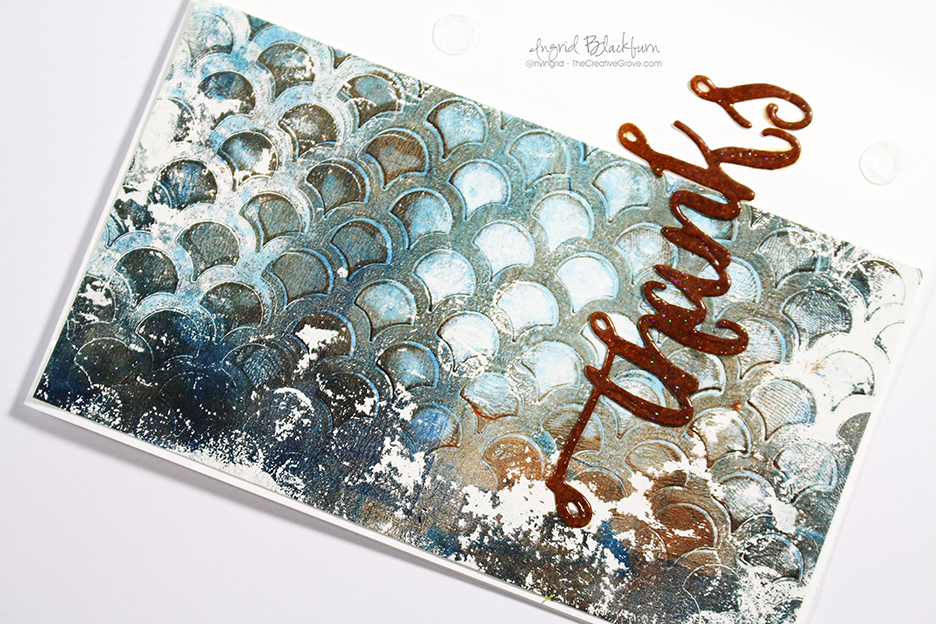
- My Gelli Plate is a 6 x 6 inch one. My piece also measures 6 x 6″. I cut my paper in two (Pained me to do so – it was SO beautiful). This is the left half.
- I trimmed it down to 5 3/8″ x 3″. That was a happy accident. Originally I intended on 5 1/2 to go top to bottom, but I love the slight 1/16″ border it ended up with.
- You don’t want to take away from the beauty of the background. So I opted to add a sponged die cut that was embossed in clear. This is the Handlettered Thanks die by WPlus9.
- To get a similar hue to the Raw Sienna in the project, so I first sponged a piece of white scrap paper with Rusty Hinge, then a bit of Gathered Twigs and Walnut Stain Distress Inks to get a matching hue. Distress inks really helped here, as their translucent nature allowed me to build upon previous layers fro just the right color.
A few clear sequins finished it off. I love the simplicity yet complexity that this card has. I have to admit, some of the creations I whipped up with my Gelli Plate really stunned me. Once I got the hang of it, and that creating mono-prints was about layering and pulling it up together, I really started to have fun! I see a ton of “Gelli-ing” in my future!
So whip out those stencils – take what you will from this project, mono-printing, sponging, color combo, layout, anything and get those stencils out. Add fun stuff to the challenge gallery!
Remember our definition of Mixed Media is – stamps + ink, plus two other elements which add texture and/or dimension. Can’t wait to see what you stencil up!
Now go get those fingers inky –

[optin_box style=”12″ width=”600″ alignment=”center” email_field=”email” email_default=”Enter your email address” email_order=”2″ integration_type=”aweber” double_optin=”Y” list=”3846012″ name_field=”name” name_default=”Enter your first name” name_order=”1″ name_required=”Y”][optin_box_field name=”headline”]If you enjoyed this tutorial…[/optin_box_field][optin_box_field name=”paragraph”]PHA+4oCmeW914oCZbGwgbG92ZSBvdXIgPGVtPjxzdHJvbmc+ZnJlZSA8L3N0cm9uZz48L2VtPnN1YnNjcmliZXIgb25seSB2aWRlbyBzZXJpZXMuIMKgTGVhcm4gbmV3IHRlY2huaXF1ZXMgdGhyb3VnaCBvdXLCoDxlbT48c3Ryb25nPmV4Y2x1c2l2ZTwvc3Ryb25nPjwvZW0+wqBDcmVhdGl2ZSBUaXBzIGUtbGV0dGVywqBhbmQgc3Vic2NyaWJlciBvbmx5IHZpZGVvIGFuZCBwcm9qZWN0IHR1dG9yaWFscyE8L3A+Cg==[/optin_box_field][optin_box_field name=”privacy”][/optin_box_field][optin_box_field name=”top_color”]undefined[/optin_box_field][optin_box_button type=”0″ button_below=”Y”]Get Exclusive Tips![/optin_box_button] [/optin_box]