One Layer Flicked Distress Technique

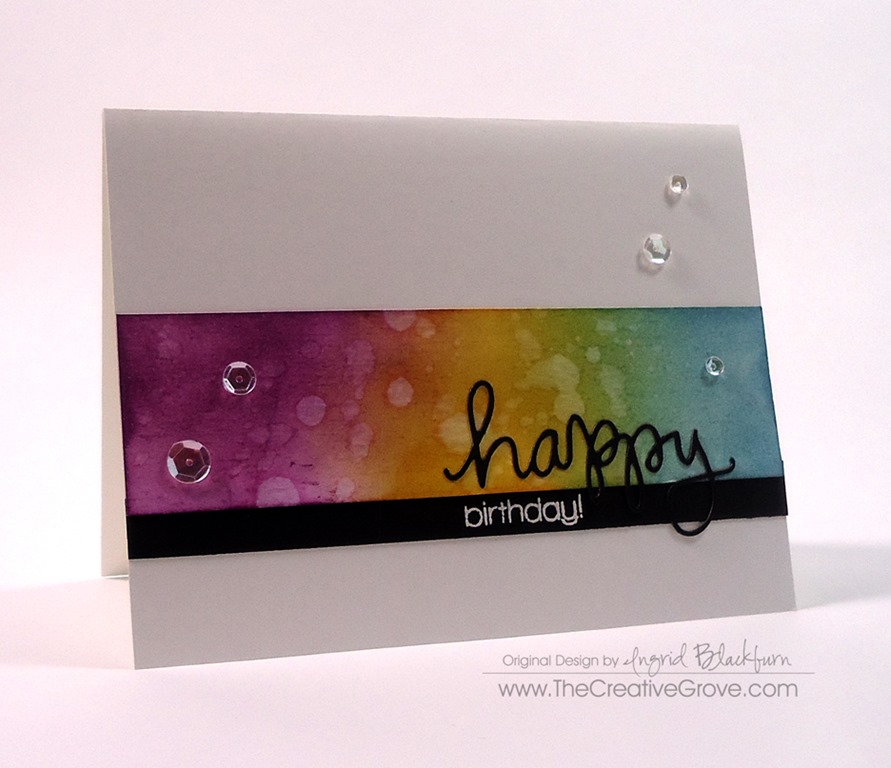
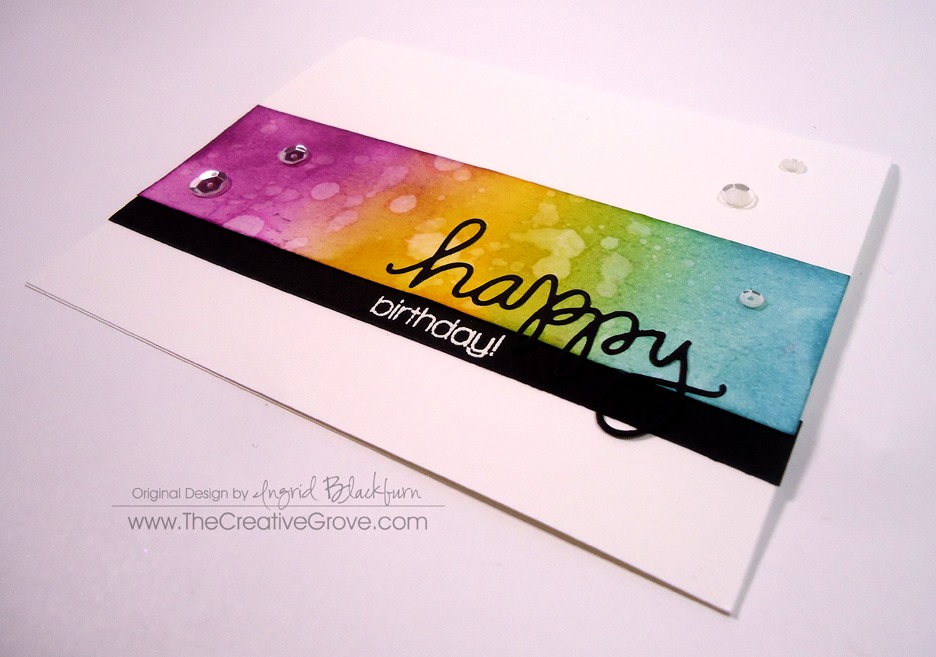
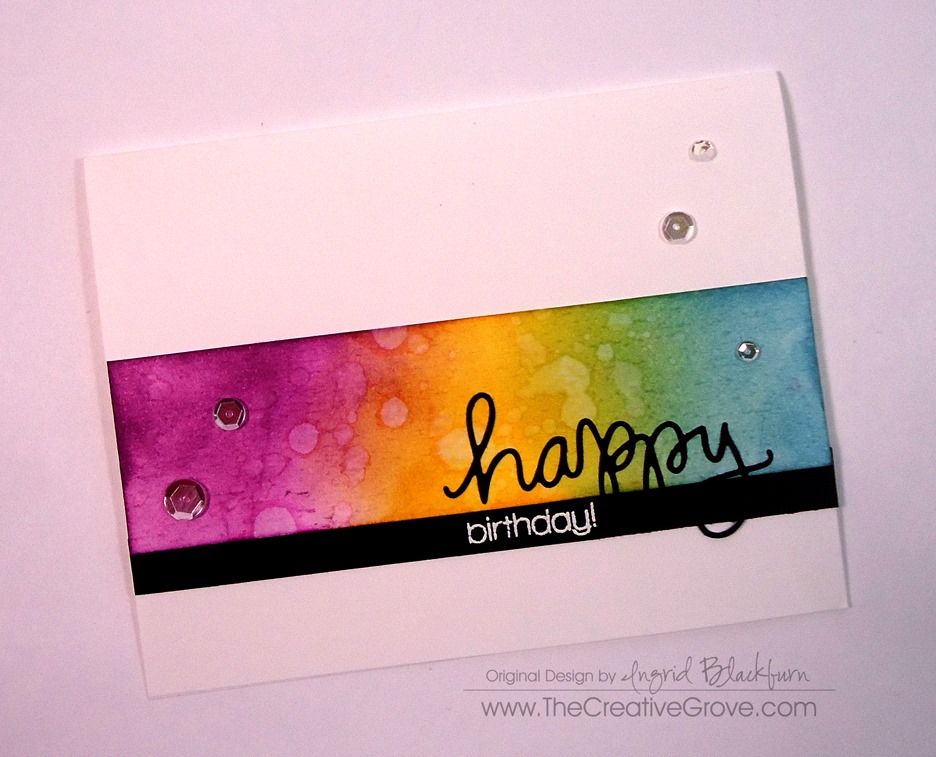
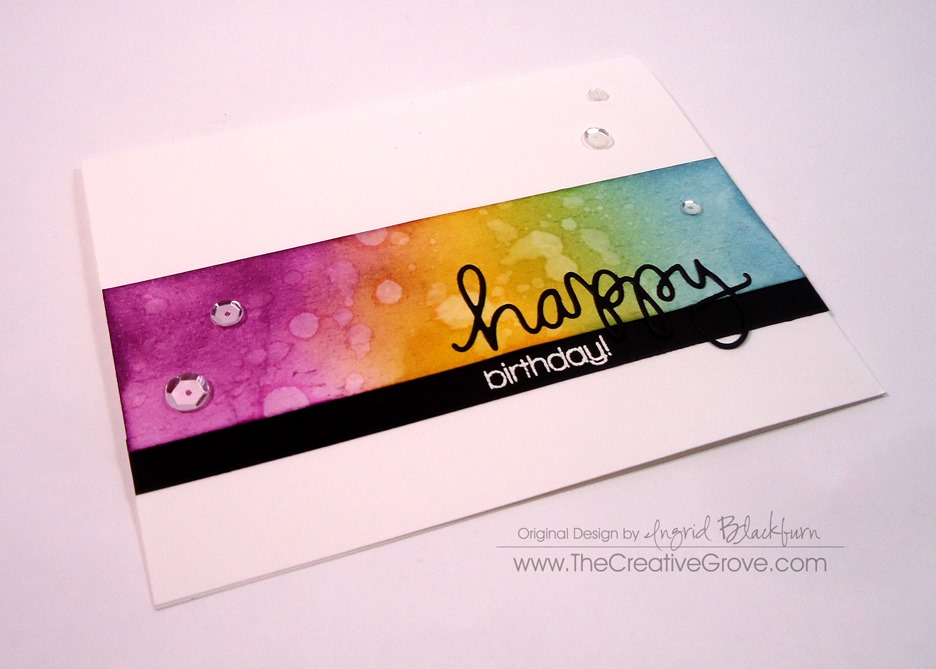
Have you ever just loved a card or technique and wanted to duplicate it, but in a different way?  This project shows you just how to do that!  A few months back, I made a great card using the Flicked Distress Technique.  Well, after seeing the challenge for blending on the challenge blog One Layer Simplicity Challenge, I decided to re-create this card, but this time – I’d do it completely in one layer!

OLC Flicked Distress 001

This card re-created in one layer would not be an easy task, or so I thought – it turned out to be quite simple, and what a cool impact card this is – all for the price of half a sheet of white cardstock!  I even filmed a step by step tutorial for you, so grab a beverage, sit back and enjoy!

Watch this video on You Tube

Did you like that?  If so, be sure to subscribe to our Creative Tips E-List for more exclusive videos and projects.  It’s free – Be sure to sign up to the right or below!

OLC Flicked Distress 006

Here’s a link to the original project in case you wanted to see the layered version! Thanks for stopping by today, see you next time!

Signature

OLC Flicked Distress 004

[optin_box style=”12″ alignment=”center” email_field=”email” email_default=”Enter your email address” integration_type=”aweber” double_optin=”Y” list=”3846012″ name_field=”name” name_default=”Enter your first name” name_required=”Y” opm_packages=””][optin_box_field name=”headline”]Learn more with our exclusive FREE video series:[/optin_box_field][optin_box_field name=”paragraph”]PHA+UGx1cyB5b3XigJlsbCBiZSBhZGRlZCB0byBteSBGUkVFIENyZWF0aXZlIFRpcHMgRS1sZXR0ZXIgd2hlcmUgSSBzaGFyZSBleGNsdXNpdmUgcHJvamVjdHMsIHZpZGVvcyAmYW1wOyB0aGUgMTIgRGF5cyBvZiBDaHJpc3RtYXMgUHJvamVjdCBTZXJpZXM8L3A+Cg==[/optin_box_field][optin_box_field name=”privacy”][/optin_box_field][optin_box_field name=”top_color”]undefined[/optin_box_field][optin_box_button type=”0″ button_below=”Y”]Get Instant Access![/optin_box_button] [/optin_box]

Vibrant Flicked Accents


How to tutorial on the Flicked Distress Technique

Church bells fill the air this early Sunday morning here in Rome.  I’m drinking a rich cappuccino while writing this for you.  I created several projects to share with you while I’m traveling for several weeks through Europe, and I thought this was the perfect one to share with you today.  Yesterday we saw all the magnificent works of art in the Sistine chapel and all the Vatican museums.  Those rooms really take your breath away.

I look at those works of art and wonder how those men could paint for years on one project like that!  It really puts it all into perspective – sometimes things just take a little bit of time.  And the masters studied and worked on their craft for years, decades actually.  It’s amazing to me that with the art of Paper Crafting we get to spend a little bit of time in our day to create something beautiful to share with those that we love.  And this is one such project.

This card really packs a punch with its colors and simplicity.  It’s the simplest of cards to make, you’ll just be shocked!  No need to study for decades for this one – the right tools turn you into the master.

Learn distress ink techniques at The Creative Grove - Flicked Distress Technique

Your first step is to pick the right ink.  Just like anything in life, you need the right stuff.  You’ll want to pick inks that are translucent in nature.  That way as you layer them upon one another – be it just one shade or a mixture as you see in this card, they work together to create deeper hues rather than flat and dull.

This project uses Distress Inks because their very chemical nature is a translucent dye based ink.  What makes it so unique is that it reacts like a watercolor.  When water is added to the mix, it moves, blends and creates something new.  That’s how you get those cool effortless effects with them.  And when you add water to a set project like this one – that’s how you get those cool flicked marks, just like water spots.

If you are one of our Community members, then you have access to a step by step video on how to create the Flicked Distress Technique like this card.  It’s in our Project and Resource library.  To find out more about our online classroom site Click Here.

Flicked Distress Technique 004

Creative Tips:

To create this project, you’ll want to use the right tools with your Distress Inks by Ranger.  I used the mini sponge applicators.  Start with a strip that is long enough to cover the span of your card, mine is 5 1/2 x 1 1/2”.  You can also sponge an entire sheet and cut it down.

Using Ranger Distress Inks, start with Mustard Seed in the middle of your piece of scrap paper.  you’ll want to cover 1/2 of it – leaving enough space at the left and right to show a different color.  Yellow is a great color to combine other colors with to create new ones.  Start by sponging off your paper and lightly in a circular motion, sponge onto your project.  The reason you want to start off your paper is that the first impression you make is always a harsh one since your tool has the most ink on it at that moment.  You will naturally ease up as you work your tool further onto your project.

Add several layers of your mustard seed, and don’t worry if your sponging isn’t flawless in the beginning.  I promise it will all blend together and look effortless at the end.  That’s the beauty of Distress Inks – due to their true translucent nature, they blend effortlessly.  I was so frustrated when I first started layering mine, because it didn’t look flawless and I was really watching my pressure!  But sure enough, as I trusted the process and kept working at it – something happened and it began to look unbelievable.  I still to this day say “that’s so cool” every time I create a project like this.

Flicked Distress Technique Birthday Card

Once you’re happy with the depth of your Mustard Seed, add Broken China to the right.  continue as you did for the Mustard Seed, just overlap a little to create a beautiful shade of Green between the two.  Don’t overlap too much, just a little goes a long way.  Do the same on the opposite side with Seedless Preserves.  Once you have your layers complete, do one final pick me up with the Mustard Seed to brighten it up and you’re all set!

Spritz a little water onto your hand where your palm and fingers meet and in a firm and fluid motion flick the water a few times onto your project.  I encourage you to try this first on a practice piece to “get it”.  That gives the spots your see above.  Dry it quickly with a little zap from a heat tool.  The reason for the heat tool is that water will always react with Distress Inks, and if you get a really get area, you want it to just stop, rather than continue to work the ink.

To finish your card, emboss the word Birthday from the set happy by Simon Says Stamp onto a strip of Black card stock.  Attach it to the bottom of your strip and place the coordinating word Happy above it with liquid glue.  Add a few sparkling clear sequins by Pretty Pink Posh are you’re set!

So what did you think?  Have you tried this technique out before – I’d love to know!  Leave me a comment and tell me what color combinations you’ve tried!  Have fun – Ciao!

Signature


If you like learning how to create this technique then you’ll LOVE our online classroom community.  We add new step by step project tutorials each week with up close photographs and classes.  Learn more about how to be a part of our paper crafting community HERE.