WOW Embossing Glitter & Powder Blog Hop

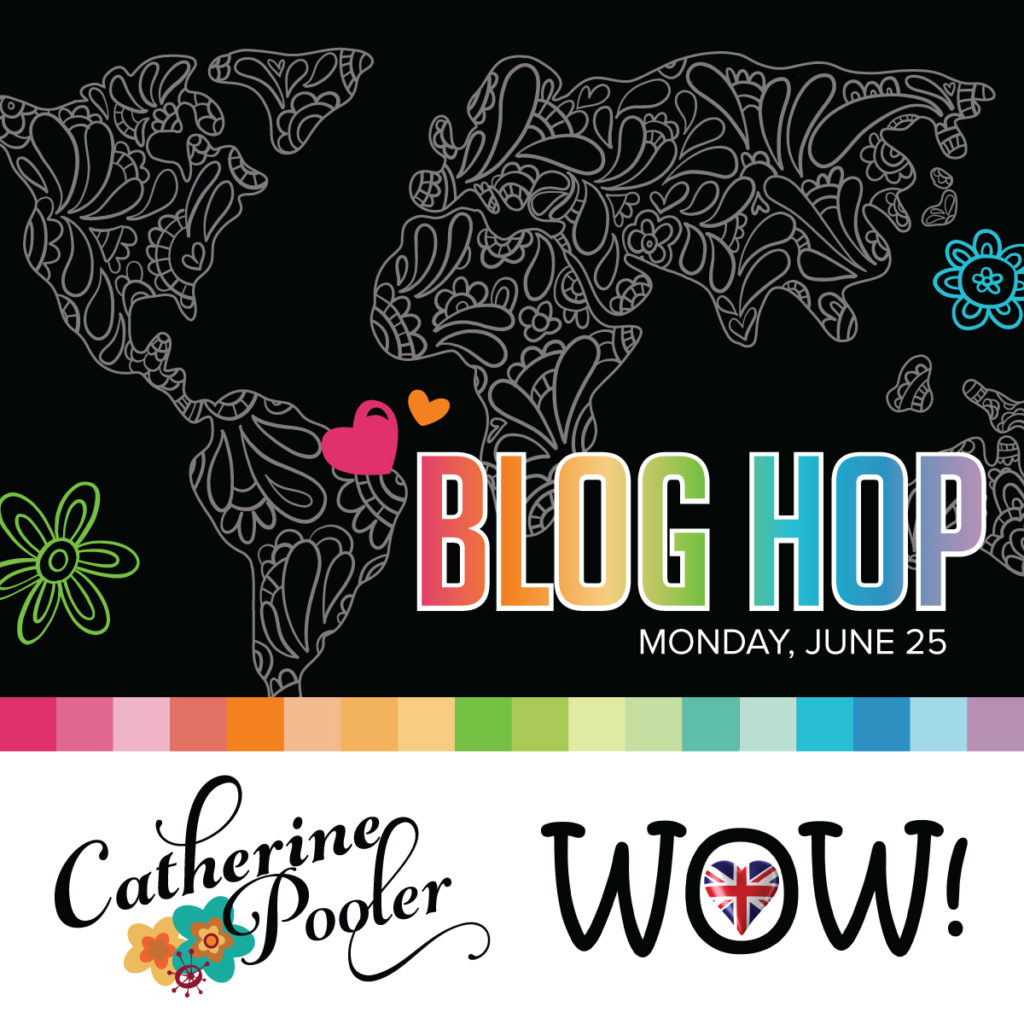
Let’s kick off our Monday morning with some Sparkly inspiration…it’s all about WOW Embossing Glitter today! (okay – a few embossing powders too…) Thanks for stopping by – you’ve probably hopped on over from the incredibly talented Ilina Crouse’s blog. We have quite a hop for you today, so let’s get to it!

SO what exactly is WOW Embossing Glitter? The geniuses behind the incredible powders decided to mix their regular embossing powders with some sparkly glitter and voila! And let me tell you – no one does embossing powder or embossing glitters like WOW. If you haven’t tried them yet – don’t wait, don’t pass go – RUN…you’ll thank me for sure.

If you’ve followed me for a bit, you know that glitter and I are not exactly on the best of terms. Oh, don’t get me wrong – I LOVE the look, I just seem to always get more on me (and ultimately my hubby) than my project?!! Enter Embossing Glitter. The sheer fact that the glitter melts into that gorgeous embossing powder and stays put had me at hello!

Now, I’ll admit, I do still get glitter on me, don’t ask me how – it just happens. I’m quite sparkly as I write this, but the cool thing is, I have six super sparkly cards all ready to hit the mailbox. I had so much fun making these cards, and I know each one will definitely brighten up each person’s day – what’s better than that!

So let me show you too can create!

WOW Embossing Glitter Tutorials

No. 1 – Well Hello There

My original project ended up being #1 and #2 on the same piece. It didn’t quite turn out as I expected – so I could do one of two things – toss and start over, or split and create two cards! Obviously the only one that made sense was to create two, right? Have you ever had that happen to you? Come on, I know you have!

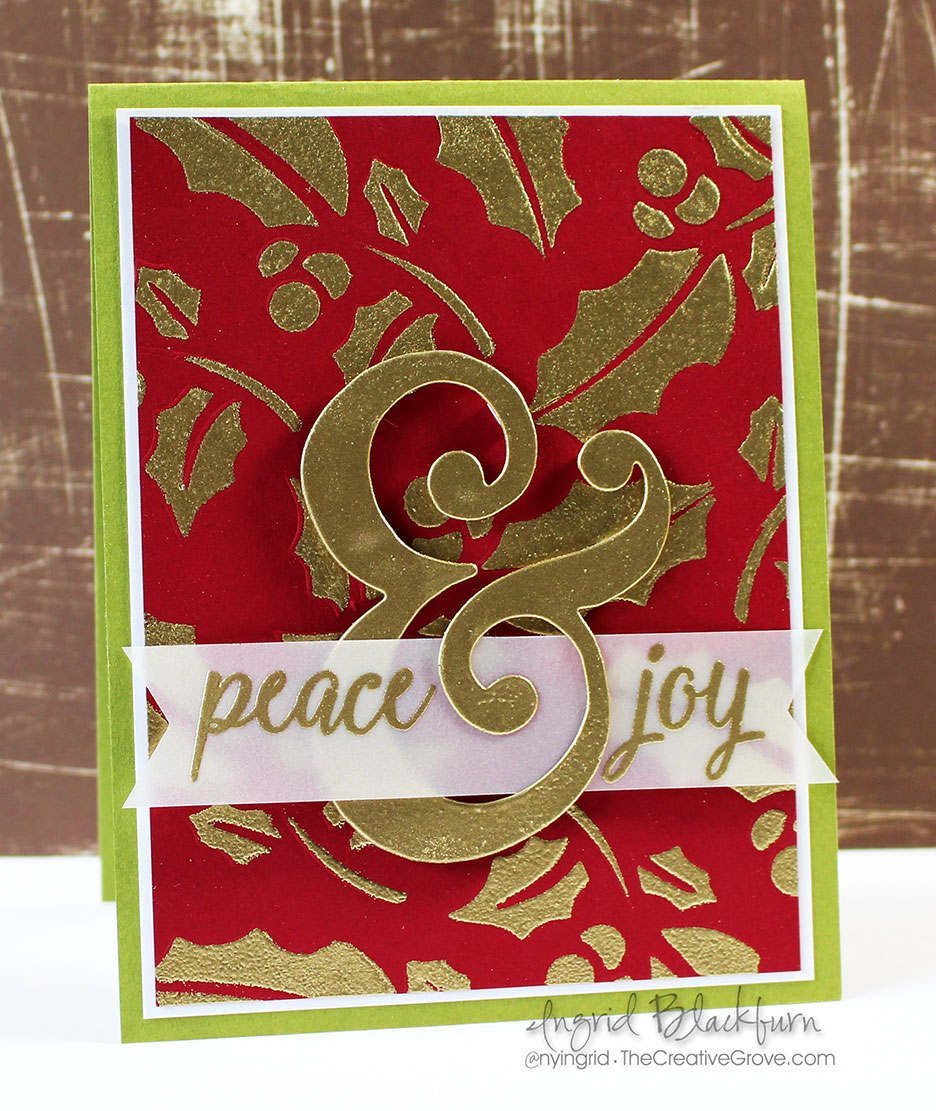
This one is simple, straightforward and quite honestly – striking! The beauty of using Catherine Pooler Ink…it stays wet for a few seconds. The key to this is to be completely ready. Have everything you need out. If not, once you’ve stamped in your desired colors, you’ll just need to stamp over it with versamark and then add your WOW Embossing Glitter. Here, I used Wanderlust. Wanderlust is a special blend inspired by Catherine Pooler. It’s drop dead gorgeous. Just like a little jar of diamonds!

WOW Embossing Glitter

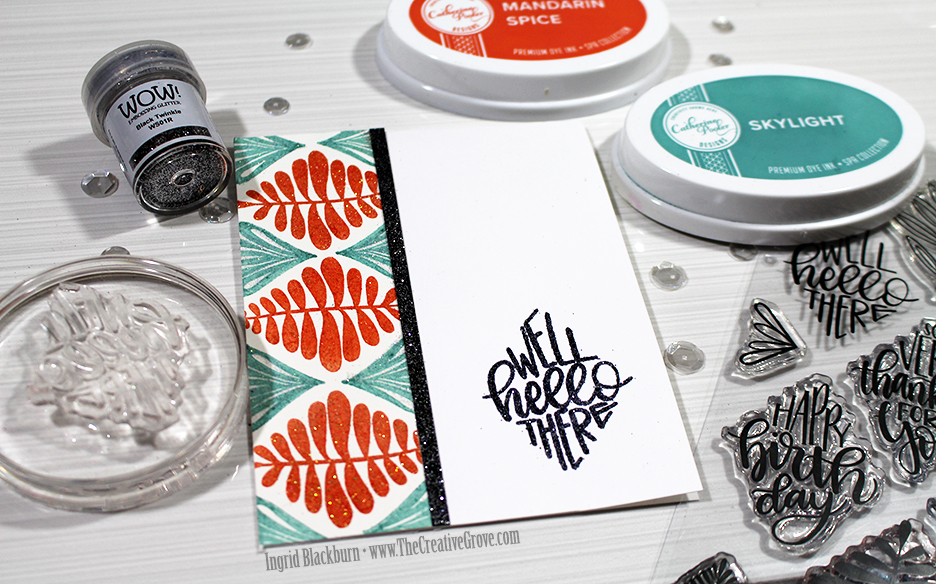
Mask of a border, stamp your Say it in Diamonds pattern alternating in Mandarin Spice and Skylight. The key is to stamp and image or two, and add the powder. Don’t get too ahead of yourself – you want to get excellent coverage. Emboss and repeat, it’s that simple!

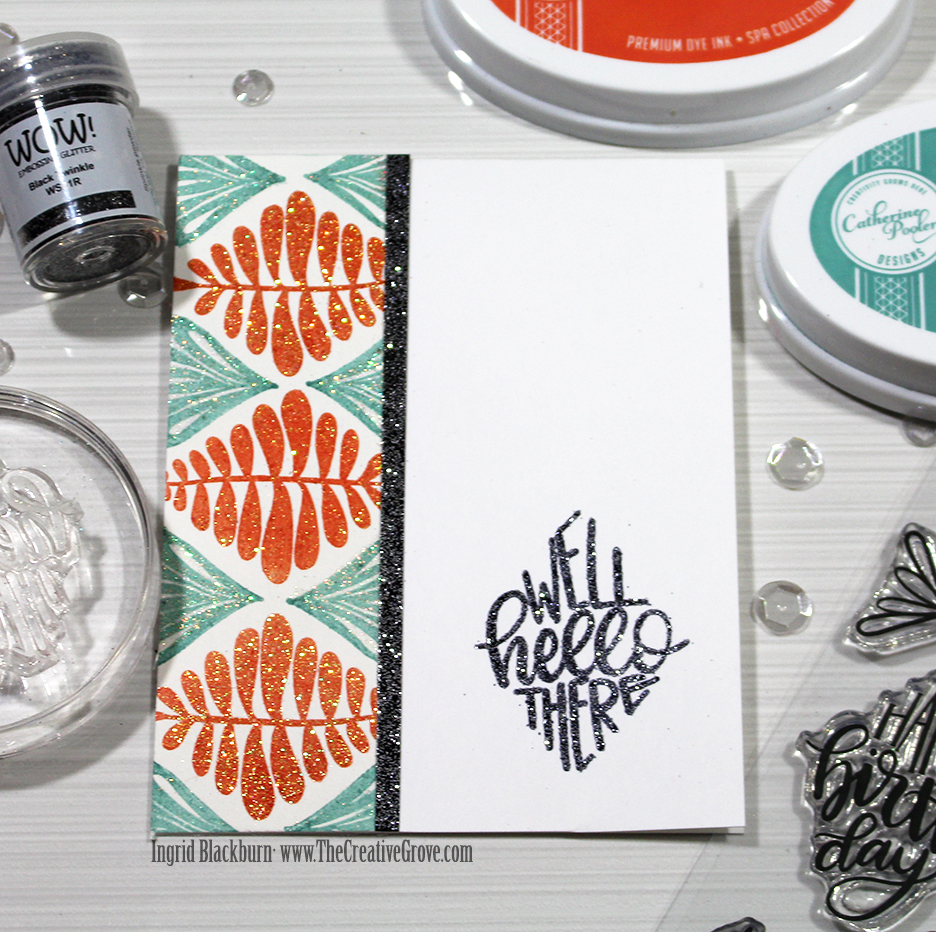
Smoosh your versamark ink pad onto a scrap piece of Midnight cardstock, add Black Twinkle and voila – you have your own glitter paper!! Stamp and emboss your sentiment from Say it in Diamonds in Black Twinkle, adhere your strip and that’s it! Super quick, VERY sparkly, and perfect for any occasion.
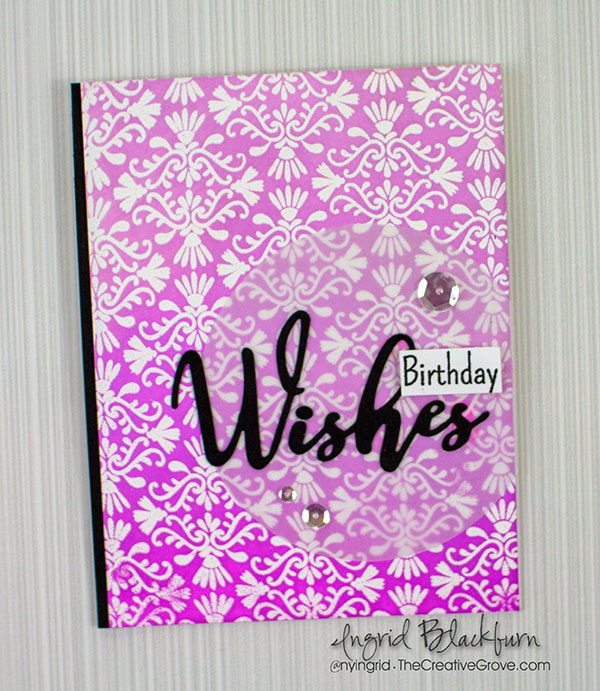
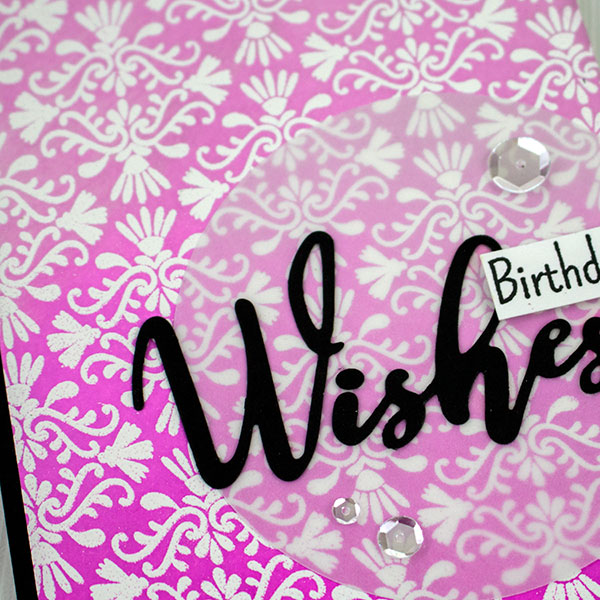
No. 2 – Make a Wish

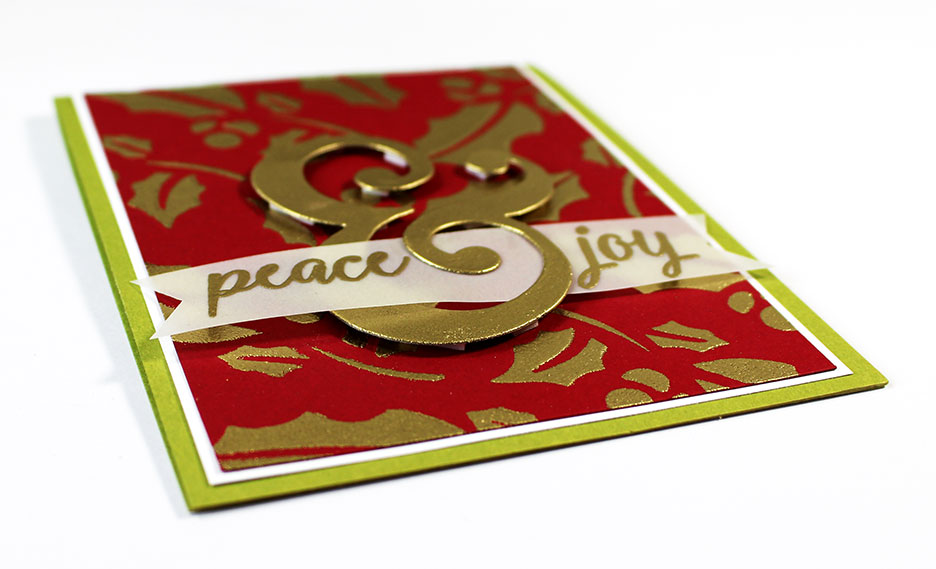
The other half of my original project was a sunburst. I wanted to sponge some colors, glitter them up and then create my border. What I didn’t account for, was adding the wrong Embossing Glitter…lol! Whoops! I was supposed to add Sunset Boulevard, but added Turkish Nights. It was a happy accident for me, as I ended up with two projects instead of one!

Mask off a few inches, and sponge Limoncello rays through your Twisted Sunburst stencil – this stencil ROCKS! Shift and sponge Mandarin Spice in the open space. It’s okay if a tiny bit overlaps. You will get a bonus while highlight to the rays.

Place your stencil over your Limoncello rays. Smoosh a Versamark pad through your stencil. Lift and add Aladdin Embossing Glitter to half your rays from the sun outward. Tap the excess off and add Turkish Nights (or better yet, Sunset Boulevard). Emboss. The different between Turkish Nights and Sunset Boulevard is Purple vs. Orange hues.

WOW Embossing Powder

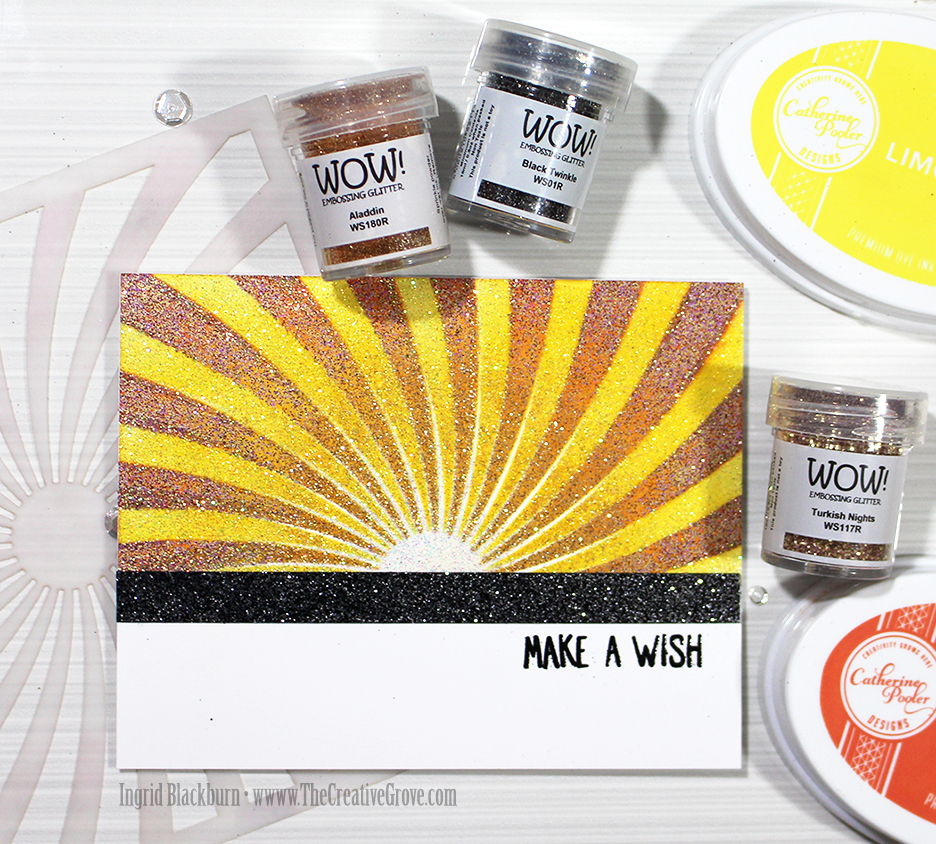
Shift your stencil to cover your embossed areas, and smoosh a versamark pad through your stencil onto the Limoncello Rays. Smoosh a little versamark from the corner of your pad onto the white sun. Add Wanderlust Embossing Glitter and heat set.

Create your own glitter strip using Midnight cardstock and Black Twinkle. Adhere over seam on card and emboss a sentiment in your remaining white space. I used a few from the new Starlights stamp set with some Primary Ebony Embossing Powder. It’s that simple. You can create this with just glitters, or sponge and glitter like I did. The result is pretty darn eye-catching!

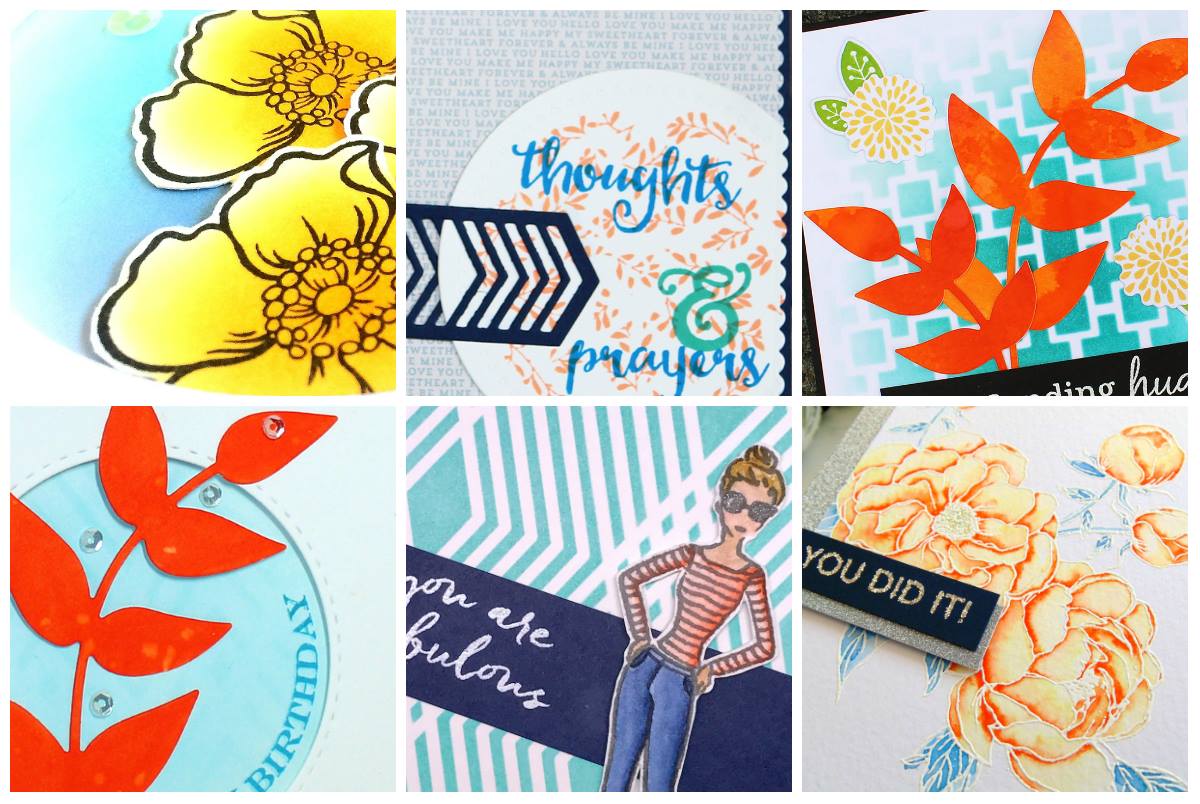
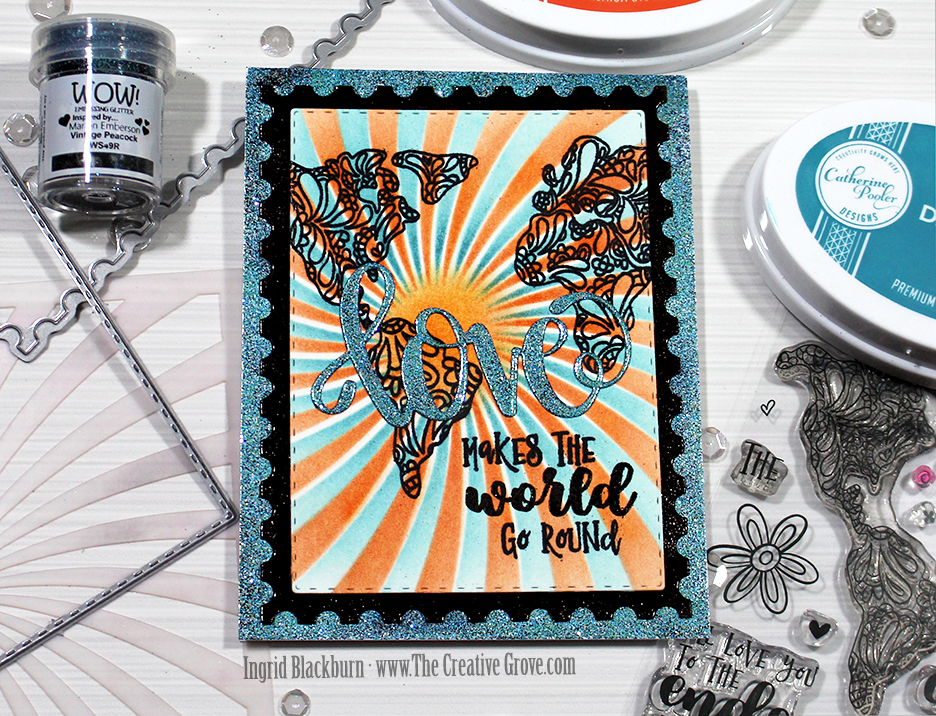
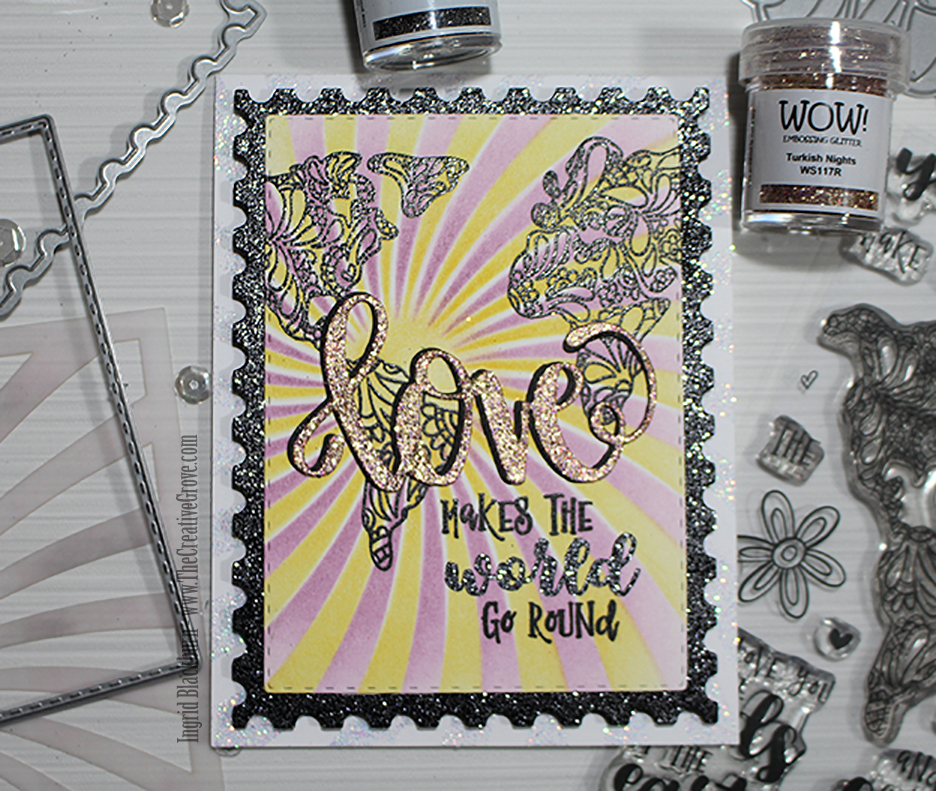
No. 3 – Love Makes the World Go Round

I had a little fun with this one. And I have to say – it ended up being quite relaxing! The fun part, seeing all the WOW Embossing Glitter sparkle to life.

Start out by smooshing versamark over several word dies. I used the Love Word Die with (Left to right) Fools Gold, Aladdin, Vintage Peacock, and Turkish Nights. Once you have your word dies – pick some ink colors that will compliment the sparkle! Here are the combinations that spoke to me:

Fools Gold – World embossed in WOW Earthtone Pepper, Rose Petals and Icing on the Cake inks and Chocolate cardstock. Fools Gold has an earthy gold quality to it with a dark reddish undertone to it. So Rose Petals seemed like a fun pairing. I love the look of pink and brown, so this ended up being one of my favorites!

Aladdin – Emboss the world in Ebony, and give a nod to our British hosts from WOW today. I thought it would be fun to honor not only the UK, but it’s the 4th next week, so red, white & blue it is! Aladdin was the perfect compliment. It wasn’t gold – but has a little gold in it. This one uses Peppermint Scrub, Juniper Mist and white to its advantage. The Postage Stamp Die edges are embossed in Black Twinkle and the card base is surrounded with Wanderlust – it’s a beauty!

WOW Embossing Glitter

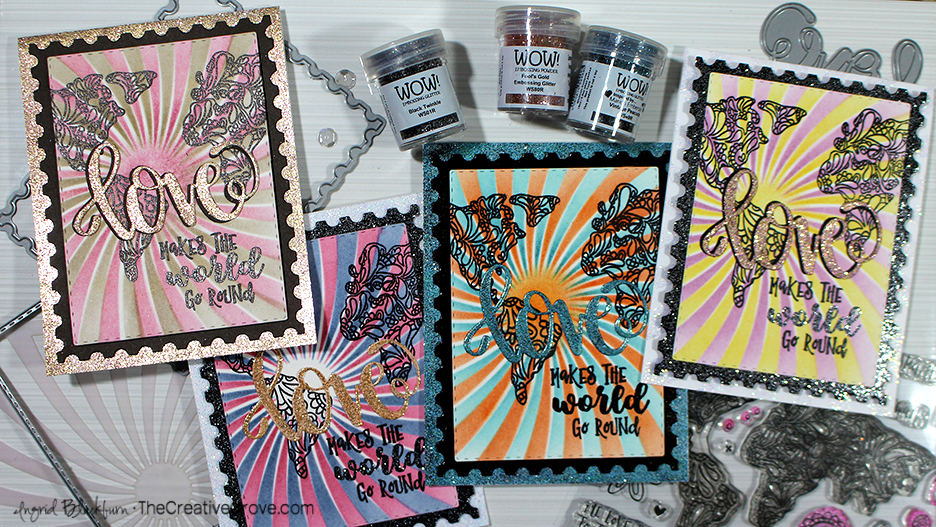
Vintage Peacock – This one was my all time favorite of the day. I’m a sucker for the complimentary colors – Blue and Orange together. The Vintage Peacock has some gorgeous teal in it mixed with deep black and silvery sparkle. For an added twist, the world and postage die border is embossed in my favorite brown by WOW – Primary Bark. Done on Chocolate cardstock or with Black ink underneath, it’s super deep. The edge of the card base is embossed in more Vintage Peacock – this card is a STUNNER!

Turkish Nights – This one is a bit different than the bunch. Turkish Nights has this deep Lavender hue mixed with Gold, so naturally – Sugared Lavender and Shea Butter were my ink choices, right? The world is stamped in black and embossed in Clear Regular powder. The postage die edge is embossed in Black Twinkle and the card base has a perimeter of the Twisted Sunburst stencil embossed in Wanderlust. It isn’t too visible, so I switched to just smooshing the edge of the base in later cards.

WOW Embossing Powder and Glitters

Each one has it’s own personality and character. It was fun to mix and match powders with embossing glitters. Ultimately I kept the palette more to the Spa side, which seemed to work well with the glitters. I love the variation in the die cut rectangles from the Postage Dies – the alternating Stamp/Stitched look. And The World Awaits is the perfect stamp set. It’s fun, has endless sentiment options and is totally unique on the market.

Prizes and Hop List

So I hope you enjoyed these couple of projects! Be sure to comment on everyone’s blogs. We have prizes!!! WOW is giving away 6 powders of your choice along with a carry case, and Catherine Pooler is giving away the Life of the Party collection of inks!

Winners will be announced the week of July 2nd on the WOW Blog.

Enjoy all the inspiration. Jaine Drake is up next from here. And then hop on through the list!! If you ever get lost along the way – be sure to start back up at the WOW blog!

Ingrid Blackburn – You are HERE!
Jaine Drake . – Hop here NEXT!!

Now it’s your turn to add a little sparkle to your day!
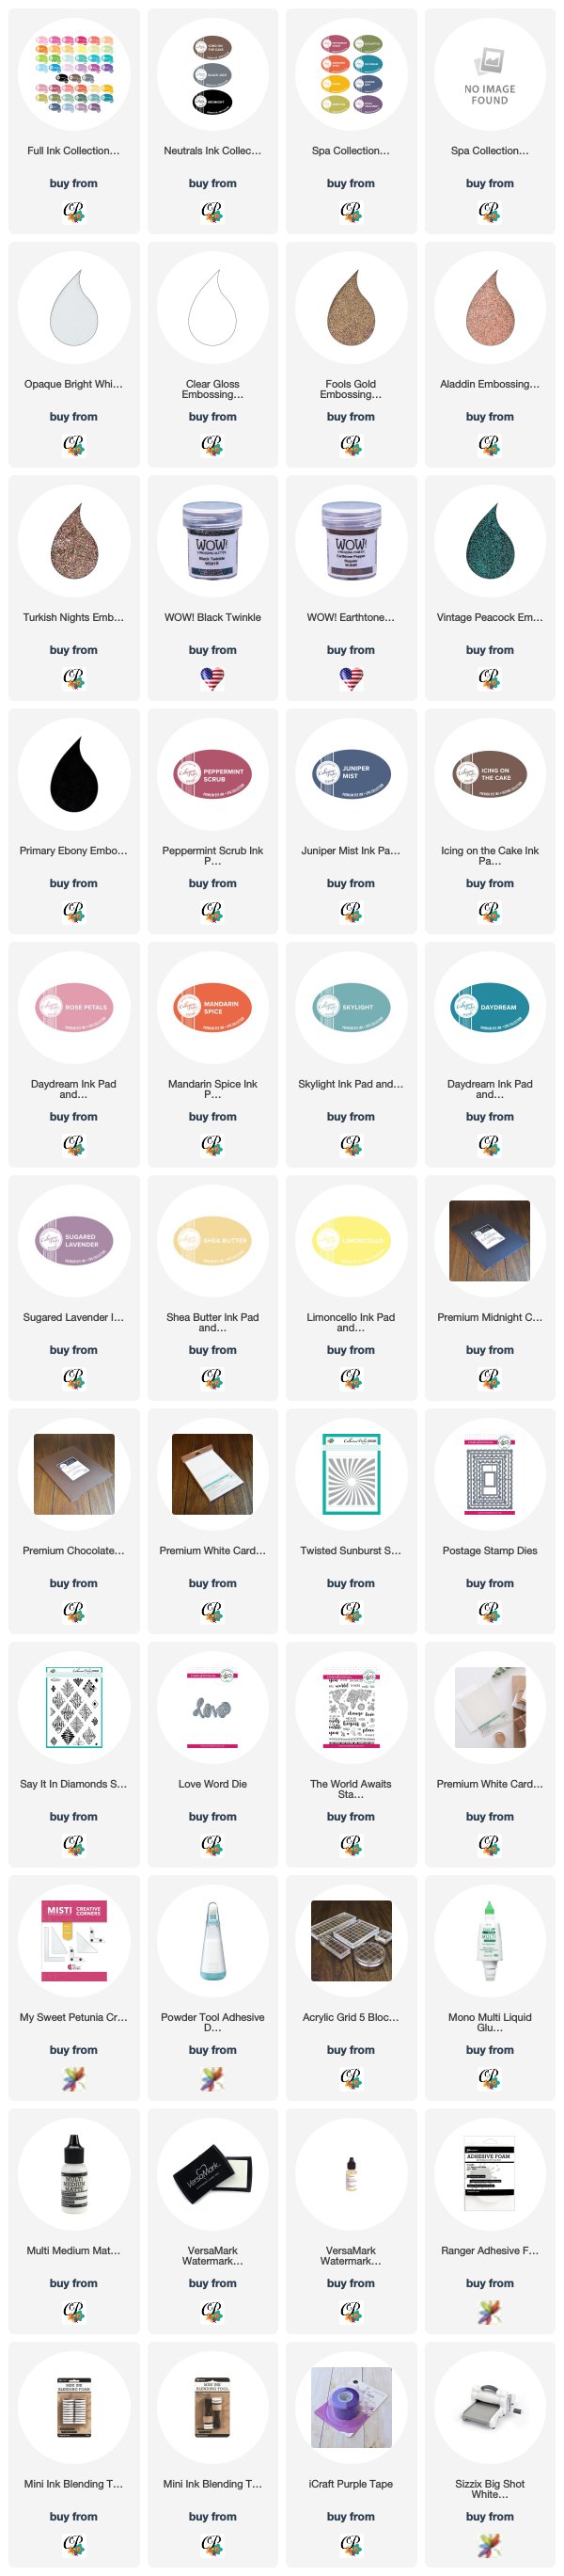
Supplies

To make finding the supplies I used in these projects a bit easier for you, here are a few clickable links. Compensated Affiliate Links are used when possible. Click here for disclosure. Happy Shopping!


Spring Fling Sneak Peek

Today I have a sneak peek into the new Spring Fling release over at Catherine Pooler Designs tomorrow! Yup, you get a glimpse into some fun new products – and new ink colors!!! Gotta love that.

For the last few weeks, Catherine has been revealing the new ink colors and products on her blog. And the entire Design Team has been sneaking projects yesterday and today, getting ready for the big day tomorrow.

I thought it would be fun to see how a few of the new colors played with the old today – so here’s how to create a cool, simple ombre look for my Sneak Peek!

Spring Fling Ombre Wishes Tutorial

First you’ll want to emboss the new Modern Damask Background Stamp in white onto some Catherine Pooler Designs Bright White 100# card stock (it’s great for ink blending). Can I just say I’m in LOVE, LOVE, LOVE with this background stamp. The pattern is fabulous, and it has a lot of negative space – perfect for coloring, if you’re into that like me!

Spring Fling Inks by Catherine Pooler Designs

To get the ombre look, you’ll always want to start out with your lightest shade of ink. Here I used the new Sweet Sixteen – at the top. Use a mini sponge tool to evenly add it to the top 1/3 of your project. I went maybe a little over that, as I wanted it to blend effortlessly with my next new ink color – Pixie Pink.

Isn’t the Pixie Pink gorgeous. It’s the perfect blend heading between Sweet Sixteen and Flirty Fuchsia – my last shade, and one from the last Party Collection release.

The look is gradual, but really cool. Each color has its own unique character, and creates a beautiful background.

Spring Fling Ombre

To finish off your card, stamp Birthday from the Hello World Stamp Set. Pop it up over the new Spot on Sentiments word die – Wishes. If you want it to stand out just a bit more, add a vellum circle – cut with my new Circles Dies – they’re coming out tomorrow too!

I love adding vellum over bright backgrounds to tone them down if you need to – or just for a little accent. Some sequins are the perfect finishing touch along with a 1/8″ black edge to balance my card.

I hope you liked it – be sure to pop on by tomorrow. At 9 am, we have a Spring Fling Blog hop with the Dream Team – it should be pretty amazing. And of course…there are prizes, why not!

If you’re a StampNation member, be sure to check out today’s challenge too. My card is the upper right one – I LOVE it when Maureen Merritt puts Mood Boards together as inspiration – it’s the perfect way to jump right into a card.

StampNation

See you tomorrow!

CAS – Embossing on Vellum

cas-embossing-on-vellum-ingrid-blackburn-hls

Chances are if you love to emboss, you’ve tried embossing on vellum before. Embossing really gets a pop when laid on top of the slick vellum surface. Today I’m playing along with the Clean and Simple challenge over at Happy Little Stampers. And the technique is yup, you guessed it –  embossing on vellum.

oct-2016-cas-badge

Embossing on Vellum Tutorial

Clean and simple cards need a focal point. This project uses embossing on vellum not just to highlight the focal point, but to soften a busy background as well. To bring more attention to that focal point, emboss a golden twig wreath around.

Embossing on Vellum - DIY Christmas Cards

The focal point. One of the brilliant properties of vellum is that it is translucent. So I took a busy stamped off Peppermint Stick background in green and placed it behind my vellum window. With the golden twigs – it really worked.

But the card needed a tiny bit more. The clean and simple look was what I was after, so I didn’t want to clutter it up too much. I ended up choosing to add some golden holly leaves & berries in the corner.

Embossing on Vellum Technique

All the little touches seem to pull it together. The vellum cuts down the strong stamped background just the right amount….now it adds something rather than dominating. The golden accents added to the card, without pulling your eye from the dominant focal point – just what you’re looking for in clean and simple design.

When working on your clean and simple cards – don’t be afraid to stray from a white card. White space – which is what CAS design needs doesn’t literally mean white!

Now it’s your turn – head on over to Happy Little Stampers and join in the Embossing on Vellum Challenge fun!

Till next time –

Signature

[optin_box style=”12″ alignment=”center” email_field=”email” email_default=”Enter your email address” integration_type=”aweber” double_optin=”Y” list=”3846012″ name_field=”name” name_default=”Enter your first name” name_required=”Y” opm_packages=””][optin_box_field name=”headline”]Learn more with our exclusive FREE video series:[/optin_box_field][optin_box_field name=”paragraph”]PHA+UGx1cyB5b3XigJlsbCBiZSBhZGRlZCB0byBteSBGUkVFIENyZWF0aXZlIFRpcHMgRS1sZXR0ZXIgd2hlcmUgSSBzaGFyZSBleGNsdXNpdmUgcHJvamVjdHMsIHZpZGVvcyAmYW1wOyB0aGUgPHN0cm9uZz4xMiBEYXlzIG9mIENocmlzdG1hczwvc3Ryb25nPiBQcm9qZWN0IFNlcmllczwvcD4K[/optin_box_field][optin_box_field name=”privacy”][/optin_box_field][optin_box_field name=”top_color”]undefined[/optin_box_field][optin_box_button type=”0″ button_below=”Y”]Get Instant Access![/optin_box_button] [/optin_box]

Gold Embossed Christmas Cards

Today I have a fun gold embossed Christmas card for you. This month over at Happy Little Stampers the theme for the Christmas Challenge is Gold. I’d love to see what you create with this fun and wide open challenge!

HLS Christmas Challenge July 2016

Here’s my project:

Large Ampersand in Gold


I embossed the Holly leaf stencil by ARTplorations in Gilded Gold embossing powder by Brutus Monroe – I love it’s depth of color! I then die cut the large Ampersand from Catherine Pooler Designs – And dies. Doesn’t it rock?!! I smooshed it into some versamark and added the BM powder. I used the Catherine Pooler Designs And Sentiments for some great greetings. The card base is Old Olive and the card front is Cherry Cobbler. I just LOVE the look.

Gold-Embossed-Christmas-Cards-002

So hop on over to Happy Little Stampers and create some GOLD fun this month!!! It’s July…that means it’s time to get going on your Christmas cards…lol!

Now go get those fingers inky!

Signature

CAS Embossed Tree

So have you had a chance to play along with the Happy Little Stampers new Christmas Challenge yet? If not, jump right on in! Here’s a little more quick, simple, easily mass produced inspiration for you!

This tree is simply embossed using a fun background stamp and then cut at several angles to form a few trees. You would be surprised at how quick and easy it is to mass produce these beauties.

HLS Christmas Challenge July 2015

CAS Embossed Tree July 2015 HLS

I made several versions on different neutral colored card bases. My tree is in Always Artichoke with an Early Espresso trunk. The background stamp is Dotted Fusion by Penny Black, embossed in gold.

CAS Embossed Tree 003 CAS Embossed Tree Trio

So if you’re in a pinch for a super quick, fun, very clean and simple card – this one is a winner!

Tell me which base you like the best in the comments below – I’m still undecided. And be sure to jump into the challenge fun over at the Happy Little Stampers Christmas Challenge! I can’t wait to see how you are inspired!

Signature-24-pt_thumb.jpg

Black and White Emboss Resist Poppies

Pleasant Poppies Background Stamp

The emboss resist technique is one that you probably use in card making so often that you don’t even give it a thought. It can be used in several ways; today we’re going to feature it with a little coloring using markers and the Pleasant Poppies background stamp.

Embossing techniques are probably some of my favorites. And embossing in general was probably one of the biggest wow techniques you first saw when learning how to stamp, am I right? I’d love to know what it was for you…tell me in the comments below!

Emboss Resist + Markers Video Tutorial

This project tutorial uses emboss resist to create monochromatic poppies for a truly striking card. Like I say in the video, creating black flowers is kind of weird for me, but I have to admit, the card is gorgeous! Here’s the step by step tutorial:

View on YouTube

Now that you’ve seen the video, I listed some instructions for this project. If you haven’t had a chance to see the video, it gives a lot more detail than the tutorial below.

Emboss Resist Technique

Creative Tips –

  • You’ll want to create your background first. Stamp the Dictionary stamp in tone on tone ink (Basic Gray). The Basic Gray card front measures 4 x 5 1/4”.
  • Be sure the background is completely dry as in the video.
  • Use a de-static tool like an embossing buddy on your card front.
  • Emboss the Pleasant Poppies stamp using White Pigment Ink and embossing powder.
  • Color your flowers in using a Basic Black marker.

Embossing Techniques

    • The embossed poppy outline will “resist” the dye ink – that’s the emboss resist technique! Simple, right?
    • Color your images in sections.
    • Lightly dampen a paper towel by spritzing it with a fine mist mini-spritzer. I can not stress lightly enough. You don’t want to add water to your project, just use it as a tool to remove the ink that the embossed image resisted.
    • Wipe lightly over your emboss resisted image. I first pat it, then wipe, being careful not to push my towel into my cardstock. You want to just stay on the raised surface.
    • Add a greeting embossed on Vellum card stock and adhere your card front to the white base. The card base measures 4 1/4 x 11”.

How to embossing tutorials

That’s it! You can try this technique with any colors, but you’ll want to make sure that your marker is darker than your background image (the dictionary stamp). Otherwise you’ll see the background image through your colored flower.

I entered this card in the following challenges:  Happy Little Stampers and Virginia’s View.

HLS March Sketch Challenge   Virginias View March 2014

So what did you think? Are the emboss resist flowers Weird or Striking for you – tell me in the comments – I’d love to know!

Signature

[optin_box style=”14″ alignment=”center” disable_name=”Y” email_field=”email” email_default=”Enter your email address” email_order=”1″ integration_type=”aweber” double_optin=”Y” list=”2841626″ name_field=”name” name_default=”Enter your first name” name_required=”Y”][optin_box_field name=”headline”]If you enjoyed this tutorial…[/optin_box_field][optin_box_field name=”paragraph”]PHA+Li4ueW914oCZbGwgbG92ZSBvdXIgPHNwYW4gc3R5bGU9ImNvbG9yOiAjMjQ0YzVlOyI+PGVtPjxzdHJvbmc+ZnJlZSA8L3N0cm9uZz48L2VtPjwvc3Bhbj5zdWJzY3JpYmVyIG9ubHkgdmlkZW8gc2VyaWVzISDCoEdldCB0aGXCoDxzcGFuIHN0eWxlPSJjb2xvcjogIzI0NGM1ZTsiPjxlbT48c3Ryb25nPmV4Y2x1c2l2ZTwvc3Ryb25nPjwvZW0+PC9zcGFuPsKgQ3JlYXRpdmUgVGlwcyBlLWxldHRlciB3aGljaCB3aWxsIHRlYWNoIHlvdSBuZXcgdGVjaG5pcXVlcyB0byBhZGQgdG8geW91ciBzdGFtcGluZyBza2lsbCBzZXQuIMKgTGVhcm4gaG93IHRvIG1ha2UgcHJvamVjdHMgeW91J2xswqBsb3ZlITwvcD4K[/optin_box_field][optin_box_field name=”privacy”][/optin_box_field][optin_box_field name=”top_color”]undefined[/optin_box_field][optin_box_button type=”1″ text=”Send me exclusive tips!” text_size=”26″ text_color=”#000000″ text_bold=”Y” text_letter_spacing=”-1″ text_shadow_panel=”Y” text_shadow_vertical=”1″ text_shadow_horizontal=”0″ text_shadow_color=”#a3b640″ text_shadow_blur=”0″ styling_width=”100″ styling_height=”10″ styling_border_color=”#000000″ styling_border_size=”1″ styling_border_radius=”6″ styling_border_opacity=”100″ styling_shine=”Y” styling_gradient_start_color=”#a3b640″ styling_gradient_end_color=”#5b661e” drop_shadow_panel=”Y” drop_shadow_vertical=”1″ drop_shadow_horizontal=”0″ drop_shadow_blur=”1″ drop_shadow_spread=”0″ drop_shadow_color=”#000000″ drop_shadow_opacity=”50″ inset_shadow_panel=”Y” inset_shadow_vertical=”0″ inset_shadow_horizontal=”0″ inset_shadow_blur=”0″ inset_shadow_spread=”1″ inset_shadow_color=”#a3b640″ inset_shadow_opacity=”50″ location=”optin_box_style_14″ button_below=”Y”]Send me exclusive tips![/optin_box_button] [/optin_box]

Merry Winter Wonderland

When I think of December I think Winter Wonderland.  With Christmas, trees, lights, snow and all the trimmings!  This card brings out the fun and wintery scene.  I hope you love it!  May you have a very Merry Christmas with your friends and family!

The top image has an embossed background using the Penny Black Fleur de Lys Background stamp – white on white and a watercolored White Christmas stamped image.  The sequins from Pretty Pink Posh give it a snowfall feel.

PB White Christmas 001

This image also is watercolored for the main stamped image from White Christmas, but has a glitter edge using Iridescent Ice Embossing Powder.  The background is just a dots embossing folder and the added silver cord gives it a holiday look.

PB White Christmas 002

Both are for the Merry Monday Christmas Challenge.  Enjoy and have a very Merry Christmas!

139

Signature

For Creative Tips, be sure to add yourself to the Creative Tips E-Letter list to get exclusive videos and projects sent directly to you free!

Simple Snowflakes

Sometimes I just need a quick card.  I’ve found that the stamp set Snowflake Soiree is that go to set for quick and easy cards.  Don’t get me wrong, I can make a complex one with the best of them, but sometimes simpler is best.

This card represents just that.  A quick and easy holiday card that even has a little embossing on it!  I stamped the snowflakes in Midnight Muse – my new favorite winter color, and embossed the saying from the set in Silver.  I popped the banner up with dimensionals and threw a white Decorative Label Punched piece behind for a little contrast.  Of course, snowflakes just wouldn’t be right without a Rhinestone Jewel!

And that’s it!  Just a quick, simple and easy card for the day.  What are you going to make with this great set from our Holiday Catalog?

Creatively yours –

Ingrid

To Shop 24/7 in the Creative Store – Click here!

Stamp Sets – Snowflake Soiree (127925) Paper – Whisper White (100730), Midnight Muse (126843) Ink – Midnight Muse (126860) Cool Tools – 1” square punch The Perfect Finish – Stampin’ Dimensionals (104430), Rhinestone Basic Jewels (119246)

Snowflake Soiree 127925L