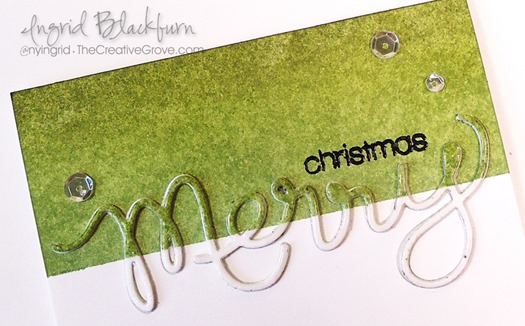
Stacked Die Cuts – CAS Green Christmas Card

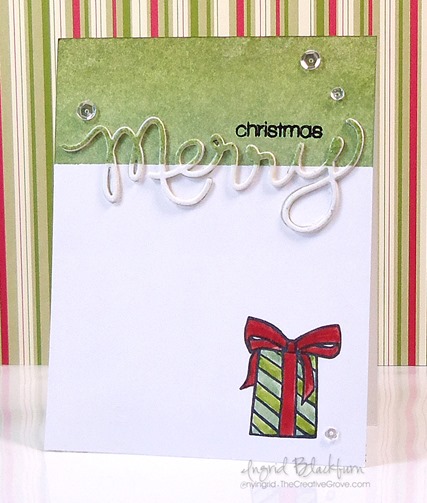
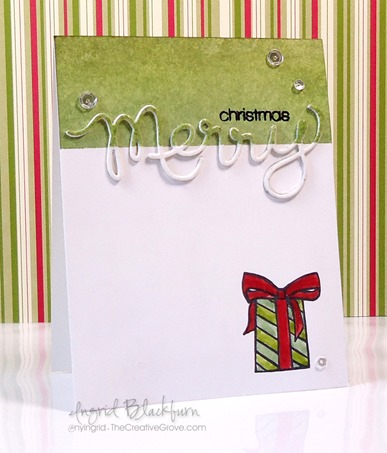
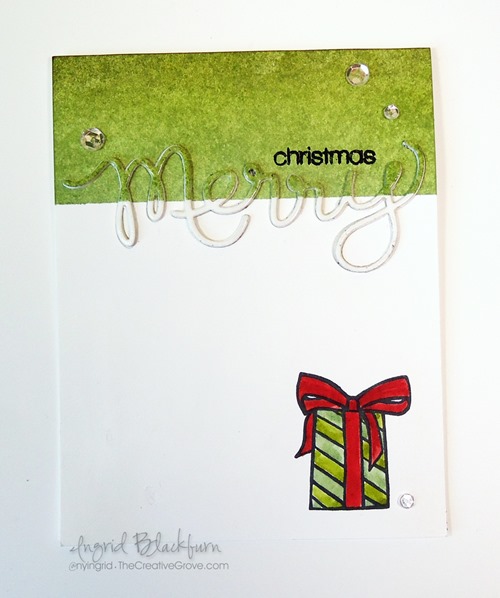
Stacked Die Cuts seem to be all the rage lately. If you haven’t tried this creative technique yet, I think you’ll be surprised at just how easy it is. Enjoy this quick tutorial into how this simple card was created!

Stacked Die Cuts 001

Stacked Die Cuts Card

  • You will first want to create your blended background on the top fourth of the card.  To see a step by step video tutorial on how to create a perfectly blended background, click here.
  • Mask off the bottom 3/4 of your card with post it notes. Use the following Distress inks in order when blending from the bottom up – Bundled Sage, Peeled Paint and Forest Moss.
  • Die cut the word Merry from your project, being sure to keep all the little pieces (Y, M – 2, E, R).  I keep these stuck to a piece of washi or painters tape so they don’t go missing.
  • Emboss the word Christmas in Black up above your Negative Die Cut word in the green area. Tip – be sure that area is totally dry – definitely use a de-static tool like an embossing buddy.

Stacked Die Cuts 003

  • Lay your Green/White cut out word Merry on a piece of painters tape or masking tape. Smoosh a versamark pad over your word and emboss in clear to give a shine. Once cool, remove with tweezers and set aside.
  • Stamp your gift in the bottom right corner using Memento Tuxedo Black ink. I use this ink because I’m going to watercolor with distress inks and it doesn’t bleed and gives a crisp image.
  • Watercolor your image using Bundled Sage, Peeled Paint and Fire Brick with an Aqua Painter.  Tip – be sure your paint brush isn’t too wet, as this is regular card stock. If you use too much water, you’ll get little white dots or lines from your paper.
  • Die Cut four more words in white.
  • To create your Die Cut stack, glue all five die cuts to each other with your Blended Piece on top.

Stacked Die Cuts 004Stacked Die Cuts 006

  • Add adhesive to a piece of Copy Paper that is wider than your negative cut out, adhere so that the sticky side faces the front.
  • Add your die cut and the cut out pieces to the sticky paper exposed in the negative die cut image. And there’s your stacked die cut!
  • Attach your card front to your card base and add a little Forest Moss to the top at the fold so there is no white exposed.
  • Add sparkling clear sequins from Pretty Pink Posh if you desire using Tombow Mono Liquid Glue.

Stacked Die Cuts 002

I designed this card with three challenges in mind today – Merry Monday – Gifts and Addicted to CAS – Green and Happy Little Stampers – Sponged.

CAS_Mar2015 150ATCAS - code word green

If you liked this tutorial on Stacked Die Cuts, be sure to get our exclusive video tutorial series by being on the Creative Tips E-letter list, sign up at the bottom!

Signature

[optin_box style=”14″ alignment=”center” disable_name=”Y” email_field=”email” email_default=”Enter your email address” email_order=”1″ integration_type=”aweber” double_optin=”Y” list=”2841626″ name_field=”name” name_default=”Enter your first name” name_required=”Y”][optin_box_field name=”headline”]If you enjoyed this tutorial…[/optin_box_field][optin_box_field name=”paragraph”]PHA+Li4ueW914oCZbGwgbG92ZSBvdXIgPHNwYW4gc3R5bGU9ImNvbG9yOiAjMjQ0YzVlOyI+PGVtPjxzdHJvbmc+ZnJlZSA8L3N0cm9uZz48L2VtPjwvc3Bhbj5zdWJzY3JpYmVyIG9ubHkgdmlkZW8gc2VyaWVzISDCoEdldCB0aGXCoDxzcGFuIHN0eWxlPSJjb2xvcjogIzI0NGM1ZTsiPjxlbT48c3Ryb25nPmV4Y2x1c2l2ZTwvc3Ryb25nPjwvZW0+PC9zcGFuPsKgQ3JlYXRpdmUgVGlwcyBlLWxldHRlciB3aGljaCB3aWxsIHRlYWNoIHlvdSBuZXcgdGVjaG5pcXVlcyB0byBhZGQgdG8geW91ciBzdGFtcGluZyBza2lsbCBzZXQuIMKgTGVhcm4gaG93IHRvIG1ha2UgcHJvamVjdHMgeW91J2xswqBsb3ZlITwvcD4K[/optin_box_field][optin_box_field name=”privacy”][/optin_box_field][optin_box_field name=”top_color”]undefined[/optin_box_field][optin_box_button type=”1″ text=”Send me exclusive tips!” text_size=”26″ text_color=”#000000″ text_bold=”Y” text_letter_spacing=”-1″ text_shadow_panel=”Y” text_shadow_vertical=”1″ text_shadow_horizontal=”0″ text_shadow_color=”#a3b640″ text_shadow_blur=”0″ styling_width=”100″ styling_height=”10″ styling_border_color=”#000000″ styling_border_size=”1″ styling_border_radius=”6″ styling_border_opacity=”100″ styling_shine=”Y” styling_gradient_start_color=”#a3b640″ styling_gradient_end_color=”#5b661e” drop_shadow_panel=”Y” drop_shadow_vertical=”1″ drop_shadow_horizontal=”0″ drop_shadow_blur=”1″ drop_shadow_spread=”0″ drop_shadow_color=”#000000″ drop_shadow_opacity=”50″ inset_shadow_panel=”Y” inset_shadow_vertical=”0″ inset_shadow_horizontal=”0″ inset_shadow_blur=”0″ inset_shadow_spread=”1″ inset_shadow_color=”#a3b640″ inset_shadow_opacity=”50″ location=”optin_box_style_14″ button_below=”Y”]Send me exclusive tips![/optin_box_button] [/optin_box]
Clean and Simple Design with a European Twist

So what exactly is clean and simple card design – we’re going to explore just that…rooted in everyday life with a European Twist.  In the past several weeks, I created several projects to share with you here on the blog, our member VIP Community and the free Creative Tips List – 12 Days of Christmas Newsletter before setting off for a three week tour of seven countries in the Mediterranean.  We have been exploring various countries for a few weeks now, and today we are pulling into Naples, Italy.  As we sail up the Amalfi coast, the rain is pelting the window early this morning.  Thankfully, I don’t think it will last.

Rain or shine we venture out into each new city and country.  So far I’ve been inspired by the gorgeous ancient architecture of Athens, Greece, the barren and desolate countryside of Albania, and the uber-densely populated rich textures of the island of Malta.  In the coming days we will explore several ports in Italy, before venturing on to more countries and adventures.

Europe has such beauty and charm, and one of the things I am definitely drawn to is it’s simplicity sometimes.  Yes, there are the great works of art and architecture as in the Vatican City Sistine chapel and such beauty and grace all around, but the clean and simple look is what always captivates me.  I love the contrasting colors and find myself photographing a single cactus among a gorgeous old wall, or a unique door mixed with the textures of it’s surrounding building – just like clean and simple projects.

The Core of Clean and Simple Design

A true Clean and Simple project, aka CAS, has I would say up to 70% white space with only one true focal point and minimal embellishments.  It’s the empty space that allows you as the reader to focus on the beauty of the card.

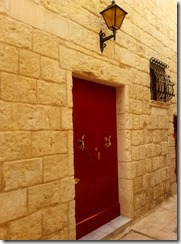
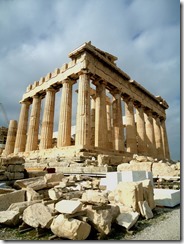
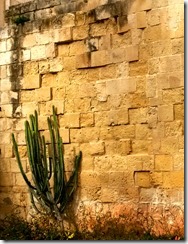
Here are a few examples to help illustrate my point.  While the beauty of the Acropolis is amazing (pictured center below), because I truly love the clean and simple look, I am drawn more to the images on the right and left.  There’s real beauty in these photographs – mostly from their simplicity.  I took the CAS photos two days ago on the island of Malta.  On the left in Mdina – the Silent City and on the right in Valetta – the capital.  While the Parthenon (center) at the Acropolis is stunning, there’s a lot going on in this photo.  The Ruins take over.  I find the other two photos to be more interesting in texture and your eye is immediately drawn to the focal image – the door or Cactus.

Malta-Silent-City-DoorAcropolis 001Malta-City-Wall-cactus

In paper crafting, clean and simple projects consist mostly of ‘white’ space with one focal point.  This card definitely exemplifies that theory.  Your focal point should be placed with the Rule of Thirds in mind.  Break your area into a three section grid – horizontally and vertically – this gives you nine boxes (like a tic tac toe box).  In a nutshell, your focal point should never just be in the center, rather it should cross one of the main lines sharing two squares.  We’ll discuss that more in depth another day.  This will create more interest or drama in your project rather than just placing it in the center.  It makes it more appealing to the reader’s eye.

Look at all three photos above – the subject of each photo is never dead center with equal spacing – rather it crosses the thirds or two thirds – and in this, it gives the images interest, depth and character.

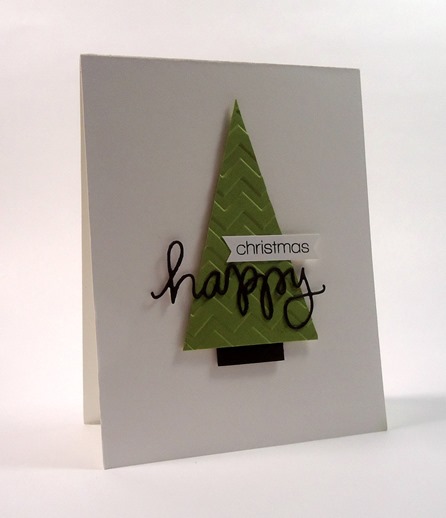
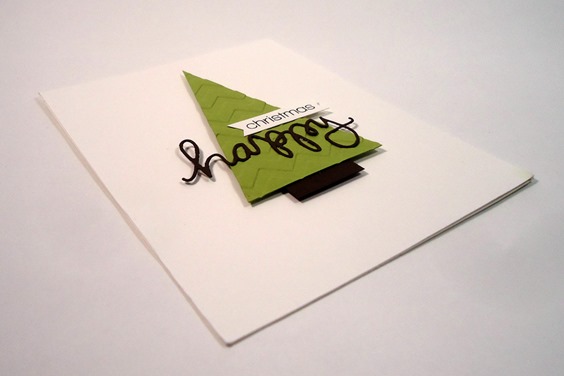
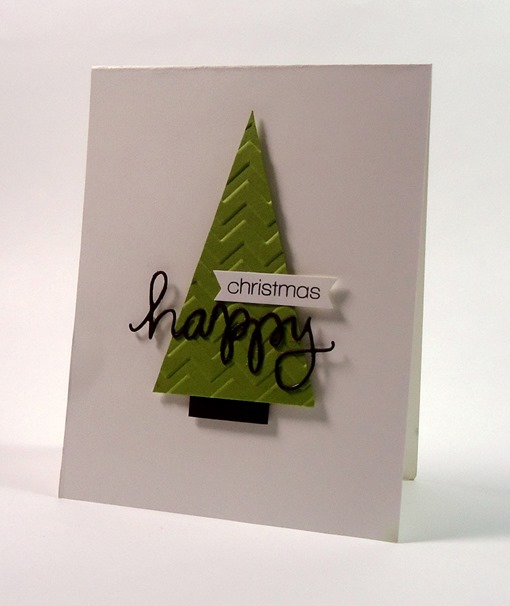
So let’s apply these rules to our project today.  The beauty of the stark white mixed with the neutral colors and simple embossed tree draws me in.  It also helps that the image, while in the center, crosses the top and middle rather than have equal spacing all around.  It makes it more interesting.  Take the tree itself as another example.  The greeting is in the bottom third of the tree itself and extends to the right or left, never just directly in the center.  Little details like this help pull a project together.

Clean and Simple Single Tree 001

To make this card, first, you’ll want to cut your tree.  Pick a center point on the top edge of a long rectangle and cut up from both opposite points.  I used a paper trimmer, but scissors will work fine.  I’d recommend longer scissors for a straighter edge over micro tip.

Once you have your tree, run it through your Big Shot with a fun embossing folder.

Clean and Simple Design Single Tree 003

Add a small trunk using a coordinating brown color.  I used Pear Pizazz for my tree and Early Espresso for my trunk.  Cut a sentiment in Espresso as well – I used Happy by Simon Says Stamp for my steel die – Merry would also work here.  Then stamp your greeting – I used Christmas from the coordinating Happy stamp set by Simon Says Stamp.  Use a hexagon punch to create your banner ends and attach them both using liquid glue.

Pop your tree up for a slight shadow on your card and you’ll have a great subtle layer in a shadow.  Overall, this card is super easy, quick and easily mass produced.

Clean and Simple Designed Single Tree 002

I love this card – simple always works for me.  What do you do for your Christmas cards – Clean and Simple or ornate? Tell me in the comments below!

Thanks for stopping by for a little bit about Clean and Simple Card Design today – wait till you see what I have for you next!

Smile

Signature

[optin_box style=”14″ alignment=”center” action=”http://www.aweber.com/scripts/addlead.pl” disable_name=”Y” method=”post” email_field=”email” email_default=”Enter your email address” email_order=”1″ integration_type=”custom” double_optin=”Y” name_default=”Enter your first name”][optin_box_hidden][/optin_box_hidden][optin_box_code]

[/optin_box_code][optin_box_field name=”headline”]If you enjoyed this tutorial…[/optin_box_field][optin_box_field name=”paragraph”]PHA+PHNwYW4gc3R5bGU9ImNvbG9yOiAjNjQ2MzVlOyI+TGV04oCZcyBzdGF5IGluIHRvdWNoISBNeSBvY2Nhc2lvbmFswqA8L3NwYW4+PHNwYW4gc3R5bGU9ImNvbG9yOiAjNjY2Njk5OyI+PHN0cm9uZz48ZW0+ZXhjbHVzaXZlPC9lbT48L3N0cm9uZz7CoDwvc3Bhbj48c3BhbiBzdHlsZT0iY29sb3I6ICM2NDYzNWU7Ij5DcmVhdGl2ZSBUaXBzIGUtbGV0dGVyIHdpbGwgdGVhY2ggeW91IHRvIG1ha2UgcHJvamVjdHMgdGhhdCB5b3UgbG92ZeKApjwvc3Bhbj48L3A+Cg==[/optin_box_field][optin_box_field name=”privacy”][/optin_box_field][optin_box_field name=”top_color”]undefined[/optin_box_field][optin_box_button type=”0″ button_below=”Y”]Send me exclusive tips![/optin_box_button] [/optin_box]
1+2=3 Black, Silver and Gold

If you joined me the other day for my Merry Monday Challenge entry, then you saw this card.  Have you ever had a stamp just get under your skin and you can’t stop working with it?  Well, seven cards later, that was me yesterday!

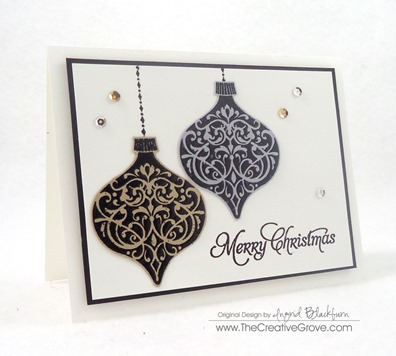
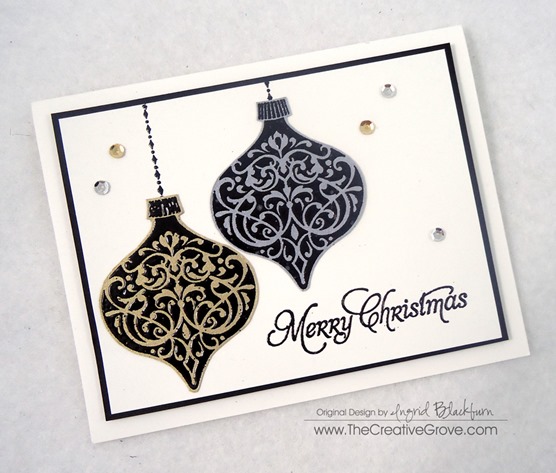
Today will be day two of this month’s 1+2=3 Series. Remember this?  Back in June I started this series with the classic stamp set Lovely as a Tree.  This month, it’s the stamp from Ornament Keepsakes (1 stamp set) + the two colors Silver and Gold (Black and White as my neutrals) = three looks (or in my case…seven…lol). 

Of course, if you’re on the Creative Tips E-letter List, then you’ll see a bonus fourth project…and VIP Community members have a video behind the embossing science of it all and how I designed all the cards.

So enough talk…here’s todays card:

Ornament Keepsakes 003

As you can see, I went for a complete Clean and Simple look.  Each item is embossed, including the string for the ornaments. 

Ornament Keepsakes 004

The most exciting part of this little experiment…I have seven more Christmas cards done.  Stay tuned tomorrow for the third in this series!

To see the first card in this series, click here.  To see the Lovely as a Tree 1+2=3 series, click here.

Happy Stamping…

Signature

To get exclusive content emailed to you – get on the Creative Tips List!

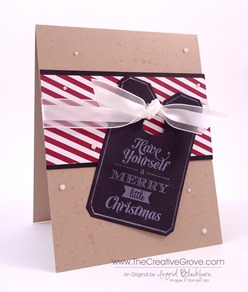
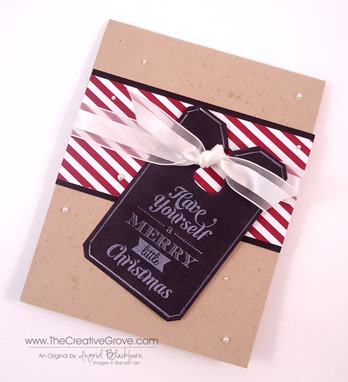
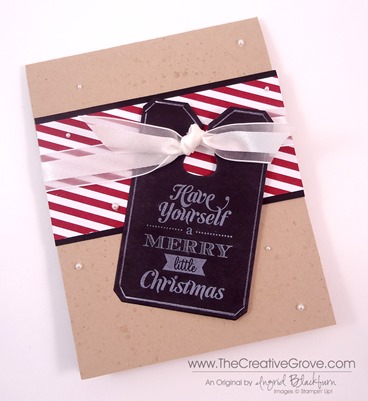
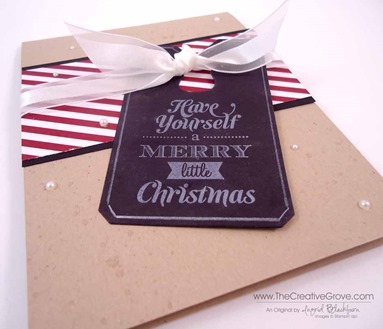
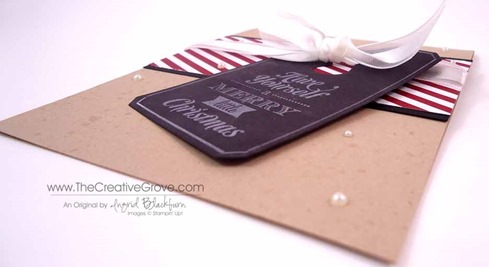
Merry Little Christmas Chalk Talk Card

Chalk Talk 004 Main R

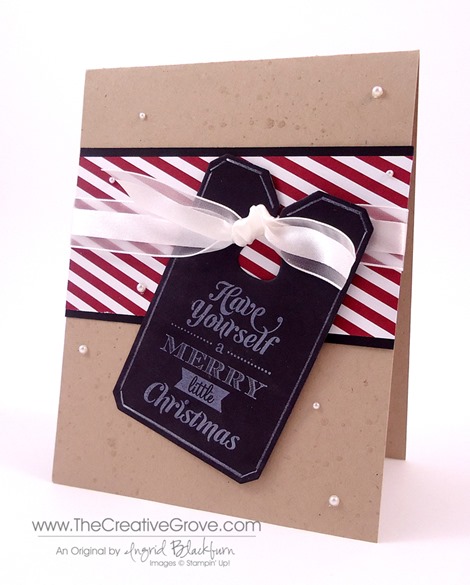
Need a super quick, simple and fun Christmas card?  Well you’ve found it!  Today’s card takes a page from the Clean and Simple rule book.  This card is colorful, packs a punch and is quite trendy!  The Chalkboard look is fun, and the stamp set Merry Little Christmas really works for this look.  Read on for all the details!

What do you think?  It’s a fun little card, right?!!  Simple, but fun.  If you love this card and are looking for great ideas to say thanks, be sure to try out the newest Class of the Month in the classroom – Thanks.  It’s on Pre-sale for 22 more hours, then will go back up to the full price, so save 20% while you can!  Click here for class detailsChalk Talk 004 Side

Creative Tips –

  • Since the black chalk board look is so striking against the Crumb Cake, the color Cherry Cobbler is the perfect compliment to bring the card together. 
  • The cute papers from the Paper Stack Season of Style really helps this particular look.  Don’t you just love the candy cane feel to the paper?Chalk Talk 004 Angle
  • Something else this card looks like is a package.  That’s one of the great ways to use the Chalk Talk Framelits
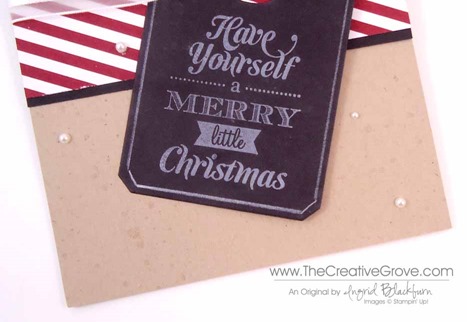
  • To give a little interest to the great amount of white space, stamp off in Crumb Cake with the splats from Gorgeous Grunge three times, once up top and once in each corner.  Chalk Talk 004 Texture
  • Tip – don’t over stamp this, it will ruin the random effect – trust me on that!  It will look forced rather than just that little interest that you were going for.
  • Your Cherry Cobbler is 2’” x 4.25” and the Basic Black is 2.25” x 4.25”
  • Cut the tag out with the Chalk Talk Framelits and stamp the greeting from Merry Little Christmas in Whisper White Craft Ink.  Draw and outline around the edge with a White Watercolor Pencil.Chalk Talk 004 CU
  • To give it that chalk board look, drop an Embossing Buddy on the tag in several places to look like chalk residue.
  • Wrap your ribbon around and tie a flat knot.  Bring your tag through to make sure of the placement on the card. 
  • Attach the Basic Black to your Crumb Cake base.Chalk Talk 004 Tag
  • Tip – Use Snail on the left side of your tag and two dimensionals on the right.  This will help give it the randomly attached look.
  • Add Pearl Basic Jewels in multiple sizes for a punched up look, it looks great without them too!Chalk Talk 004 Main L

Just in – the Clearance Rack has been updated!  Be sure to check it out along with the one day sale specials. 

Signature Snowflake 001 

Supplies:

Clean and Simple Christmas Cards

026

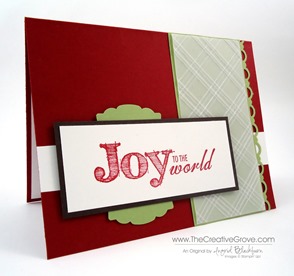
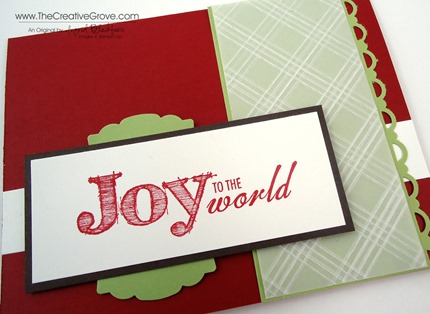
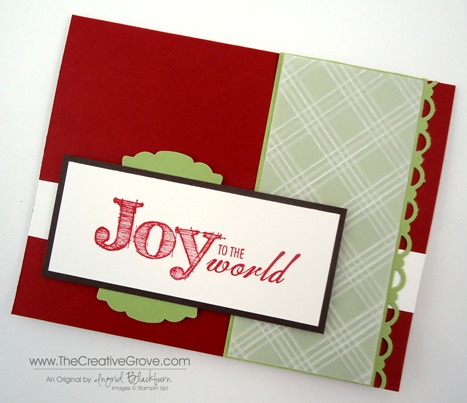
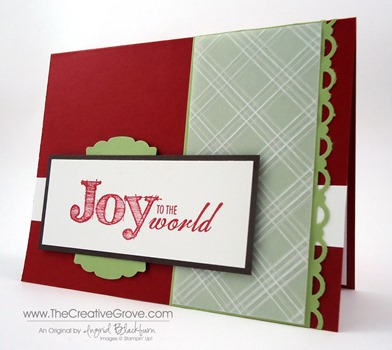
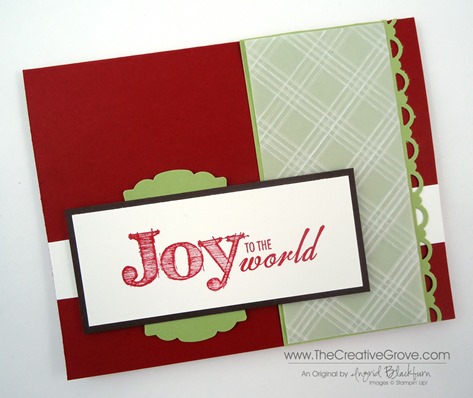
Clean and simple Christmas cards make a statement.  They are easy to look at and just feel warm and friendly.  I don’t know how else to put it!  This card exemplifies all that.  It’s bright, cheery, has a touch of interest, but overall is just a happy clean looking card.  Read on to find out all the little things that make this card a perfect clean and simple card.

12 Weeks of Christmas banner_small

And if you want more Christmas projects delivered right to your inbox, be sure to subscribe to the Creative Tips list.  There’s only a few hours left before the first one goes out!  You’ll automatically be included in the 12 weeks of Christmas perk in addition to exclusive videos, projects, specials and community.  Subscribe Here for the 12 weeks of Christmas

Stamp Set – Joy to the World Ink – Real Red Card Stock – Real Red, Pear Pizzazz, Early Espresso, Whisper White, Vellum Card Stock Tools – Scallop Border Trim Punch, Artisan Label Punch, Stylish Stripes Embossing Folder, Big Shot Finishing Touch – Stamping Dimensionals 

Creative Tips –

  • For a bright and cheery palate, use Real Red, Pear Pizzazz, Whisper White, Early Espresso and Vellum card stock.
  • This is an A2 card, so the dimensions are 4 1/4” x 5 1/2”.
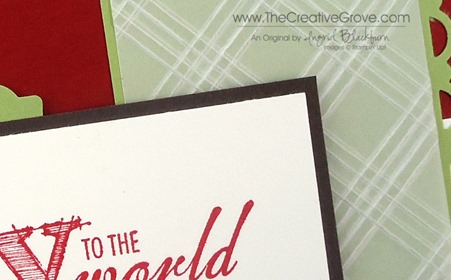
  • Take a strip of Vellum card stock and run it through the Stylish Stripes Embossing Folder using your Big Shot.  Once you have it in one direction, rotate it and emboss it a second time.  The folder is only 4 1/4” wide.  So you will not be able to do this with a larger piece.  Trim your piece 1/16” shorter so that it fit perfectly.  Your Vellum measures 4 3/16” x 1 11/16”.029
  • Use a piece of Pear Pizazz cardstock that is at least 2” x 4 1/4” but it can be wider – great for scraps!  Cut one edge using the Border Scallop Trim Punch.  It’s much easier to trim your cardstock to the exact amount needed after you punch.  You will want a slight border of 1/16” all around your vellum card stock.
  • Punch an Artisan Label Punch and cut it in half. 
  • Stamp Joy to the World in Real Red from the Joy to the World stamp set. on a 3 1/4” x 1 1/4” piece of Whisper White card stock.  Matte onto a piece of 1 1/2” x 3 1/2” Early Espresso card stock.024
  • Arrange the Pear Pizzazz Artisan Label Punch around the word Joy and adhere. 
  • Place all pieces onto your folded Real Red card to figure out the spacing.  Once you’ve figured out where the Early Espresso will overlap the Vellum, add adhesive to the vellum in that spot to secure it to the Pear Pizzazz.  This way you do not see any of the adhesive anywhere else.
  • Place the Whisper White strip onto the Real Red card stock and adhere the Pear Pizzazz over it.  Adhere the Early Espresso greeting with the label attached to it using Stamping Dimensionals to give it a little character and dimension.
  • Add a Whisper White panel to the inside of your card (4” x 5 1/4”)025

And that’s it!  Pretty simple, right?  If you loved this card, be sure to tune in for the Clean and Simple Christmas Card class that will go live in the next few weeks.  You will get a page of instruction just like this, more close up photos, a measurements section and video with step by step instruction for every project.  To check out what other classes we have click here.023

Clean and simple Christmas cards are a definite style that fits everyone.  Give it a try!

Signature Snowflake 001

Shop 24/7 in the Creative Store – click here!

48 hours left plus two Sneak Peeks

Here’s a little sneak peek at one of the super cute 12 weeks of Christmas projects that will hit inboxes in 48 hours!  Do not miss out on 12 weeks of step by step projects, tags, gifts and wrapping ideas!  You will not find any of these projects on the blog, so if you are a blog subscriber and you would like to see these projects, make sure you sign up for the creative tips list in the box below!

12 Weeks of Christmas banner_small


And be sure to stop by Wednesday for this super cute clean and simple Christmas card!  Here’s a sneak peak of that!

Clean and Simple Christmas Sneak

Have a fun start to the week!

Signature Snowflake 001

Shop 24/7 in the creative store – click here!

One Layer Card–Joyful Christmas

What do you do if you have a small budget but want cute and quick Christmas Cards to make?  Make one layer cards!  I’ve been wanting to get to know all the awesome readers that subscribe to my Creative Tips list – over there on the right —>.  So I asked them to tell me what things they struggle with creatively, if any?

Jackie M wrote:

I want to make my Christmas cards this year, but to be honest, I need a ton.  And budget is definitely an issue for me.  I would love to try a one layer card, but really struggle with design and making then special.  Considering I want to make more than 100, I don’t want to get too intricate with them. 

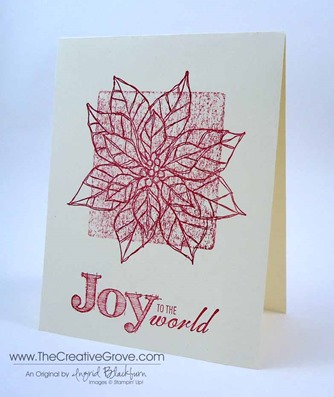
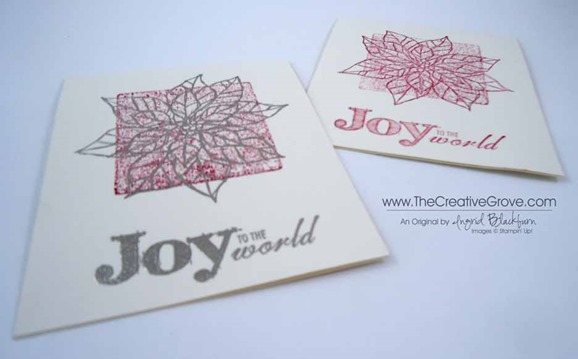
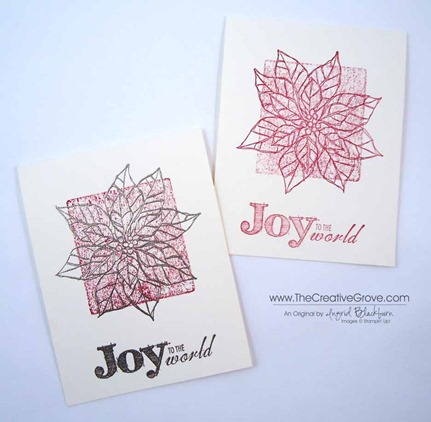
I have a solution to your problem Jackie! Here is a quick and easy one layer card that not only is cost effective (just a 1/2 sheet of Very Vanilla cardstock – after shipping and tax that’s just $.13!), but classic and modern in design.  Give this one a try.  I have two versions – a completely stripped down one for those who don’t have too many supplies, and one punched up.

037

Creative Tips –

  • Stamp your clear acrylic block in Raspberry Ripple (yes the block, not stamp), stamp off and lightly mist with water.  I used the Stampin’ Spritzers – you get two for $2.95, and they give off just the perfect light stream. 
  • Stamp your block onto your folded card, keeping the same amount of space top, left and right.
  • Stamp the Poinsettia from Joyful Christmas directly on top of the block in the same shade – Raspberry Ripple.
  • To keep with the monochromatic theme – you can stamp your sentiment in the same color.  Here I used one of the greetings from Joy to the World Stamp Set.  The Joyful Christmas Set also has a great saying!038

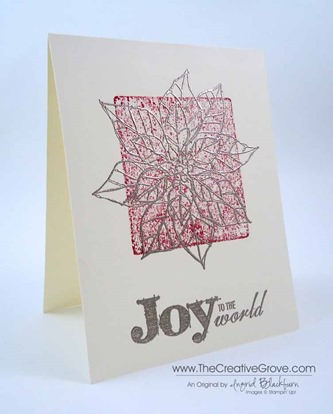
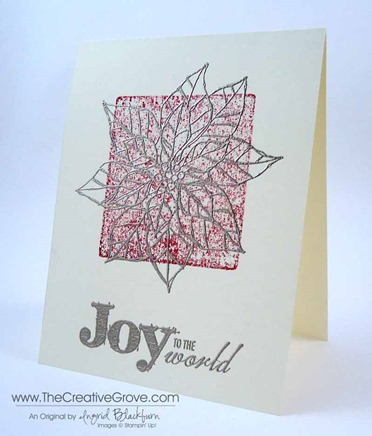
You can also kick this card up a notch for a different vibe as well.  Here you see the same card, but for the Poinsettia Flower and greeting, use Versamark and embossing powder.  Here you see Pewter Embossing Powder.  It’s a nice touch that’s in between black and silver.  044

Even though the card is rather simple, it looks awesome in person.  It’s quick, cost-effective and great when you need something on the simpler side.  Plus, sometimes we need quick Christmas cards or want to send something handmade – but we know the person isn’t going to appreciate it, so why not made a variety?041

And if you think this is too much on the simple side, try flipping the flower image for something else and throw a greeting like Thanks or Happy Birthday on there.  It’s a great card for any occasion!

Are you part of The Creative Grove community?  Get tips, special projects and exclusive videos from time to time.  Subscribe in the box at the top right or click right here!  Be the first to know about specials, discounts and more!

Signature Snowflake 001

039

Shop 24/7 – click here!

Stamps – Joyful Christmas, Joy to the World Ink – Cherry Cobbler, Versamark Paper – Very Vanilla Cool Tools – Heat Gun Finishing Touch – Pewter Embossing Powder

Stampin’ Up! Joyful Christmas

Joyful Christmas 001 001

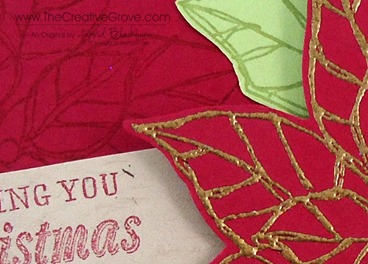
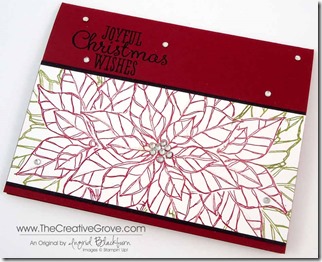
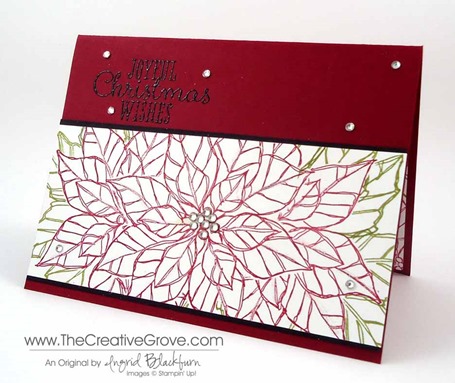
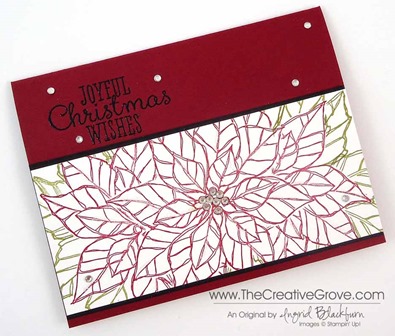
Do you need a quick but colorful Christmas card?  This clean and simple card is powerful with its intense color, yet quite easy to mass produce.  Let me show you how.

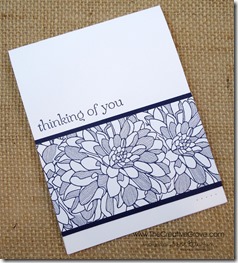
For me, when I make 100 Christmas cards, I need something that will keep me excited through the process, are you like that?  One of the things that I love is the color Cherry Cobbler.  I just love it – it makes me happy just to look at it.  Do you have a color that just makes you happy too?  I’d love to know what colors you absolutely love – tell me in the comment section.  Cards like this one with interesting detail keep me fascinated as well.  Last month I showed you how I made this clean and simple Regarding Dahlia’s card:

       Regarding Dahlias 003 Main Angle 2Joyful Christmas 001 005

Can you tell how this card is based of that one.  When you have a great idea – duplicate it!  To make this one, you’ll start with a center image, use a mask to cover it and stamp outward from there. 

  • Tip – be sure to stamp a mask onto a piece of printer paper – not cardstock.  The thickness of cardstock will give you a white space and won’t allow you to get your second image to flow into the main image. 
  • Tip – cut your mask on the inside of the line, not on the line and definitely not outside the line.  That will give you a gap.

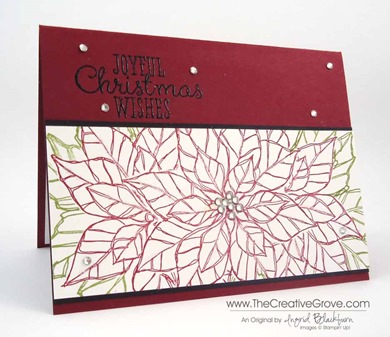
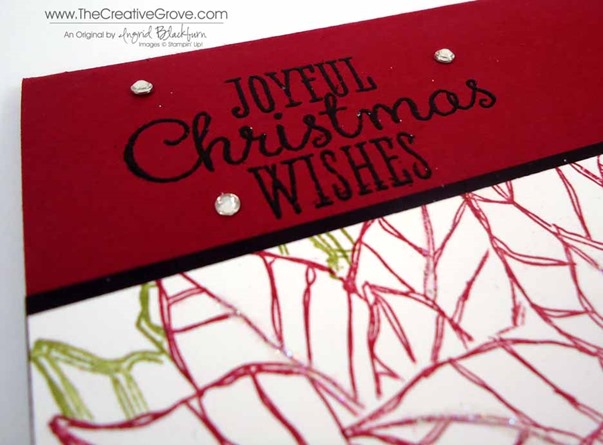
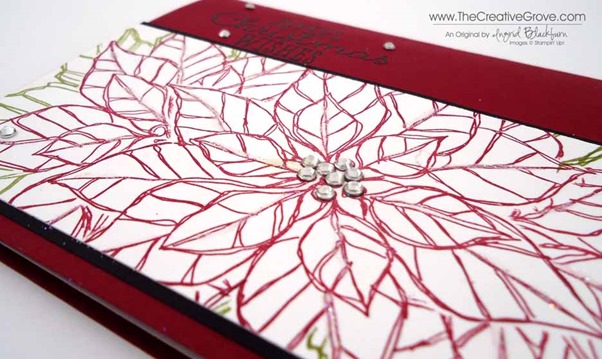
Since the cardstock is so rich, you will want to give your sentiment an opportunity to pop off the color by embossing it in Black.  Some glitz and glamour was added using Rhinestone basic Jewels and Dazzling Diamonds Glitter (hard to see on the photos as it’s rather light just on the veins.

Joyful Christmas 001 007Joyful Christmas 001 008

To help the white poinsettia banner pop, you may wish to matte it onto a piece of Basic Black card stock.  To add depth without taking away from the beautiful Cherry Cobbler color you can use Old Olive for the leaves.  It doesn’t take away from the images, rather it compliments it and supports it with a neutral rich color.

  • Tip – stamp your flowers on a larger piece of white and then cut it down to the desired length.  That way you don’t stress yourself out with getting it perfectly centered.  I began with a 4”x 11” piece that I cut down.
  • The final strip is 2 1/2” x 5.5” and the Basic Black is 5.5” x 2 5/8”.  The Cherry Cobbler is an A2 card – 8 1/2” x 5 1/2”
  • Tip – If I was mass producing this card, I would pre-cut my Whisper White Strips.  I would also perfect one and keep it above my working strip as a master.  This would help you as a guide to get each one just right.  You can also draw a box on your grid paper to show where to stamp.

The inside panel is just Whisper White with the same images stamped in the corner.  Keep it small, just a touch.  Joyful Christmas 001 002

It’s a fun card that pops and is easy not only easy to stamp, but gives you that richness that you are looking for.  And added bonus – this is rather easy to prep and cost effective. 

Online Stamping Classes

Do you want to learn how to make creative scenery cards or Christmas Cards?  Try our Brayer 101 – Introduction to Creative Scenery online class or the Class of the Month – Festive Flurry.  You’ll learn how to master this technique using a brayer to create unbelievable scenes that will leave you feeling like an artist or make the coolest cards that will leave your friends and family stunned.  Find out more here.

Signature Snowflake 001

Joyful Christmas 001 004

Stamps – Joyful Christmas Ink – Cherry Cobbler, Old Olive, Versamark Paper – Cherry Cobbler, Basic Black, Whisper White Cool Tools – Heat Gun, Black Embossing Powder Finishing Touch – Pearl Basic Jewels, 2 way glue pen, Dazzling Diamonds