We all need a few different types of Christmas cards – especially Masculine Cards. So what makes a Masculine Christmas card? Well, color mostly! When I think masculine, I think neutral colors – earthy, and not too overly cutesy.
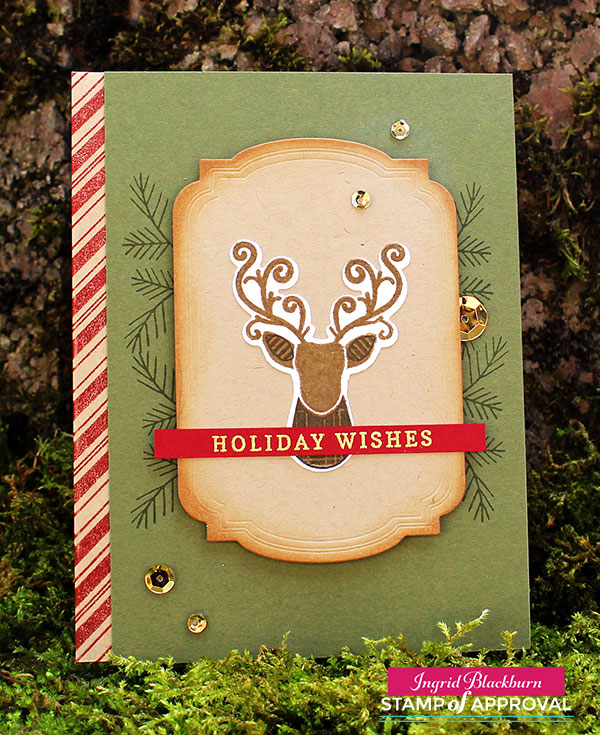
Today’s project is just that – and my first to really feature the rockin’ Stag from the Hip Holiday stamp set in the Candy Cane Lane Collection by Stamp of Approval. I’ve shared a few projects this past week already from this great collection – that goes on sale if you’re on the Wish List or a StampNation member this morning.
Tomorrow – if there are any left, it will go live to the public. There’s still time to get on the Wish List – so don’t wait if you like any piece of the collection. We also had three great Blog Hops loaded with Holiday card ideas for you. I have links to everything you may have missed below – not to worry!
Now back to our Masculine Christmas Stag….Here’s a quick tutorial for this great clean and simple card – another great mass producible one:
Masculine Christmas Cards: Forest Stag Tutorial
To keep with a masculine look – use neutral or muted colors. I chose to use Kraft card stock for the frame & card base. For the panel I used a dusky green – Always Artichoke by Stampin Up. For red accents – Cherry Cobbler and the Stag in White so that he really pops.
Once you’ve die cut your frame with the Merry Label Dies (CAS-ual Fridays for Stamp of Approval), edge it lightly with Tea Dye Distress Ink. This helps to accentuate the edge, give it a rustic look and showcase some of the debossing around the edges.
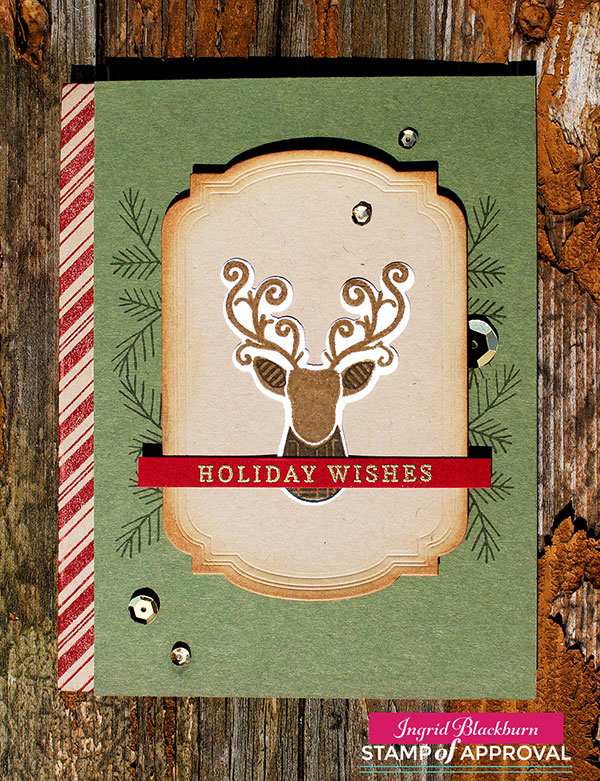
Use the coordinating dies for the Hip Holiday set to cut the stag out in white. Next, stamp the stag in Soft Suede & Early Espresso for the patterned ears & neck. I just love him – isn’t he great! I made one with eyes and a smile, but ended up liking the one without a face better.
Rather than clutter the label die with stamped images – add some tone on tone boughs from the Merry & Bright Bough Stamp set. Keep it minimal so that it doesn’t overtake the card.
TIP – to get the bough placement just right, lightly trace the label die so you have a guide, then erase your lines once done! If you are mass producing cards, create a label out of masking paper, trim it down to the inner debossed line. That way you don’t have to keep tracing it!
Fold your card base in half and stamp the Peppermint Stick background stamp in Cherry Cobbler on the edge. Glue your Artichoke card front on.
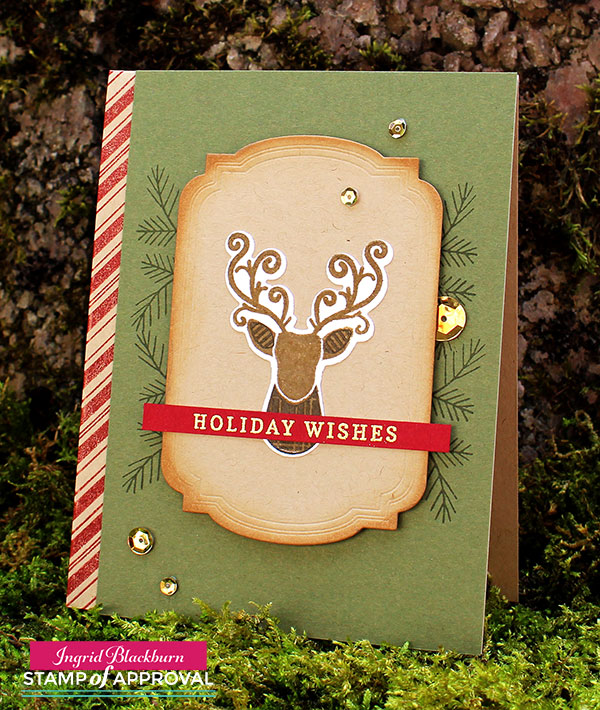
Glue your stag to the label, emboss a greeting in gold onto Cherry Cobbler. I used the lower part of Sweetest Holiday Wishes from the Candy Cane Lane stamp set. TIP – I actually cut that one apart – there is a bit of space between the sweetest and Holiday Wishes – it easily lines back up if desired – but I’ll get so much more use from it this way without having to constantly mask it off!
Glue your greeting over the stag and label – trim the edges and pop it all up with foam tape. Add a few gold sequins by Pretty Pink Posh (that large one is by Rico Designs) and you’re all set!
It’s cute, right? I’m in love with this color combo.
More Christmas Project Ideas
If you didn’t get a chance to see my two videos for this collection, here are the links to those pages. There’s a video on each!
CAS Peppermint Bark Peek-a-Boo Candy Canes & Christmas in a Box
I also have a great Christmas in a Box project on there too. Tomorrow, you’ll get to see another video tutorial with a technique project right here, so stop on by.
If you would like to get even more Christmas ideas from me, check out my YouTube channel, plus subscribe to my Creative Tips E-letter below or to the right. In about a month, I will be starting my yearly 12 Days of Christmas series. You’ll only see those projects free in your inbox through Creative Tips.
[optin_box style=”12″ alignment=”center” email_field=”email” email_default=”Enter your email address” integration_type=”aweber” double_optin=”Y” list=”3846012″ name_field=”name” name_default=”Enter your first name” name_required=”Y” opm_packages=””][optin_box_field name=”headline”]Learn more with our exclusive FREE video series:[/optin_box_field][optin_box_field name=”paragraph”]PHA+UGx1cyB5b3XigJlsbCBiZSBhZGRlZCB0byBteSBGUkVFIENyZWF0aXZlIFRpcHMgRS1sZXR0ZXIgd2hlcmUgSSBzaGFyZSBleGNsdXNpdmUgcHJvamVjdHMsIHZpZGVvcyAmYW1wOyB0aGUgPHN0cm9uZz4xMiBEYXlzIG9mIENocmlzdG1hczwvc3Ryb25nPiBQcm9qZWN0IFNlcmllczwvcD4K[/optin_box_field][optin_box_field name=”privacy”][/optin_box_field][optin_box_field name=”top_color”]undefined[/optin_box_field][optin_box_button type=”0″ button_below=”Y”]Get Instant Access![/optin_box_button] [/optin_box]

To see all the amazing creations from the past few days – don’t miss the blog hops….You can still win a free box! Leave comments along the way. Check them out here:
Blog Hop – Day One Blog Hop – Day Two Peppermint Watercolor
And finally… if you’re a StampNation member – be sure to check out the Challenge this morning! It’s loaded with Stamp of Approval cards!!! Can you guess which one is mine?!
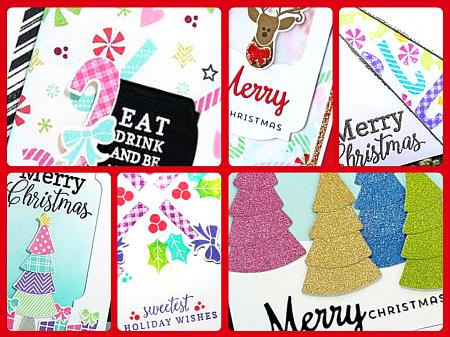
Now you have some serious holiday inspiration! See you tomorrow with even more…

[optin_box style=”12″ alignment=”center” email_field=”email” email_default=”Enter your email address” integration_type=”aweber” double_optin=”Y” list=”3846012″ name_field=”name” name_default=”Enter your first name” name_required=”Y” opm_packages=””][optin_box_field name=”headline”]Learn more with our exclusive FREE video series:[/optin_box_field][optin_box_field name=”paragraph”]PHA+UGx1cyB5b3XigJlsbCBiZSBhZGRlZCB0byBteSBGUkVFIENyZWF0aXZlIFRpcHMgRS1sZXR0ZXIgd2hlcmUgSSBzaGFyZSBleGNsdXNpdmUgcHJvamVjdHMsIHZpZGVvcyAmYW1wOyB0aGUgPHN0cm9uZz4xMiBEYXlzIG9mIENocmlzdG1hczwvc3Ryb25nPiBQcm9qZWN0IFNlcmllczwvcD4K[/optin_box_field][optin_box_field name=”privacy”][/optin_box_field][optin_box_field name=”top_color”]undefined[/optin_box_field][optin_box_button type=”0″ button_below=”Y”]Get Instant Access![/optin_box_button] [/optin_box]
