Polka Dot Christmas

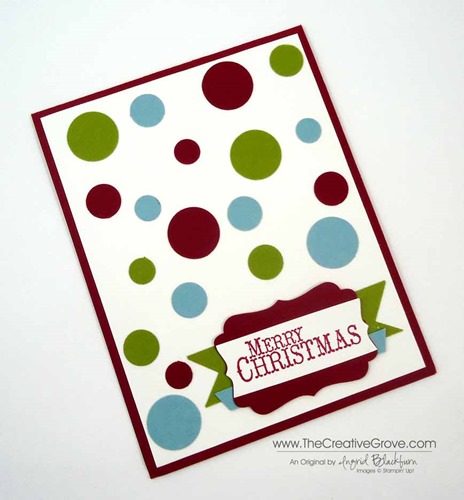
Clean and simple Christmas card 001

Since we’re packing all weekend, I thought I would dig into the archives and share one on my first Christmas cards that I blogged about on my old blog.  It’s a classic and you can substitute any greeting here.  Hope you enjoy it! SmileClean and simple Christmas card 003

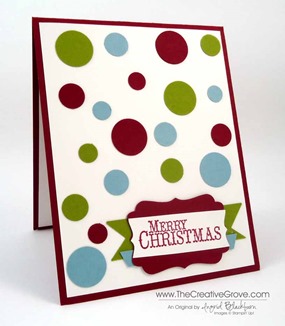
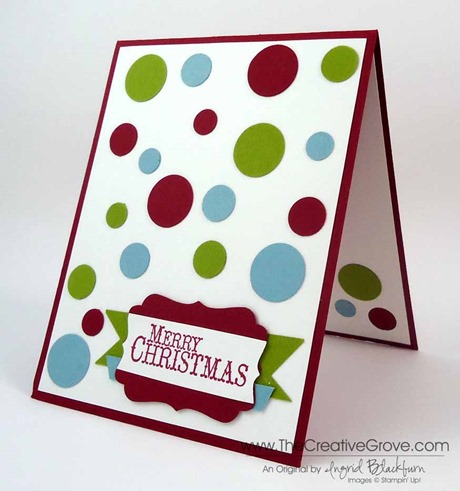
The circles were punched using a 3/4”, 1/2”, and the circle punch from the Itty Bitty Shapes Punch Pack.  The banner was made using a Square Punch, and Decorative label Punch.  It’s a fairly simple card that has a classic contemporary look to it.

The colors are Cherry Cobbler and retired – Baja Breeze and Lucky Limeade. 

Clean and simple Christmas card 002

Moving Special

Don’t miss out – this special ends today!  Everyone who order a minimum $25 before shipping and handling and uses the hostess code – VWCWVJ34 will get 15 – 6×6” sheets of Designer Paper sent to them directly in the mail from me! Smile

Signature Snowflake 001

To shop 24/7 – click here

CAS Chock-full of Cheer

This is a re-designed card of this one from a few weeks ago.  I wanted to try a sample with my Chock-full of Cheer and Cheerful Christmas wheel.  I wanted a crisp and clean look and here’s the result.

I switched it up a bit by stringing the ornament onto the Cherry Cobbler Baker’s Twine which is a near match to the Raspberry Ripple Cardstock.

  • I punched a small circle with my 1/16th handheld punch to string my ornament.  It’s a tight fit, so I opened the hold a big using my paper piercer.
  • I stamped tone on tone for the two background pieces.  One with the Cheerful Christmas Wheel which I unmounted and use as a clear stamp.  The other with my Distressed Dots background stamp.  Both compliment each other and give that holiday feel to my project.
  • I didn’t want my greeting to take over the card so I stamped onto half a Curly Label punch and adhered it sideways.  It’s just the right amount.

  • I didn’t have the perfect colored button, so I created my own button embellishment using sponged cardstock.  It’s the only sponged piece on the card – but necessary for a little more depth to the button.  I punched two holes just like a normal button so I could tie my Cherry Cobbler Baker’s Twine through it.  It looks pretty close!
  • To completely finish the project off, I popped up the ornament, added the center in Raspberry Ripple, and added a pearl to it.

Overall, this project is fun and colorful.  I like the amount of white space to the card and feel that it really pops off the page.  What do you think?

New this October 1 – 31, 2012! Get a FREE Festive Paper Piercing Pack when you order one of the Ornament Bundles this month only!  Click here for more details on this limited time offer.

B1_ChristmasGift_demo_Oct0112_NA Creatively yours –

Ingrid

To Shop 24/7 in the Creative Store – Click here!

Stamp Sets – Chock-full of Cheer (126717), Distressed Dots (122815), Perfect Pairs (122497), Cheerful Christmas Wheel (127310) Paper – Whisper White (100730), Gumball Green (126840), Raspberry Ripple (126842) Ink – Gumball Green (126861), Raspberry Ripple (126859) Cool Tools – Curly Label Punch (119851), 1 3/4” Circle Punch (119850), 3/4” Circle Punch (119873), 1/16” Circle Handheld Punch (101227), Paper Snips (103579) The Perfect Finish – Pearl Basic Jewels (119247), Cherry Cobbler Baker’s Twine (123125), Stampin’ Dimensionals (104430)

A fun challenge


I was challenged to make a card with the stamp set Chock-Full of Cheer and here is my fun little result!  The images in this set are quite fun in nature, so I find this set easy to use.  Especially with the complimentary wheel Cheerful Christmas and matching Designer Series Paper Be of Good Cheer.

I didn’t want to get too ornate with this one, just quick, simple and colorful.  This set to me screams bright bold color.  I chose to stick to the new 2012-2014 In Color collection and used everything except Primrose Petal!  I also kept the accessories to a minimum and just used the Scallop Border Punch and one Pearl Basic Jewels.  The end result is an easily mass produced card – I made 25 in just a few hours, that is just as fun as it is quirky.


  • To get just a hair of Raspberry Ripple showing around the stamped image squares and rectangle, I measured 1/16th to the left, right and in etween both.  For a total of 4/16 – or 1/4” larger than my white before I cut it up.
  • For the bottom, I used the large row of circles and masked it off if I felt it needed it, depending on where I stamped my Merry Christmas – in this case, to the right. 

You could kick this card up a notch if you wanted to with more Pearl Basic Jewels or some Rhinestone Basic Jewels.  You could even stamp the circles at the bottom in alternating colors like I did for the card in this post.  Just have fun with it – after all, it’s in the name of the set… Chock-full of Cheer!

Creatively yours –

Ingrid

To Shop 24/7 in the Creative Store – Click here!

Stamp Sets – Chock-full of Cheer (126717) Paper – Whisper White (100730), Gumball Green (126840), Raspberry Ripple (126842), Summer Starfruit (126839) Ink – Gumball Green (126861), Raspberry Ripple (126859), Midnight Muse (126860), Summer Starfruit (126853) Cool Tools – Scallop Edge Border Punch (119882) The Perfect Finish – Pearl Basic Jewels (119247)

Chock Full of Cheer

The Unexpected for the Expected

I love unorthodox colors for the expected – especially for Christmas cards.  I find that some of the best cards take me by surprise.  I have been making Christmas cards all summer long to get ready for my classes this fall.  I sat down at my crafting table and decided that Basic Gray was going to make it into my card somehow.  And so I decided to try a more masculine theme with Night of Navy, Cherry Cobbler, Basic Gray and just a hint of Silver Glimmer Paper.

I wanted the pop feel so I popped out the Merry Christmas from the Cheerful Christmas Wheel which I of course unmounted from its wheel and turned into a clear stamp – one of my new favorite things to do!  It is definitely much easier to line up when stamping than by wheeling.

For a little added embellishment, I stamped and punched out the center, added some paper piercing in the corners – and popped the image up over a piece of Cherry Cobbler card stock so that just a hint of red showed through the piercing.  The seam binding ribbon and Rhinestone in the center were just the right finishing touches to the ornament.

Masculine, rich, detailed, and unexpected.  Not everything has to be green and red for the holidays!  And on a side note, as I post this project on 9/11 – why not a patriotic holiday card? 🙂

Creatively yours –

Ingrid

To Shop 24/7 in the Creative Store – Click here!

Stamp Sets – Chock-full of Cheer (126717), Cheerful Christmas (127310) Paper – Whisper White (100730), Night of Navy (100867), Cherry Cobbler (119685), Basic Gray (121044), Silver Glimmer Paper (124005) Ink – Night of Navy (126970), Cherry Cobbler (126966), Cool Tools – Paper Piercing Tool (126189), Essentials Mat Pack (126187), Stampin’ Pierce Mat (126199), Scallop Trim Border Punch (118402), 3/4" Circle Punch (119873), Itty Bitty Shapes Punch Pack (118309) The Perfect Finish – Stampin’ Dimensionals (104430), Rhinestone Basic Jewels (119246), Cherry Cobbler 1/2” Seam Binding Ribbon (120992)

Chock Full of Cheer

Cheerful Christmas

Chock Full of Cheer Fun


I’m continuing with my Christmas in July series.  Today I’m stamping with Chock Full of Cheer, which is just my kind of stamp set.  I absolutely love the look.  It’s clean and crisp, fun to work with and best of all includes a saying!  I’m all about the versatility when it comes to my craft supplies.  Gumball Green has quickly become a favorite of mine from our new In Color collection this year.  Here I paired it with Rose Red for a muted red holiday effect. 

I wheeled the Cheerful Christmas coordinating wheel in Rose Red for the background and paired it with our Distressed Dots background stamp.  I love adding the matching wheel to a project, it just takes it to the next level, don’t you think?

The best part about this project is that I did not use a Stamp-A-Ma-Jig to line up the alternating colored rows of dots.  Believe it or not, with our clear stamps, I found this rather easy to line up.  Which was greatly appreciated since I stamped the dots in alternating colors which required a cleaning in between.  I’m a bit of a perfectionist sometimes, and I knew if I stamped the three rows of red, I would not get it spaced right, so a cleaning and re-inking each time was necessary.

For the inside of the card, I picked three dots and colored them with our Marvelous Markers.  I just love that our markers are the same ink as our inkpads.  The little dots inside add just the right touch.

I added a little border punched with our Scallop Edge Border Punch to help break up the colors in addition to the ribbon.  I popped a Pearl in the middle of the ornament for a little flash at the finish.  All in all – it’s a simple card that looks great.  I really love the Basic Black background that make the colors really pop.  Hope you like it too!


Create Away –

Ingrid

To Shop 24/7 in the Creative Store – Click here!

Stamp Sets – Distressed Dots (122815), Chock Full of Cheer (126717), Cheerful Christmas (127310) Paper – Whisper White (100730), Basic Black (121045), Gumball Green (126840), Rose Red (102544) Ink – Gumball Green (126861), Rose Red (126954),  Gumball Green Marker (126856), Rose Red Marker (119700) Cool Tools – 1 3/4” Circle Punch (119850) The Perfect Finish – Stampin’ Dimensionals (104430), Basic Black Grosgrain Ribbon, Pearl Basic Jewels (119247)

 Chock Full of Cheer 

Cheerful Christmas

new stamp

Vintage Christmas

Have I told you yet how much I love Christmas?  You may be wondering why I’m making holiday cards in June.  Well, it’s never too early in my book!  Actually, I’m determined to be WAY ahead of the game this year and be done with my holiday cards early this year.  No more making them last minute for me.

I was taking a quick break and looking at Pinterest when a rather simple card gave way to inspiration for this super quick project.  Actually I’ve been itching to break out this stamp set – Tags til Christmas.  This is my first ornament punched card too.  I know – what was I waiting for?!!

I love the result, you can’t ever go wrong with the Vintage Wallpaper embossing folder for the Big Shot and I love the Early Espresso and new in color – Raspberry Ripple together.  The pearls are the perfect finishing touch along with light sponging on the card front edge and insert inside.  The embossed background is dragged sponged on the front first in Chocolate Chip and then in Early Espresso for a little more depth.  I used scraps from my Early Espresso for the ornament hooks and then popped one up on dimensionals.

This is a great project to mass produce – it literally look minutes.

Create away –

Ingrid

To Shop 24/7 in the Creative Store – Click here!

Be sure to check out the Clearance Rack!

Stamp Sets – Tags til Christmas (121169), Chock-full of Cheer (saying) (126717) Paper – Very Vanilla, River Rock, Raspberry Ripple, Early Espresso Ink – Early Espresso, Chocolate Chip, Raspberry Ripple Cool Tools – Ornament Punch, Vintage Wallpaper Embossing Folder, Big Shot, Sponges Finishing Touch – Stampin’ Sponges, Stampin’ Dimensionals,  Pearl Basic Jewels