5 Card Ideas

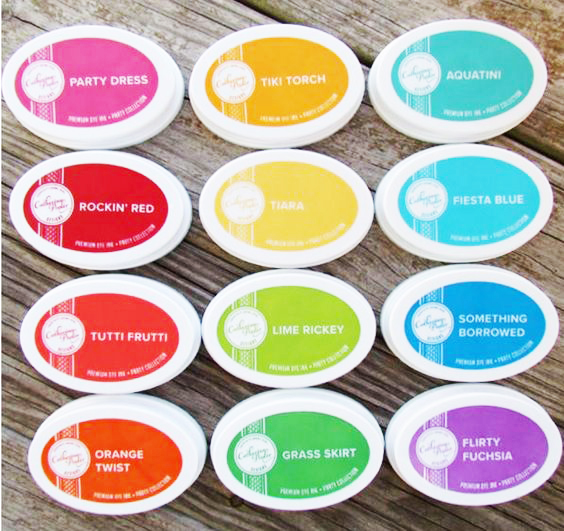
5 card ideas with 4 new ink colors in the Spa line of ink by Catherine Pooler. BOOM! Or as my good crafty friend Laurel Beard likes to say…BOOM BOOM!

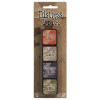
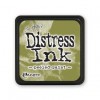
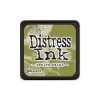
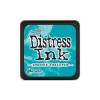
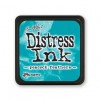
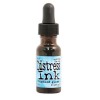
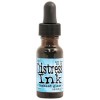
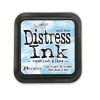
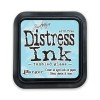
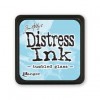
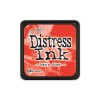
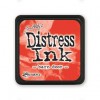
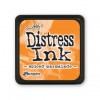
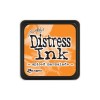
That’s right, Catherine released the final four colors to complete the Urban Oasis collection. These are spa inks, so muted colors – but boy do they pack a punch when used together – just look!

The Creative Grove Ingrid Blackburn

I love good solid card designs, and here are some fun ones for you. Because we always need go to looks that are always home runs, right?

But wait, there’s more…In addition to these 5 card ideas, I even have two videos for you. SOLD! Let’s dive right in…

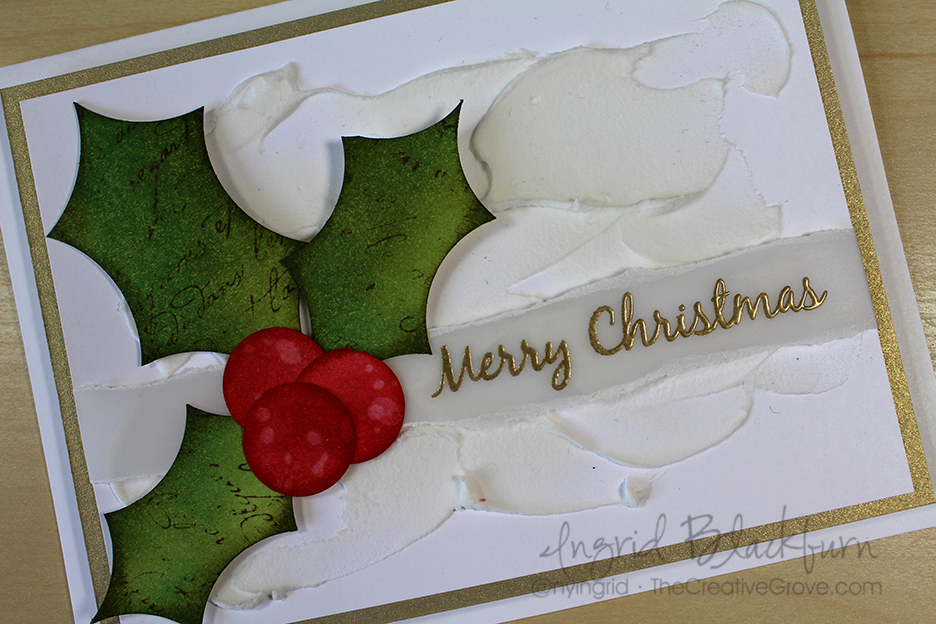
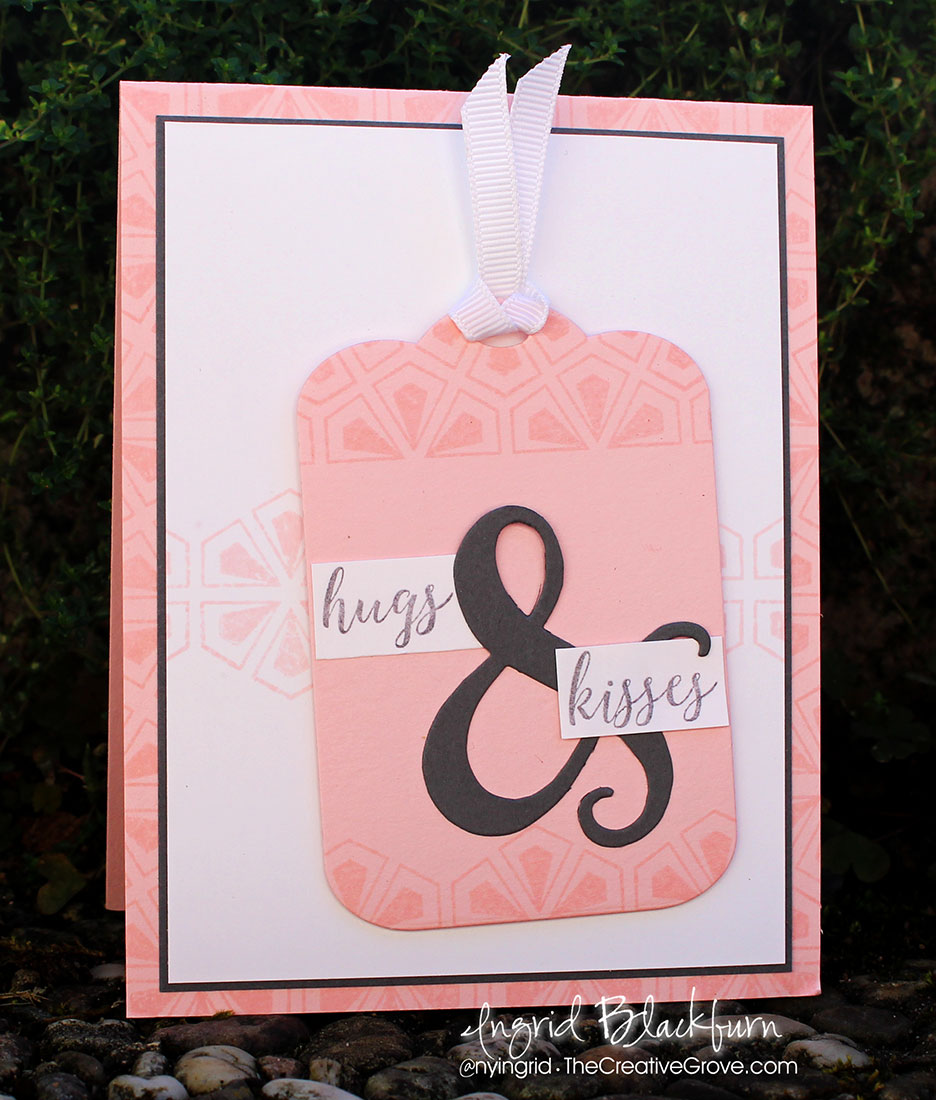
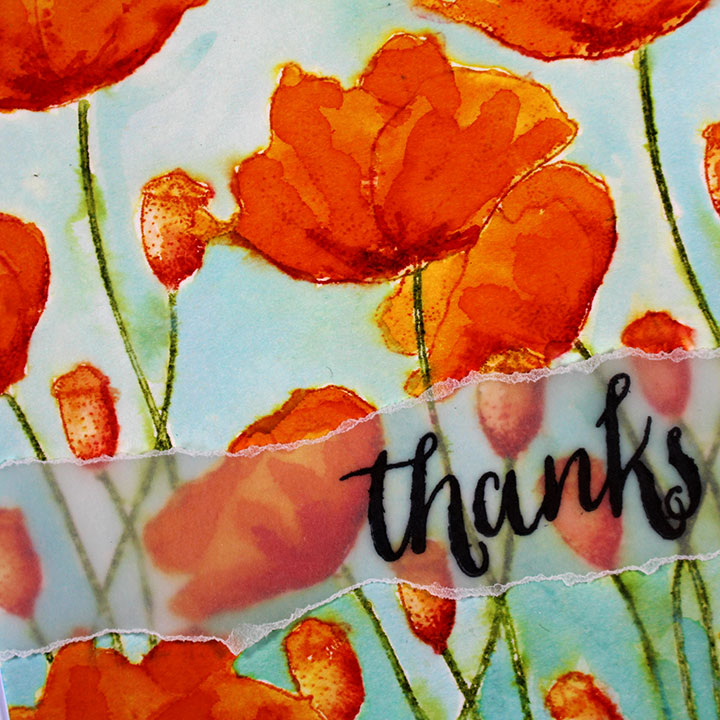
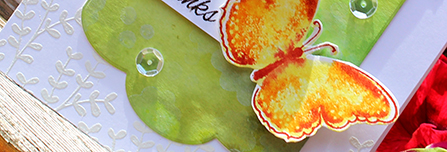
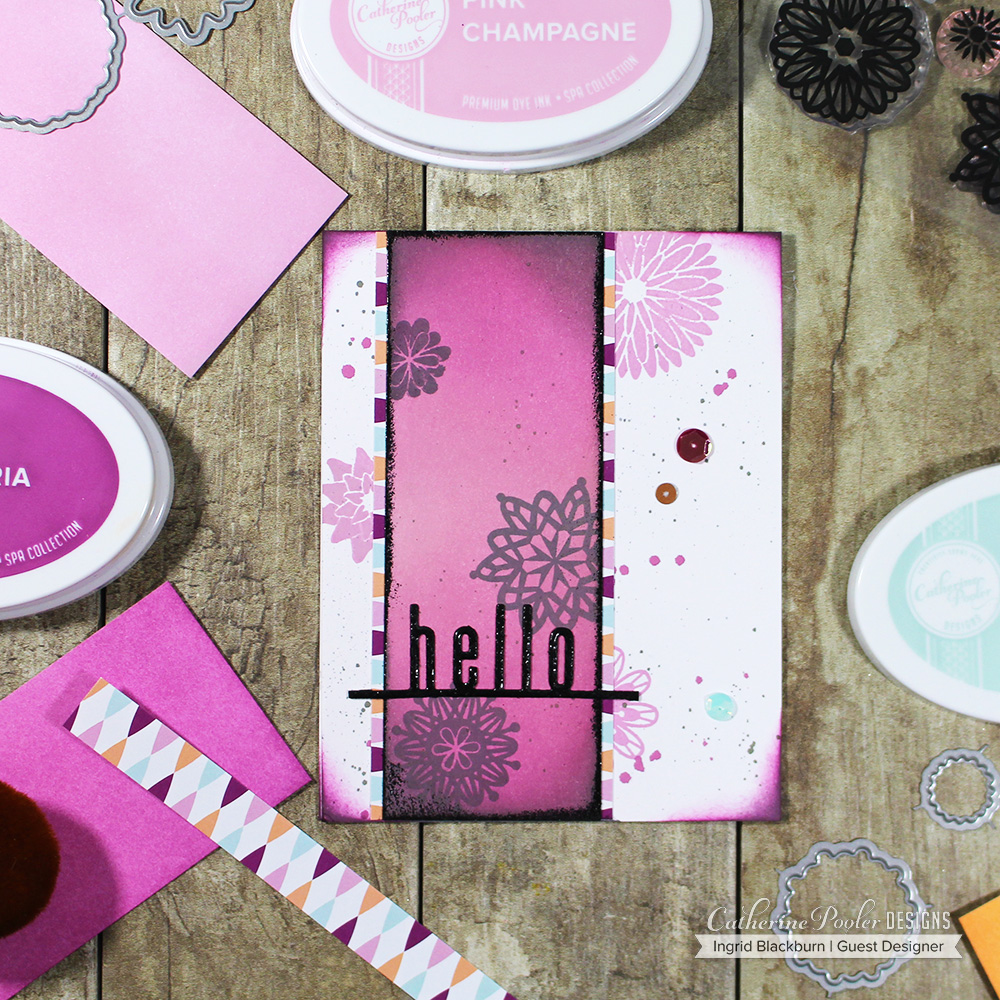
Frosted Sangria Blossoms – the card that almost wasn’t. I posed this question to my newsletter subscribers first and then to my community over on YouTube. Sometimes a card just doesn’t work out the way you want it to. This first one was just that.

5 card ideas

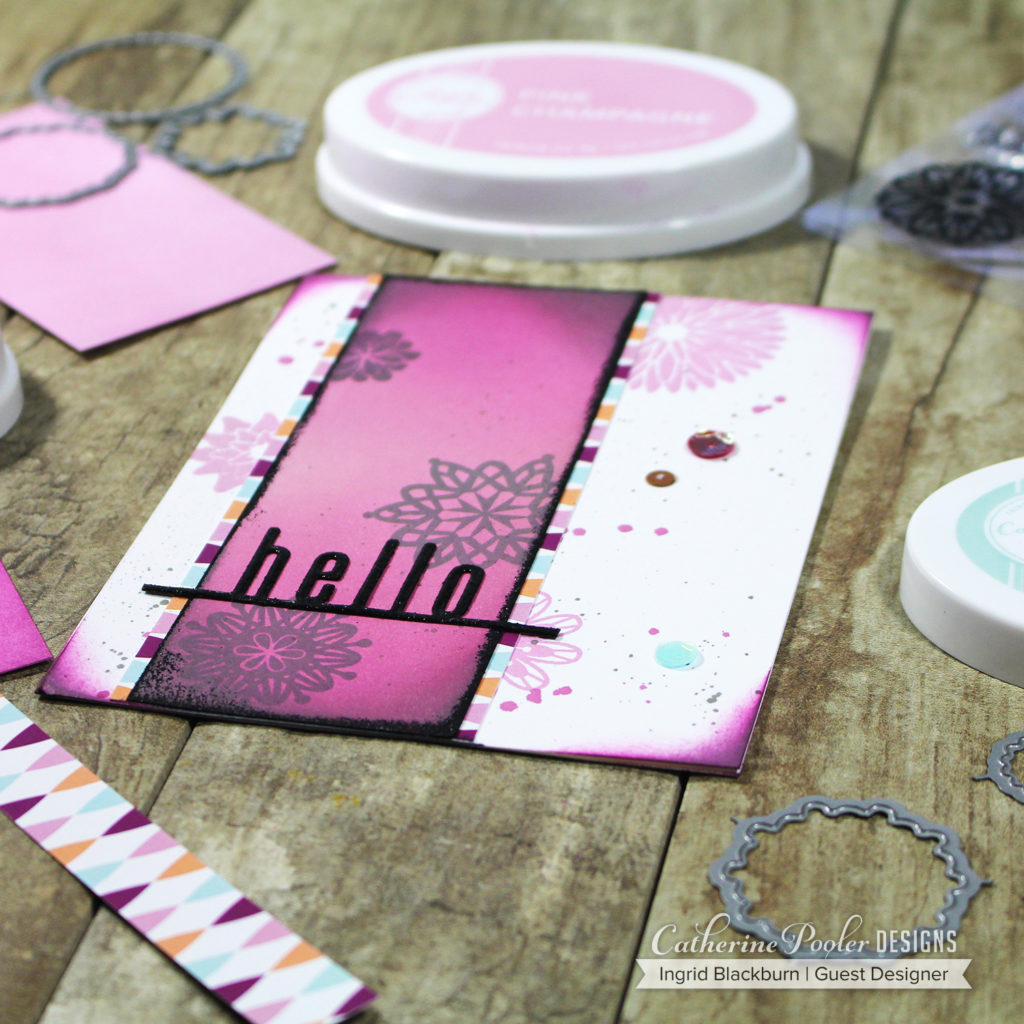
Now, mind you… it wasn’t the stamp set – it’s a great elements set that is quite versatile. And, it most definitely was not the inks. I don’t even think it was the layout. Something just didn’t click.

I filmed my struggle for you, but was unsure of whether or not you’d want a video? The card isn’t rocket science, and my videos are more about techniques, not just making an easy card like this. (#shameless channel plug…Subscribe here lol) That’s not why you watch my videos, let’s be honest.

So what am I even talking about? It’s about the very real struggle we all sometimes go through when cardmaking – it just not working out as planned, and troubleshooting that very struggle, along the way. If you do want to see a video on THAT, leave me a comment!

And more importantly, if you don’t – me mentioning it here is enough – that’s totally fair, and I definitely want to know that too. 🙂 Let’s get to it, shall we?

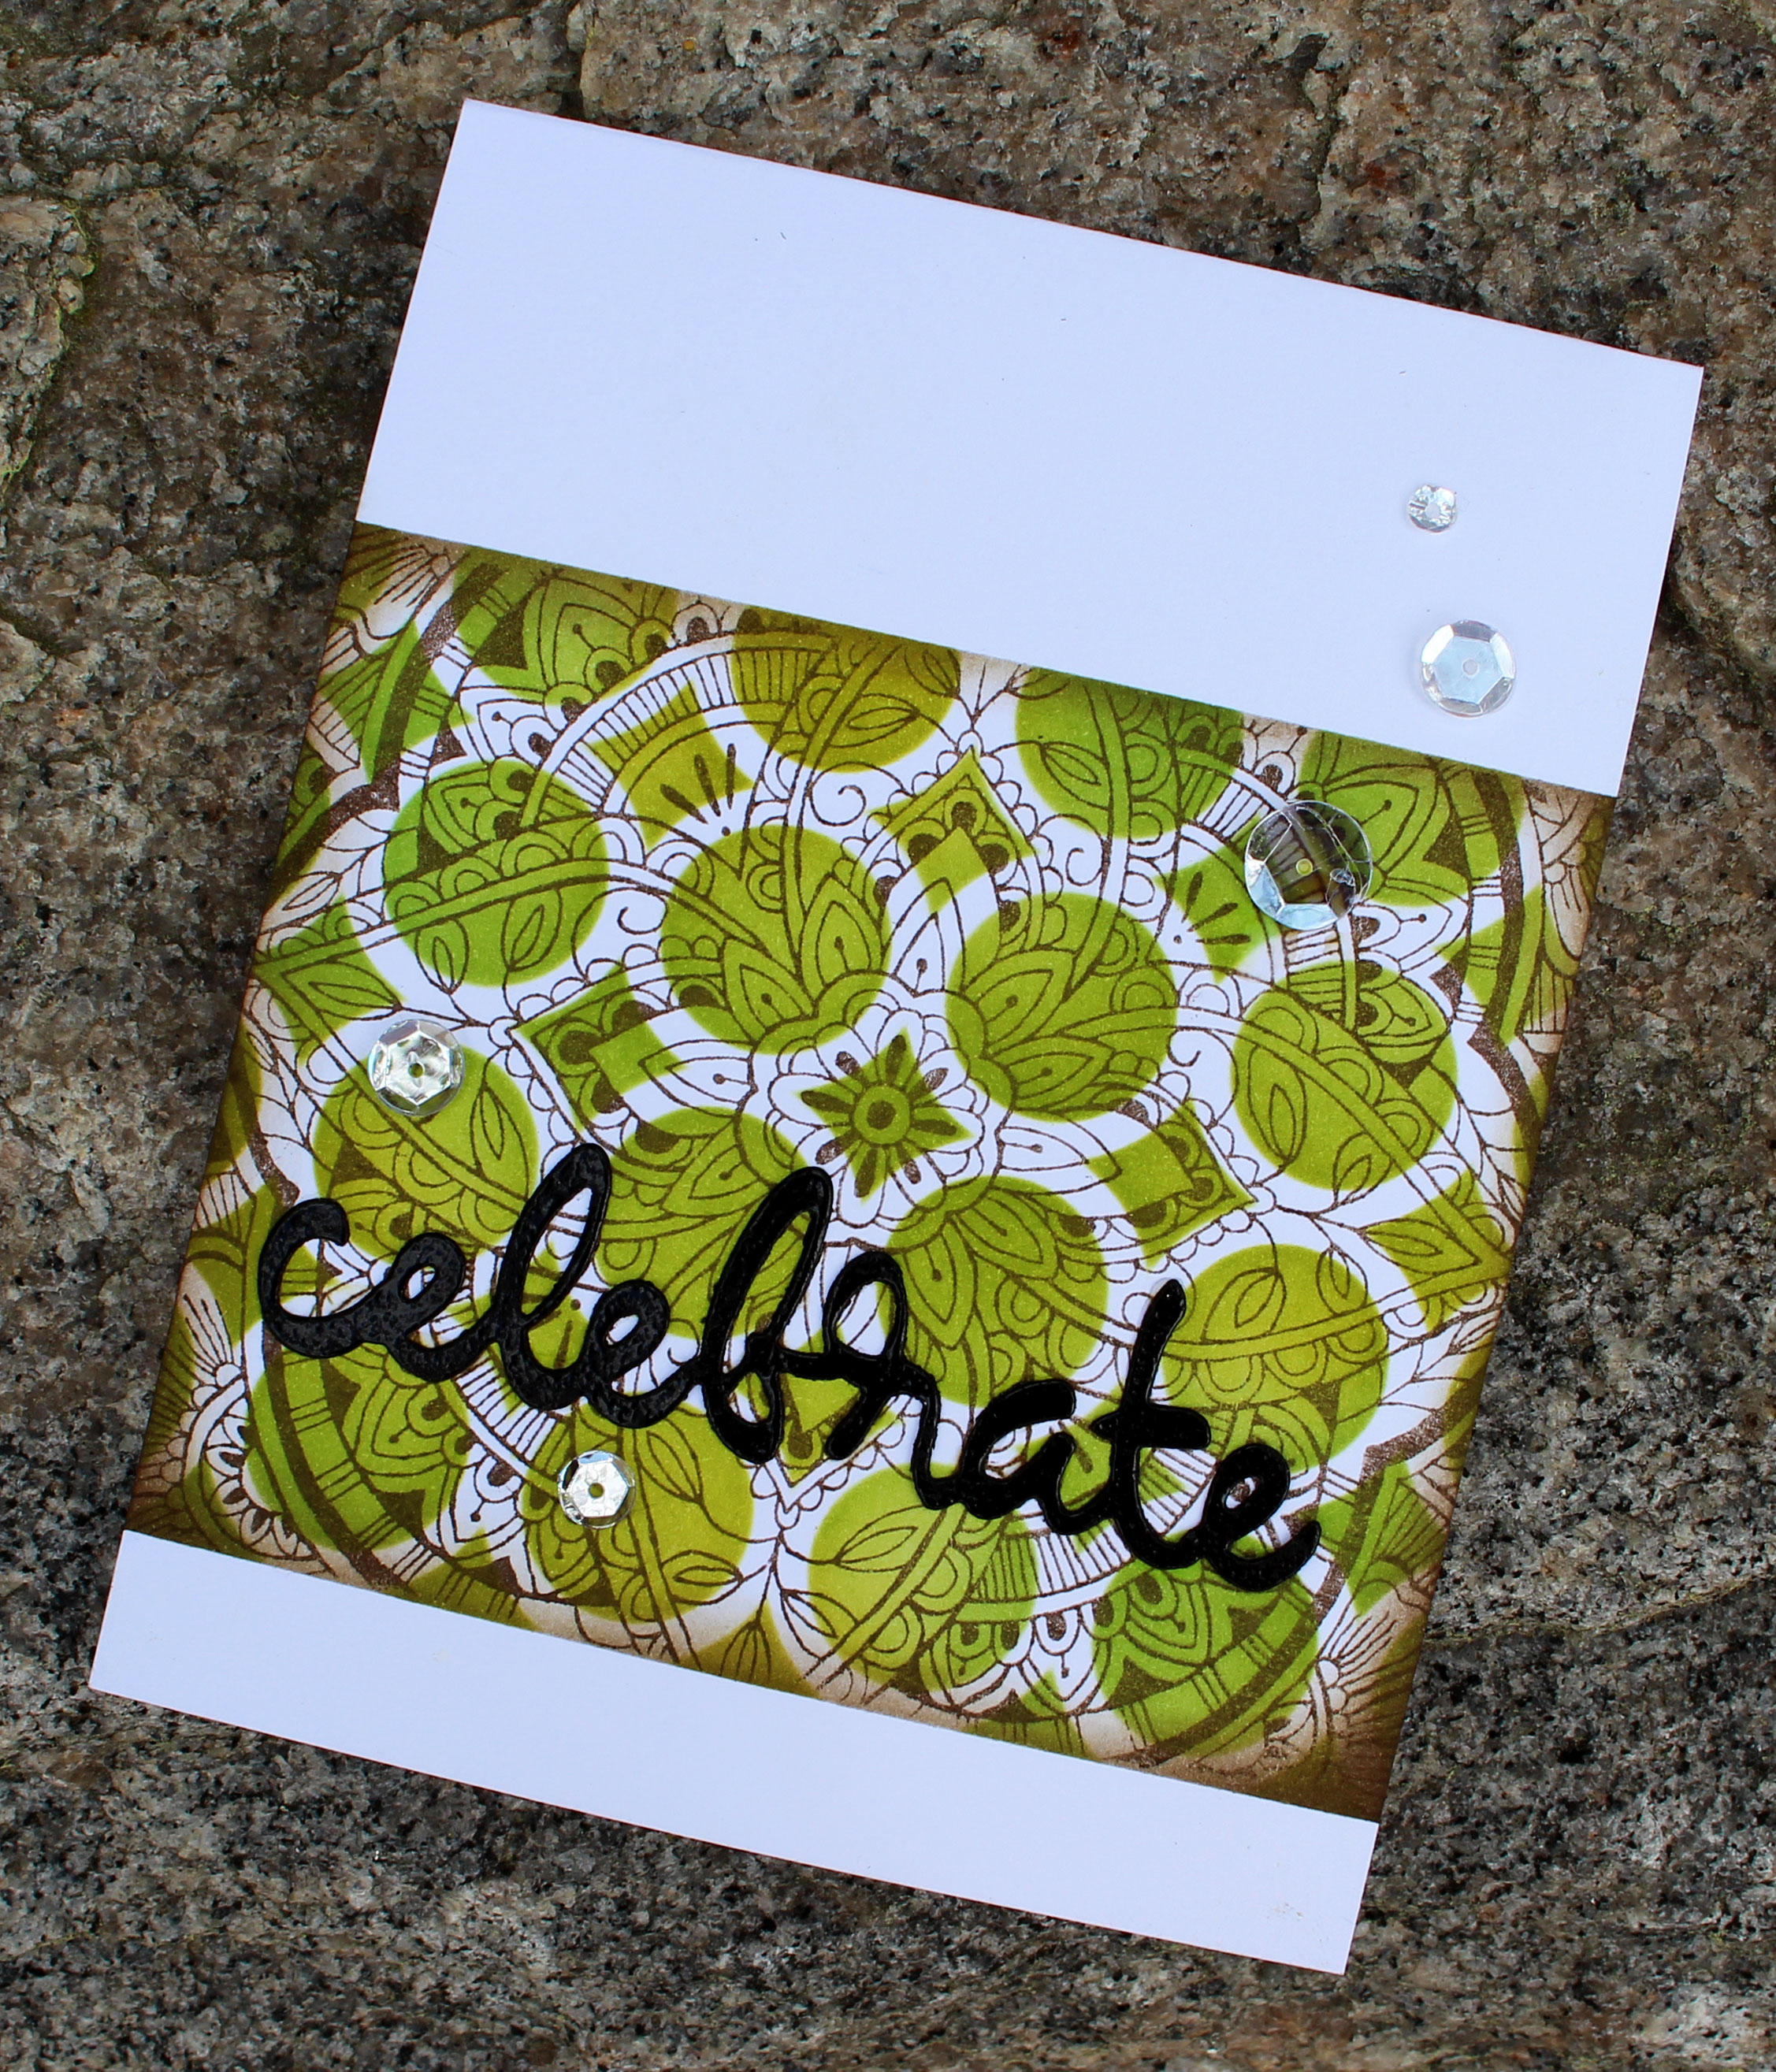
Card Idea no. 1 – Frosted Sangria Blossoms

Spoiler alert – without all the little, I like to call them ‘somethin’ ‘somethin’ techniques on this card – it just does NOT work. Do you like it?

5 card ideas

You’ve heard my little story… So, should I make the video, or pass? Would you watch? Feel free to tell me what you would be interested in seeing too, that’s always of great value to me.

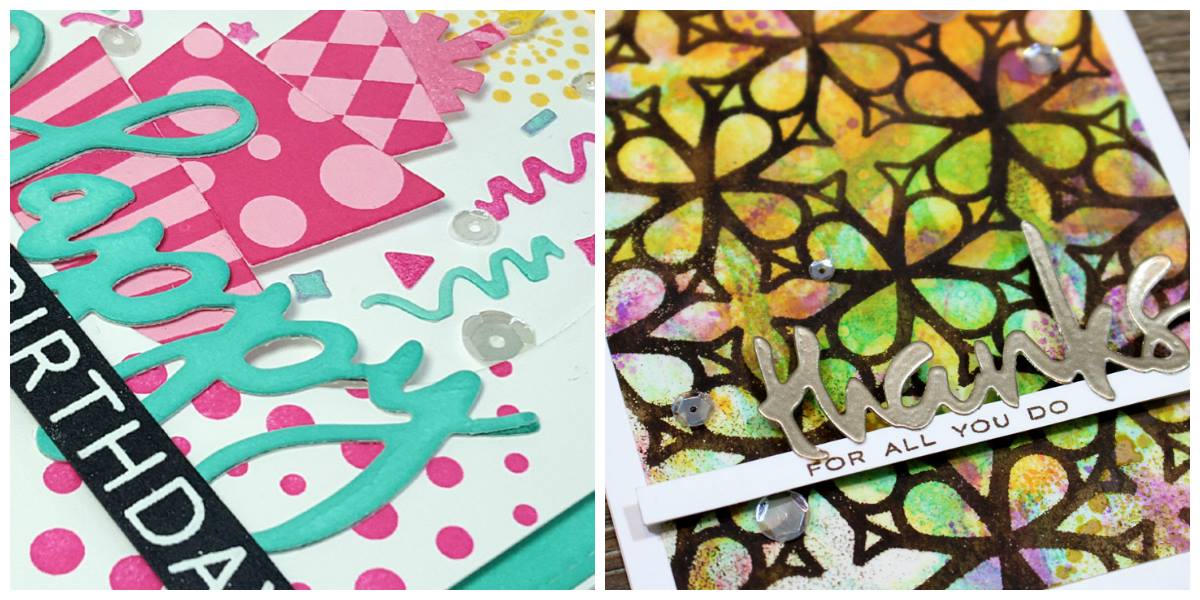
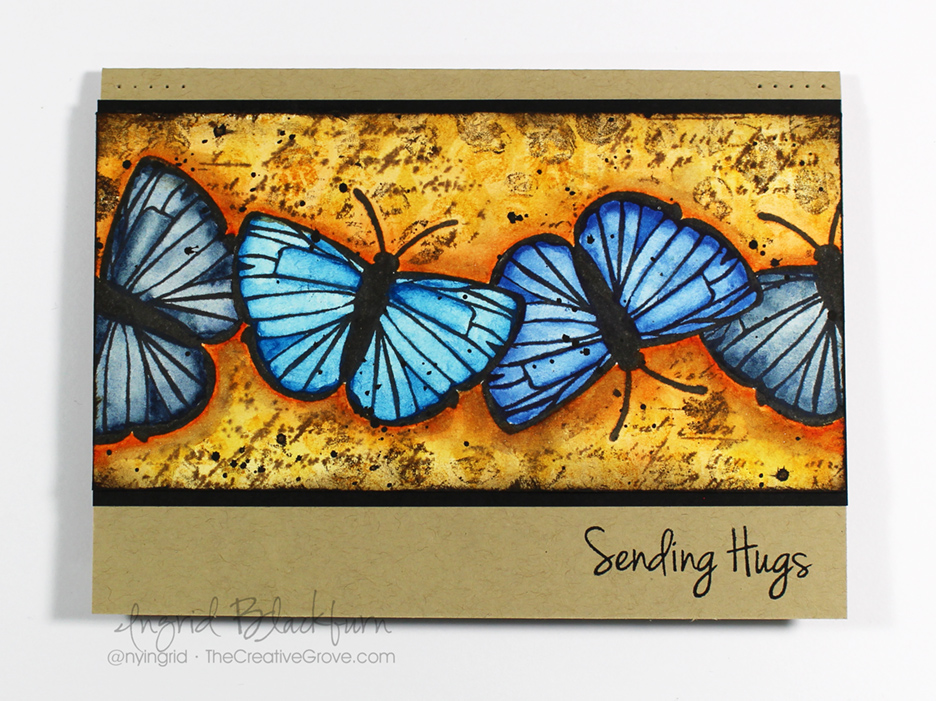
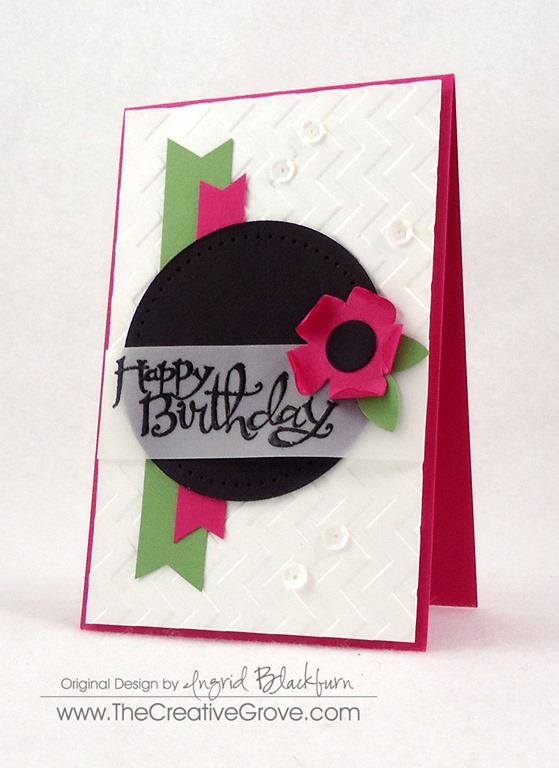
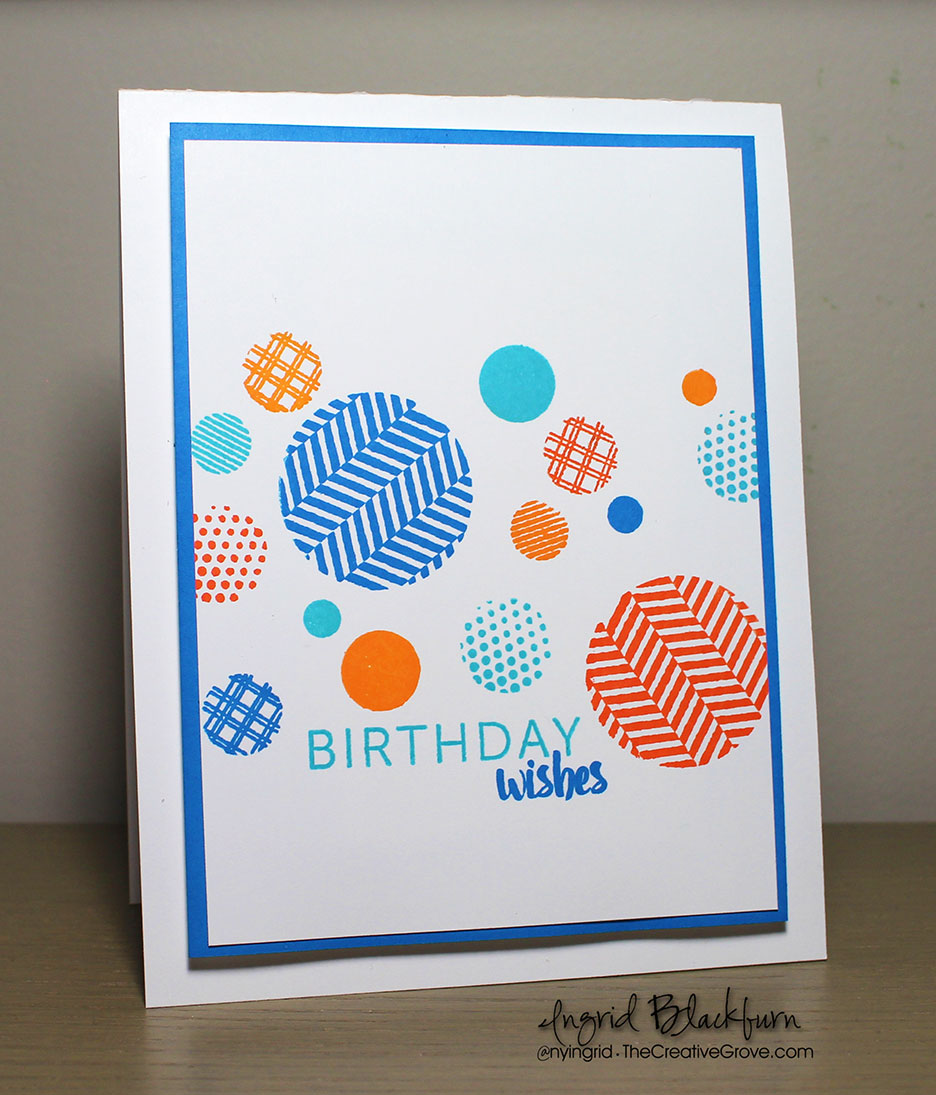
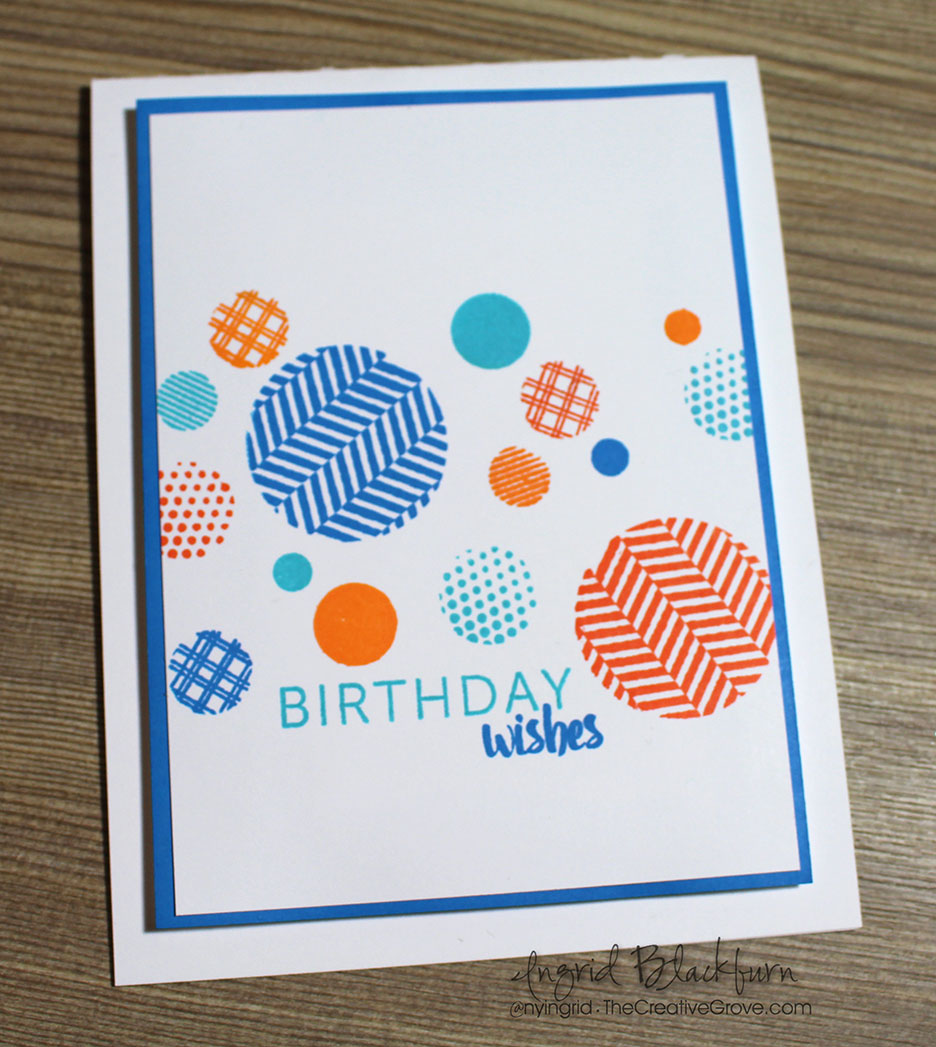
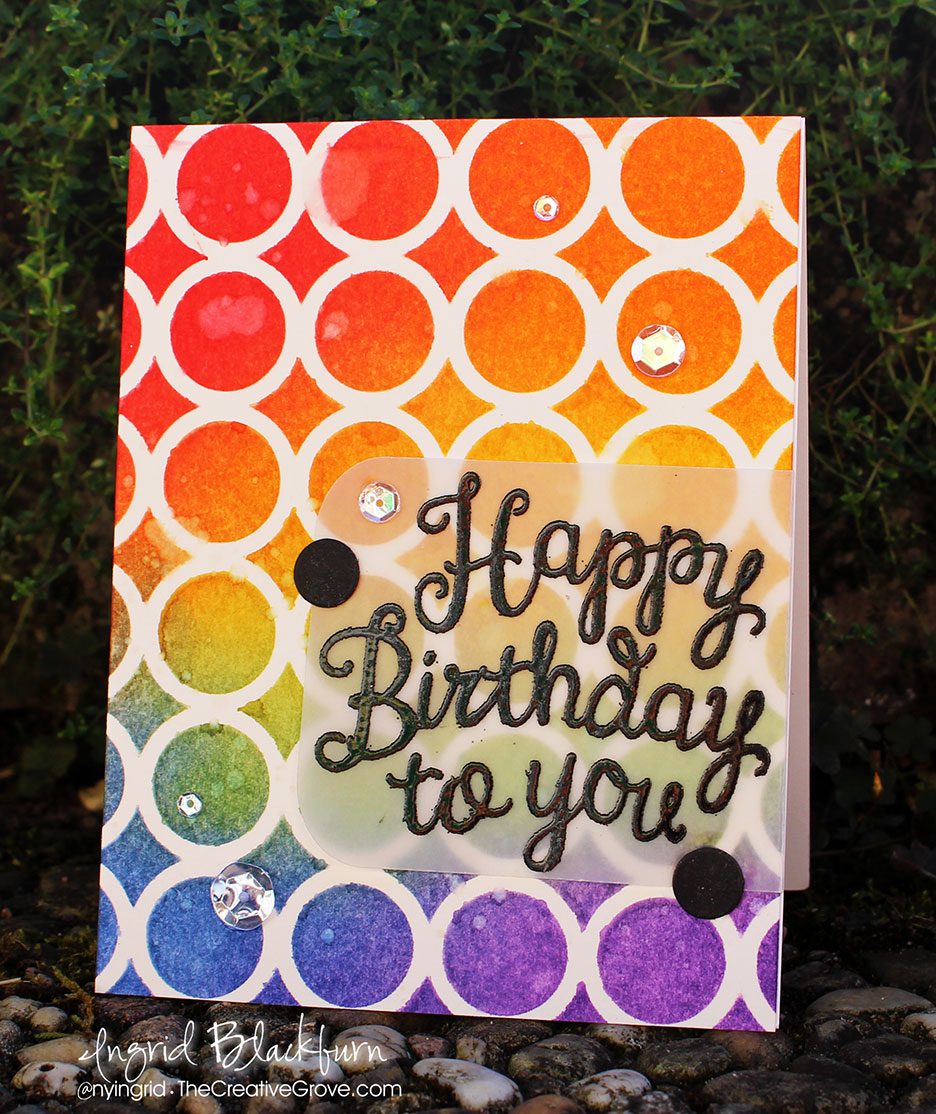
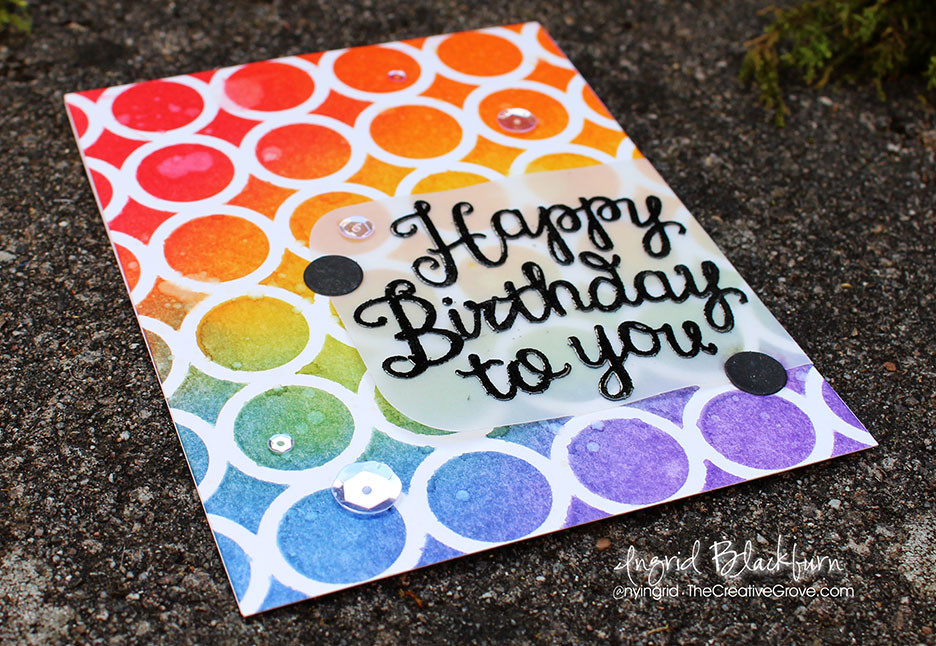
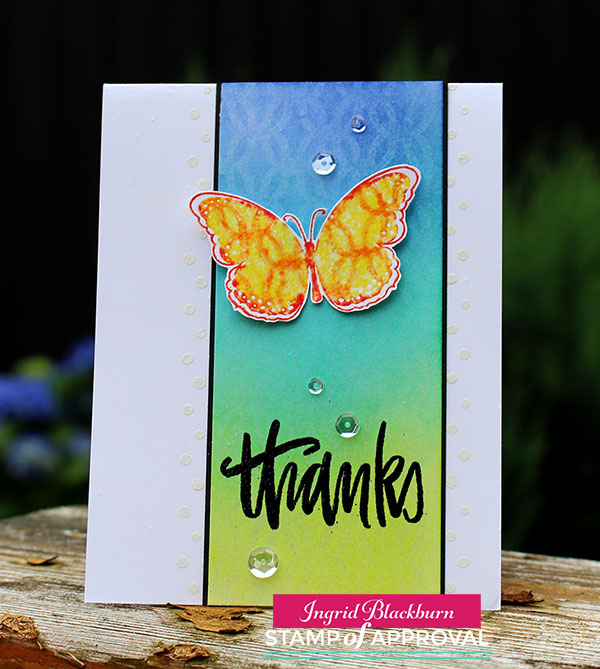
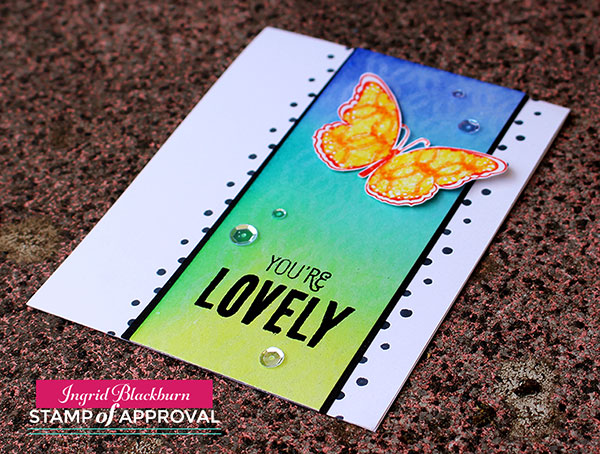
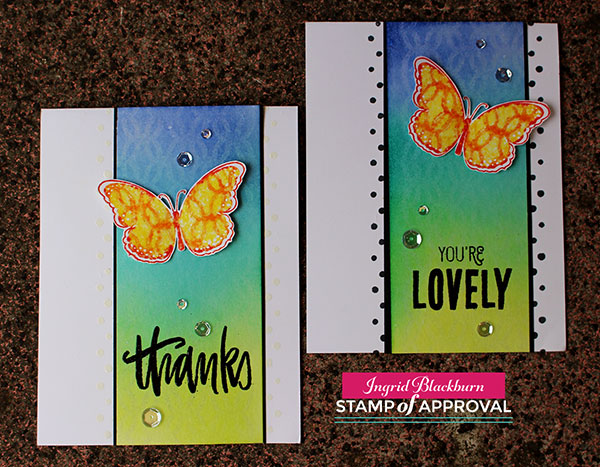
Card Idea no. 2 – The Classic Strip

You’ve seen it before, and you’ll see it again – the classic strip card. No that’s not a dirty word…seriously get your mind out of the gutter…lol!

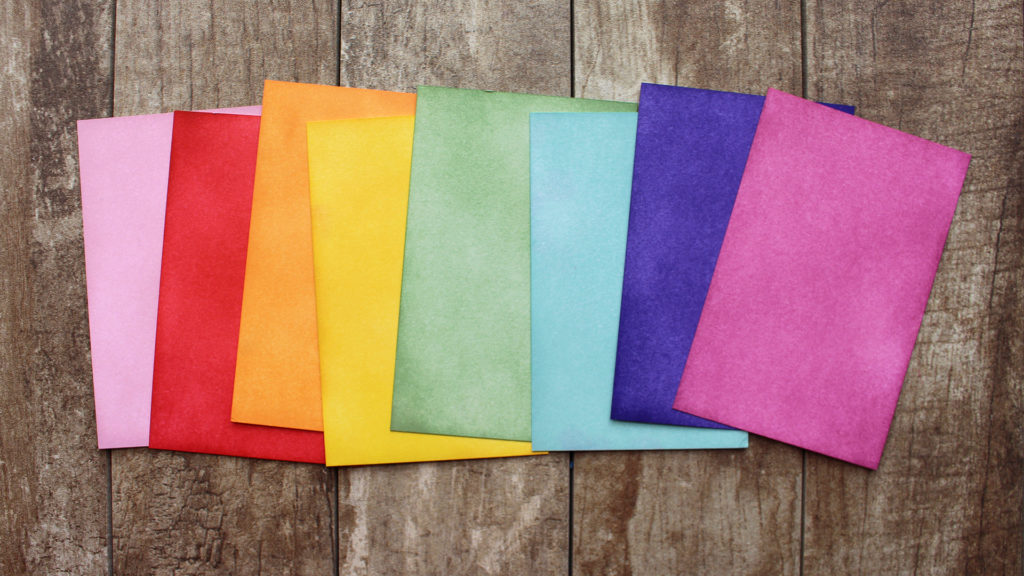
Here’s the deal – sponge, watercolor, smoosh, however you wish to do it, and use all the colors of the rainbow. I chose to use each color of the now complete Urban Oasis spa ink collection by Catherine Pooler. These inks are muted, and SO my thing.

Next, Cut down little 3/8″ strips, assemble, lop off the edges and matte. THAT’s it. BAM! (inner Emeril Lagase). And you have a super easy card to make. Seriously, think patterned paper – theme it, white on white, embossed black on matte black – whatever you want!

You just got some great ideas, didn’t you? I see the wheels turning….

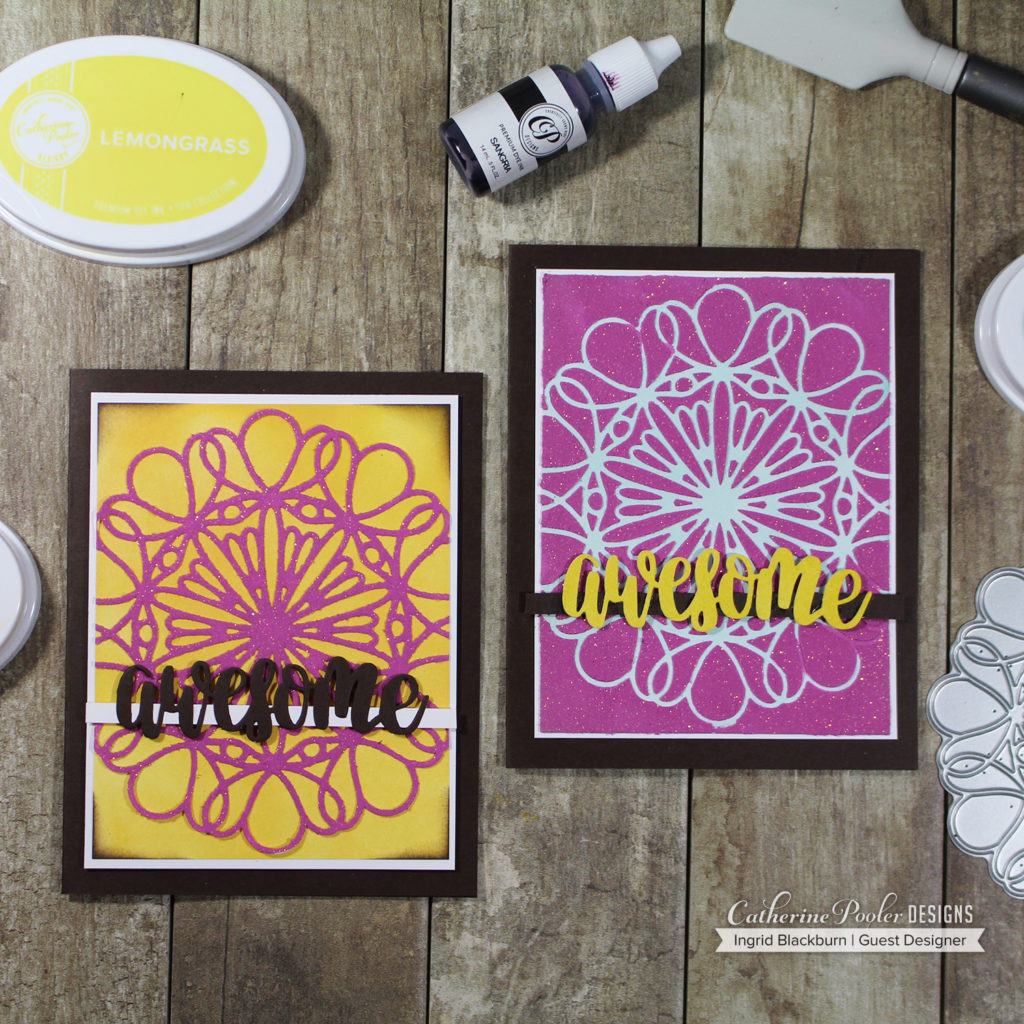
Card Idea no. 3 and no. 4 – DIY Colored Glitter Paste

Okay, the video on this one says it all. Actually it shows it all. These two cards do NOT photograph as pretty as they are. The texture, sparkle and strangely weird color combination are very cool, you’ll just have to trust me on that.

Watch on YouTube

Making your own glitter paste could not be ANY easier. Paste + Glitter = Glitter Paste. Okay – spoiler….but did you see what I did in the video to color that paste? Is it with perhaps a tool you have in your own craft room, which you forget to use all the time? Hummm…….

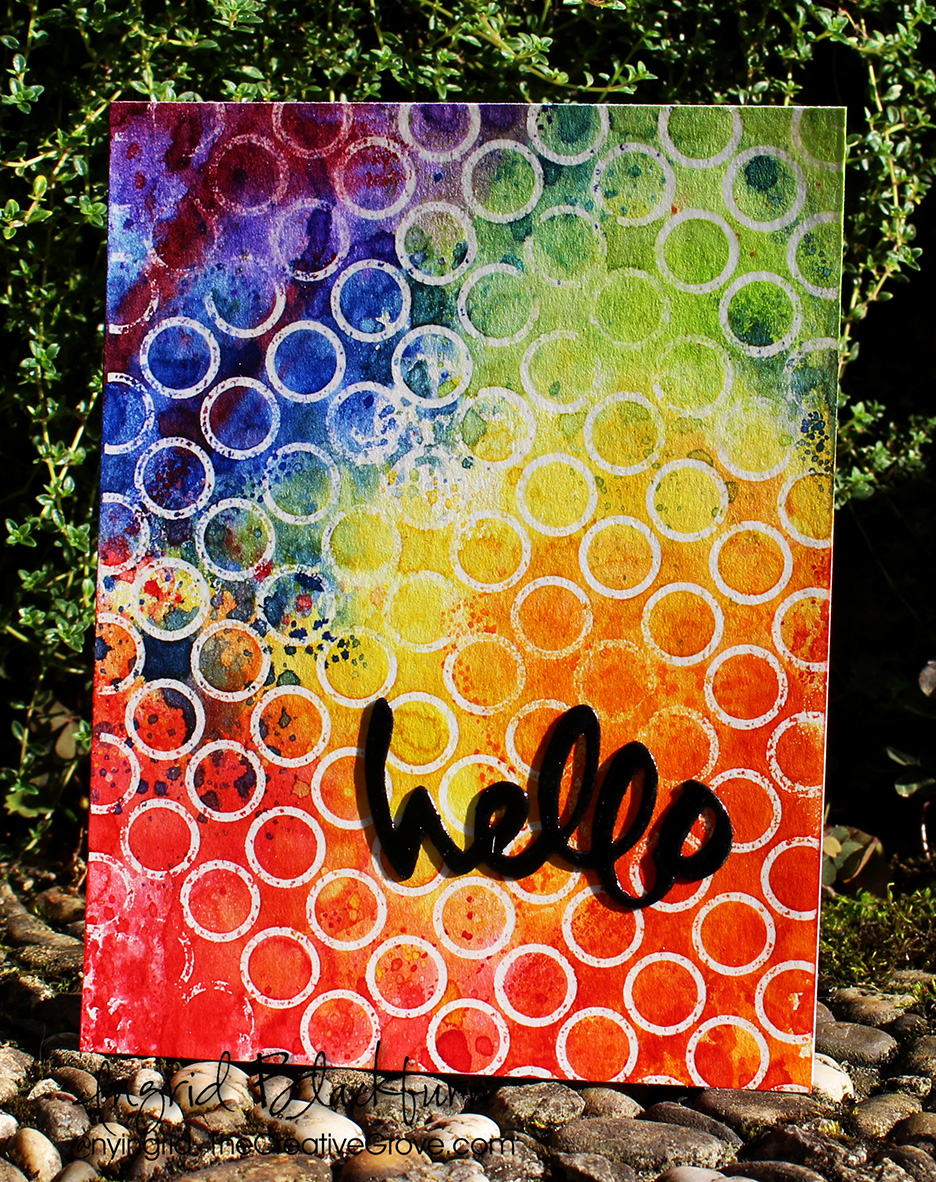
Card Idea no. 5 – Galaxy Card

Are you addicted to galaxy cards as much as I am?

Watch on YouTube

I can not tell you how many I have pinned, between aurora borealis cards, nebula’s, and just galaxy skies – we’re talking hundreds…if not a thousand inspiration photos. Here’s a video on just how easy it is to create your own with ink blending. Pay attention the the end, that final corner tip makes the card!! (seriously watch it, it’s only 5 minutes).

I have a killer watercolor version coming in the next few months – that’s a true painting tutorial, you interested?

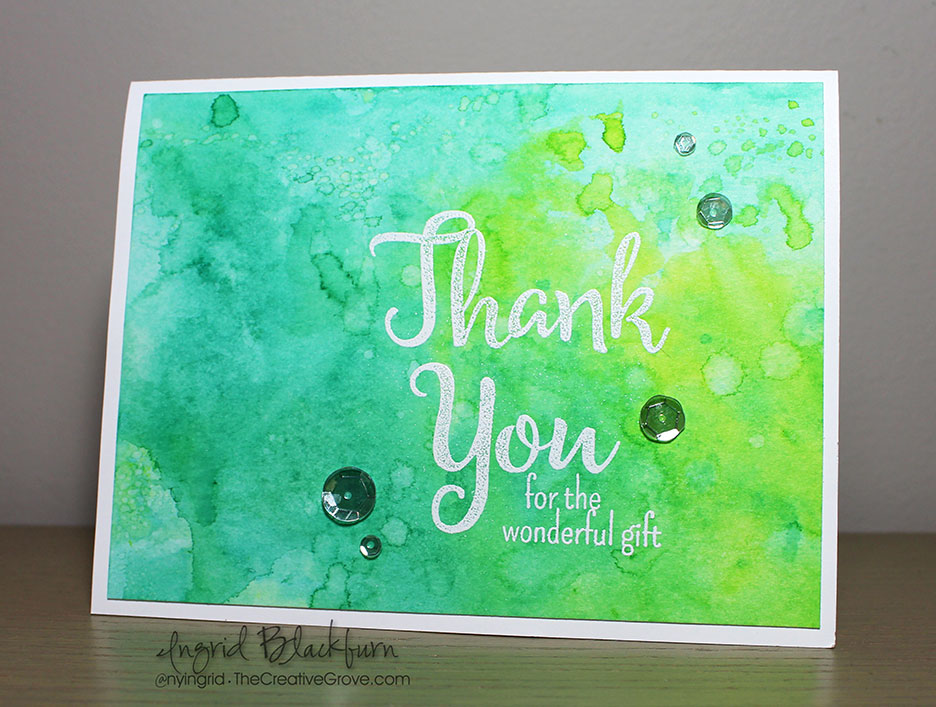
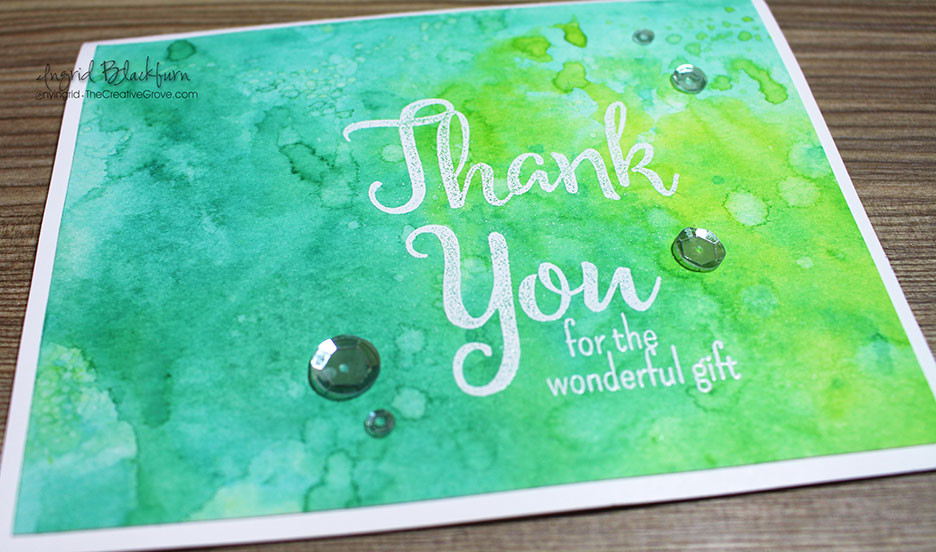
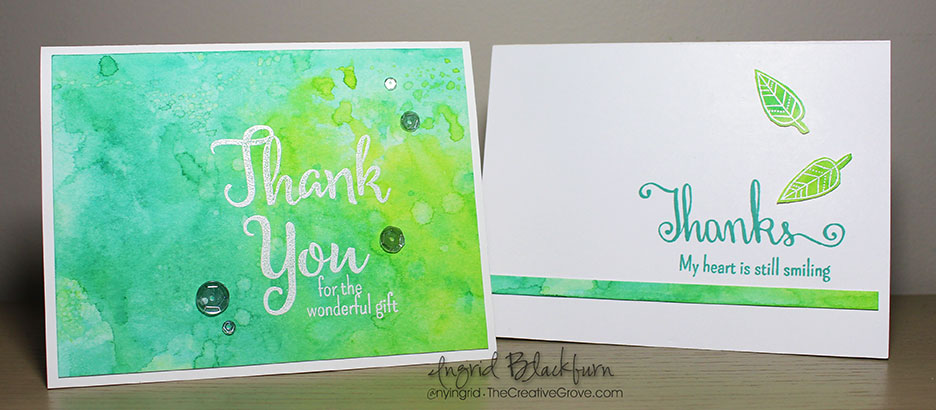
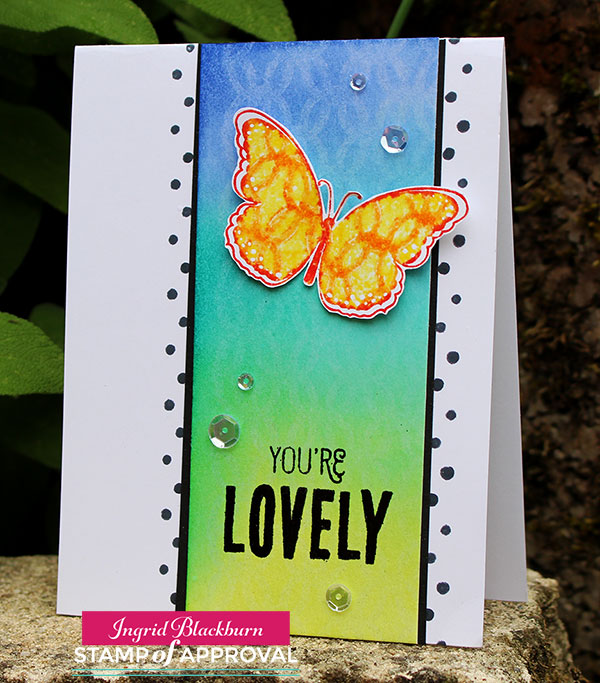
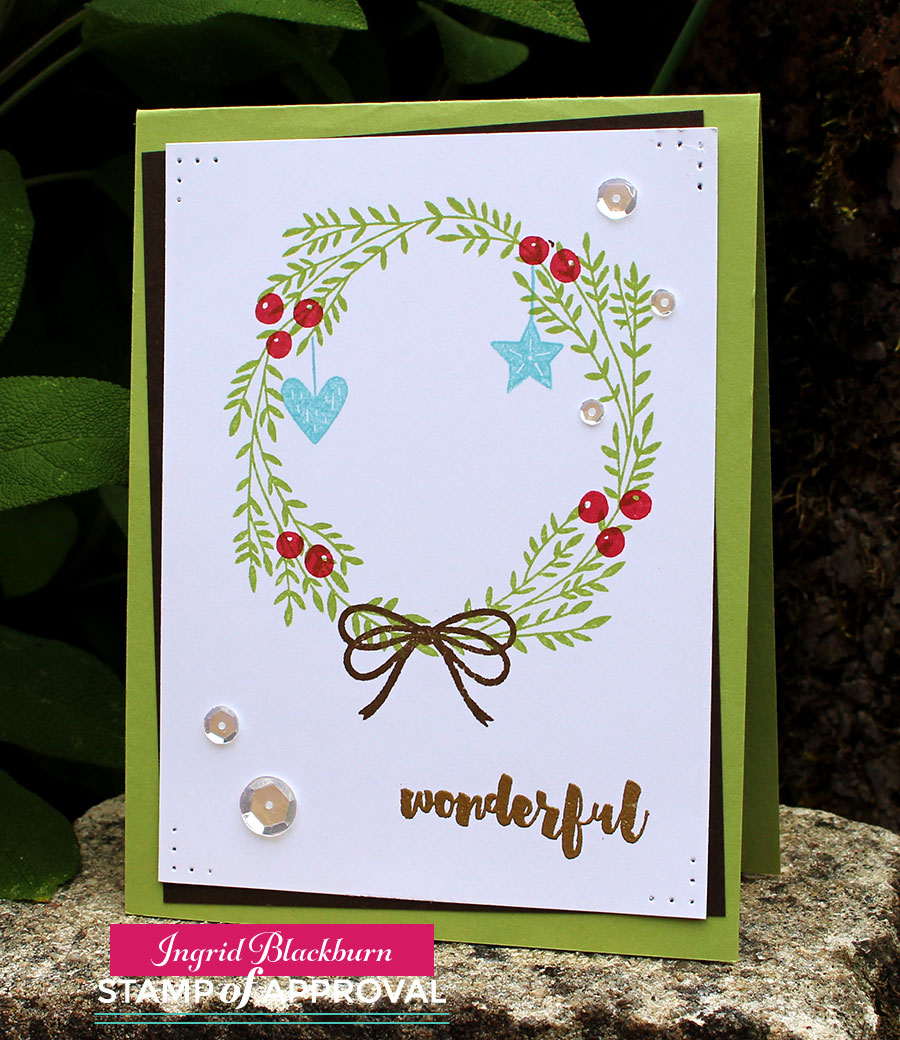
Okay – so if you haven’t heard yet….Catherine Pooler released four new ink colors and a whole slew of new products – some very cool products. I just used one stamp set, a little paper and sequins…wait till you see the rest. Click here to see those.

Till next time, thanks for reading, watching and if you haven’t already (get on that…) commenting!

Ciao –

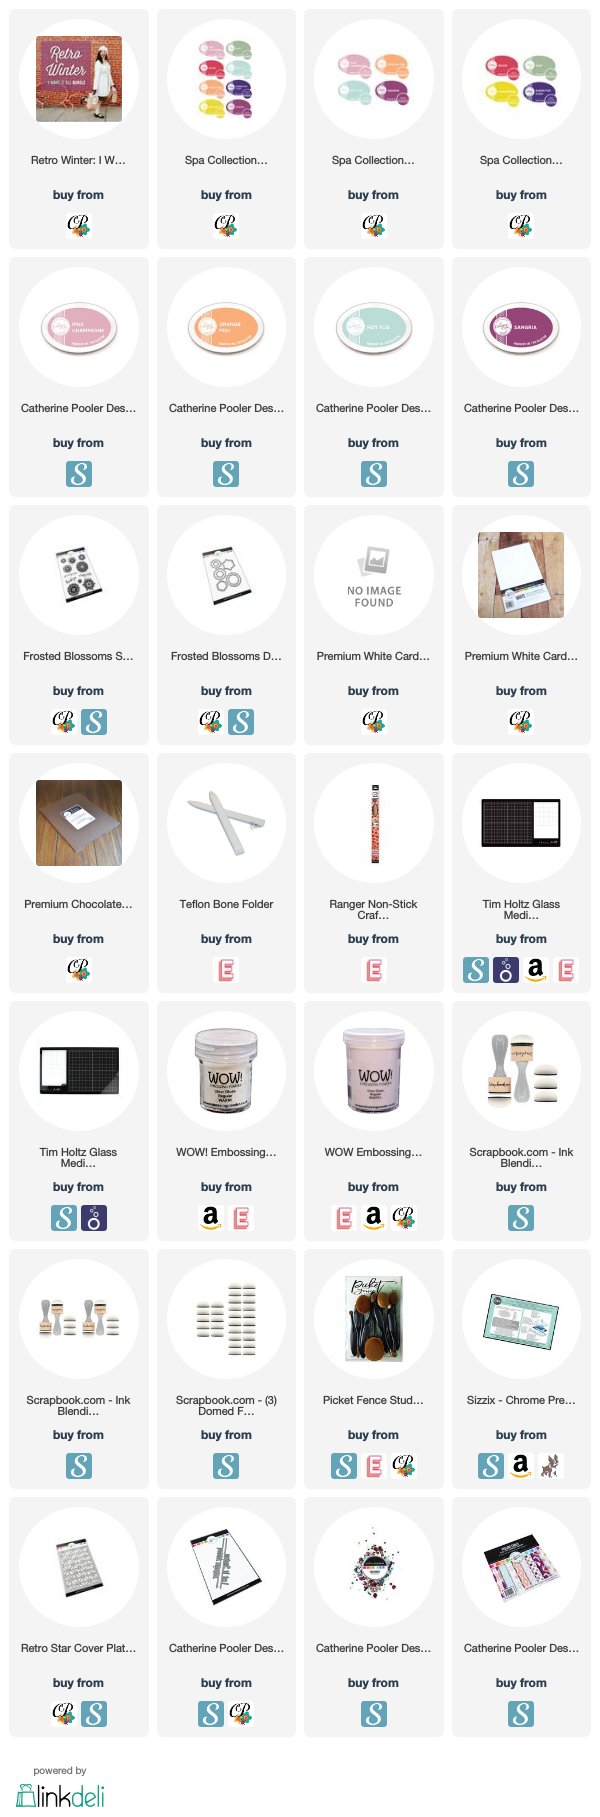
Here’s what I used…. I’d love it if you shop through my links – it keeps me making videos for you – you know, those supplies are not cheap! I appreciate you supporting my art – check out the Patron page too! 😉

Definitely up my Alley

Hi everyone! I thought I’d pop in here and showcase some of my favorite projects that literally have piled it on. This week over at StampNation, I created a fun project that piled on the techniques. The challenge this week is to pile it on – can be layers, stamps, embellishments, techniques – whatever you desire. And let me tell you – it’s SO up my alley, you’d think Maureen Merritt created this challenge just for me!

You’ll have to head on over to StampNation to see my actual project, but here’s a little sneak peek:

Pile it on techniques - Ingrid Blackburn - StampNation

Mine’s the one on the right. It’s just about one of the prettiest cards I’ve made and would you believe has six – yes six techniques going on there!

Now for the fun – you may not have seen all these. I put the project title below each one so if you want to see the blog post – some have videos too – just click those names. Here are some of my favorite piled on projects that I’ve made:


Layered Christmas Tree               Blue & Lime Christmas        Watercolored Texture


Textured Holly Leaves                               Layered Watercolor Butterflies

                         One of my favorites – true Mixed Media – Beautiful World


                                             For Dad – Original Mixed Media

Beautiful Layers                        Piled on Fall                 Stencil & Background Combo

One of my all time favorites – Simply layered card stock!

So I hope that gave you enough Piled On inspiration! Click Here to find out more about StampNation & to check out my project for this fun challenge. Be sure to say hi! 🙂

Till next time.

Catherine Pooler Ink Party Collection Release – Blog Hop

How cool were Lydia’s projects? You’re probably arriving from Lydia Evans blog….well, it’s finally here – the long awaited Party Collection of inks! I have to say – I have been really excited about this new ink release and I’m just bursting ready to continue to show you how great these inks are – and the colors – I’m in love with the vibrant new – Catherine Pooler Designs Premium Dye Ink – the Party Collection.

Catherine Pooler Ink Blog Hop - Party Collection

Catherine’s inks initially debuted in November with a small release in the Foundations Box – exclusive stamp sets, card stock, acrylic block & just five little ink pads – everything you need to get stamping…they sold out in under 24 hours. Up until today, you could only get your hands on these beauties that way – well now you can get the entire collection + refills in the Catherine Pooler Store!

This is the first line of colors to be released, and they are bright, vibrant, cover amazingly and watercolor like a dream. Along with some of the best card stock I’ve worked with (and that’s saying a lot – I’ve been stamping for over 15+ years), you will not be disappointed.

catherine-pooler-designs-ink-party-collection

The inks are foam pads – and that’s to your advantage. It’s different than most brands available today – one of the pluses to that is that the coverage is so much better than felt pads. You just need a little love tap and your coverage is incredible.

Well, today the Design Team has a blog hop filled with colorful creativity for you. There are prizes too – so comment along the way!

I have three projects, so let’s dive right in:

#1 – Birthday Wishes

I thought I would have some fun with the Spot On stamp set that is exclusive to the Foundations Box – you’ll also get the Fiesta Blue and Twisted Orange ink pads in there. Pair them up with Tiki Torch and Something Borrowed and you’re all set.

party-collection-ingrid-blackburn-002

The thought behind this card was to use complimentary colors – blue and orange. The colors just pop and those awesome graphic circles give a ton of interest.

But my favorite is mixing the many greetings in this set – how awesome is it to use print and script together? LOVE that!

party-collection-ingrid-blackburn-001

Notice how perfect that Something Borrowed mat is for my card front? I just ran the ink pad down a the sides of my white card stock and created my own perfectly matching card stock….think outside the box when you need perfect color co-ordination next time.

#2 Thank You Watercolor Dream

Okay – you had to know that I would do a little watercoloring today…lol! I’m OBSESSED with the new Aquatini ink pad from the Party Collection. Let’s just start with the name – brilliant! All the names are fun actually. To get this watercolor abstract look, use the Wrinkle Free Distress Technique – only with these amazing inks – yup….distress move on over – there’s a new watercolor ink in town.

party-collection-ingrid-blackburn-005

I mean look at this watercolor dream – I LOVE…just LOVE how these inks sponge, watercolor and react with water afterward. Everything I’m looking for in Mixed Media, watercolor and many more techniques.

This project has a blend of Aquatini, Lime Ricky and a hint of Tiara underneath (seriously – those names rock!). I really worked the Lime Rickey and Aquatini to get just the right look. Flick a little clean water and you’re all set.

party-collection-ingrid-blackburn-006

Once dry, emboss a greeting and add some sequins. Here I added the new Still Smiling Thank You…I’ve been in desperate need of a great thank you card for a dear friend…as our personal belongings are still en route from Europe to our new home! So I’m a crafter without any cards….go figure – Still Smiling and simple amazing techniques to the rescue!

#3 CAS Thanks

I fell in love with project #2 – so I took my scraps from my trimmed down watercolor piece and stretched that technique piece into a great Clean and Simple card. The leaves are stamped and embossed in white from the Still Smiling stamp set and the greeting is stamped in what else – Aquatini!

party-collection-ingrid-blackburn-007

The greetings in this set are just priceless. You’ll have to check them out here. Isn’t that texture in the watercolor piece just awesome. I love how bright and vibrant it is…even after being diluted with the spritzed water/heat repeat!

party-collection-ingrid-blackburn-003

Well there you have it – just a quick little glimpse into the Party Collection at Catherine Pooler Designs. Now hop on next to Allison Copes blog for more colorful creativity!

I hope you had fun – see you VERY soon! 🙂

Signature

[optin_box style=”12″ alignment=”center” email_field=”email” email_default=”Enter your email address” integration_type=”aweber” double_optin=”Y” list=”3846012″ name_field=”name” name_default=”Enter your first name” name_required=”Y” opm_packages=””][optin_box_field name=”headline”]Learn more with our exclusive FREE video series:[/optin_box_field][optin_box_field name=”paragraph”]PHA+UGx1cyB5b3UnbGwgYmUgYWRkZWQgdG8gbXk8c3Ryb25nPiBGUkVFPC9zdHJvbmc+IENyZWF0aXZlIFRpcHMgRS1sZXR0ZXIgd2hlcmUgSSBzaGFyZSBleGNsdXNpdmUgcHJvamVjdHMsIHZpZGVvcyAmYW1wOyB0aGUgMTIgRGF5cyBvZiBDaHJpc3RtYXM8L3A+Cg==[/optin_box_field][optin_box_field name=”privacy”][/optin_box_field][optin_box_field name=”top_color”]undefined[/optin_box_field][optin_box_button type=”0″ button_below=”Y”]Get Instant Access![/optin_box_button] [/optin_box]

CP Designs Shop Grand Opening – Blog Hop

Welcome my crafty friends! Today I have three projects & a video that showcase some great things now available in Catherine Pooler’s brand new online shop. How exciting! We always need good quality designs and products, right? And Catherine Pooler Designs does not disappoint.

CP Designs Store

Before we get creative here are a few things you’ll want to know. The shop will open this afternoon. To find out the moment the cyber doors swing open, you’ll want to make sure you’re subscribed to Catherine’s newsletter – she’ll be announcing the moment it goes live! Catherine also has a great video series and some cool PDF’s for new subscribers. So when you’re on Catherine’s site, be sure to subscribe so that you’re in the know.

Prizes – Of course we have some prizes for you too! Leave a comment on the blogs along the hop – there are three $25 gift certificates up for grabs between now and noon (EST) on 9/1.

Now for a little creative mojo for you today. I have three projects, all very different from one another, a little Stamp of Approval mixed in with some fresh Catherine Pooler Designs! Enjoy and be sure to let me know what you think in the comments below!

Contemporary Crooky Cake

Okay – I know the stamp set is called Bring on the Cake…but I just can’t not call it crooky cake…lol! I wanted some bright, bold colors to pop off a neutral dark background. I’m into dark greys at the moment. And I thought this have great masculine look, while still being a little fun and funky.

Those streamer stamps totally rock – they’re embossed in Alabaster by Brutus Monroe, and are the perfect little something in the background. I also left the card as a single layer to keep with a minimal look.

Crooky-Cake---Ingrid-Blackburn

The cake is stamped in Distress Picked Raspberry, Peacock Feathers Wilted Violet, Salty Ocean & Squeezed Lemonade.

Geo Hugs & Kisses

For this project, I kept with my grey and added a little Pale Pink to the mix. Don’t you just love this geometric pattern used throught. It’s on the card base, card front and tag. The Geobuilders Stamp Set is so crazy versatile…it’s easy to see why it’s a favorite.

For this project I paired it up with the And Dies & And Sentiments set – two new sets recently released by Catherine Pooler Designs. They go quite well with the Tag Buddies by CAS-ual Fridays for the first Friendship SOA collection.

I love making cards that can be used for lots of occasions – and Hugs & Kisses covers that!

Geobuilders-And-Sentiments---Ingrid-Blackburn

Ring in the Birthday

And last, but definitely not least – my favorite. I just recently got my hands on this Pattern of Rings stencil by Winnie & Walter for the first SOA Friendship Collection. I have wanted to make this card for FOREVER! It’s no secret that I love water & Distress Inks – so I did a little sponge/direct to paper combo with some really bright and vibrant Distress colors. Here’s a video of the technique:

Watch in HD on YouTube

You’ll want to use Wilted Violet, Chipped Sapphire, Twisted Citron, Mustard Seed, Candied Apple & Carved Pumpkin. Isn’t this combo cool?! Once the colors were added over the stencil, I spritzed it lightly with a mini mister being careful not to add too much water. You’ll want just enough to activate the ink and get that watercolor look, but not too much that it runs under your stencil. If you do find that you’ve added too much, just quickly sop it up with a paper towel.

Pattern-of-Rings-Birthday---Ingrid-Blackburn-001

Dry your project and then flick some water droplets at it. I did this two ways – one with my hands and another with a paint brush for some smaller more purposeful droplets.

Once dry, add your greeting (HB2U by SugarPea Designs for the Young at Heart Collection) by embossing it in black onto vellum card stock. I cut it out using the larges tag from Tag Buddies by CAS-ual Fridays – yup the same one as above!

Pattern-of-Rings-Birthday---Ingrid-Blackburn-002

Add some embellishments and you’re all set. I added two little circles, cut out using Friendly Flowers Fri-Dies by CAS-ual Fridays – both die sets are from the Friendship collection. By adding those black circles and another strategic Sparkling Clear Sequin, you’ll be able to help secure that piece of vellum down. I also wrapped the top of the tag around to the back.

I love bright vibrant Birthday cards – and this stencil really didn’t disappoint.

Don’t miss out on all the crafty goodness!

I hope you enjoyed those three projects! If you liked that, be sure to sign up for my Creative Tips E-letter to get an exclusive video series with more. Up next – have fun hopping along to the talented Chaitali Narla. Be sure to leave comments along the way for a chance to win!

Here’s the list of all the talented designers for today’s hop!

BLOG HOP LIST:

Now go get your fingers inky –

Signature

[optin_box style=”12″ alignment=”center” email_field=”email” email_default=”Enter your email address” integration_type=”aweber” double_optin=”Y” list=”3846012″ name_field=”name” name_default=”Enter your first name” name_required=”Y” opm_packages=””][optin_box_field name=”headline”]Learn more with our exclusive FREE video series:[/optin_box_field][optin_box_field name=”paragraph”]PHA+UGx1cyB5b3XigJlsbCBiZSBhZGRlZCB0byBteSBGUkVFIENyZWF0aXZlIFRpcHMgRS1sZXR0ZXIgd2hlcmUgSSBzaGFyZSBleGNsdXNpdmUgcHJvamVjdHMsIHZpZGVvcyAmYW1wOyB0aGUgMTIgRGF5cyBvZiBDaHJpc3RtYXMgUHJvamVjdCBTZXJpZXM8L3A+Cg==[/optin_box_field][optin_box_field name=”privacy”][/optin_box_field][optin_box_field name=”top_color”]undefined[/optin_box_field][optin_box_button type=”0″ button_below=”Y”]Get Instant Access![/optin_box_button] [/optin_box]

Watercolor Painted Poppies Video Tutorial

Blooming-Garden---Ingrid-Blackburn-Sneak-2

Have you every just had a crazy amount of fun making a card before? Well, that was me with this project! I’m guest blogging over at my friend Catherine Pooler’s blog today and have a written and video tutorial for you – be sure to hop on over there to check it out!

A few weeks ago over at StampNation, we had a fun challenge CASEing one of our members – Gail Hislop. I used one of her creations to get inspired and created this field of poppies – I have to say, I think it’s the prettiest watercolored card I’ve EVER made! To see it, you need to be on StampNation, so if you’re a member – here’s a direct link…Field of Poppies Card

Gail-Hilsop-Case---Sneak-Peek

The last time I was with Catherine – in real life – was last fall. We hung out one morning over coffee. I did what any good crafter would do…I brought cards with me! She fell in love with one of my tutorials for my Just Cards class, and wanted me to show how to watercolor stamp and paint it. So we hopped onto periscope and I did a quick live tutorial.

When she asked me to do a guest post on her blog…I immediately went to this technique. I knew she’d love an in depth tutorial, so what are you waiting for – hop on over to Catherine’s blog and check it out! Be sure to leave a comment and let us know what you think!! 🙂

See you VERY soon!

Signature

thumbnail-2

PS – and if you’re a StampNation member…be sure to see my in depth tutorials on Embossing Powders & some fun techniques for the summer event – Heat it Up!


Lovely Thank You

Lovely-Notes-Thank-You---Ingrid-Blackburn-003

I probably make thank you cards more than any other card, how about you? I thought I’d share a fun little color blocked project with you today using the Lovely Notes Stamp of Approval Collection. This collection has been arriving all over the world and it’s about to sell out, so if you’re on the fence, don’t wait! Find out more here.

Lovely Notes SOA Now

Color blocking is something I’ve been doing long before I started making cards – I get that from my scrapbooking days. But I love the look on cards. For today’s Thank You card you’ll want to use 1 inch pieces that are stamped tone on tone for a subtle but great look.

I used the Lovely Flowers, Butterfly Notes and Lovely Lattice Background stamps (Catherine Pooler Designs) from this collection for this card. Don’t they just go together perfectly! That’s what I love about the Stamp of Approval collections – the versatility. They are so well thought out – not just slapped together like other boxes or kits. You can literally interchange any of the stamp sets and they’d work together – I LOVE that!

Lovely-Notes-Thank-You---Ingrid-Blackburn-002

A simple supporting colorful panel behind my color blocked piece is a great way to finish off the card and allow you to use a smaller color blocked area if you can’t quite figure the spacing out. Love those little tricks! The key is to remember that you need the measurement to the left, right and three more times for inbetween the middle panels.

A simple Thank You greeting (Butterfly Notes) popped up and adorned with die cuts from the Lovely Flowers & Banners Dies (co-ordinating) adds the perfect finishing touch. I love this card and wanted to share it with you. So tell me in the comments – what kinds of cards do you make most?

Lovely-Notes-Thank-You---Ingrid-Blackburn-001

The Lovely Notes collection is still available – but don’t wait…it’ll be sold out soon, and then not available again until later in the fall. To find out more about the collections – visit the Stamp of Approval site here.

See you very soon – I have a few videos coming up next!

Signature

[optin_box style=”12″ alignment=”center” email_field=”email” email_default=”Enter your email address” integration_type=”aweber” double_optin=”Y” list=”3846012″ name_field=”name” name_default=”Enter your first name” name_required=”Y” opm_packages=””][optin_box_field name=”headline”]Learn more with our exclusive FREE video series:[/optin_box_field][optin_box_field name=”paragraph”]PHA+UGx1cyB5b3XigJlsbCBiZSBhZGRlZCB0byBteSBGUkVFIENyZWF0aXZlIFRpcHMgRS1sZXR0ZXIgd2hlcmUgSSBzaGFyZSBleGNsdXNpdmUgcHJvamVjdHMsIHZpZGVvcyAmYW1wOyB0aGUgMTIgRGF5cyBvZiBDaHJpc3RtYXMgUHJvamVjdCBTZXJpZXM8L3A+Cg==[/optin_box_field][optin_box_field name=”privacy”][/optin_box_field][optin_box_field name=”top_color”]undefined[/optin_box_field][optin_box_button type=”0″ button_below=”Y”]Get Instant Access![/optin_box_button] [/optin_box]


Lovely Lattice Butterflies – SOA is live!

Lovely Lattice Background - Catherine Pooler Designs

I’ve been creating a lot with the kissing technique lately. I have to say, this simple technique always amazed me!  It’s been a cram packed few days of inspiration here and on the design team blogs. If you’ve missed any of the fun, I have links at the end for you.

Lovely Notes SOA Now

Today the Stamp of Approval Lovely Notes Collection goes live – yup…if you’re on the wait list you’ve received a link to head on over and grab a box. It’s the first release of these six stamp and two dies sets. You’ll also get a loaded PDF with projects and step by step instructions – how’s that for a place to start! Not on the list – no worries – get on it right here and get a head start on the public release tomorrow (if it hasn’t sold out!).

If you’ve seen any of my past three posts, you know I still have more projects for you – yup…today I even have another video! Over at StampNation, there’s a challenge going live today – Meadow Daydreams. I have to say, this challenge is made for me – I LOVE this kind of a color palette and theme. I’m actually shocked that I didn’t do a scenic card! Here’s a sneak peek into the project I created…to see it, you have to be a member of StampNation though.

Meadow-Daydreams-Sneak Peek

New Inspiration for you

So to piggy back on the challenge – I created a few cards with the same color palette, theme and then I loaded them up with techniques – after all, that’s kind of my thing, isn’t it?I have a video tutorial for you here and a written one below.And if you aren’t already – I’d love for you to subscribe to my YouTube channel too – click here.

Click Here to see the video in HD

Lattice Butterfly Tutorial – the Kissing Technique + others

  • Ink up your Lovely Lattice Background stamp by Catherine Pooler Designs in Versamark
  • Transfer your image to a piece of 140# Cold Pressed Watercolor Paper (5 1/2 x 4 3/4″) & clean your stamp
  • Sponge your colors over your image blending the colors Twisted Citron, Peacock Feathers and Blueprint Sketch

Kissing Technique - Stamp of Approval

  • Allow your Distress Ink to fully dry while working on your butterflies
  • Ink up the large butterfly from Butterfly Notes by Catherine Pooler Designs in Squeezed Lemonade & Edge in Barn Door.
  • Ink up your Lovely Lattice Background stamp in Spiced Marmalade (you only need an area as large as your stamp)
  • Kiss your inked up butterfly to your inked up background stamp; thus transferring your image to it – or kissing

Butterfly Notes - Stamp of Approval - Catherine Pooler

  • Stamp on a piece of regular white card stock and heat emboss immediately in clear embossing powder. If your image has dried before your powder sticks, just stamp over your butterfly in versamark. Repeat for a second butterfly.
  • Fussy cut out your images
  • Cut your background in half (5 1/2 x 4 3/8″) and rub a de-static bag onto the bottom half. Stamp (Versamark) the greeting Thanks – Handpainted Thanks by Neat & Tangled & You’re Lovely by Catherine Pooler Designs – Lovely Flowers. Emboss in Black.
  • Trace the edges of your strip lightly for a guide where you plan to adhere it to your card base.
  • Stamp the polka dots from Lovely Flowers (landscape so you have the alternating ends) down the side using the line to keep your pattern straight. You’ll need to overlap the bottom dot with the top for an even pattern. I stamped one in Memento Tuxedo Black and the other I embossed with Versamark and white embossing powder.

The Kissing Technique - Versamark - Ingrid Blackburn

  • Matte your background onto black (5 1/2 x 4 1/2″) so that it just has a sliver of black – this will cover your line.
  • Adhere your butterfly with two mini glue dots in the center and place a foam dot under each wing toward the top to help with the illusion of flight.
  • Add Sparkling Clear Sequins by Pretty Pink Posh.

I love how the background stamp just magically appears. This technique has the biggest wow on glossy card stock & with darker inks, but the subtle effect here is lovely and the perfect accent.

Stamp of Approval

Lovely Notes SOA Banner

Thanks for joining me today! I have two more projects headed your way in the days to come, so be sure to stop back by! In the meantime, if you missed any of the six projects I posted this week, or the blog hops for all 18 designers – yup…there were that many – click on the links below for the starting point of each hop:

Day 1               Day 2               Day 3

And don’t forget to check out the Stamp of Approval – Lovely Notes Collection – it’s live right now – but just for those on the wait list!

Now that we’ve given you a ton of inspiration, it’s your turn – take what you learned here today or over the past three days and create your own cards – go get your fingers inky!!!

Signature

[optin_box style=”12″ alignment=”center” email_field=”email” email_default=”Enter your email address” integration_type=”aweber” double_optin=”Y” list=”3846012″ name_field=”name” name_default=”Enter your first name” name_required=”Y” opm_packages=””][optin_box_field name=”headline”]Learn more with our exclusive FREE video series:[/optin_box_field][optin_box_field name=”paragraph”]PHA+UGx1cyB5b3XigJlsbCBiZSBhZGRlZCB0byBteSBGUkVFIENyZWF0aXZlIFRpcHMgRS1sZXR0ZXIgd2hlcmUgSSBzaGFyZSBleGNsdXNpdmUgcHJvamVjdHMsIHZpZGVvcyAmYW1wOyB0aGUgMTIgRGF5cyBvZiBDaHJpc3RtYXMgUHJvamVjdCBTZXJpZXM8L3A+Cg==[/optin_box_field][optin_box_field name=”privacy”][/optin_box_field][optin_box_field name=”top_color”]undefined[/optin_box_field][optin_box_button type=”0″ button_below=”Y”]Get Instant Access![/optin_box_button] [/optin_box]


SOA Lovely Notes Blog Hop

Lovely Notes SOA Blog Hop

Welcome to the Lovely Notes Collection Blog Hop – Day 3! What do you think so far…pretty amazing, right? Well I hope to add a little creative inspiration for you today with a few projects. I’ve been sharing a few projects over the past few days – this collection is so easy to create with, and I have so much more to keep sharing with you this week.

The Stamp of Approval Lovely Notes Collection is a curated collection of stamps and dies that work fabulously together or alone. Not only do you get a box FULL of amazing stamps and dies, but you’ll get a downloadable PDF Project Guide (for free!) with tons of project tutorials using them!

The stamps and dies in the Stamp of Approval Collections are brand new on the market and won’t be released for individual sale for several months. To find out how to get a box, you have to be on the wait list! Yes, these boxes sell out so fast – the last one was gone in 33 hours….so don’t wait. The wait list will find out before the public will. Click Here to sign up for the wait list and find out more.

Today I’m going to inspire you with several of the components of this collection. Specifically the Lovely Flowers, Lovely Flowers & Banners Dies, Lovely Lattice Background, Butterfly Notes, Wonderful Wreath – all by Catherine Pooler Designs, and Handpainted Thanks by Neat & Tangled. So let’s get right to it with a little Christmas in July, here are your tutorials!

Lovely Notes Project Tutorials

Wonderful Wreath

I was in love with this wreath the moment I saw it. It reminds me of olive branches – delicate and whimsical. To get this clean and simple look, stamp your wreath on white in Stampin Up Pear Pizzazz, the berries in Primrose Petals, hang some ornaments in Baja Breeze and tie it all up with an Early Espresso bow. It was that simple. This is a GREAT mass produced card.

Lovely-Notes-SOA-Project-2---Ingrid-Blackburn-001


For an elegant touch, emboss your greeting in Gilded Gold by Brutus Monroe – my new favorite gold. Add a few sparkling clear sequins by Pretty Pink Posh and a little simple paper piecing in the corners finishes it off.

I’m addicted to the tilt for the matte in the background (thanks Maureen!) – a little Early Espresso on a Pear Pizzazz card base. It’s that simple.

Thanks Friend

This awesome handpainted Thanks stamp by Neat & Tangled is my new favorite greeting – I love bold scripty greetings. I used this stamp just one way – did you know there are two others that layer for a multi tone effect! How cool is that?

You’ll want to stamp some of the Lowely Flowers and cut them using the coordinating Dies. I used the Stampin Up colors – Marina Mist, Wisteria Wonder, Rose Red & Garden Green. On a large piece of white scrap paper – at least card front size, stamp the thanks towards the bottom center/right. Repeatedly stamp thanks in a light neutral tone, I used River Rock. TIP – alter where the word starts on each line so that it flows.

Lovely Notes SOA Collection - Ingrid Blackburn


Stamp the dots from Lovely Flowers in the middle 2/3 of the Soft Suede card base. I stamped it completely across so that the left and right side were even.

Cut your tag out using the large banner die from the Lovely Flowers & Banners Dies set. Try to place the Rose Red Thanks a bit off centered to the right at the bottom. You definitely want some neutral below as well. Stamp the word Friend from the Lovely Flowers Stamp set in Soft Suede on a piece of scrap and attach to your tag.

Pop the tag up using Foam Tape or Fun Foam and adhere your embellishments. TIP – The leaf branch has three sprigs – I cut mine apart to get it just right – sometimes just one or two.

That’s it – it’s a cute card – I had way too much fun with the Lovely Flowers stamps & dies as you’ll see tomorrow!

Bold Watercolor Greetings

If you’ve followed me for a while here, on YouTube or in an online class – you know I love to watercolor! This project takes some of the various greetings in this collection and puts them to good use. I wanted greetings that would stand out, so I used two from Lovely Flowers, one from Butterfly Notes and one of my new favorite Thanks from Handpainted Thanks. Here’s a video tutorial for you:

Click Here to watch video in HD on YouTube

To get this outline look, first stamp your images in versamark. Go back over them with a de-static tool and stamp again in Versafine Onyx Black Ink. Emboss in Black and heat set. Once cool, secure your project down with low tack painters tape on the upper and lower edges.

Smoosh some Distress Ink onto your craft mat or acrylic block – I used Rusty Hinge, Ground Espresso, Gathered Twigs and Vintage Photo. Grab some ink with a large wet brush and start painting onto your dry watercolor paper. You want your watercolor to flow together without getting out of control.

Handpainted Thanks - Lovely Notes Collection - Ingrid Blackburn

TIP – if your paper accumulates too many puddles or your colors blend out of control, gently dip the edge of a dry paper towel into a puddle to sop it up without removing color. Or use a thirsty brush (Not dripping wet). Water will naturally be attracted to a dry surface.

Once you have the look you want, heat set or allow to dry on it’s own. TIP – keep some lighter areas along with dark for a balance.

Stamp the Lovely Lattice Background stamp in Ground Espresso onto a folded Espresso card base. I just inked up the top and bottom. Quickly dip into clear embossing powder and heat set for a tone on tone look. If using a vanilla or white background, use Versamark ink for a watermark look. The key is not to compete with your watercolor, but rather support it.

It’s a pretty quick and easy project. I made four as I wasn’t sure of the look I wanted. Here’s a rainbow one too:

Lovely Notes Stamp of Approval Ingrid Blackburn


I added a little dry embossed line to the top and bottom for a simple embellishment. No matter what color combination you choose, you’ll love this technique.

Now that you have some inspiration…time to find out just how you can win a free box!

Lovely Notes SOA Win

It’s your turn to hop along and check out what the uber talented Amy Tsutura has in store for you next! Here’s the blog hop list:

Catherine Pooler

Neat and Tangled

Kristie Goulet

Yoonsun Hur

Ingrid Blackburn – That’s Me * You are here*

Amy Tsuruta You’re next stop!

Justine Hovey

Be sure to leave a comment on each designers blog for a chance to win a Lovely Notes Collection of your own! There’s a giveaway for all three days of the hop! If you missed out on any of the Blog Hops – start at the beginning with Catherine’s Blog and Day 1.

And stop by tomorrow for more inspiration –

Signature

[optin_box style=”12″ alignment=”center” email_field=”email” email_default=”Enter your email address” integration_type=”aweber” double_optin=”Y” list=”3846012″ name_field=”name” name_default=”Enter your first name” name_required=”Y” opm_packages=””][optin_box_field name=”headline”]Learn more with our exclusive FREE video series:[/optin_box_field][optin_box_field name=”paragraph”]PHA+UGx1cyB5b3XigJlsbCBiZSBhZGRlZCB0byBteSBGUkVFIENyZWF0aXZlIFRpcHMgRS1sZXR0ZXIgd2hlcmUgSSBzaGFyZSBleGNsdXNpdmUgcHJvamVjdHMsIHZpZGVvcyAmYW1wOyB0aGUgMTIgRGF5cyBvZiBDaHJpc3RtYXMgUHJvamVjdCBTZXJpZXM8L3A+Cg==[/optin_box_field][optin_box_field name=”privacy”][/optin_box_field][optin_box_field name=”top_color”]undefined[/optin_box_field][optin_box_button type=”0″ button_below=”Y”]Get Instant Access![/optin_box_button] [/optin_box]