Mojo Monday Garden Flowers

Mojo Monday Flowers

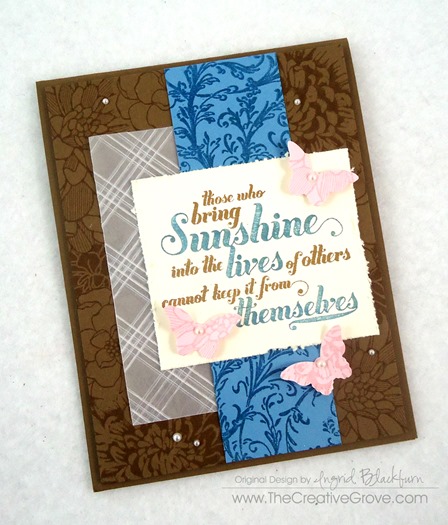
It’s the middle of summer and all the flowers here are in bloom.  I thought I’d bring you a floral card with non-traditional colors today for Mojo Monday. Smile

Today’s sketch had me immediately reach for all my floral stamps.  Did you happen to see my card last week with the amazing floral garden?  If not, check it out here.  But first see all the creative tips listed below.

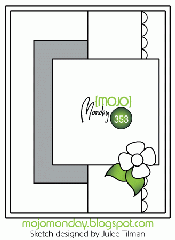
Here is today’s Mojo Monday sketch from the Challenge Blog and my interpretation:

mojo353DSC01940

As you can see, I strayed a tiny bit and excluded the scallop border.  I planned on including it, but didn’t want to take away any further from the pretty flower background I created.

Creative Tips –

  • Mask various flower stamps that you have to create your own background.  Alternate open images with tighter ones for a filled out look.
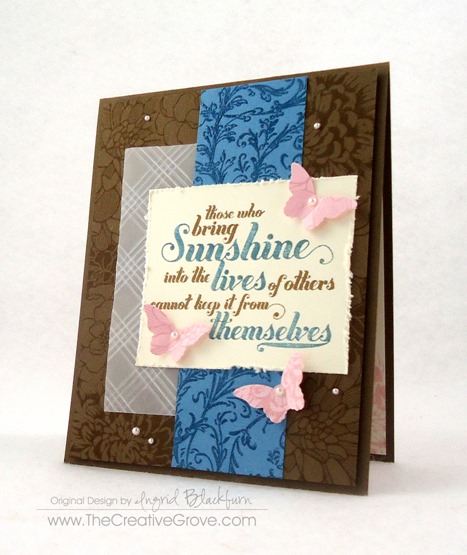
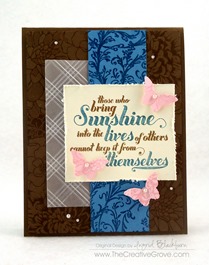
  • Don’t feel you need to stick to traditional flower colors.  Here you see Baked Brown Sugar.

DSC01941

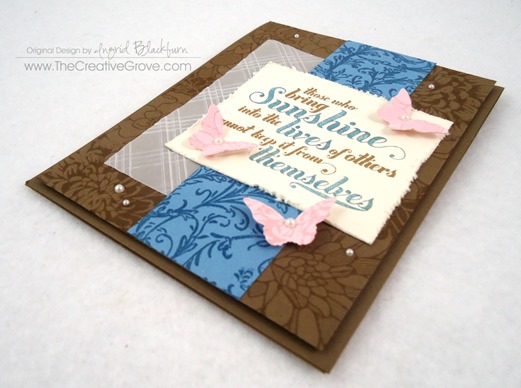
  • I kept playing with which colors to put in the background, and finally decided on adding a little texture to Vellum as a subtle piece.  To create this cross-hatch pattern, alternate a striped embossing folder to make the x’s.
  • Do you have stamps that are tucked way in the back and forgotten about?  My filigree background stamp seems to be one of those.  I wanted something with a romantic feel, so I embossed the pattern on a piece of Marina Mist card stock in versamark and clear embossing powder.  It compliments the flowers, yet stands on its own.

DSC01948

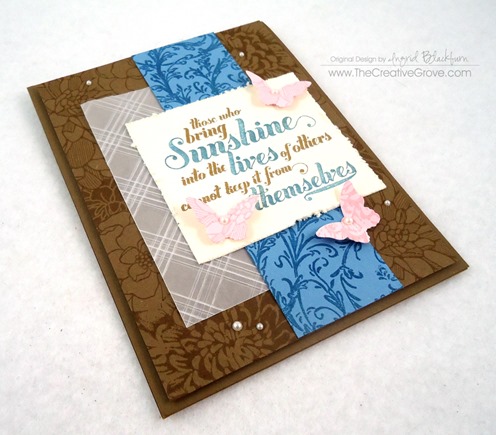
  • The greetings from this set are cool.  I love the boldness of chosen words and chose to highlight them.  I didn’t have a baked brown sugar marker, so I inked up the entire image with an ink pad and removed the ink from where I needed with a blender pen.  I then colored those words in with a marker that I did have.

DSC01943DSC01949DSC01947

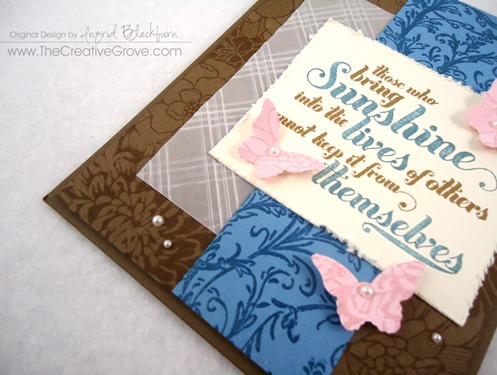
  • I’m sure you’ve noticed that I rarely use just plain butterflies.  Here you see several stamped with floral images and then punched out.  It gives a little character to the wings and looks pretty cool!
  • For a finishing touch, distress your edge of the greeting, add some pearls and pop up your card front.

Mojo Monday Flowers

This clean and simple project completely works for me.  It’s loaded with various techniques, and works – even with non-traditional garden floral colors!

Signature


[optin_box style=”13″ alignment=”center” action=”http://www.aweber.com/scripts/addlead.pl” disable_name=”Y” method=”post” email_field=”email” email_default=”Enter your email address” integration_type=”custom” double_optin=”Y” name_default=”Enter your first name”][optin_box_hidden][/optin_box_hidden][optin_box_code]


IF YOU ENJOYED THIS POST
Let’s stay in touch! My occasional Creative Tips will teach you to make projects that you love…

[/optin_box_code][optin_box_field name=”headline”]If you enjoyed this tutorial…[/optin_box_field][optin_box_field name=”paragraph”]PHA+PHNwYW4gc3R5bGU9ImNvbG9yOiAjNjQ2MzVlOyI+TGV04oCZcyBzdGF5IGluIHRvdWNoISBNeSBvY2Nhc2lvbmFswqA8L3NwYW4+PHNwYW4gc3R5bGU9ImNvbG9yOiAjNjY2Njk5OyI+PHN0cm9uZz48ZW0+ZXhjbHVzaXZlPC9lbT48L3N0cm9uZz7CoDwvc3Bhbj48c3BhbiBzdHlsZT0iY29sb3I6ICM2NDYzNWU7Ij5DcmVhdGl2ZSBUaXBzIGUtbGV0dGVyIHdpbGwgdGVhY2ggeW91IHRvIG1ha2UgcHJvamVjdHMgdGhhdCB5b3UgbG92ZeKApjwvc3Bhbj48L3A+Cg==[/optin_box_field][optin_box_field name=”privacy”][/optin_box_field][optin_box_field name=”top_color”]undefined[/optin_box_field][optin_box_button type=”0″ button_below=”Y”]Send me exclusive tips![/optin_box_button] [/optin_box]
My type of Floral Garden

Fabulous Florets and Lattice  (3)

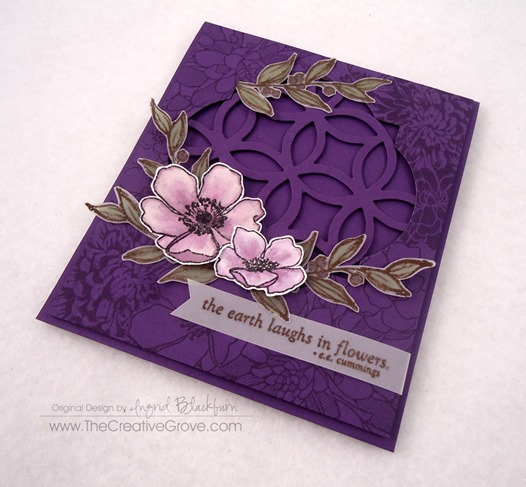
Do you have a flower garden?  I won’t lie, I do not have a green thumb.  Much to my parents dismay that I literally can not keep any floral plants alive – just ask my Dad, he asked me to care for 12 of his potted plants including two orchids earlier this year while traveling.  I explained that it wasn’t a good idea and that I was not cut out for this, but he insisted that I could do it.  Sure enough three months later, the one remaining orchid flower literally clinging on trying to prove me wrong, gave up and succumbed to the truth…I do not have a green thumb.  Story aside, today’s floral project I can do.

It’s July 1st and that means two of my favorite challenges went live – Virginia’s View and One Layer Simplicity Challenge – more on the latter tomorrow – it’s a great card (check it out here), you’ll want to stop by!  I wish I could post it today, but how many cards can I post in one day…lol?!  This month, Virginia’s View is about Die Cuts – one of my favorite toys to play with.  You too?

virginias view challenge 5

This one is a bit involved, but I had so much fun stamping, embossing and water coloring all afternoon!  Sometimes I just like to make an involved card, you know?  There are a ton of ideas below, so enjoy the creative tips tutorial!

Creative Tips –

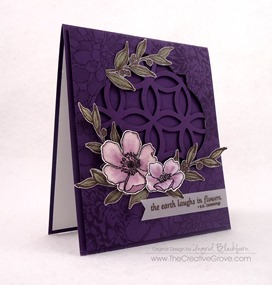
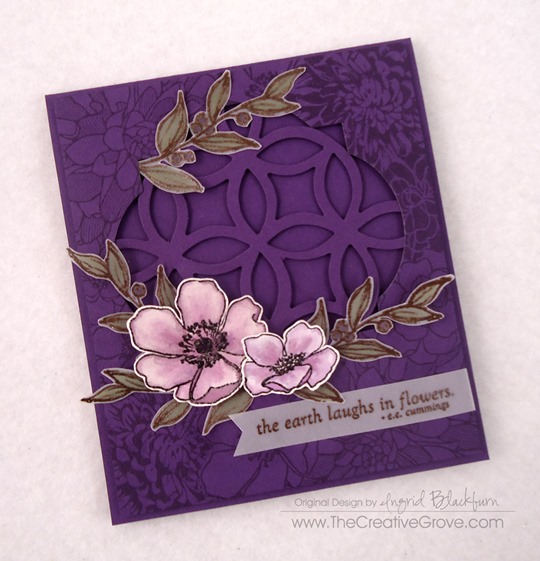
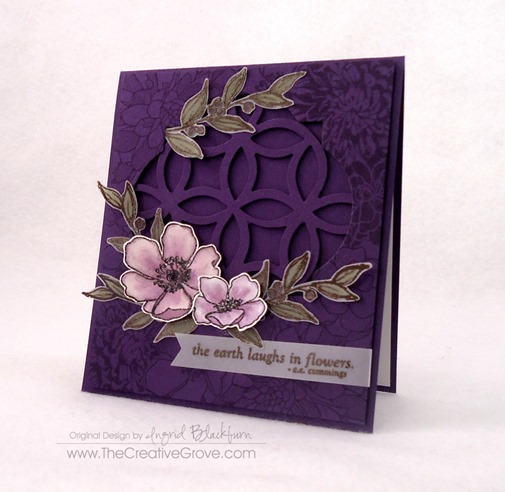
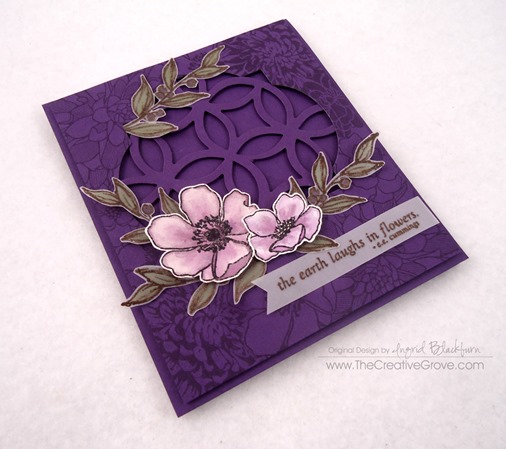
  • I knew I wanted to use the lattice die today.  Try coupling it with an open area such as this one made by the Window Frames Collection by Stampin’ Up!
  • To make the flower garden, use various types of flower images of all sizes.  Here you see the large flowers from Blooming with Kindness, Regarding Dahlia’s, Fabulous Florals and Secret Garden.

Fabulous Florets and Lattice  (5)

  • First create masks out of copy paper and then add a little 2-way glue to the back.  Allow it to properly dry so that you can use it as a post it.
  • Mask several flowers, going around the frame, and filling up the entire card front. Here you see Perfect Plum ink on Elegant Eggplant card stock.
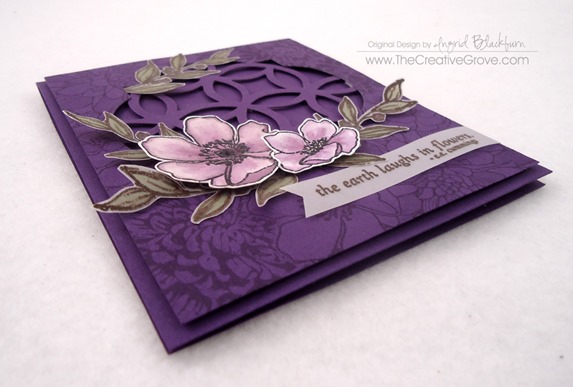
  • Attach your lattice die cut to the back of your frame filling it up evenly and pop it up with foam tape or dimensionals.  This will help create a shadow and give your project depth.

Fabulous Florets and Lattice  (8)

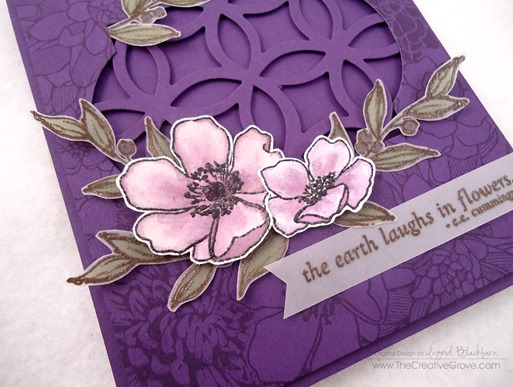
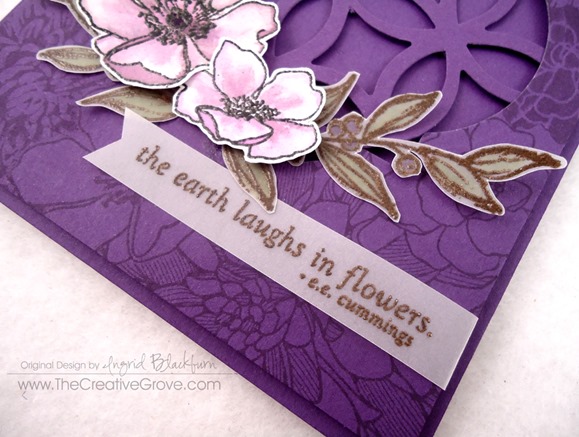
  • To create some whimsy, I used the branch stamp from Simply Sketched.  Emboss it on Vellum card stock with Espresso embossing powder.  Color from behind using Pear Pizzazz and Perfect Plum Markers.
  • Emboss the two flowers from Fabulous Florets in Black on watercolor paper.

DSC01631Fabulous Florets and Lattice  (11)

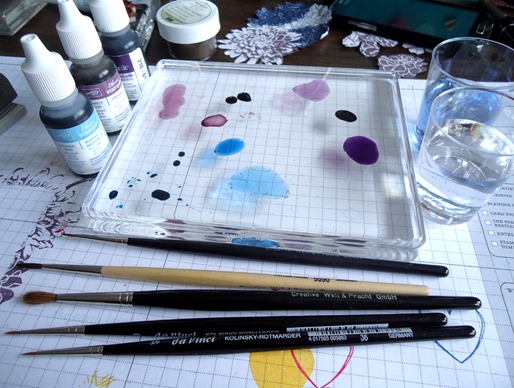
  • Color using Perfect Plum and Elegant Eggplant reinkers with varying strengths mixed with water.  We have a great tutorial on water coloring in layers in our Watercolor Techniques that Wow online class, along with six other techniques and projects.  Click Here for more Information

Fabulous Florets and Lattice  (9)Fabulous Florets and Lattice  (10)Fabulous Florets and Lattice  (1)

  • Arrange on your project and selectively choose where to place adhesive.  I used Liquid Glue for the branches – mostly on covered areas and tucked behind areas.  The flowers are popped up on dimensionals.
  • Emboss your greeting – this one from Fabulous Florets in Espresso on Vellum.  Vellum gives it a softer look to blend in a bit better with the flowers.  Wrap around the card front and tuck to secure under one of the branches.

Fabulous Florets and Lattice  (2)

Virginia’s View is a great challenge that will challenge your creative juices.  She’s really got some great ideas and I love participating in it!  I was honored to be considered a honorable mention last month for this tag.  A challenge that really put me out of my comfort zone.  So give it a try!

I hope I amused you and inspired you in some small way today.  For more inspiration on a regular basis, be sure to join the Creative Tips List.  Get projects, tips and exclusive videos sent directly to your inbox.

Have fun creating!

Signature-Blog

Fabulous Florets and Lattice  (7)


[optin_box style=”13″ alignment=”center” action=”http://www.aweber.com/scripts/addlead.pl” disable_name=”Y” method=”post” email_field=”email” email_default=”Enter your email address” integration_type=”custom” double_optin=”Y” name_default=”Enter your first name”][optin_box_hidden][/optin_box_hidden][optin_box_code]


IF YOU ENJOYED THIS POST
Let’s stay in touch! My occasional Creative Tips will teach you to make projects that you love…

[/optin_box_code][optin_box_field name=”headline”]If you enjoyed this tutorial…[/optin_box_field][optin_box_field name=”paragraph”]PHA+PHNwYW4gc3R5bGU9ImNvbG9yOiAjNjQ2MzVlOyI+TGV04oCZcyBzdGF5IGluIHRvdWNoISBNeSBvY2Nhc2lvbmFswqA8L3NwYW4+PHNwYW4gc3R5bGU9ImNvbG9yOiAjNjY2Njk5OyI+PHN0cm9uZz48ZW0+ZXhjbHVzaXZlPC9lbT48L3N0cm9uZz7CoDwvc3Bhbj48c3BhbiBzdHlsZT0iY29sb3I6ICM2NDYzNWU7Ij5DcmVhdGl2ZSBUaXBzIGUtbGV0dGVyIHdpbGwgdGVhY2ggeW91IHRvIG1ha2UgcHJvamVjdHMgdGhhdCB5b3UgbG92ZeKApjwvc3Bhbj48L3A+Cg==[/optin_box_field][optin_box_field name=”privacy”][/optin_box_field][optin_box_field name=”top_color”]undefined[/optin_box_field][optin_box_button type=”0″ button_below=”Y”]Send me exclusive tips![/optin_box_button] [/optin_box]
 

Mojo Monday Blooming with Kindness

It’s that time again – Mojo Monday!  Today’s sketch was easy to work with.  I quickly took out my newest set – Blooming with Kindness and got to work.  I was remembering these flowers in a deep purplish blue from my childhood and quickly decided that I would double stamp it in Marina Mist and Eggplant.  I took out my Color Coach for some ideas and settled on Crumb Cake to go along with the Marina Mist and Whisper White.

Mojo267Sketch

Creative Tips:

  • I used my Stamp-a-Majig to place my flower stamp directly on and then slightly off for a striking look.  I didn’t want the center too doubled, so I definitely needed a Stamp-a-Majig.
  • I wanted a little pop of color, so I chose Garden Green for some of the Big Shot die cut Little Leaves Sizzlits.
  • I stamped the flower in Marina Mist on Marina in Mist cardstock and then punch out a butterfly using the new Elegant Butterfly punch.  I added some Pearl Basic Jewels and outlined the Butterfly with the Marina Mist Marker for some depth.

  • To give the Butterfly the look of flight I secured the center down with glue dots while popping up the wings with Stampin’ Dimensionals.
  • I stamped the flower in Elegant Eggplant on the coordinating cardstock for that little something in the background.
  • One of the great things about this set is that it comes with five sayings.  I chose the Birthday saying and created a banner with the 1” Square Punch.
  • I used the Scallop Trim Border Punch to create a whimsical border in Whisper White to the right of the flower.

I absolutely love how this card turned out.  I definitely think cutting the flower out was the best way to highlight it versus stamping it onto a larger block.  This card is clean, simple and elegant.  I hope you enjoy it too!

Signature Snowflake 001

To Shop 24/7 in the Creative Store Click here!

Stamp Sets – Blooming with Kindness (126422) Paper – Whisper White (100730), Elegant Eggplant (105126), Crumb Cake (120953), Marina Mist (119682) Ink – Marina Mist (126962), Elegant Eggplant (126969) Cool Tools – 1” Square Punch (124094), Stampin’ Trimmer (126889), Paper Snips (103579), Stamp-a-Majig (101049), Scallop Trim Border Punch (118402), Little Leaves Sizzlits (114511) The Perfect Finish – Pearl Basic Jewels (119247), Stampin’ Dimensionals (104430)

Blooming with Kindness126422L