Mojo Epic Day

Really Good Greetings Main

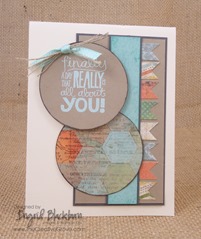
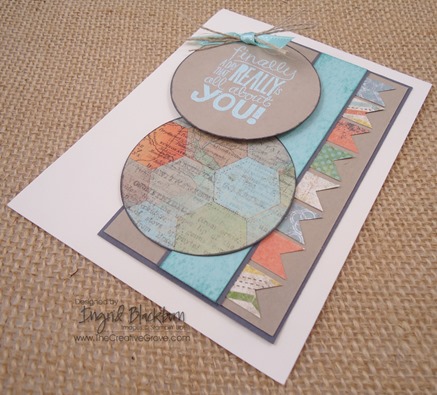
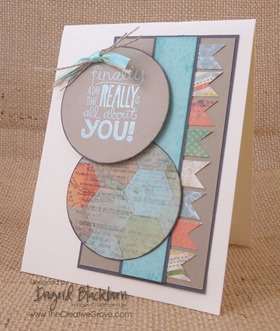
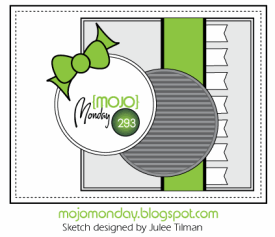
Hello Mojo Monday fans!  Today you’re getting a sneak peek into the new Greeting set Really Good Greetings combined with the all new Epic Day Designer Series Paper and one awesome sketch!  I wanted to do a birthday card today since it’s my good friend Becky’s birthday today.  We’ve lived an amazing life as good friends for the past 20+ years since we went to the University of Utah together – so I thought she deserved an epic card for today!  Read on to see all the creative details that went into making this card.

              Mojo293SketchReally Good Greetings Front

Creative Details:

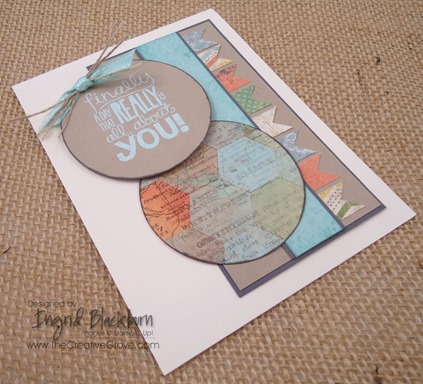
  • I decided to flip the orientation of the card to suit my banners better.  They already are only 1/2” wide so I didn’t want to lose too much of the cool design in the Epic Day DSP.
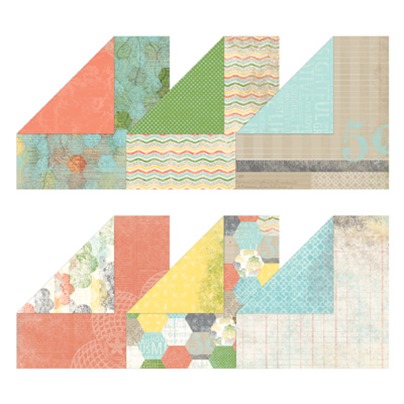
  • One of the things I love about Stampin’ Up! Designer Series Paper is that on the back of the package it tells you what colors are used.  So you don’t have to try to figure out which colors are used in the patterns.  Let me tell you, that rocks!Really Good Greetings Side
  • I went with a few neutrals as my main colors based on those used in the DSP.  I then added the pool party because it was a subtle little color pop.  The Epic Day This and That DSP already has so much going on, I didn’t want to overwhelm my card. 
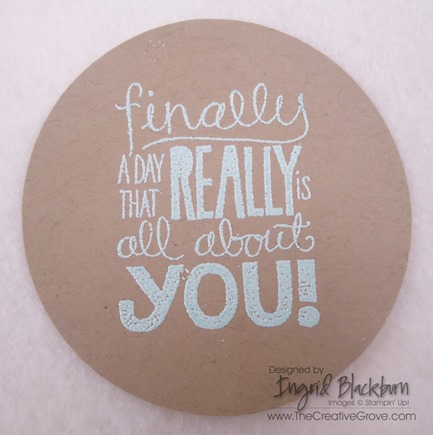
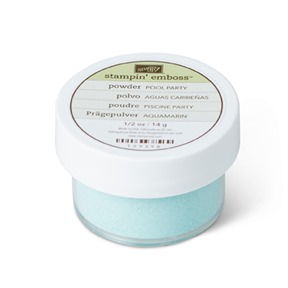
  • I decided to emboss my saying using Versamark ink and the new Pool Party Embossing Powder available in our Spring Mini Catalog.  I first didn’t use an Embossing Buddy, but that experiment didn’t go over so well.  Here is an example of one without an Embossing Buddy and one with.  Really Good Greetings No EBReally Good Greetings W EB
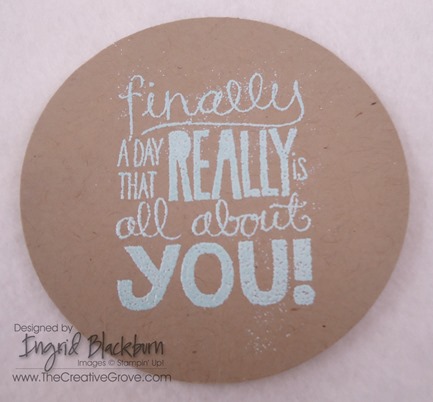
  • An Embossing Buddy rubbed over your cardstock will get rid of the oils and static that embossing powder loves to cling to.  With a greeting that is so detailed an fine, you can clearly see why you need one.
  • To make my banners, I used a 1” Square Punch.  For my video on how to make these cool little embellishments click here.
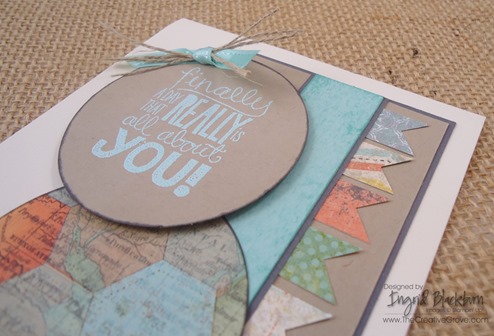
  • I wanted a little something on my Pool Party strip that wouldn’t take away from the rest of my card, so I dragged my Pool Party Classic Ink pad directly over the top for a little texture.  It was that perfect little something the card needed.Really Good Greetings CU
  • I tied a bow originally for the top embellishment, but you know, I’m just not a bow kind of person.  To I changed it to a single know with some of our linen thread coming out of it.  Tip – the best way to attach a knot like this is with Glue Dots.
  • Instead of adding a larger circle for a border in Basic Gray, I just edged my circles directly with my ink pad.  It was that little separation to the rest of the card. 
  • Finally, I popped up my greeting for a little drama in the card.  I know you’re thinking drama?  But it is something that sets it apart.  To me it’s an embellishment being dramatic, so yet – drama in your card!  (Yes, I know I am goofy sometimes!)
  • Really Good Greetings Height

I love the end result, I hope you do too!  The DSP that I used today is meant to coordinate with our new This and That Book and products.  If you haven’t checked it out yet, be sure to.  It’s a very trendy cool way to capture your life and I think you’ll love all the cool things that coordinate with this epic paper. Check it out here

Are you getting my Exclusive Video Series?

Be sure to sign up for my Creative Tips Newsletter and get the latest Creative Grove news in addition to my free Creative Techniques Video Series!  Don’t miss out on our creative community – the only way to get this exclusive content is to sign up in the box on the upper right or click here.

Signature-Snowflake-001_thumb1_thumb[1]

To Shop 24/7 in the Creative Store – Click here!

Really Good Greetings Angle

Stamp Sets – Really Good Greetings (130333c, 130330w)  Ink – Versamark (102283), Pool Party (126982), Basic Gray (126981) Paper – Very Vanilla (101650), Pool Party (122924), Basic Gray (121044), Crumb Cake (120953), Epic Day This and That DSP (130814) Cool Tools – 2 1/2” Circle Punch (120906), Heat Tool (129053), Pool Party EP (129398),  1” Square Punch (102094) Finishing Touch – Stampin’ Dimensionals (104430), Pool Party Ribbon (SAB Retired), Linen Thread (104199)
Pool Party Embossing PowderEpic Day This and That DSP

Creative Notebook Covers

Notebook Cover 001 Main

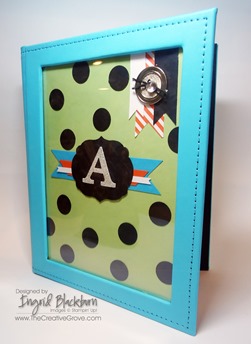
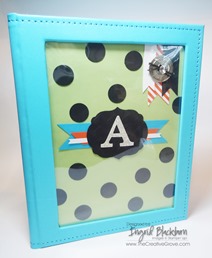
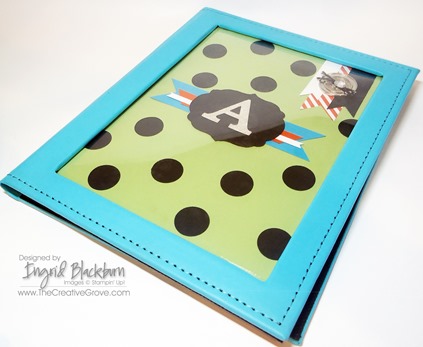
Who doesn’t love a great notebook and a handmade gift?  I had the privilege to help a good friend and fellow CG Crew team mate out with a fun little project she was doing – personalized notebooks for Admin Day this past week as one of their gifts.  Isn’t she a cool boss?  I’ve never had a boss make me something before – if that doesn’t say “I value you”, I don’t know what does!  Here is one of the notebooks that were made that day.

Notebook Cover 001 Front Notebook Cover 001 Inside

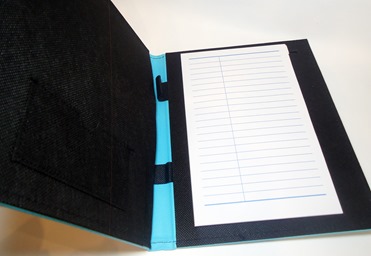
Amy got these cool Notebook covers that had a place to do something fun and creative in the cover. They came in a cute box and were just screaming to be personalized.  She had to make a few, so I just let the creative juices start flowing and this is what we ended up with for one of them.

Creative Tips:

  • We was going to make polka dots using sponge daubers, but then decided on a cleaner look and punched out polka dots with the 1” circle punch instead.
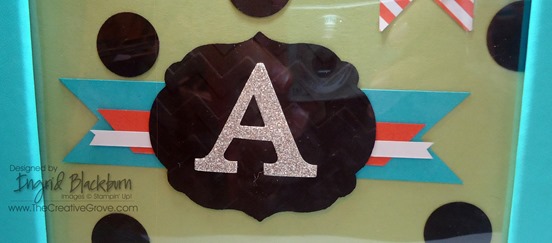
  • To give a little more emphasis to the name plate – we ran the Basic Black card stock through the big shot first with the Labels Framelits Collection and then through the Chevron TIEF folder.Notebook Cover 001 Name CU2
  • To really make it pop – we created a banner display behind it in the Tempting Turquoise, Tangerine Tango and Whisper White. 
  • The initial was made using the Typeset Alphabet Bigz dies and the Silver Glimmer Paper.
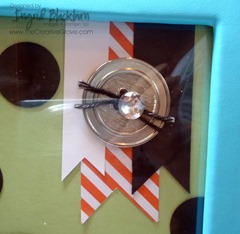
  • We wanted to add a little flair, so we created hanging banners in the corner with Basic Black and Whisper White cardstock.  We added a Tangerine Tango striped Designer Series Paper from the Sycamore Street DSP Collection that was available during Sale-a-bration (now Retired). 
  • To make the hanging banners we used a 1” Square punch.  It make the larger banner, we used a 1 3/8” Square Punch.
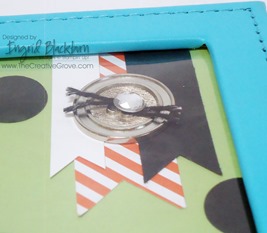
  •               Notebook Cover 001 Button CU Notebook Cover 001 Button Height

  • We added a little flair to the banners by putting one of the Silver Basic Designer Buttons from the Spring Catalog. 
  • We threaded it with some Basic Black Baker’s Twine.  You might be asking  – wait Stampin’ Up! doesn’t carry that?  You would be correct – we made it from the Whisper White Baker’s twine – something that everyone should have.  What we did was run my Classic Basic Black ink pad over it on our Grid Paper and voila, Basic Black Baker’s Twine!
  • We then popped one of our Large Rhinestone Basic Jewels to the top for a little bling!
  • This project turned out super cute and I know the recipient will love it.  According to Amy, it totally fits her personality, and the fact that it was handmade will certainly make her feel appreciated.

Signature Snowflake 001

Be sure to check out the Retired Lists!  Get all your favorites while you still can.

Retired Stamp Sets                      Retired Accessories List

To Shop 24/7 in the Creative Store – Click here!

Notebook Cover 001 Angle

Stamp Sets – none! Paper – Whisper White (100730), Certainly Celery (105125), Tempting Turquoise (102067), Tangerine Tango (111349), Basic Black (121045), Silver Glimmer Paper (124005), Sycamore Street DSP (retired) Ink – Basic Black (126980) Cool Tools – Big Shot (103954), Chevron Embossing Folder (127749), 1 3/8” Square Punch (119877), 1” Circle Punch (119868)  The Perfect Finish – Silver Basics Designer Buttons (129325), Large Rhinestone Basic Jewels (129324), Whisper White Baker’s Twine (124262)

    Large Rhinestone Silver Basics Buttons

Best of Flowers Blog Tour

blogtour-25years-april

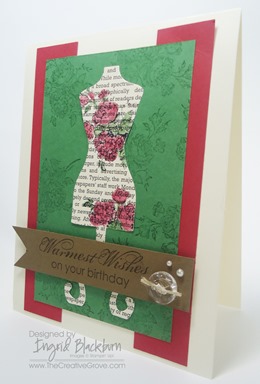
Today we’re continuing to stamp with Stampin’ Up!’s 25th Anniversary stamp set – Best of Flowers.  Welcome to the RemARKable Blog Tour!  I’m stop #3 and you’ve just come from my friend Linda’s blog Ink Stamp and Scrap.  I love Linda’s style – she stamps like me – clean and simple! 

Best of Flowers 001 Main

This is the third day of samples with this great stamp set.   Our anniversary sets have several images that are retired but were quite popular and one brand spankin’ new one!  I’m so glad they brought them back in this exclusive limited edition set!  I thought today I’d stamp with the rose bouquet as I’ve never stamped with this one before.

It also marks my first time using the Dress Up Framelits.  I just love these little framelits, they’re so cute!  And you can do SO much with them.  The limits are endless.

Best of Flowers 001 Side

Creative Tips:

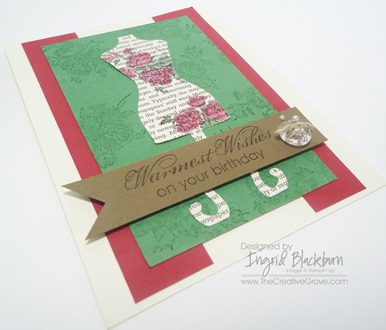
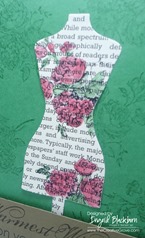
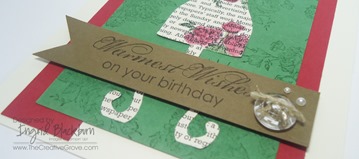
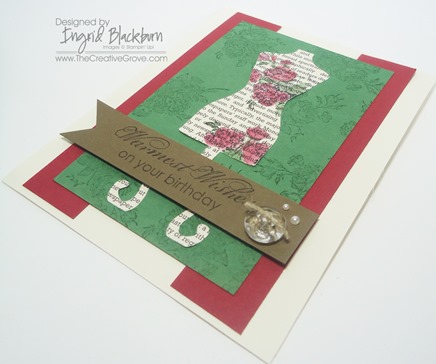
  • I took our First Edition DSP and cut that out with the dress form, stamped directly on it using Jet Black StazOn and the Rose Bouquet stamp.  Best of Flowers 001 CU
  • I squeezed my ink pads to collect the ink in the lid and water colored my images using the Aqua Painters.  I colored the image using Riding Hood Red and Garden Green.
  • I stamped color on color for the banner in Soft Suede using the Blooming in Kindness stamp set for my greeting.  I just LOVE that set!Best of Flowers 001 Banner
  • I added a Vintage Faceted Buttons with Linen Thread tied through them and two Pearl Basic Jewels to complete my banner. Best of Flowers 001 Height
  • I cut the end of the banner using a 1” Square Punch and popped it up on dimensionals for some drama to my simple card.
  • My Garden Green panel needed a little something so I created a vintage looking wallpaper by stamping the Rose Bouquet stamp several times from different angles in Garden Green.
  • I popped two Riding Hood Red panels on either edge.  It completed my card.
  • For my base, I chose Very Vanilla.
  • I just love the end result, I hope you do too.  It’s a classic card and really pops. To see my other card with this set from earlier in the week, click here.  To see my candle also done with this set, click here.

Next up is Melissa Bollinger’s blog – http://www.stampinup.net/blog/2089191.  Enjoy the rest of the tour and see you back next month!

blogtour-25years-next

Signature Snowflake 001

Best of Flowers 001 Angle

Stamp Sets – Best of Flowers (133342c), Blooming with Kindness (126420w, 126422c) Ink – Riding Hood Red (126968), Garden Green (126973), Soft Suede (126978) Jet Black StazOn (101406)  Paper – Riding Hood Red (111348), Garden Green (102584), Soft Suede (115318), Very Vanilla (101650), First Edition DSP (121878)  Cool Tools – Aqua Painters (103954), Dress Up Framelits (130101), 1” Square Punch (124098) Finishing Touch Vintage Faceted Buttons (127555), Pearl Basic Jewels (119247) , Linen Thread (104199), Stampin’ Dimensionals (104430)

Best of Flowers 133342L_thumb[2]

Oh Hello Simplicity from St. John, USVI

Oh Hello 001 Main

I’m on the Azamara Quest in the West Indies and Virgin Islands for a few weeks.  I thought I’d share some photos and projects with you while I’m away at sea.  I have some photos at the end of this from the isle of St. John in the US Virgin Islands today at the end of this post.  Enjoy, now onto a fun little project!  I just love stamp sets that really make me look at them twice.  The set Oh Hello definitely does that for me.  I didn’t notice it at first, but the oval stamp with the alternating Chevrons is an optical illusion.  That’s pretty cool if you ask me!  I wanted a clean and simple project, so I created this fun and flirty card.  Enjoy all the creative tips!

Oh Hello 001 002

Creative Tips:

  • I used the flower as a focal image together with the large doily from the Delicate Doilies Sizzlits for the Big Shot.
  • To make the flower pop a little I cut an oval using the new Oval Framelits, ran it through the Honeycomb Embossing Folder
  • I wanted the oval to pop a bit more, so I ran a sponge over it and along the sides using Garden Green Ink.  I found it easier to sponge the edges first before running it through the TIEF folder.  When I did it the opposite way, a few of the honeycomb shapes wanted to cut apart.
  • To color my flower stamp, I used Garden Green and Rose Red Markers.  I cut out my image and popped it up using Stampin’ Dimensionals.
  • I wanted a little more to my image, so I stamped the large patterned oval in So Saffron behind the Doily and off to the left.  Together it really made a beautiful combination.
  • I wanted the doily to stand out a bit so I used my bone folder to curl the edges up a little on the top and bottom.  I made sure to only add adhesive to the center.

Oh Hello 001 CU

  • I used the chevron stamp along with my Stamp-a-Majig to line it up along the bottom of the card.  It made for a pretty background for my Banner Flag.
  • I used a 1 3/8” Square Punch to create my banner flag and anchored it with Stampin’ Dimensionals.  For a little pop to it, I added two alternating sized Pearl Basic Jewels.
  • The card needed a little something to break it up in the center, so I added two different sizes of strips.  This is a great way to use those left over slivers of card stock that you have left over.
  • For my finishing touch, I added some minor paper piercing in the upper corners.  The Essentials Paper Piercing Templates along with our Stampin’ Pierce Mat and Paper-Piercing Tool are the most cost effective and easy way to add that little something to your project.  No stamper should be without those three tools!

I hope you loved this little simple project.  I just love this stamp set.  The sayings are great – and you can never have enough of those!  I find that the mix of stamps in the Oh Hello set are fabulous.  And even better is our Oval Framelits bundle with the Oval Framelits.  You’ll get 15% off the total cost and have some real staples that you’ll use over and over again.

Well our white beach/teal waters snorkeling day was not as planned thanks to pouring rain showers and a grey sky (not fun when all the taxis are open air).  We still enjoyed all St. John had to offer, just a bit wet!

DSC01417

Colorful beach front living

DSC01419

Our ship Azamara Quest anchored off shore way back there!

DSC01432 My office for the rest of the rainy day with St John in the background.

I’m off to Ilse Des Saints, Guadeloupe in the Eastern Caribbean today.  We can’t wait to explore this island for the first time. Look for some more fun projects tomorrow, more photos and hopefully we’ll have some better weather!

Signature Snowflake 001

To Shop 24/7 in the Creative Store – Click here!

Stamp Sets – Oh Hello (130733c, 130730w), Oh Hello Bundle (131102w, 131101c) Ink – So Saffron (126957), Garden Green (126973), Rose Red Marker (119700 – Subtles Marker Collection), Garden Green Marker (119701 – Regals Marker Collection)  Paper – Whisper White (100730),So Saffron (105118), Garden Green (102584), Rose Red (102544)  Cool Tools – Stamping Sponges (101610), Stamp-a-Majig (101049), Delicate Doilies Sizzlits (126999), 1 3/8” Square Punch (119877), Honeycomb TIEF (129378), Oval Framelits (129381)  Finishing Touch – Stampin’ Dimensionals (104430), Essentials Paper Piercing Pack (126187), Stampin’ Pierce Mat (126199), Paper-Piercing Tool (126189), Pearl Basic Jewels (119247)

Be of Good Cheer Case

I love it when I CASE (copy and steal everything) a great concept.  I was challenged to case a particular design this week and I immediately went to my designer paper – Be of Good Cheer.  The matching stamp set – Chock-full of Cheer gave me the perfect greeting to use.  I blinged it up with our Rhinestone Basic Jewels and here is the result.

Creative tips:

  • I used a square punch to make my banner flag ends.  Watch for my video on how to do this tomorrow.
  • I needed a little something on my Gumball Green cardstock that wasn’t going to take away from the strong images of the Be of good Cheer DSP, so I used my Distressed Dots background stamp.
  • To make the greeting stand out a bit, I popped it up on Stampin’ Dimensionals, added a large Rhinestone Basic Jewels, and left an 1/8” of Gumball Green in-between the flag and the Cherry Cobbler striped paper.  I had it hang just slightly over the Gumball Green cardstock to provide continuity from the Very Vanilla background.
  • To finish the card off just a little – I added two differing sized Rhinestone Basic Jewels to the top two corners.

It’s a clean an simple look, but makes an impact just the same.  The original design used curved edges of the scallop punch and edgelit, but I liked the straight edge a little better with the circular pattern in the paper.  Sometimes too much of a good thing isn’t good – the straight edge gave just the right amount of contrast.StampinTrimmer

The new Paper Trimmer is now available!  We’ve waited five months and finally it’s here!  SO what makes this trimmer so special?  Well, all those pesky little details that are never accounted for are finally all taken care of!  Stampin’ Up! designed and produced this product themselves.  Click here for more details about the Stampin’ Trimmer

Signature Snowflake 001

To Shop 24/7 in the Creative Store Click here!

Stamp Sets – Chock-Full of Cheer (126717), Distressed Dots (122815) Paper – Very Vanilla (101650), Be of Good Cheer (126896) Ink – Gumball Green (126861), Cherry Cobbler (126966) Cool Tools – 1” Square Punch (124094), Stampin’ Trimmer (126889) The Perfect Finish – Rhinestone Basic Jewels (119246), Stampin’ Dimensionals (104430)

Be of Good Cheer 126896L