Have you ever learned stipple brush techniques for cards? Stipple brushes are another tool you can use to apply ink to your cardstock. These brushes are tightly bound at the base, are made of a bristle or synthetic fiber and the hairs are generally the same length. They usually are on a handle. The brushes I use on this project have a natural bristle and are inexpensive brushes.

This video teaches you two stipple brush techniques – the Pop and Sweep. Both are rather easy, and the best tip I could offer you is to keep your hold on your brush loose. Enjoy this project:
So what did you think? Pretty easy! Like I mentioned before, the key is a loose hold on your brush. Remember that you are laying down lots of little dots of color with the pop technique, so try not to stay in the same spot – move around a little. Here are the project specifics.
Creative Tips for two Stipple Brush Techniques
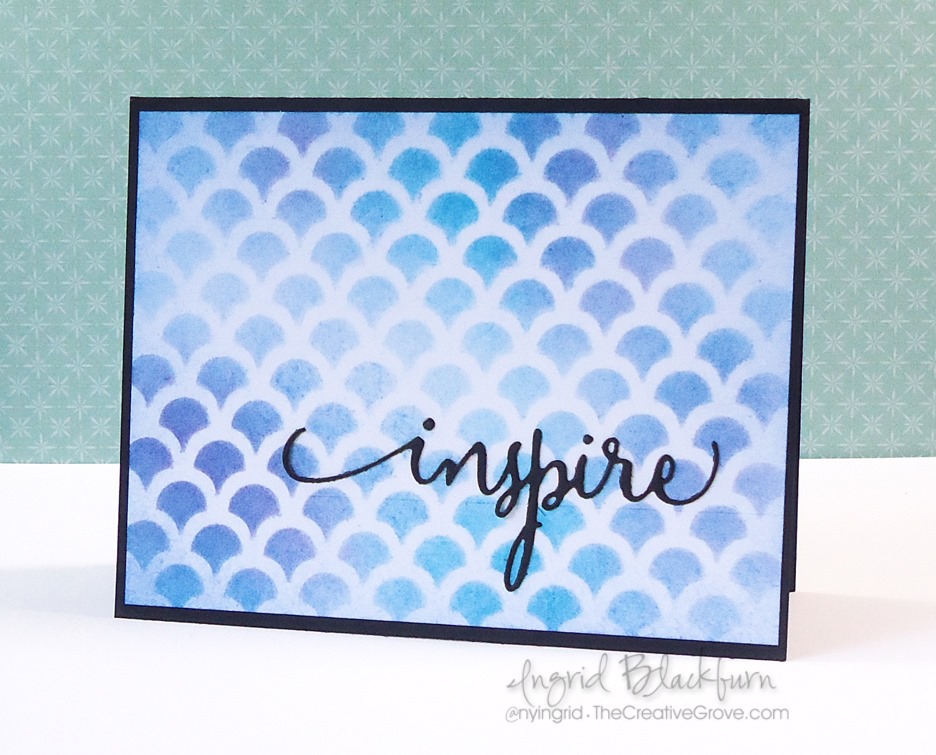
- Secure your card front to your stencil using painters tape and then secure your stencil to your craft mat.
- I used the scallop stencil by My Favorite Things.
- Apply ink with your stipple brush in a popping or pouncing motion from either your ink pad, or from your craft mat.
- Tip – when popping your brush through your stencil – keep it light, don’t smoosh your bristles or you will lose the dot effect and work against yourself.
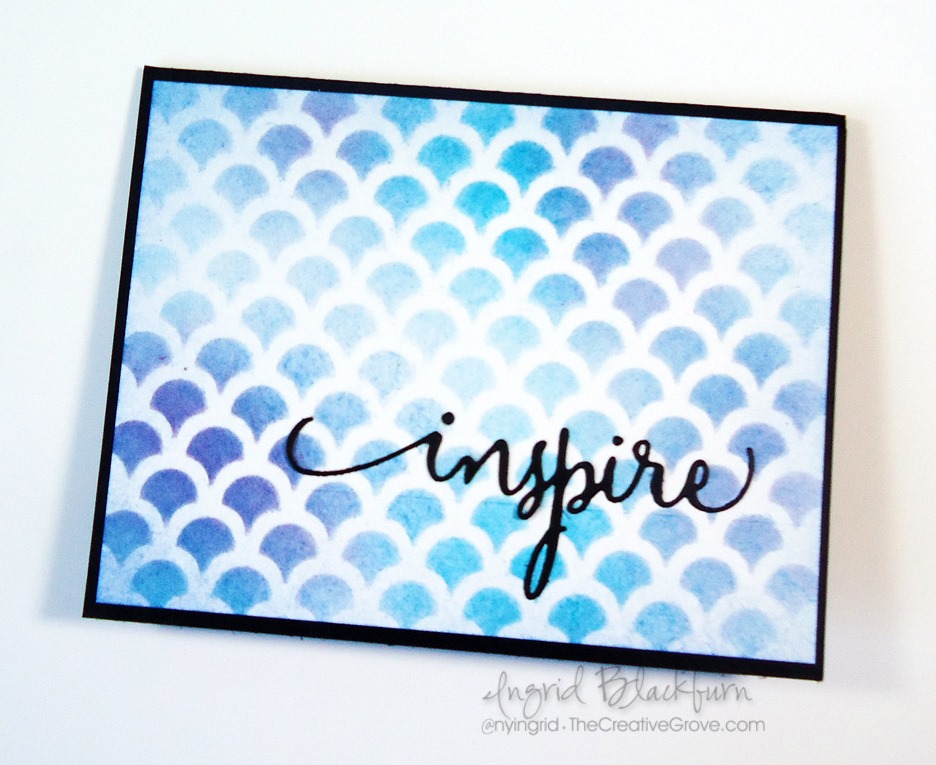
- Add your inks randomly moving your brush around rather than keeping it in one spot. If you keep it in one spot your color will become too concentrated and it won’t look effortless.
- Tip – If you do keep your color concentrated and wish to correct it, apply more but keep the circular area of application random and outward from the concentration.
- I used the colors Tumbled Glass, Peacock Feathers, Broken China, Faded Jeans and Seedless Preserves.
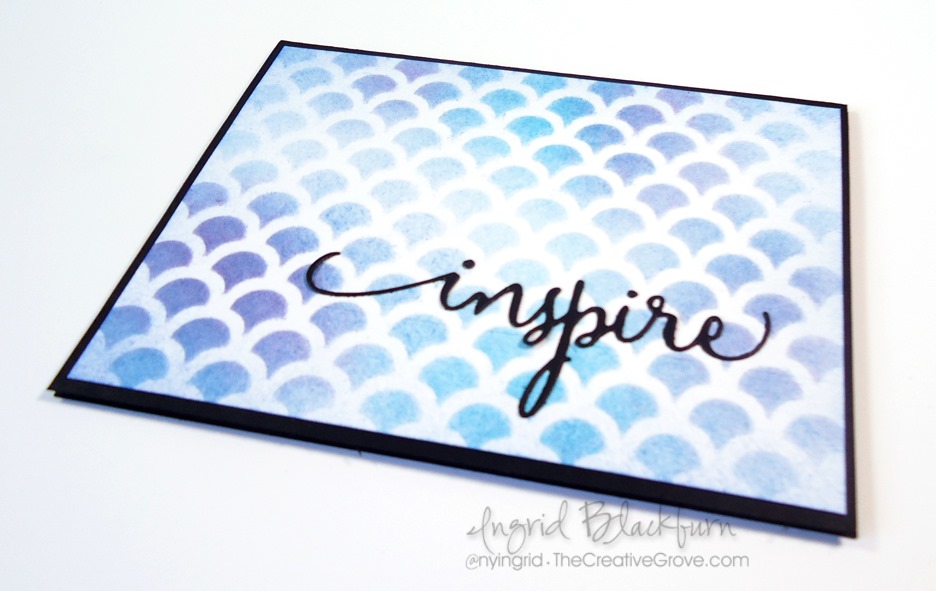
- 2nd Technique – the Sweep: to add a little finish to your edge, sweep your bristles in a flicking motion from your craft mat onto your edge in a quick and light manner. This is also a great way to use the remaining ink on your craft mat or flick the ink from your stencil onto your project, helping to clean your stencil in the process.
- Mat onto a black card base and add a greeting – I used the Inspire steel die by Penny Black.
The goal of this project was to achieve a light mixture of colors with a distinct background from the stencil. I entered this project into the Happy Little Stampers April Stencil Challenge.

Be sure to stop by later in the week for another stipple brush example, Creative Tips E-Letter subscribers will be emailed a fun project, and VIP community members will also have another project added to their library this week.
Overall, using stipple brushes in paper crafting is a pretty simple concept, and I think you’ll enjoy adding both stipple brush techniques to your technique arsenal!

[optin_box style=”14″ alignment=”center” disable_name=”Y” email_field=”email” email_default=”Enter your email address” email_order=”1″ integration_type=”aweber” double_optin=”Y” list=”2841626″ name_field=”name” name_default=”Enter your first name” name_required=”Y”][optin_box_field name=”headline”]If you enjoyed this tutorial…[/optin_box_field][optin_box_field name=”paragraph”]PHA+Li4ueW914oCZbGwgbG92ZSBvdXIgPHNwYW4gc3R5bGU9ImNvbG9yOiAjMjQ0YzVlOyI+PGVtPjxzdHJvbmc+ZnJlZSA8L3N0cm9uZz48L2VtPjwvc3Bhbj5zdWJzY3JpYmVyIG9ubHkgdmlkZW8gc2VyaWVzISDCoEdldCB0aGXCoDxzcGFuIHN0eWxlPSJjb2xvcjogIzI0NGM1ZTsiPjxlbT48c3Ryb25nPmV4Y2x1c2l2ZTwvc3Ryb25nPjwvZW0+PC9zcGFuPsKgQ3JlYXRpdmUgVGlwcyBlLWxldHRlciB3aGljaCB3aWxsIHRlYWNoIHlvdSBuZXcgdGVjaG5pcXVlcyB0byBhZGQgdG8geW91ciBzdGFtcGluZyBza2lsbCBzZXQuIMKgTGVhcm4gaG93IHRvIG1ha2UgcHJvamVjdHMgeW91J2xswqBsb3ZlITwvcD4K[/optin_box_field][optin_box_field name=”privacy”][/optin_box_field][optin_box_field name=”top_color”]undefined[/optin_box_field][optin_box_button type=”1″ text=”Send me exclusive tips!” text_size=”26″ text_color=”#000000″ text_bold=”Y” text_letter_spacing=”-1″ text_shadow_panel=”Y” text_shadow_vertical=”1″ text_shadow_horizontal=”0″ text_shadow_color=”#a3b640″ text_shadow_blur=”0″ styling_width=”100″ styling_height=”10″ styling_border_color=”#000000″ styling_border_size=”1″ styling_border_radius=”6″ styling_border_opacity=”100″ styling_shine=”Y” styling_gradient_start_color=”#a3b640″ styling_gradient_end_color=”#5b661e” drop_shadow_panel=”Y” drop_shadow_vertical=”1″ drop_shadow_horizontal=”0″ drop_shadow_blur=”1″ drop_shadow_spread=”0″ drop_shadow_color=”#000000″ drop_shadow_opacity=”50″ inset_shadow_panel=”Y” inset_shadow_vertical=”0″ inset_shadow_horizontal=”0″ inset_shadow_blur=”0″ inset_shadow_spread=”1″ inset_shadow_color=”#a3b640″ inset_shadow_opacity=”50″ location=”optin_box_style_14″ button_below=”Y”]Send me exclusive tips![/optin_box_button] [/optin_box]
Great technique! TFS. Can’t wait to try it.
Awesomeness, love the soft colors of the distress inks with the stencil.
Thanks Carol – it’s a fun stencil! 🙂
This is a great technique Ingrid. Thanks so much for the video … really show the different ways you can stipple!! And thanks for playing along at Happy Little Stampers. xx
Thanks Loll – I love the HLS challenges! 🙂
Great video! I can’t wait to go home and try this out!
You’ll have fun with it – it’s a fun technique! 🙂