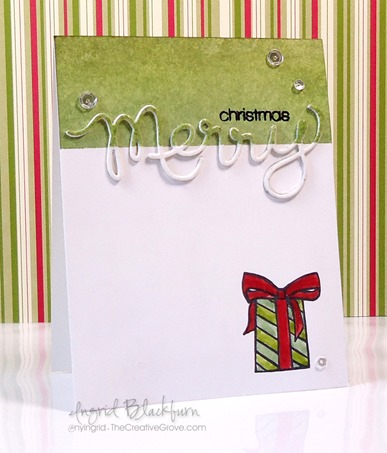
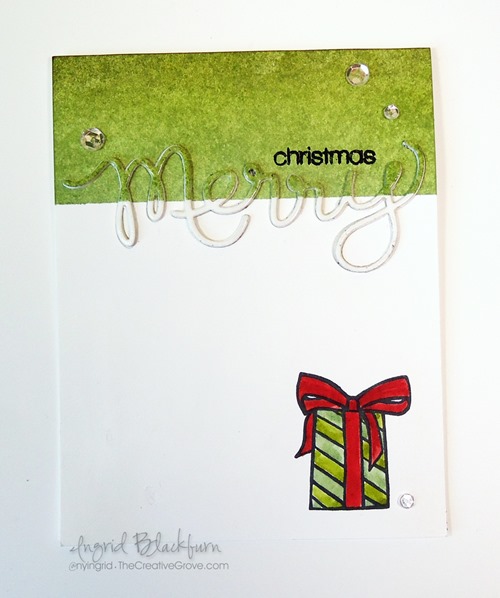
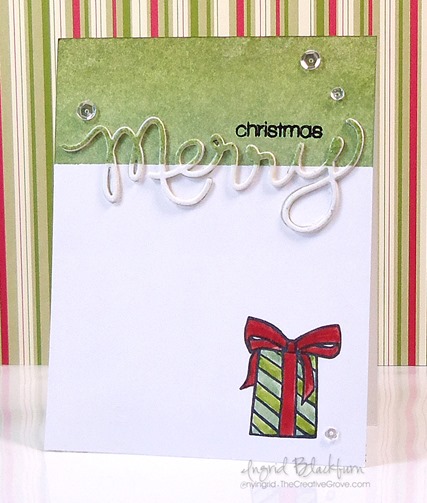
Stacked Die Cuts seem to be all the rage lately. If you haven’t tried this creative technique yet, I think you’ll be surprised at just how easy it is. Enjoy this quick tutorial into how this simple card was created!
Stacked Die Cuts Card
- You will first want to create your blended background on the top fourth of the card. To see a step by step video tutorial on how to create a perfectly blended background, click here.
- Mask off the bottom 3/4 of your card with post it notes. Use the following Distress inks in order when blending from the bottom up – Bundled Sage, Peeled Paint and Forest Moss.
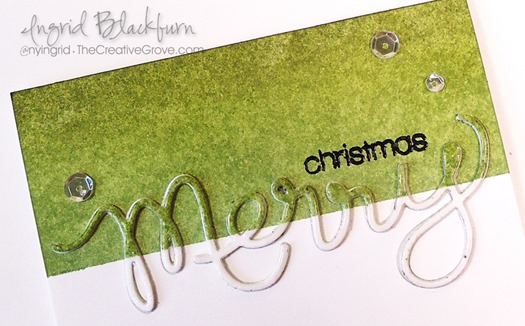
- Die cut the word Merry from your project, being sure to keep all the little pieces (Y, M – 2, E, R). I keep these stuck to a piece of washi or painters tape so they don’t go missing.
- Emboss the word Christmas in Black up above your Negative Die Cut word in the green area. Tip – be sure that area is totally dry – definitely use a de-static tool like an embossing buddy.
- Lay your Green/White cut out word Merry on a piece of painters tape or masking tape. Smoosh a versamark pad over your word and emboss in clear to give a shine. Once cool, remove with tweezers and set aside.
- Stamp your gift in the bottom right corner using Memento Tuxedo Black ink. I use this ink because I’m going to watercolor with distress inks and it doesn’t bleed and gives a crisp image.
- Watercolor your image using Bundled Sage, Peeled Paint and Fire Brick with an Aqua Painter. Tip – be sure your paint brush isn’t too wet, as this is regular card stock. If you use too much water, you’ll get little white dots or lines from your paper.
- Die Cut four more words in white.
- To create your Die Cut stack, glue all five die cuts to each other with your Blended Piece on top.
- Add adhesive to a piece of Copy Paper that is wider than your negative cut out, adhere so that the sticky side faces the front.
- Add your die cut and the cut out pieces to the sticky paper exposed in the negative die cut image. And there’s your stacked die cut!
- Attach your card front to your card base and add a little Forest Moss to the top at the fold so there is no white exposed.
- Add sparkling clear sequins from Pretty Pink Posh if you desire using Tombow Mono Liquid Glue.
I designed this card with three challenges in mind today – Merry Monday – Gifts and Addicted to CAS – Green and Happy Little Stampers – Sponged.
If you liked this tutorial on Stacked Die Cuts, be sure to get our exclusive video tutorial series by being on the Creative Tips E-letter list, sign up at the bottom!
[optin_box style=”14″ alignment=”center” disable_name=”Y” email_field=”email” email_default=”Enter your email address” email_order=”1″ integration_type=”aweber” double_optin=”Y” list=”2841626″ name_field=”name” name_default=”Enter your first name” name_required=”Y”][optin_box_field name=”headline”]If you enjoyed this tutorial…[/optin_box_field][optin_box_field name=”paragraph”]PHA+Li4ueW914oCZbGwgbG92ZSBvdXIgPHNwYW4gc3R5bGU9ImNvbG9yOiAjMjQ0YzVlOyI+PGVtPjxzdHJvbmc+ZnJlZSA8L3N0cm9uZz48L2VtPjwvc3Bhbj5zdWJzY3JpYmVyIG9ubHkgdmlkZW8gc2VyaWVzISDCoEdldCB0aGXCoDxzcGFuIHN0eWxlPSJjb2xvcjogIzI0NGM1ZTsiPjxlbT48c3Ryb25nPmV4Y2x1c2l2ZTwvc3Ryb25nPjwvZW0+PC9zcGFuPsKgQ3JlYXRpdmUgVGlwcyBlLWxldHRlciB3aGljaCB3aWxsIHRlYWNoIHlvdSBuZXcgdGVjaG5pcXVlcyB0byBhZGQgdG8geW91ciBzdGFtcGluZyBza2lsbCBzZXQuIMKgTGVhcm4gaG93IHRvIG1ha2UgcHJvamVjdHMgeW91J2xswqBsb3ZlITwvcD4K[/optin_box_field][optin_box_field name=”privacy”][/optin_box_field][optin_box_field name=”top_color”]undefined[/optin_box_field][optin_box_button type=”1″ text=”Send me exclusive tips!” text_size=”26″ text_color=”#000000″ text_bold=”Y” text_letter_spacing=”-1″ text_shadow_panel=”Y” text_shadow_vertical=”1″ text_shadow_horizontal=”0″ text_shadow_color=”#a3b640″ text_shadow_blur=”0″ styling_width=”100″ styling_height=”10″ styling_border_color=”#000000″ styling_border_size=”1″ styling_border_radius=”6″ styling_border_opacity=”100″ styling_shine=”Y” styling_gradient_start_color=”#a3b640″ styling_gradient_end_color=”#5b661e” drop_shadow_panel=”Y” drop_shadow_vertical=”1″ drop_shadow_horizontal=”0″ drop_shadow_blur=”1″ drop_shadow_spread=”0″ drop_shadow_color=”#000000″ drop_shadow_opacity=”50″ inset_shadow_panel=”Y” inset_shadow_vertical=”0″ inset_shadow_horizontal=”0″ inset_shadow_blur=”0″ inset_shadow_spread=”1″ inset_shadow_color=”#a3b640″ inset_shadow_opacity=”50″ location=”optin_box_style_14″ button_below=”Y”]Send me exclusive tips![/optin_box_button] [/optin_box]


Your card is super cute with the cut-out! Thanks for playing Merry Monday this week!
Thanks Debbie! 🙂
Hi Ingrid ,this is darling and a great step by step. beautiful CAS card! I like the one gift !
Thanks Marybeth – I’m so glad you enjoyed it! The one gift was weird to me at first, but the more I looked at it, the more I loved it. 🙂
LOVE LOVE this idea and design! So CAS yet so sophisticated! I am glad that you love the V. V. challenge! Your talent is much appreciated! xo
Thanks so much Virginia! I really love your work and your challenge has been so much fun for me. Thanks so much for stopping by today! 🙂
great card, love the colours and text die cut
Thanks Christine! 🙂
I really like the two-tone die-cut sentiment. Thanks for playing along with us at ATCAS! Rebecca x
Thanks Rebecca – was fun! 🙂
I love this …. the two colours and the stacked die cut over both looks fab! xx
Thanks Linda! I’m in love with the look too. 🙂
LOVE this, Ingrid! The stacked die cut is one of my fave techniques. Very cute little gift too. Thank you for joining us at Merry Monday!
Definitely addictive my friend! Thanks for stopping by. 🙂
Love the card awesome CAS design. I will certainly have to CASE
Thanks Christine – have fun making your own! 🙂
Fabulous CAS card Ingrid, I love this design. Thank you for joining us for Merry Monday.
Thanks Nina – always love Merry Monday! 🙂
Love your super crisp and clean take on the photo inspiration Ingrid.
Great CAS card. Sarah x
Thanks Sarah! It was a fun card to make. 🙂
Love the double color Merry, very nice. Pondered how did she do that, thought you had blended the Merry just as you did the card front, took a bit to realize you cut it out of the card, LOL. Cool idea.
I filmed a video to go along with it, but my camera decided to erase it…grrr. Glad you liked it! Will definitely film another. 🙂
This is very pretty, Ingrid! I love these shades of green and your colorful gift! Thank you for sharing this with us at Merry Monday!
Thanks Bonnie! 🙂
Hi Ingrid. LOVE this sweet Christmas card. The stacked die with the two colours is awesome! And I love that little gift! Thanks for playing along at Happy Little Stampers and ATCAS. xx
Thanks for visiting Loll! It was a fun card to make. 🙂