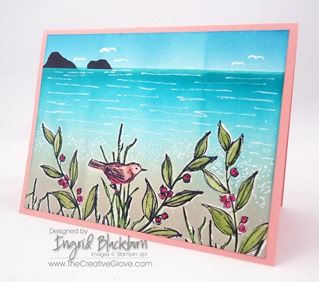
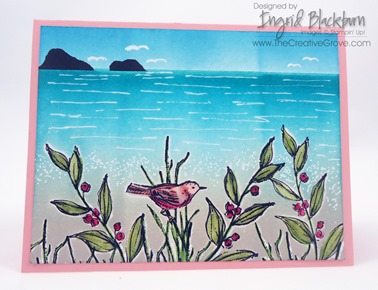
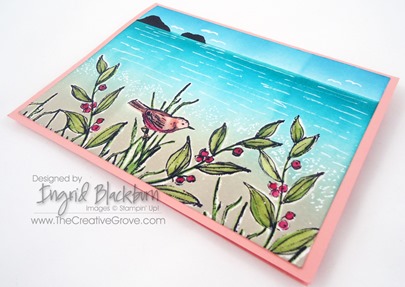
I love making creative scenery cards with my brayer. And what better way to give you a sneak peek into the next catalog (goes live May 31st!), than to do a creative Bermuda Scene using one of the new exclusive hostess stamp sets – Simply Sketched.
Here I used two stamps – the bird on the grass and the berry/leaf branch. I wanted to use some of the new 2013-2014 In Colors, so I settled on a daytime Bermuda scene. I hope you love this card as much as I do!
Creative Tips:
- I settled on a primary color combination – the new In Colors – Crisp Cantaloupe and Coastal Cabana. I then pulled in Strawberry Slush (new), Pear Pizazz, Wild Wasabi, Baked Brown Sugar (new), Tempting Turquoise, Bermuda Bay, Soft Sky, Cherry Cobbler and Early Espresso.
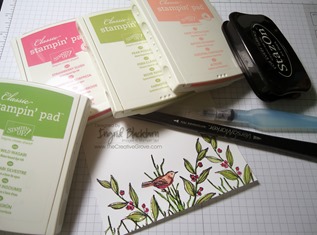
- I began by stamping my scene in Jet Black StazOn. I colored my scene using the Aqua Painters and the Classic Ink Pads in various colors. I then embossed it in crystal clear so that I could brayer directly over top.
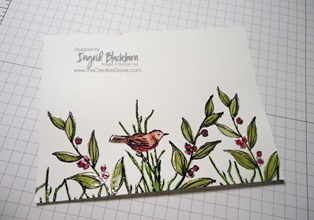
- To create the sandy beach I used Sahara Sand. I wanted to keep it light and Crumb Cake would have been a little too dark. I thought a beach scene would be a nice way for the stamped images to pop on the neutral background.
- I then brayered my water after masking off my horizon. I used a foundation of Tempting Turquoise, then Coastal Cabana and finally Bermuda Bay.
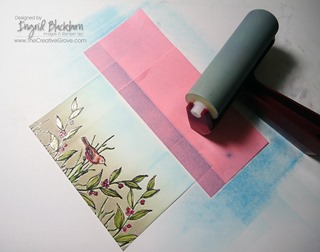
- For my sky, I used Soft Sky – which to my surprise was a little bluish gray, so I added a little pop of Tempting Turquoise to brighten it up.
- I masked my islands in Early Espresso and added my water movement and foam in our Uniball White Gel Pen.
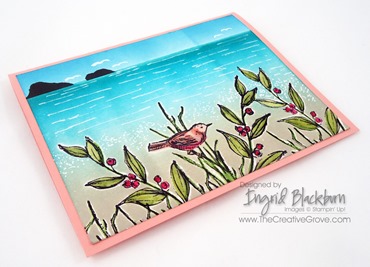
- One of my birds got a little thick unfortunately and there really wasn’t a way to fix it, so I have a little fat seagull…lol!
- I usually sponge the edges in a dark color and I would have used Early Espresso if I did that, but I wanted to keep it nice and light on the Cantaloupe, so I left the edge clean.
Overall, I think the card is light and fun. I matted my scenery onto Crisp Cantaloupe because it really gave it a Bermuda feel. This is the type of card you would learn to make in my Creative Scenery 102 class or 200 level classes. Be sure to sign up for my creative tips mailing list at the right to be sure you are getting the latest information about classes in the Orlando area and my online classes. If you are interested in hosting a weekend of brayer classes in your area – be sure to contact me – I do travel!
Learn Online!
If you loved this card – be sure to check out my in depth step by step video online class for how to create scenes just like this one! Check out brayer classes here – Brayer 101 Brayer 102 and save huge with the Bundled Classes here
Are you getting my Exclusive Video Series?
Be sure to sign up for my Creative Tips Newsletter and get the latest Creative Grove news in addition to my free Creative Techniques Video Series! Don’t miss out on our creative community – the only way to get this exclusive content is to sign up in the box on the upper right or click here.
To Shop 24/7 in the Creative Store – Click here!
Stamp Sets – Simply Sketched (129672c, 129669w) Ink –Sahara Sand (126976), Crisp Cantaloupe (131176), Strawberry Slush (131178), Baked Brown Sugar (131174), Pear Pizazz (131180), Soft Sky (131181), Cherry Cobbler (126966), Coastal Cabana (131175), Bermuda Bay (131171), Tempting Turquoise (126952), Early Espresso (126974), Jet Black StazOn (101406), Wild Wasabi (126959) Paper – Whisper White (100730), Crisp Cantaloupe (131298) Cool Tools – Brayer (102395), Stampin’ Sponges (101610), Versamarker, Clear Embossing Powder (109130), Heat Tool (129053), Aqua Painter (103954) Finishing Touch – Uniball White Gel Pen (105021)

When you say you “masked” your islands. What do you mean? What is the process for that? ~Pam
Hi Pam – To create the islands, I made masks of the islands from post its and sponged them with ink. It’s one of several techniques I teach in the final project of my Brayer 101: Introduction to Creative Scenery class. 🙂
I was looking for ideas for this set, not sure if I wanted it or not. your beautiful card convinced me I have to have it. thanks for sharing
You will love stamping with this set Judy! The ideas just keep flowing. It’s such a fun set and I truly wish it was in the catalog so it would be around longer than 1 year! Thanks for stopping by today. 🙂
So very, very pretty, Ingrid. I love the colors and the scene- just so calming. Now, since it is late, and my brain isn’t functioning as well…what do you mean by you embossed after you colored the image so you could brayer directly over it? Thanks!
I used a versamarker to add more ink so that I could emboss the image with clear embossing powder. That way it resists the ink that will be deposited by the brayer. Hope that makes sense! Thanks for stopping by Cindy! 🙂
Absolutely love the card! It’s Beautiful! I Love the colors you used. It makes me want to go enjoy the beach. Thanks for sharing this with all of us. Your creativity inspires me to be creative.
Thanks so much for stopping by today Amy! 🙂 I too love the colors, didn’t think I would as much as I did – so I was surprised! I know you’ll love playing with them yourself! Can’t wait to see more of your creations too! Have a great night. 🙂