You won’t be able to stop stamping with Ornamental Pine, so here’s an awesome watercolor technique for this stamp set. This technique is taught in our online Watercolor class as well! It’s super easy, and gives really great results! This stamp set is so gorgeous, any like image would work in it’s place and have fun with it.
If you’re not sure on the technique – practice on a piece of scrap paper first…I usually do, just to get it just right with each stamp set. Of course…then I turn that scrap into a separate project, like the one linked below.
Only two left…hard to believe we’re almost done. I hope you’ve loved each one along the way – be sure to leave me comment on any that you’ve loved!! Enjoy!
This is actually a straightforward technique. Watercolor stamping is just that – you stamp with a watery image. The key to a successful project depends on a few things – the amount of water, and your papers ability to absorb it.
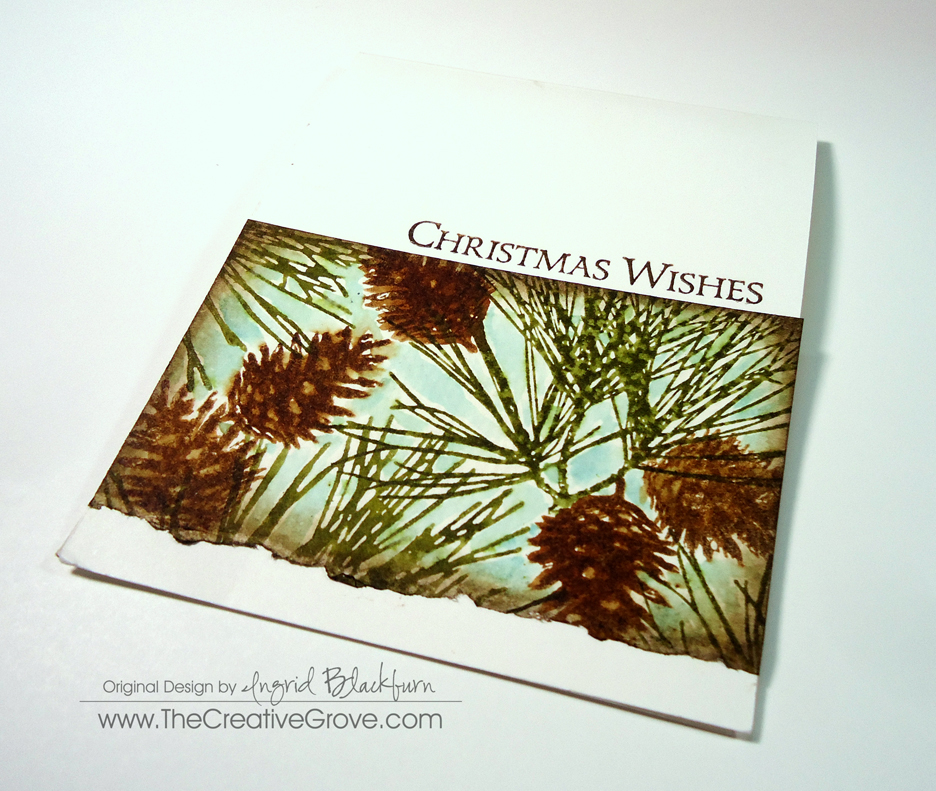
Start off with a piece of 140 pound cold pressed watercolor paper. Tim Holtz or Stampin’ Up! paper will work fine – although Tim Holtz is a bit brighter white. Use the smoother side, it’s better for stamping. Ink up your pine cone with Vintage Photo, and spritz lightly twice so the image is wet, but not puddled. Stamp and hold so the paper can absorb the water – just a few seconds should be plenty. If your image is too perfect – you don’t have enough water. If your image is a hot mess, then you have too much. But don’t worry either way – you can always work over it or adjust as needed – it’s art!
You want to stamp a few pine cones leaving space for needles. Those are stamped in the same way using Forest Moss. Try not to have too much overlap – some is okay – a ton just looks jumbled. Repeat until you’ve finished your entire scene. If you want to follow mine exactly – here’s what I did: I stamped the Top one first, then the one furthest to the right, then the one below that – upper right pine needles, then lower left cone and one above. I then filled in the rest of the pine needles.
Make sure your paper is dry before proceeding to these next steps. Go over your pine cones with vintage photo again for definition. In the white spaces, paint tumbled glass using an Aqua Painter. Swipe your ink pad onto your work surface or an acrylic block and activate ink with water from your brush.
TIP – Try not to touch too much of the pine needles, as you will re-activate that ink. It’s okay for some to get water and bleed with the blue, but if you do it too much it’ll get quite muddled. Check out my close up below to see how it’s just a little.
Fully dry your water colored piece and add a frame using Walnut Stain Distress Ink and a sponge applicator tool. Keep your frame small so it doesn’t overtake your scene. Line your piece up and stamp your greeting. I stamped mine by inking up in versamark ink first followed by Walnut Stain Distress Ink. I then embossed it with clear embossing powder. Attach your scene using a liquid glue like Mono.
The card base is just a straight-forward A2 size folded in half. The watercolor piece is 2 1/2 x 4 1/4″.
Have fun recreating this one – they’re easily mass produced!
