POWERFUL SIMPLE CARDS you’ll love

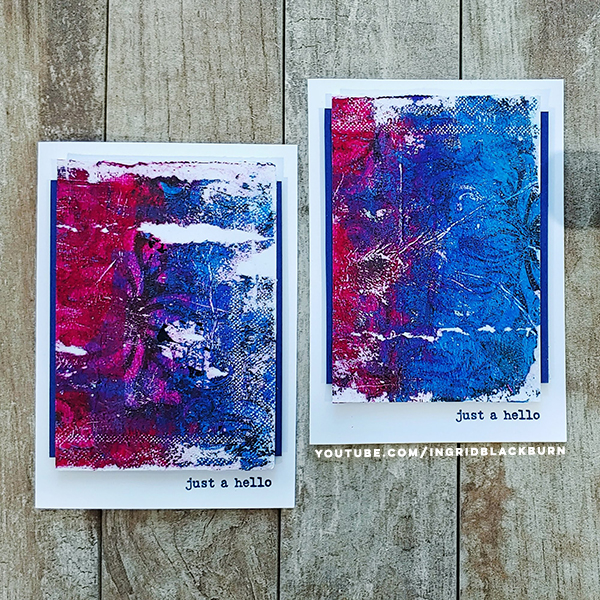
Sometimes simple cards can be quite powerful! While using color can be incredible, have you ever given the most basic color palette a try – Black & White?

Ingrid Blackburn Simple Cards

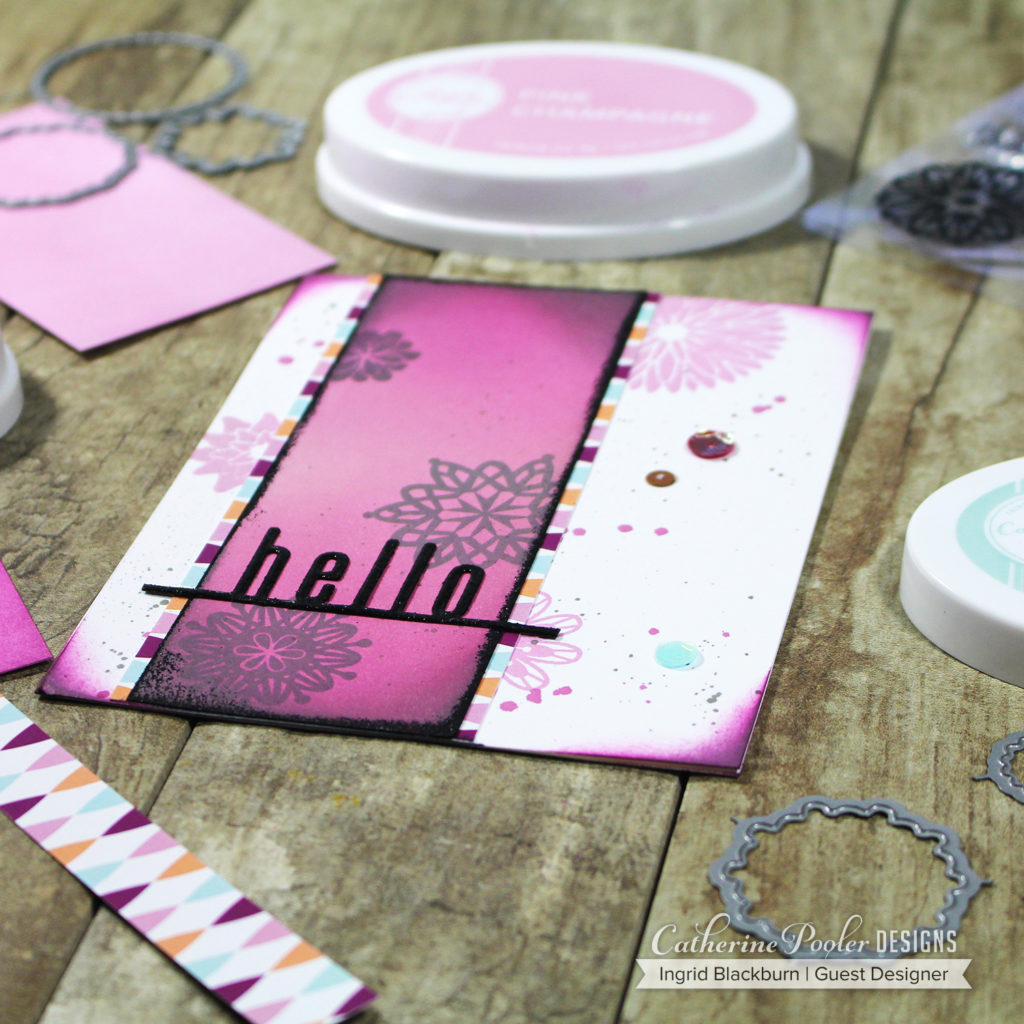
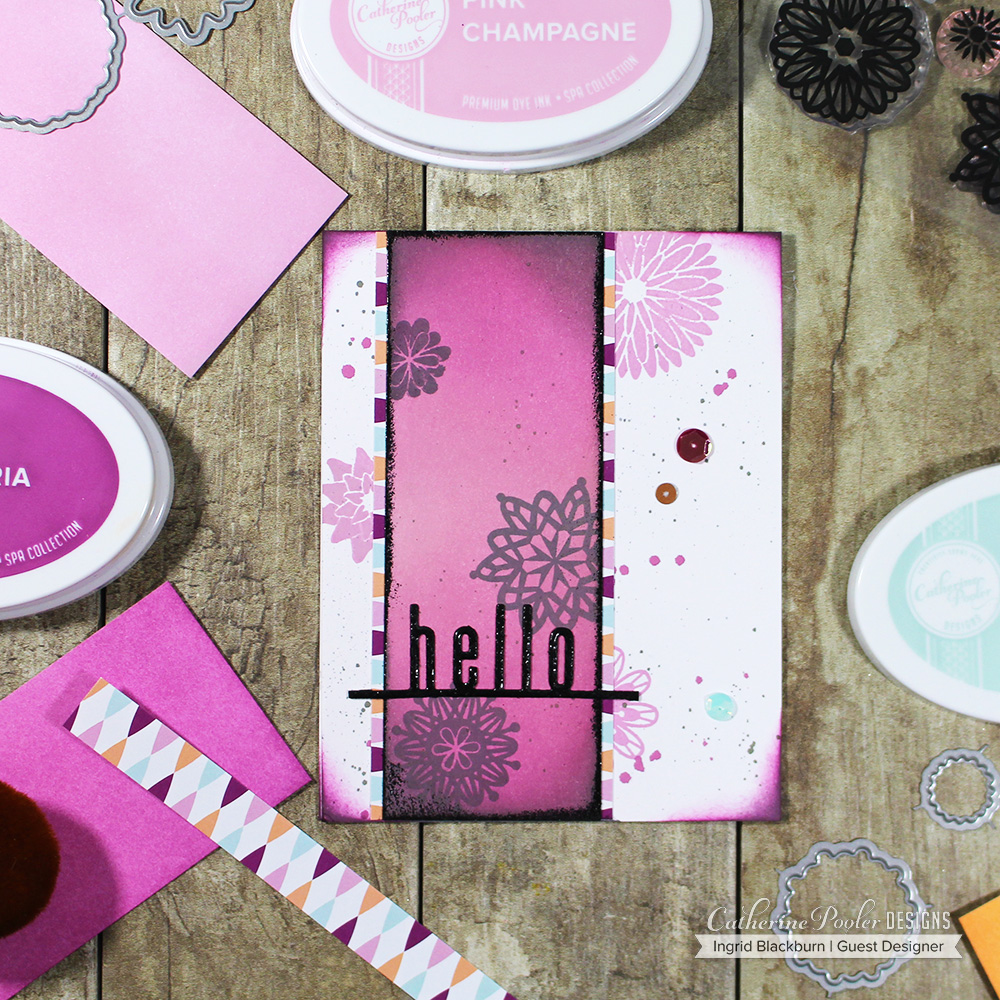
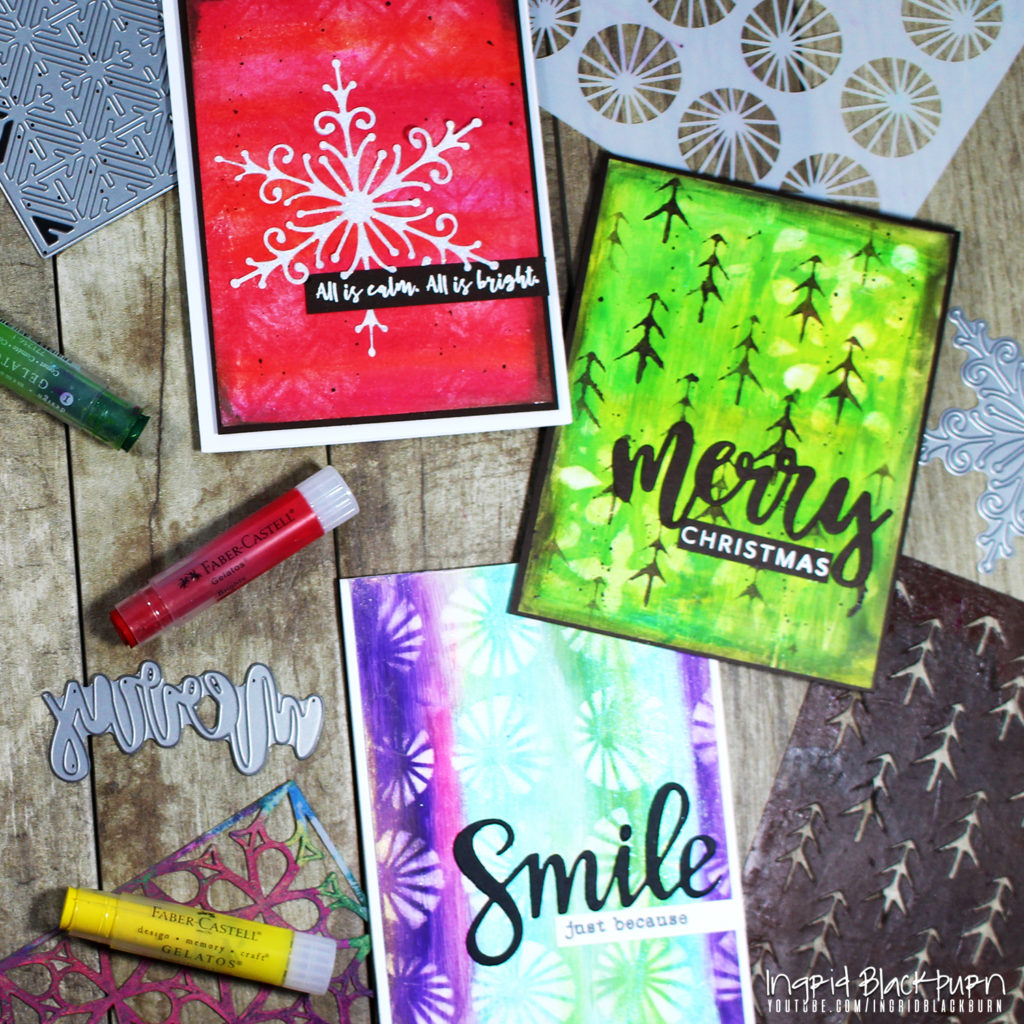
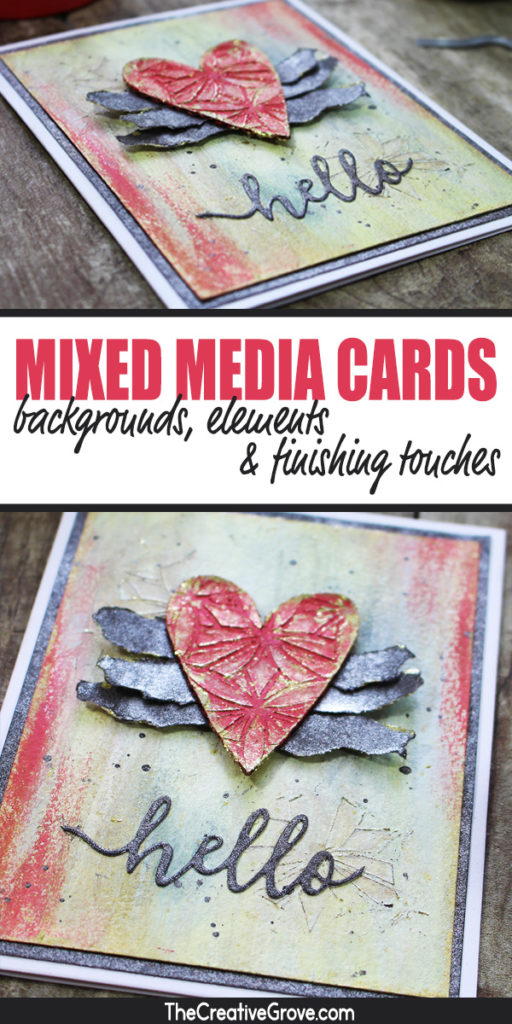
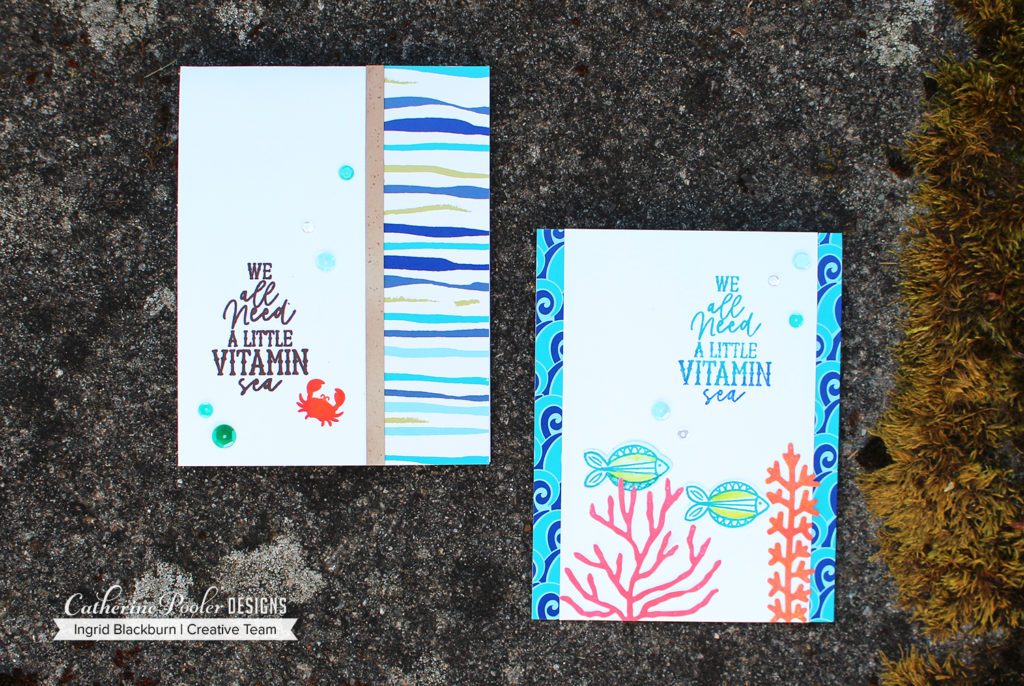
Today, I thought it would be fun play a little with some black and white card combinations. As you’ll quickly see, these three layout concepts can be made quickly, without a lot of supplies and make quite a powerful statement.

Ingrid Blackburn Simple Cards

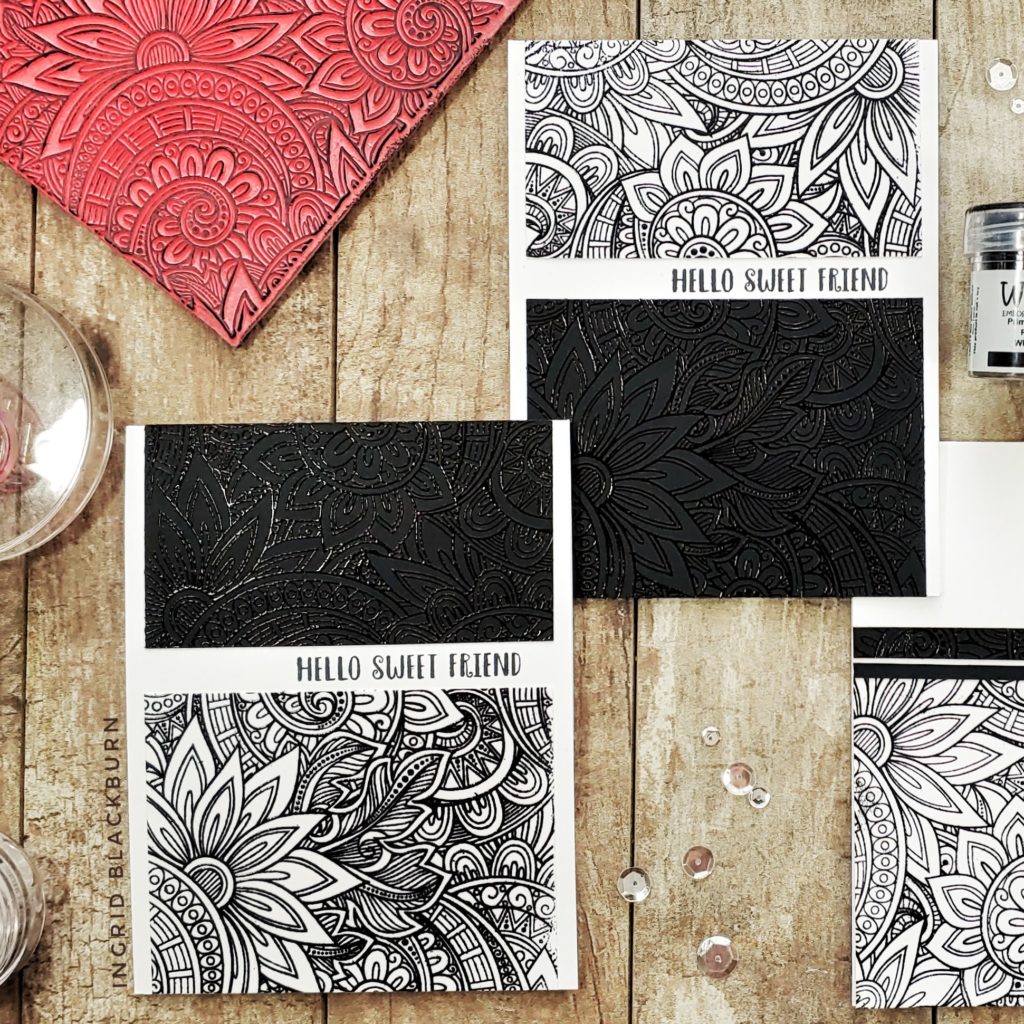
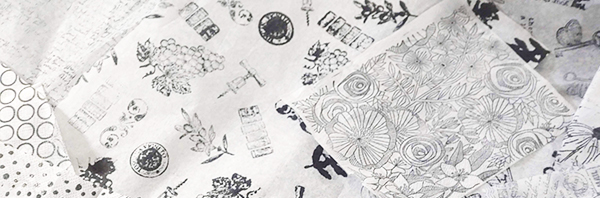
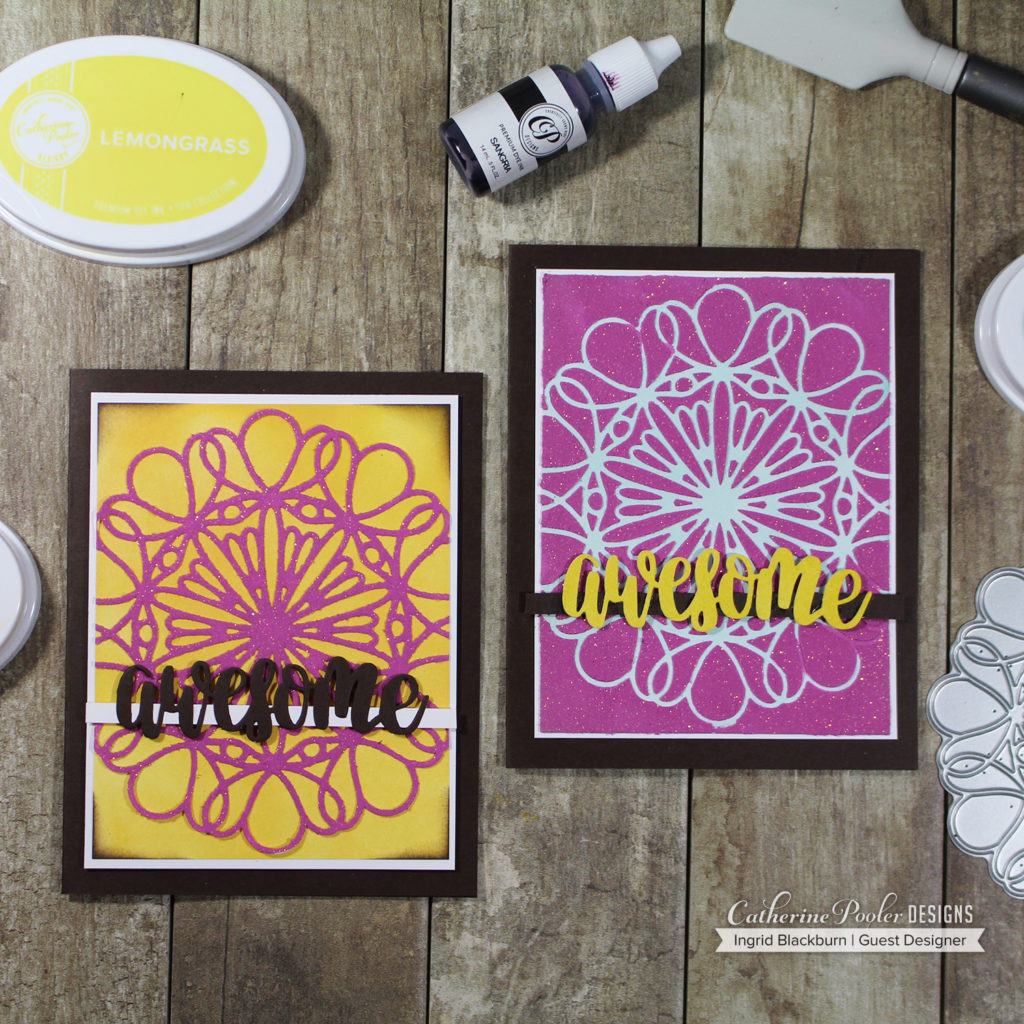
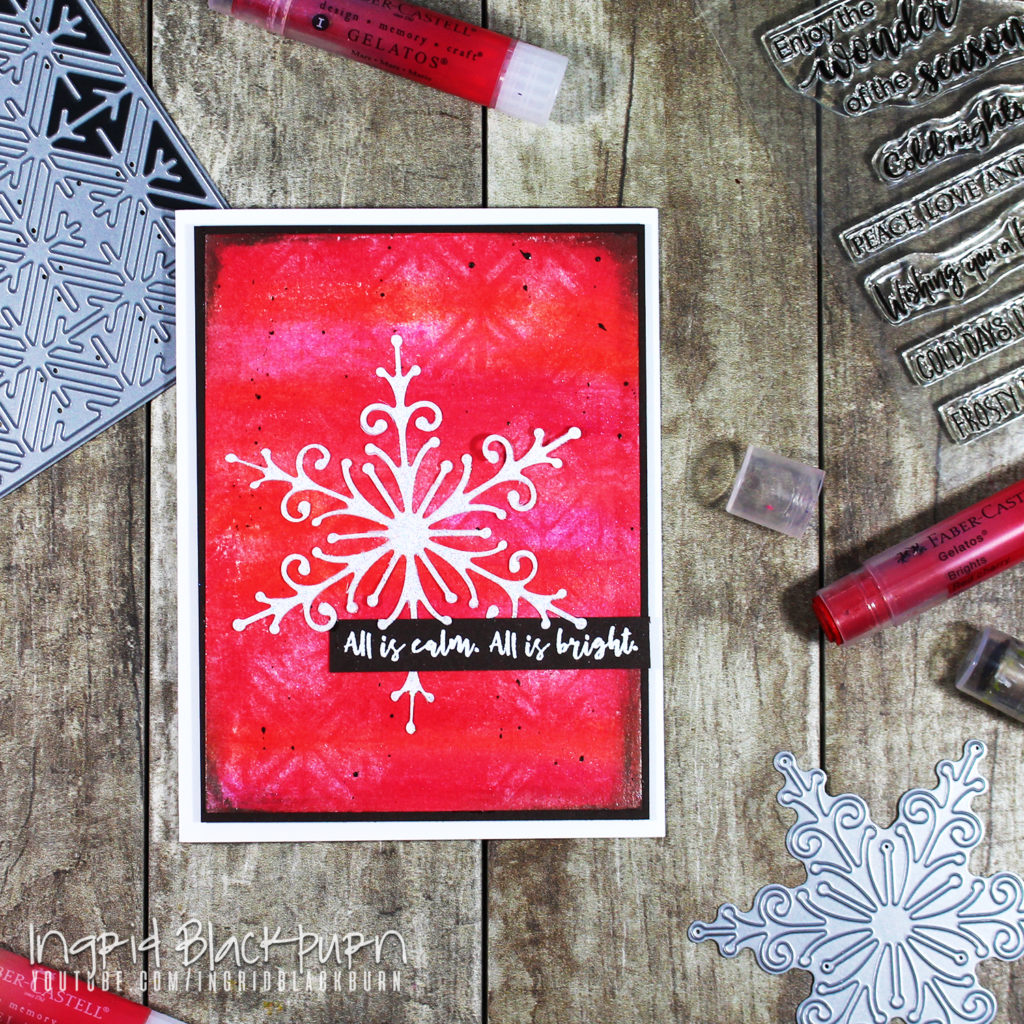
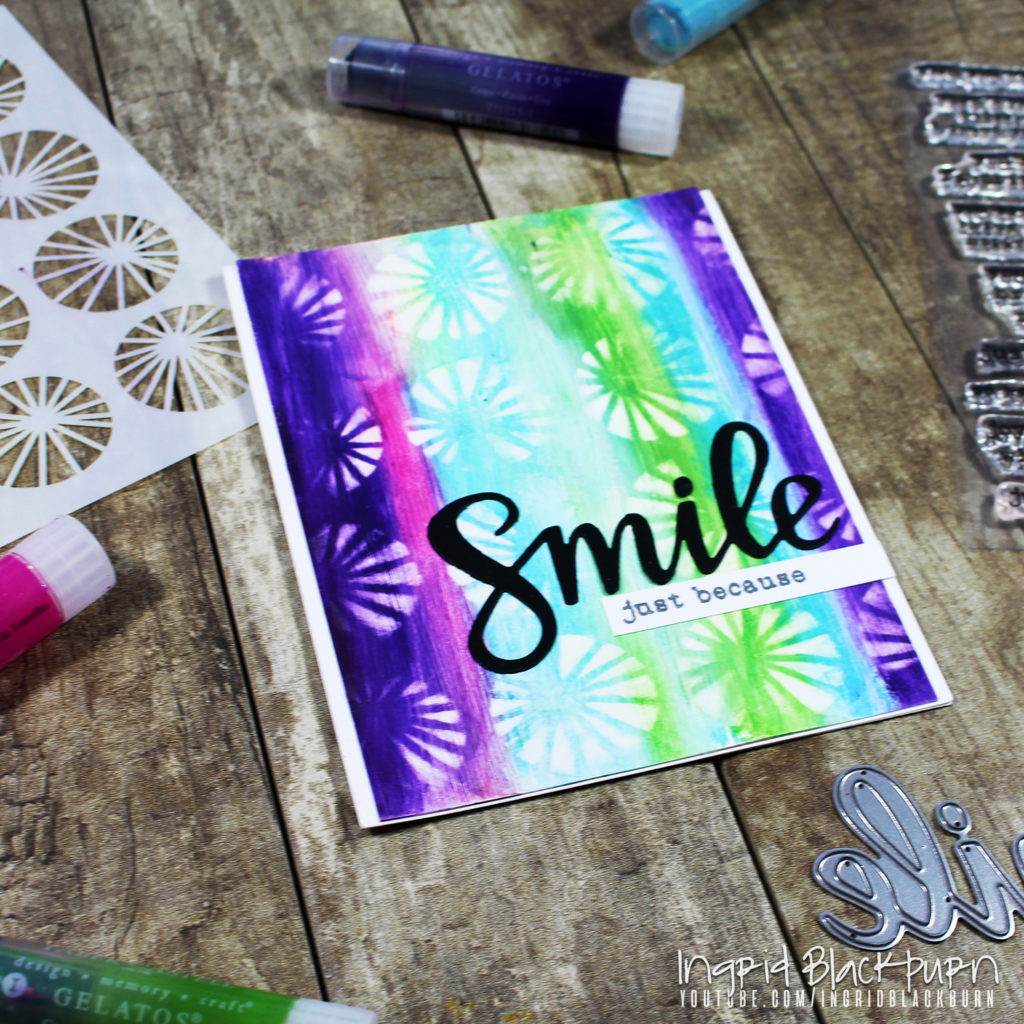
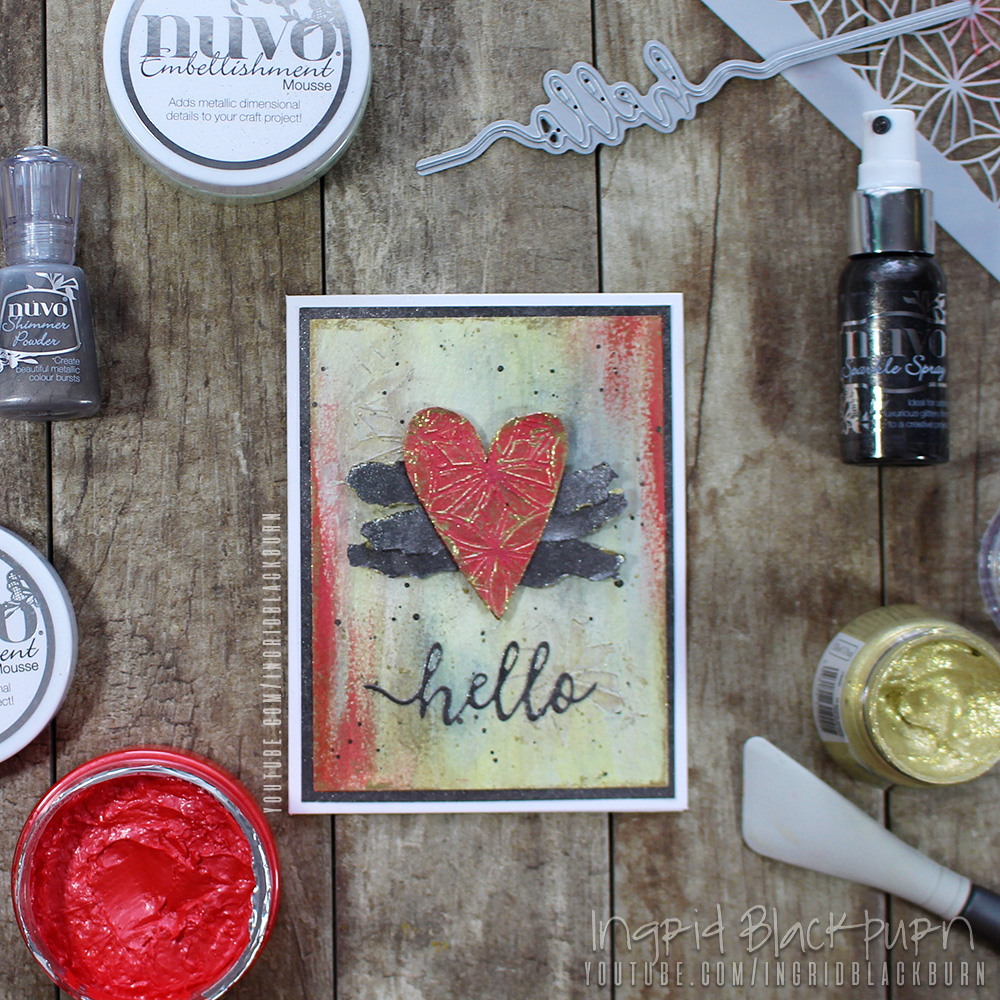
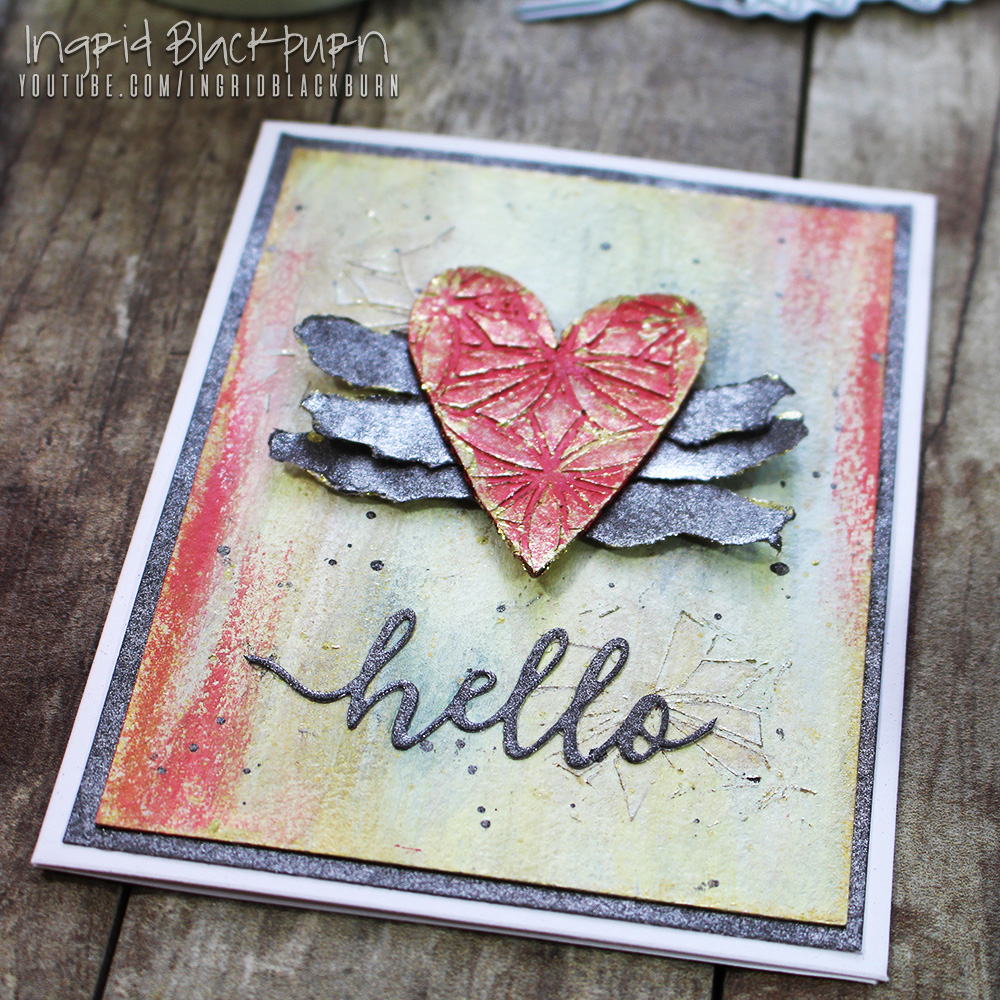
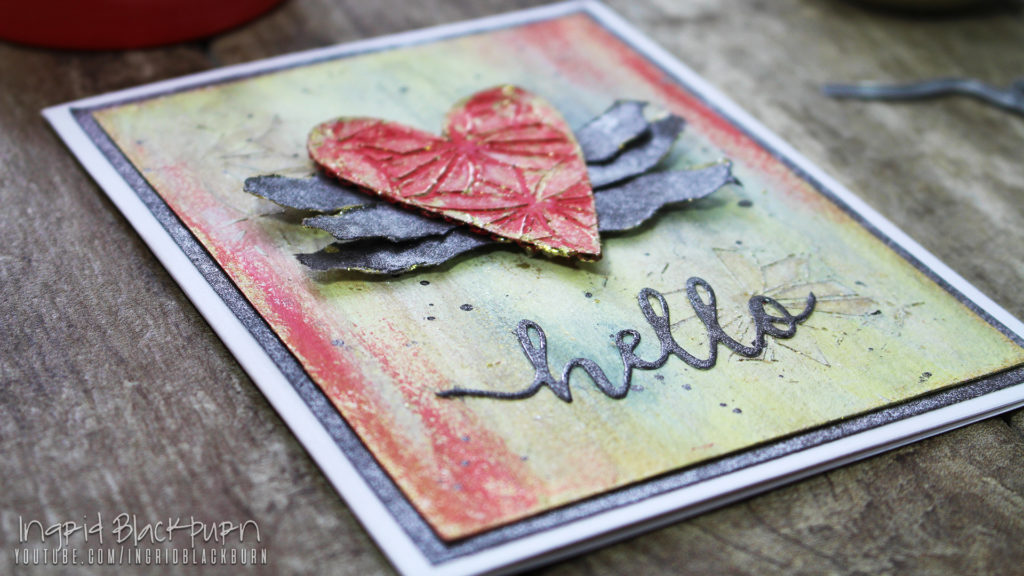
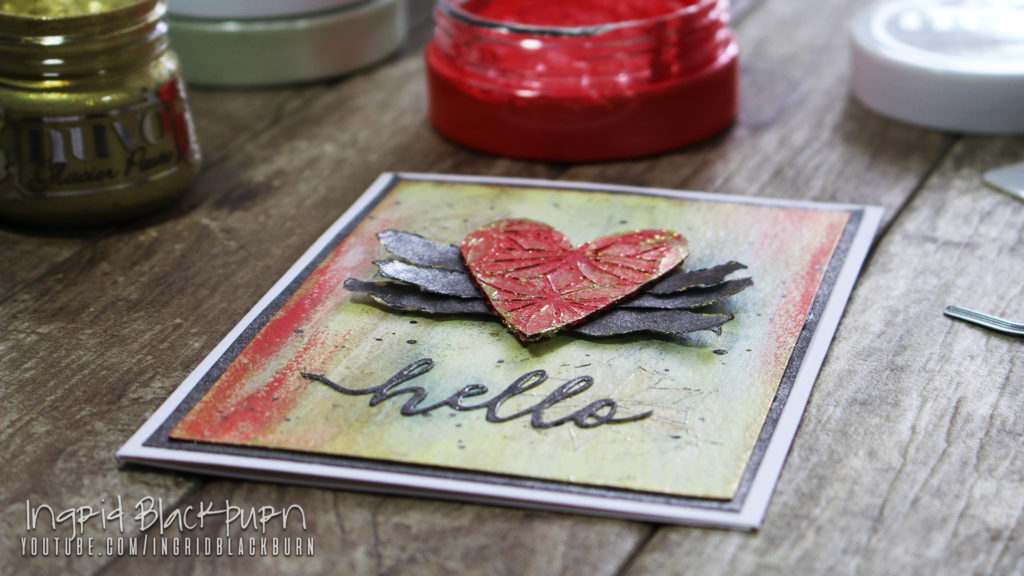
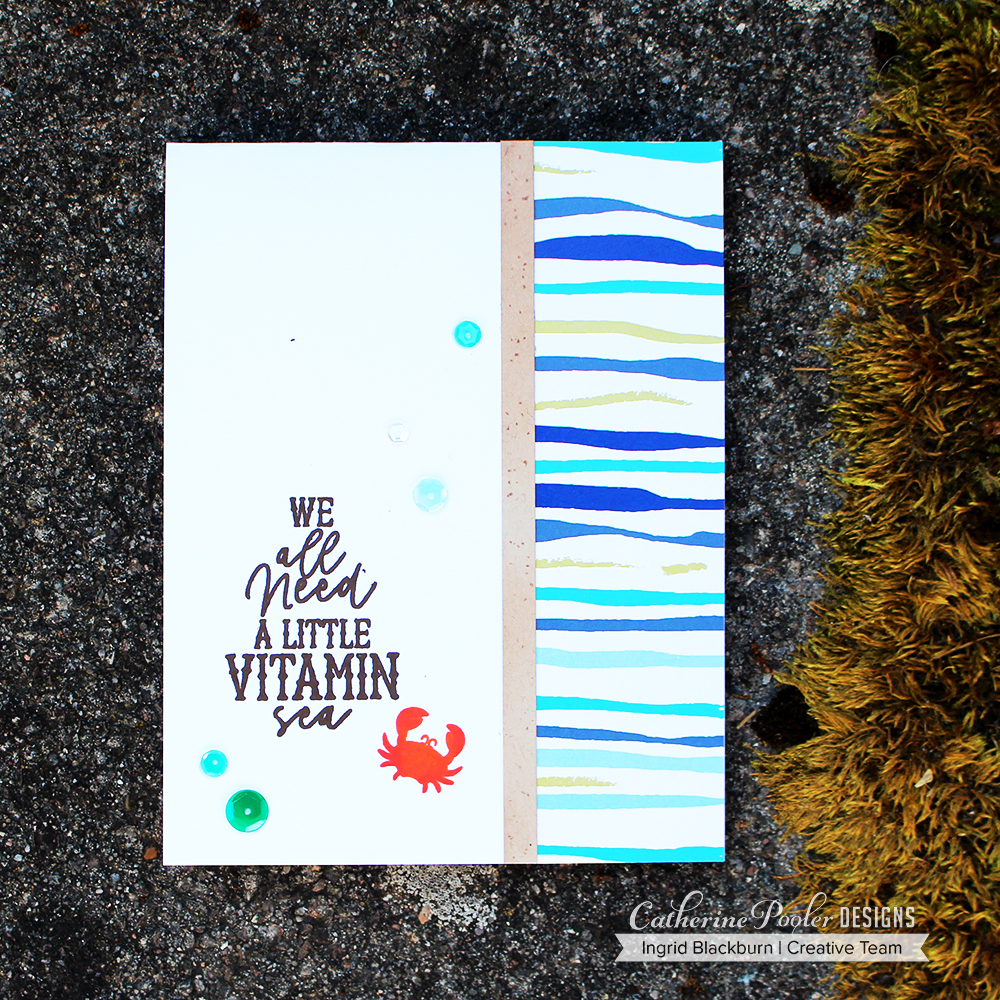
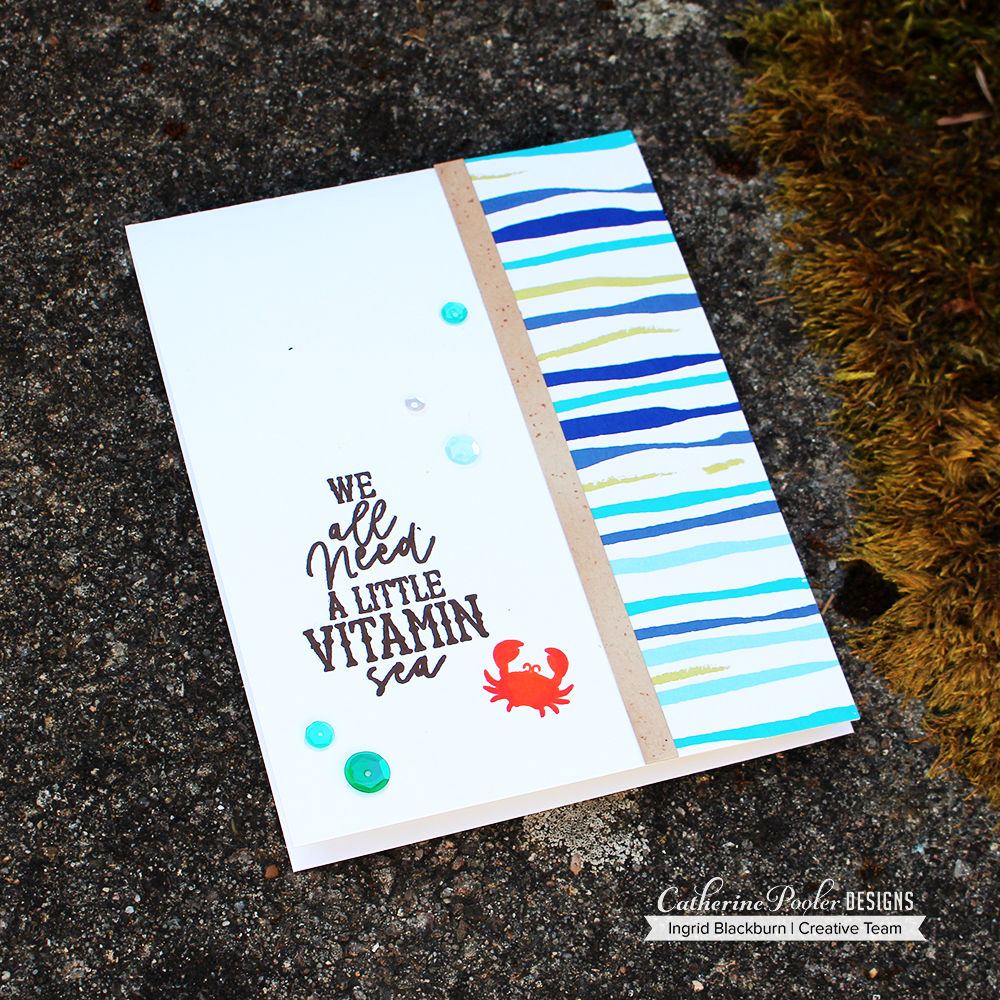
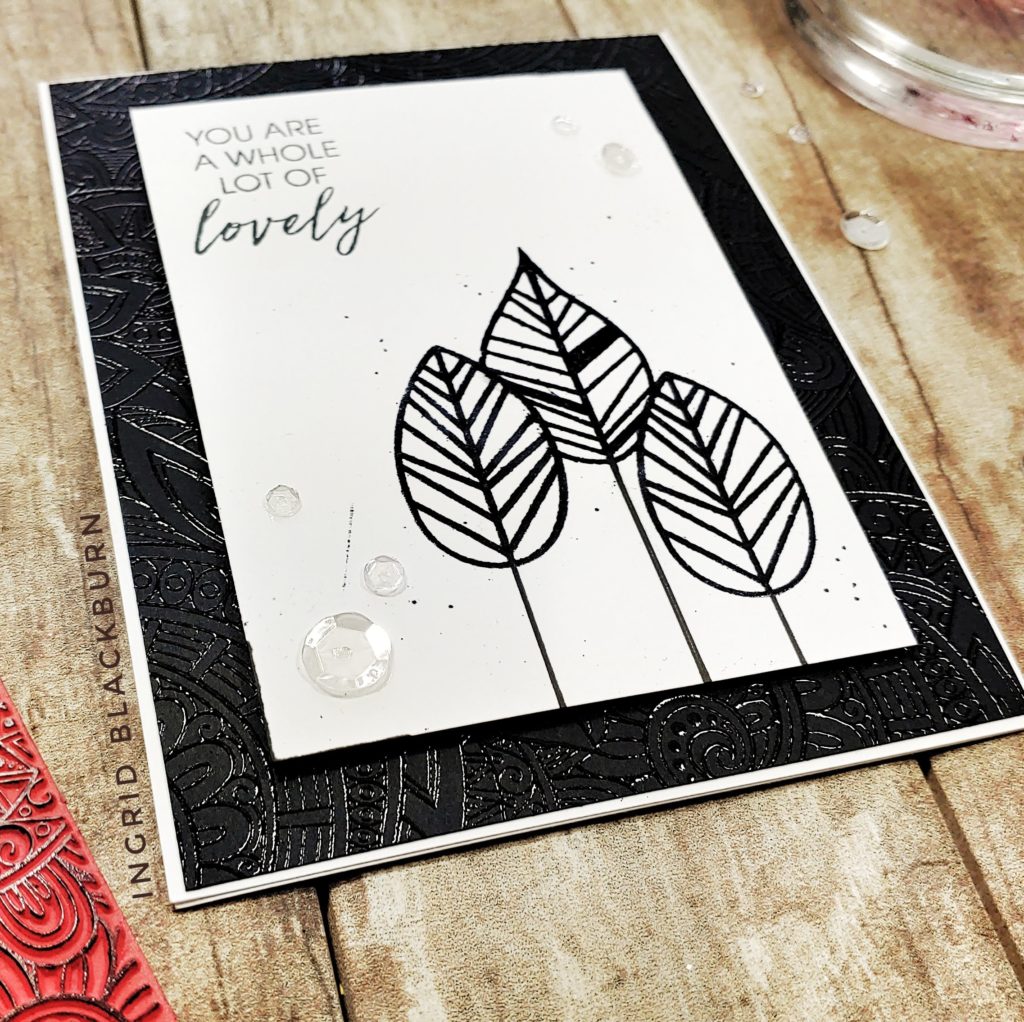
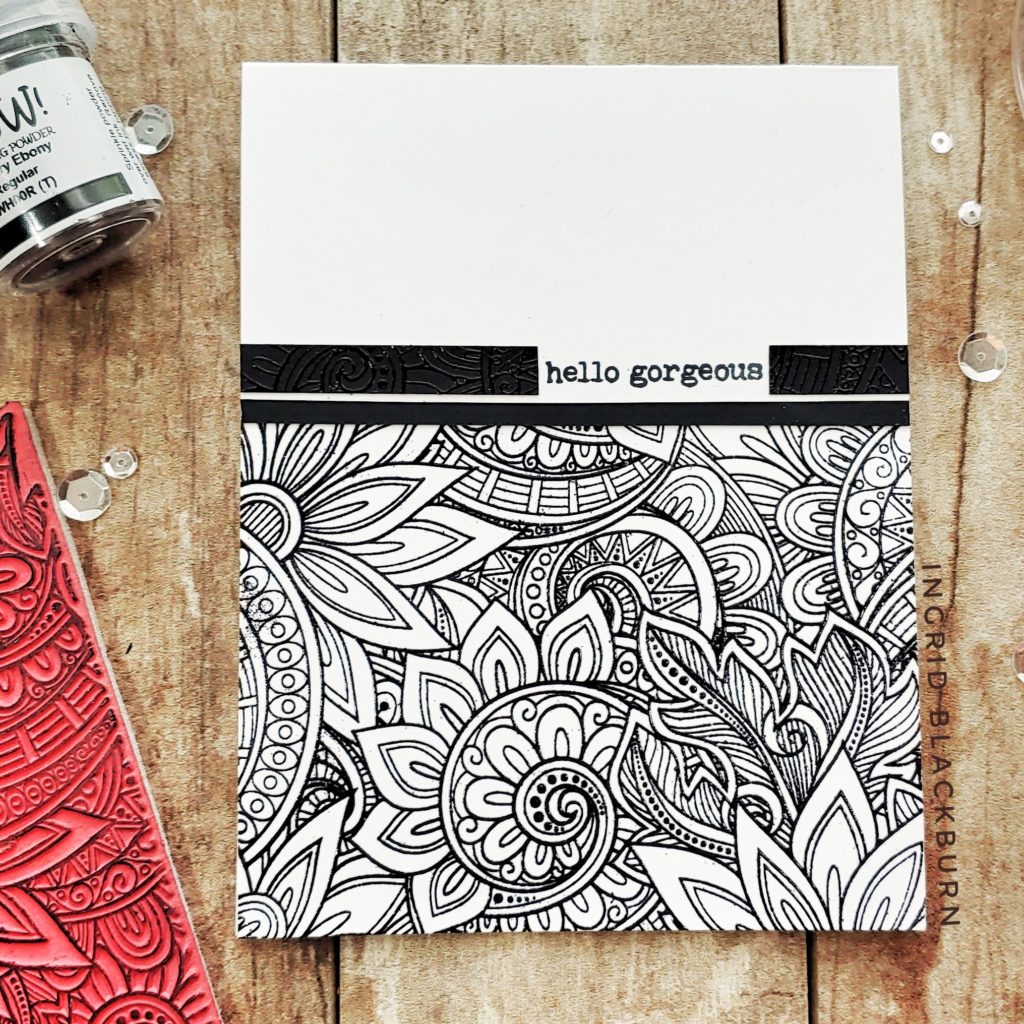
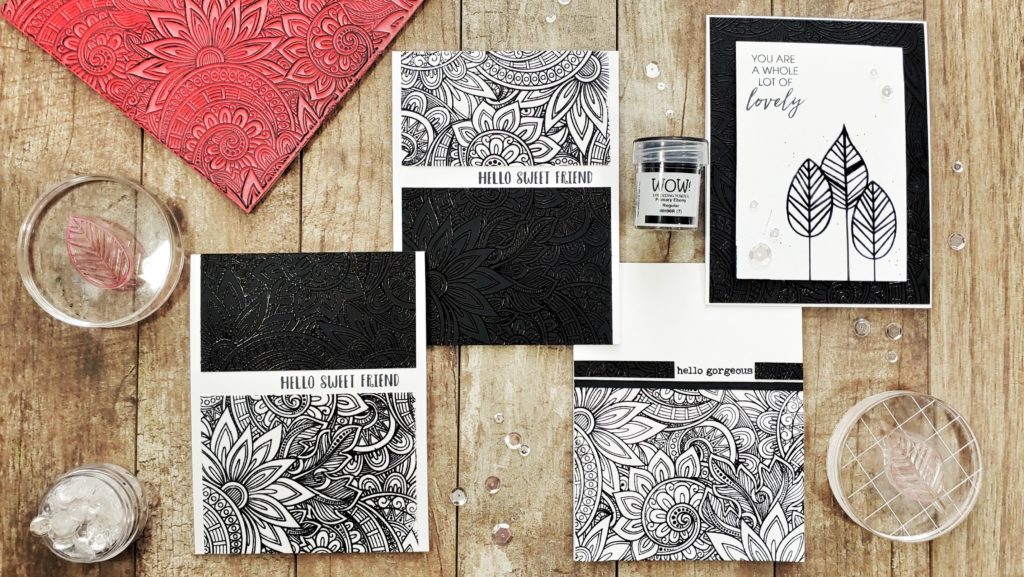
Some simple and classic heat embossing gives you powerful black and white simple cards. Playing with the mix of tone on tone and contrast really packs a punch, don’t you think? Have you ever tried this? Let me know in the comments!

If you want even more inspiration with simple and powerful cards, even some not so simple technique cards …. be sure to check out my youtube channel here too.

Ingrid Blackburn Simple Cards

The inspiration that was at the heart of today’s creations came from wanting to unite together behind our crafty sisters and brothers of color – in life, but also in the art industry. I wanted to stand together with you in support for the never-ending fight for equality all over the world.

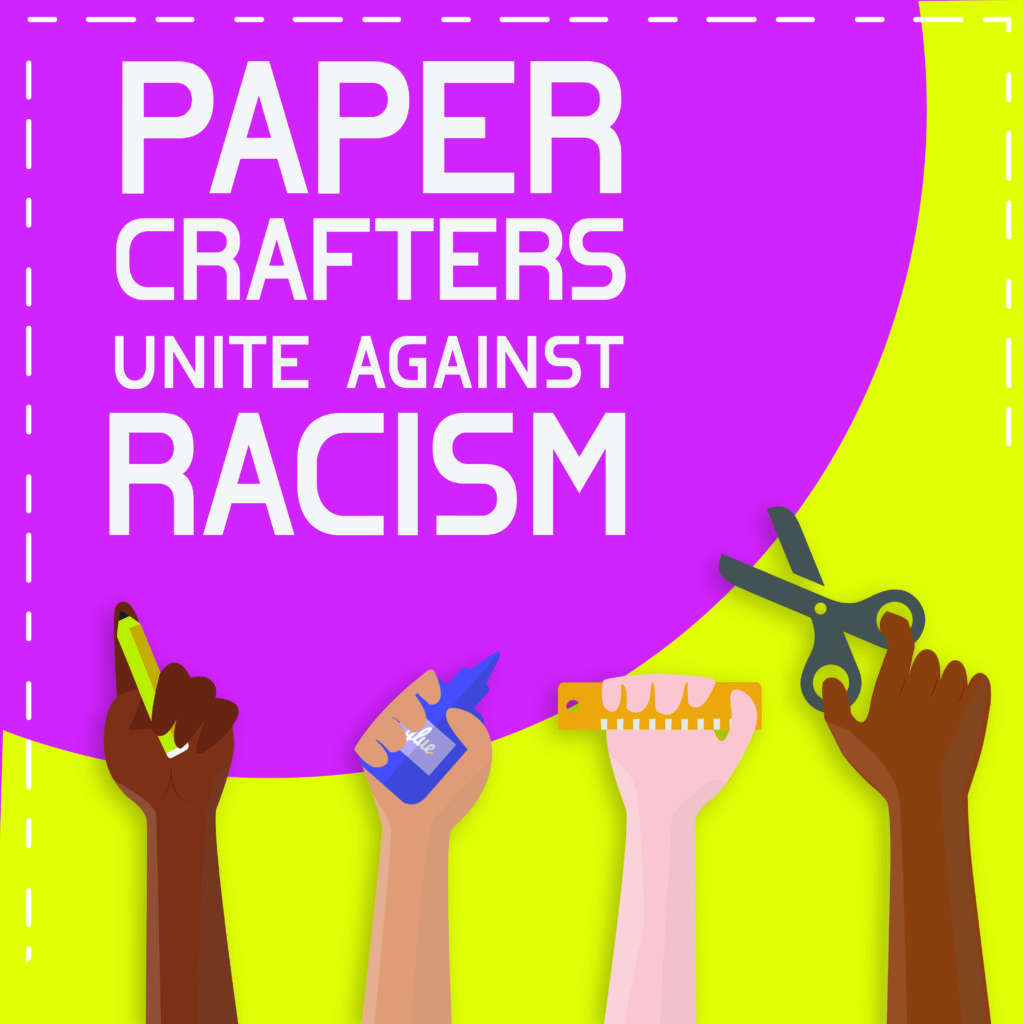
Today, some crafty friends and I are hopping from blog to blog, on instagram and youtube united. The hop is beginning with our crafty friends of color, and followed by everyone else. Hope you enjoy the beautiful inspiration we all bring to you, and find yourself some beautiful crafty voices. Thank you for your support!

To continue hopping for more inspiration, CLICK HERE for Charlotte’s blog.

The hop begins on Justine Hovey’s website HERE.

Thanks for spending a few moments with me today! See you next time…

Be different – Make amazing PAPER NAPKIN CARDS with a Gelli Plate

Paper Napkin Cards aren’t what they used to be. Have you ever used napkins or other frail papers in your art? Ever had the thinnest of papers fall apart on you? Tear as you separate them?

I’m just a girl (got gwen stefani stuck in your head now?) who LOVES that look you can get from a Gelli Arts® Gel Plate – (affectionately called Gelli Plate), a brayer, acrylic paints and a few stencils. Seriously – if you’ve never tried printing with a Gelli Plate, or used paper napkins on cards, keep reading…

I’m not talking about your everyday prints. I’m talking about those layered prints, that have the positive, negative and a whole lotta grungy colored goodness going on. So what in the world does that have to do with Paper Napkins you might ask? Well, let me start at the beginning…

Paper Napkin Cards

A few weeks ago I showed in this video exactly how I make cards quickly using the top layer of paper napkins. I always find paper napkin patterns that I LOVE. It’s become a little bit of an addiction. And forget about it around the holidays….that’s a great idea by the way…a stack of Christmas Cards made from an inexpensive pack ($3 for 80 focal images!) of Paper Napkins! It’s a no-brainer…

That video shows just how easy it is to make cards from a pack of paper napkins. Spoiler alert – they don’t even use adhesive to make the panels! Now you REALLY want to see how to make cards from paper napkins, huh?

Almost always, you’re only going to use the top layer for cards. That means that you are usually left with 2 blank layers unused. I told my youtube subscribers that I’d have some fun ideas for what to do with those left over layers, and that’s where we’re at today!

So, since today we’re making happy cards, I thought why not make THREE for you! The first two use layer 2 & 3 from the napkin – you know, the left over pieces.

I have a video coming on my youtube channel in the next few weeks, and you’re getting a sneak peek at the final projects. Are you a subscriber? If so, definitely tell me in the comments!

Here’s a little something to help you GET inspired and GET creating today with your gel plate.

If you want to know how to use one…I’ve got a great how to use a gelli plate video here and this one shows a fun multi layered print that showcases 11 ways to improve your card design.

The Prints

Now you’re going to need the unprinted layers from when you separated your napkin – it’s okay if they have some ghost imaging on them. I’m going to show you two ways of getting some COOL pieces for your cards and mixed media projects.

If when making your cards, you run up against needing an easy way to separate the layers, I have a way to do that. It’s quick, easy and works every time. And the video is only 2 minutes…even better:

CLICK HERE to watch in HD on YouTube

Now that you have your layers separated, our first two projects use white, plain, layers. This is perfect for those prints that still have a ghost image on them too.

Did you subscribe to my youtube channel? I post weekly videos on a variety of card making and mixed media projects. Hope you pop by!

For these two Paper Napkin Layers, you’ll need to create a fun pattern on your gel plate with whatever medium you want. I used a Gelli Arts® Gel Plate, a Brayer, Acrylics, stencils and items that create texture – like the above one – large bubble wrap.

Don’t leave your napkin down too long, pull your print right away. Be careful, as it’ll be wet and napkins can tear easily. This one below tore. To fix it, I adhered it next to each other. It ended up creating this cool torn look.

Notice the cool texture from the napkins? The pattern from the embossed edge? I’m telling you – it’s the COOLEST textured look.

And you don’t need anything complex for a sentiment. I used some go to sentiments like the ones from the stamp set Fluttering Friends.

Custom Gloss Spray Prints

For the third project, get a little creative and create your own papers – who needs to buy those?!! USE WHAT YOU HAVE. First up, try stamping with your favorite background image in archival ink on the napkin layers or tissue paper.

I had the need to be a little creative for about 20 minutes one day. Look at all these you can create! I used LOTS of backgrounds by Catherine Pooler, some Unity stamps (see those flying keys…love a good nod to Harry Potter) and a few other favorite stamps.

This way, when you need something interesting for a project, you have a cool stash. Best part, you’re using what you already have – doesn’t get better than that! Isn’t that cottage garden background by Catherine amazing!

For this project, I thought it would be fun to use one of my favorites (not pictured above) – Rondi’s Window Background Stamp. I love this background stamp. You can create some of the most gorgeous cards with this stamp. Now, I got a little creative here, and didn’t use a gelli plate! GASP!

Instead, I thought it would be fun to break out some of my new Dina Wakely Gloss Sprays and see how well they color fragile papers. Isn’t that tie dye effect just gorgeous?!! I love that hello die by Catherine Pooler, it’s the perfect compliment to backgrounds!

And speaking of the PERFECT compliment. Like those super THIN stripes? That’s the single best background stamp you could EVER own! It’s by The Ton and Effie outdid herself on that one. They are thin, perfectly thin and the best compliment to any background. Enough to hold interest, yet not steal the show.

Hope you enjoyed those!!

The Happy Hop

It’s been quite an interesting few months, and we all have been cooped up in our homes! A few companies decided that we all need a little joy and happiness.

Can you believe there are 146 stops on the hop – seriously…can you believe THAT?!! Crazy, right?

Be sure to hop on next to the incredibly talented Kevin Bray Here!

Happy hopping, be sure to subscribe to my youtube channel for weekly inspiration, and stay safe!

5 Card Ideas

5 card ideas with 4 new ink colors in the Spa line of ink by Catherine Pooler. BOOM! Or as my good crafty friend Laurel Beard likes to say…BOOM BOOM!

That’s right, Catherine released the final four colors to complete the Urban Oasis collection. These are spa inks, so muted colors – but boy do they pack a punch when used together – just look!

The Creative Grove Ingrid Blackburn

I love good solid card designs, and here are some fun ones for you. Because we always need go to looks that are always home runs, right?

But wait, there’s more…In addition to these 5 card ideas, I even have two videos for you. SOLD! Let’s dive right in…

Frosted Sangria Blossoms – the card that almost wasn’t. I posed this question to my newsletter subscribers first and then to my community over on YouTube. Sometimes a card just doesn’t work out the way you want it to. This first one was just that.

5 card ideas

Now, mind you… it wasn’t the stamp set – it’s a great elements set that is quite versatile. And, it most definitely was not the inks. I don’t even think it was the layout. Something just didn’t click.

I filmed my struggle for you, but was unsure of whether or not you’d want a video? The card isn’t rocket science, and my videos are more about techniques, not just making an easy card like this. (#shameless channel plug…Subscribe here lol) That’s not why you watch my videos, let’s be honest.

So what am I even talking about? It’s about the very real struggle we all sometimes go through when cardmaking – it just not working out as planned, and troubleshooting that very struggle, along the way. If you do want to see a video on THAT, leave me a comment!

And more importantly, if you don’t – me mentioning it here is enough – that’s totally fair, and I definitely want to know that too. 🙂 Let’s get to it, shall we?

Card Idea no. 1 – Frosted Sangria Blossoms

Spoiler alert – without all the little, I like to call them ‘somethin’ ‘somethin’ techniques on this card – it just does NOT work. Do you like it?

5 card ideas

You’ve heard my little story… So, should I make the video, or pass? Would you watch? Feel free to tell me what you would be interested in seeing too, that’s always of great value to me.

Card Idea no. 2 – The Classic Strip

You’ve seen it before, and you’ll see it again – the classic strip card. No that’s not a dirty word…seriously get your mind out of the gutter…lol!

Here’s the deal – sponge, watercolor, smoosh, however you wish to do it, and use all the colors of the rainbow. I chose to use each color of the now complete Urban Oasis spa ink collection by Catherine Pooler. These inks are muted, and SO my thing.

Next, Cut down little 3/8″ strips, assemble, lop off the edges and matte. THAT’s it. BAM! (inner Emeril Lagase). And you have a super easy card to make. Seriously, think patterned paper – theme it, white on white, embossed black on matte black – whatever you want!

You just got some great ideas, didn’t you? I see the wheels turning….

Card Idea no. 3 and no. 4 – DIY Colored Glitter Paste

Okay, the video on this one says it all. Actually it shows it all. These two cards do NOT photograph as pretty as they are. The texture, sparkle and strangely weird color combination are very cool, you’ll just have to trust me on that.

Watch on YouTube

Making your own glitter paste could not be ANY easier. Paste + Glitter = Glitter Paste. Okay – spoiler….but did you see what I did in the video to color that paste? Is it with perhaps a tool you have in your own craft room, which you forget to use all the time? Hummm…….

Card Idea no. 5 – Galaxy Card

Are you addicted to galaxy cards as much as I am?

Watch on YouTube

I can not tell you how many I have pinned, between aurora borealis cards, nebula’s, and just galaxy skies – we’re talking hundreds…if not a thousand inspiration photos. Here’s a video on just how easy it is to create your own with ink blending. Pay attention the the end, that final corner tip makes the card!! (seriously watch it, it’s only 5 minutes).

I have a killer watercolor version coming in the next few months – that’s a true painting tutorial, you interested?

Okay – so if you haven’t heard yet….Catherine Pooler released four new ink colors and a whole slew of new products – some very cool products. I just used one stamp set, a little paper and sequins…wait till you see the rest. Click here to see those.

Till next time, thanks for reading, watching and if you haven’t already (get on that…) commenting!

Ciao –

Here’s what I used…. I’d love it if you shop through my links – it keeps me making videos for you – you know, those supplies are not cheap! I appreciate you supporting my art – check out the Patron page too! 😉

I’ve Moved

SO….did you know that I’ve MOVED! Yup, my new (yes, I know this is the second time this year), let’s try that again….my NEW instagram account is….

@IngridBlackburn

Be sure to stop by, follow and like a few of the photos. I’m taking a trip down memory lane with some classics before dropping in some KILLER new projects.

I can’t wait to share with you. Leave me some comments on the pics, tell me what you like, what you want to see or just say Hi!

Till next time – ciao!

Easy Gelatos Techniques

Easy Gelatos techniques are something that everyone should have in their crafty toolbox. So my goal is to teach you several quick ways to punch up your backgrounds and projects with this video tutorial. Because everyone needs to know quick easy ways to create stunning and impactful backgrounds.

Justine Hovey asked me to create a fun technique video for her YouTube channel. So I thought, and thought and thought about what I wanted to teach you. Naturally, Gelatos entered my mind.

So I threw together a few ideas, grabbed some favorite supplies, and created three projects for you. And each project has my heart in different ways. Because they all are impactful, colorful, yet totally different. I can’t wait for you to see how.

Let’s get to it, shall we?

Click Here to Watch on YouTube

What did you think? I am definitely going to be making a small stack of the first one for cards I’m sending out this season – yup, definitely!

I know you all probably have Gelatos by now collecting dust somewhere, or hopefully you’ve dusted them off recently. Here are close ups and a few thoughts on the three projects for you to use as inspiration in creating your OWN backgrounds.

These easy Gelatos techniques are definitely a staple, so have fun exploring all the cool ways to use your supplies!

Rustic Christmas Card – Easy Gelatos Techniques

You can use several shades of green to create the perfect backdrop for rustic Christmas cards. I love that Merry Die by Concord & 9th. Yup, it’s my absolute favorite one ever!

And the trees stencil by Stamplorations – isn’t it AWESOME?!! Seriously – how could you NOT have those in your stash by now? Because I use them ALL the time…lol. PS – they’re linked below – again if you don’t have them.

So, what are YOUR favorite Gelatos colors? Because I would love to know – be sure to tell me in the comments below!!

Little Touches Make Projects

Who said snowflakes have to be blue? This red background is so iridescent it’s NUTS. And the fun snowflake vanishing technique in the background is the perfect backdrop for this uber sparkly snowflake die.

This project is a good example of how to creatively use dies. And the sentiment by Penny black is perfect. So you don’t need too much to punch up backgrounds. Think simple accents on your cards. Let the backgrounds shine.

But I think my favorite accent for this one are the rustic Iced Coffee Gelatos corners, because they complete the card. Don’t you think?

Fun and Funky Gelatos Techniques

Sometimes you just have the perfect stencil and funky colors in your stash to pull off something special. You can add simple colorful stripes, overlap colors and then use one rockin’ die, and voila – you have something magical.

I love that cute little sentiment strip set by Scrapbook.com too. Because I’m a sucker for typewritter font. Simple accents make backgrounds pop. So strip it down when you spend time to create fun projects like these.

Okay, seriously…what are your favorite Gelatos colors? Have you told me yet in the comments…lol? Because, my ALL time favorite three colors – and I’m limiting myself to three which is HARD….are Iced Coffee, Margarita Mix and Stardust.

easy gelatos techniques

What about you?

Leave me a comment, I’m dying to know!

Now if you haven’t seen the video over on my good friend Justine’s channel yet – what are you waiting for? So be sure to subscribe too – she puts up some fun content.

And if THAT wasn’t enough content for you….check out these gelatos posts too:

All the supplies are linked below. Happy creating!

Mixed Media Cards | Backgrounds, Elements and Finishing Touches

Today I have a cool mixed media cards tutorial for you. Even if you aren’t necessarily into mixed media, or the thought of it scares you – there are LOTS of little golden nuggets in this tutorial. You’ll find little techniques that you can adapt for any project. Let’s dive right in.

Mixed Media Cards Tutorial Tips, Elements and Techniques

Today we’re going to play with some Nuvo mediums.

I’ll be honest – Nuvo makes some insanely versatile products. If you’ve never had a chance to try them, by the end of this tutorial – you’ll definitely be itching to add them to your stash.

I’m going to break this project into sections for you. We’re going to play with:

  • Embellishment Mousse
  • Glacier Paste
  • Shimmer Powders
  • Sparkle & Mica Sprays
  • Stencils & Dies

CLICK HERE to view on YouTube in HD and Full Screen

The Background

For the background, we’re going to use several products. So, together they are going to make a cool, textured abstract which would also be great on it’s own.

You’ll want to use a piece of 140# Cold Pressed watercolor paper. Because we’re going to use a little water, and you’ll need your paper to absorb that. I always use the rougher side, because it helps with texture and holds water beautifully.

Watercolor Paper works beautifully for mixed media cards, mixed media paper too, though it is a bit thinner than 140# cold pressed paper.

How to create DIY Mixed Media Cards and Elements

Using a spatula or palette knife, spread a little embellishment mousse onto your glass mat surface. TIP – You don’t want to put your fingers into your mousse. If you do, you might leave behind oils that can contaminate your medium, which can result in a little mold to grow.

I used Honeydew (super pale green), and mixed it with custard cream (light yellow). Randomly spread the mousse over your piece – you can leave areas empty for the custard cream to fill. I personally find it spreads the best with your finger.

How to create DIY Mixed Media Cards and Elements

Once you have the look you want, add some light stenciling with an embellishment mousse using the Tonic Studios Linking Circles Stencil and your finger. This way you get a light stenciled pattern with raised edges along the pattern. This will help to trap color and create an interesting complimentary design in the background.

Heat set, then add some light watercolor using Nuvo Shimmer Powders. I started with Lunar Rocket and then added some Storm Cloud in small areas. This one is quite intense – so start small. Heat set again.

How to create DIY Mixed Media Cards and Elements

Add balanced color to opposite edges using Fusion Red Embellishment Mousse. The result will help to pull the project together once the heart is adhered.

Spray some Antique Gold Mica Mist onto your Glass Media Mat, and go over your background from the edges inward by painting it on. The result i s just a subtle shimmery effect. Heat set your background.

Easy Embellishments for Mixed Media Cards

Cut a heart from some scrap cardboard – I used a thin corrugated cardboard on one side – smooth on the other – from a box. You can always gently tear apart a shipping box. That way you will get a thinner piece of cardboard with texture and smoothness.

Color your heart with Fusion Red Mousse and then stencil the Linked Circles pattern with more Embellishment Mousse and Nuvo Spatulas. That way you’ll have a nice thick application that is raised and holds the pattern well. Heat set.

How to create DIY Mixed Media Cards and Elements

Use Thinner Cardstock

Spray a piece of Neenah 110# Exact Index Paper with Morning Fog Sparkle Spray. I use it for monoprinting and it is much more lightweight than traditional cardstock. And, you’ll find that it’s easier to tear.

Mixed Media cards can have many layers, so sometimes you need to use a thinner cardstock.

Coat your paper thoroughly. That way you won’t have any blank splotches. You’ll want your cardstock to be large enough to matte your background, and have excess for your word die and torn strips. That way you’ll have enough to go around – 5.5 x 8.5 inch worked for me.

How to create DIY Mixed Media Cards and Elements

Cut out your hello and trim for your project using the Tonic Hello Stentiment Strips. I also cut some extra words out of the center of my background matte – why waste all that gorgeous sparkly paper you created, right?!! Do you do that? Tell me in the comments.

Tear your strips so that the rough side is away from the front. You’ll tear away from you. You’ll want them to be about 3/4 – 1″ wider than your heart. So that they proportionately support the heart.

Go To Finishing Touches for Mixed Media Cards

Edging

Using your finger – add some Golden Era Glacier Paste to the background edges, lightly over your background, the edges and lightly over your stenciled heart.

Edging is one of my all time favorite ways to punch up mixed media cards.

How to create DIY Mixed Media Cards and Elements

Water down some glacier paste on your media matte with your Tonic Light Mist spray bottle. Edge a few spots of your torn Morning Fog Sprayed pieces for some dark grey/gold contrast, and you’ll notice that it makes those little pieces just pop!

Flicking

Add a little Morning Fog Spray to your glass Mat using the thin plastic tube of the spray bottle (vs. spraying & it’s flying about). Using a paint brush, flick both the watered down Golden Era Glacier Paste and Morning Fog sparkle spray onto your background. The result adds in that little bit of filler the project needs. You’ll notice that it pulls it all together.

How to create DIY Mixed Media Cards and Elements

Seriously, how GORGEOUS is that?!!

Height

Add some liquid glue to the back of your heart, and arrange your torn pieces. Pop your heart piecing up onto foam tape and add to the top 1/3 of your card. Glue your hello (snipped) onto the background and adhere the card to a white card base. The lifted result adds the necessary drama…Viola!

diy mixed media cards and elements

As you can see, you too can create mixed media cards that are incredibly sparkly – the photos don’t do it justice. I definitely encourage you to try it yourself. Tag me in social media for sure – I’d LOVE to see. Products are linked below – definitely add the mousse and glacier paste to your stash – you’ll be happy you did!

Mixed Media Cards

How to Draw Underwater Scenes with Colored Pencils

Have you ever wanted to draw underwater scenes or just create your own little world? You’d be surprised at just how easy it actually is with Colored Pencils. No, you don’t have to be an artist – so those of you who immediately said – but Ingrid, I can’t draw…keep reading!

The key to keeping this particular project real, is to create a super light background, and inter-twine the top with the bottom. You want to keep some basics in mind – things up close are larger, and things farther away are smaller – so when creating your dunes – the ones in the foreground are large and gradually get thinner and smaller as they recede into the background. Water too. That helps give it a realistic feel.

I added the shadow of the fish after I shot the video. The sunrays are streaming through the water directly from above the fish – so the shadow is below him.

You too can create this little world. Trust me when I say it’s easy – just take your time. When you draw underwater scenes with colored pencils – they are forgiving. Erase, get it how you like, just have fun. Keep it on the lighter side – you can always go darker.

Here’s a detailed video of the entire project for you. Enjoy!

Be sure to leave me a comment over on youtube, a thumbs up if you liked it and subscribe if you haven’t already! Click Here to see it in HD over on YouTube.

Click to Watch on YouTube to expand and see full screen

Thanks for watching – I hope you enjoyed this project. It’s a fun one. And if you missed the new release by Catherine Pooler – catch it here.

If you want to see more colored pencil projects – tell me in the comments below! 🙂

SUPPLIES

Below are all the supplies I used for these projects.

Easy DIY Beach Cards

Ever wanted to create some easy DIY beach cards? We’re in the height of summer and what says summer more than a day at the beach! This week I’m playing along with the Unsinkable Release over at Catherine Pooler Designs and I have several cool cards and even a few videos for you. Let’s Dive right in (okay – a little pun intended)…

Today I’m going to showcase a fun paper pack – the Salt and Seaweed Pack , one of my all time favorite sequin mix by CPD – Big Sur Sequins, and a few of my favorite stamps from this release – Vitamin Sea. Okay….a die set too – Coral Dies – someone STOP me!!

Unsinkable Collection: I Want It All…
[ CTH ]
Under the Sea Bundle
[ CTH ]
Vitamin Sea Stamp Set
[ CTH ]
Vitamin Sea Dies
[ CTH ]
Hook, Line and Sinker Stamp Set
[ CTH ]
Coral Dies
[ CTH ]
Salt and Seaweed Patterned Paper
[ CTH ]
Big Sur Sequin Mix
[ CTH ]

I was in a clean and simple mood when I created these two cards for you. They were so quick to put together, both are great designs for you to keep in your repertoire.

No. 1 – Under the Waves

The waves pattern on this paper from the Salt and Seaweed Pack is so much fun. It felt like the perfect accent to the sides. Normally I would keep those a bit smaller, so not to overpower the card, but in this case having 3/8″ wide borders made the card feel like an underwater scene.

Patterned paper can really overpower cards, so it’s important to remember to balance them with the design.

Beach and Ocean Themed greeting cards

A little super light watercolor on those little fish – well, let’s be honest – it’s regular cardstock, and water is not its friend, right? But the Lime Rickey mixed with the All that Jazz is very cool. I wanted to throw some Coral Cabana on there, but refrained…lol.

The Coral Dies are SO awesome and quite lifelike. I remember when I was 16, I went to Italy for the first time. I bought this gorgeous coral necklace – you know the kind with the spindly fingers, and I took it apart when home and made a necklace and set of earrings out of it for my mom. She still wears it to this day. I love that kind of coral, and the one of the left reminded me right away of that necklace.

You can cut out your coral dies, then use your ink pads (I used the Carnivale Minis) by pressing right onto the top of the die cuts. It’s super easy, quick and looks amazing.

beach greeting card

TIP – to get the cool orange color on the the tall coral, first ink your coral in Limoncello, then follow with Samba. It makes the coolest Orange – PERFECT for coral.

Okay – I got a LITTLE off topic there, sorry about that! Do you ever have products that evoke favorite memories for you? Tell me in the comments – I’d LOVE to know.

A few of the new Big Sur Sequins and this card was all set. To pay a nod to the cool wave patterned paper, you could stamp your sentiment like mine – first in All that Jazz, then add a little Blue Suede to the bottom. It turned out pretty cool!

No. 2 – Abstract Beach

Easy DIY Beach Cards

This super fast card can be easily mass produced and is a great one to use with any paper you love – or stamp that section!. The fun wavy paper – or zebra stripe from the Salt and Seaweed Pack, just has my heart. I love the colors, broken strands, it just reminds me of water. SO, if you look at the card from an abstract perspective, those are the waves, lapping up onto the sand, represented by this small 1/4″ strip – lightly ink blended with Sandcastle and then speckled with a brown colored pencil.

Easy DIY Beach Cards

To keep with the clean look, a good sized sentiment (From Vitamin Sea), lots of white space, some bubbles representled by the Big Sur Sequins and of course a little crab from Hook Line & Sinker. He’s stamped in Orange Twist with a slight overlay of Samba.

Hope you liked those quick easy DIY beach cards! We all need some quick little cards. And just imagine those designs in holiday, birthday, any theme really!! Stay tuned to my YouTube channel today and tomorrow for some great new videos too!

Easy DIY Beach Cards

Here’s the entire new release:

Unsinkable Collection: I Want It All…
[ CTH ]
Under the Sea Bundle
[ CTH ]
Vitamin Sea Stamp Set
[ CTH ]
Vitamin Sea Dies
[ CTH ]
Hook, Line and Sinker Stamp Set
[ CTH ]
Hook, Line, and Sinker Dies
[ CTH ]
She Sells Seashells Stamp Set
[ CTH ]
She Sells Seashells Dies
[ CTH ]
Refuse to Sink Stamp Set
[ CTH ]
Refuse to Sink Dies
[ CTH ]
Coral Dies
[ CTH ]
Ship’s Wheel Dies
[ CTH ]
Ahoy Die
[ CTH ]
Shell Parade Stencil
[ CTH ]
Salt and Seaweed Patterned Paper
[ CTH ]
Big Sur Sequin Mix
[ CTH ]

Till next time –

Supplies:

Below are all the supplies I used for these projects.