Butterflies and Remembering a Good Friend

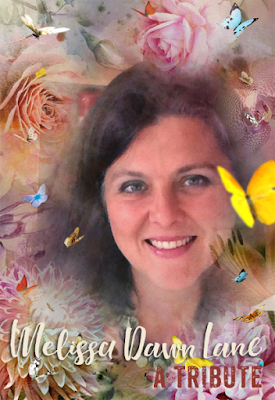
Our crafty world is such an amazing, inspiring and wonderful community. I’m blessed to have been a part of this community since 1994, and online since 1998. Over the years, I have gotten to know thousands of you, made more friendships than I can count and every now and then actually get to meet and know people in person. So many of us participate as watchers, teachers, and friends. Earlier this month, we suddenly lost one of those crafty spirits, Melissa Lane. Melissa inspired us, motivated and taught us how to pull the best out in what we do – usually in an unexpected and colorful way.
I had the first got to know Melissa as a team mate on the Happy Little Stampers Christmas Challenge Team and then really well on the Mixed Media Team. I was living in the Black Forest in Germany at the time, and was shocked that on a world wide team put together by Kylie Purtell, a few of my team mates lived just 45 minutes from me. Isn’t it funny, that in this big huge world – three of us were so close in geographically? Especially put together by a leader who lived in Australia, and two of us being American and living in a foreign country!

Melissa, Tanya Kabel & myself vowed one day to get together to flex our crafty muscles to just stamp with a friend. In this day and age, we all get to know about each other from blogs, instagram, facebook and youtube accounts – but when do you actually get to stamp LIVE and in person? I was no longer alone!! Sadly, Tanya ended up not being to make it that day, but Melissa and I had the rare opportunity to spend the entire day crafting, chatting and we even had dinner together with the family. It truly was a perfect day.
You can’t go empty handed, right? I brought my famous apple/raspberry German crumb cake for the family, since I towed all my craft supplies along with me like a little kid just excited to play with a good friend…lol. I think I had all my stencils (I had quickly been accumulating several Artplorations stencils), a gel plate, acrylic paints, nearly all my stamps, inks and anything else I could think of with me.

Melissa quickly grabbed my gel plate, and made several backgrounds with this very mask I used today. I remember borrowing it and she borrowed several of my stencils that she didn’t have as she was new on the Stamplorations Design Team – and I seemed to have almost all of them…lol. We ink blended, watercolored, got out the pastes and were just two kids in a candy store showing each other our favorite techniques and playing with mediums. We very quickly made a mess in her cute little crafting corner of the house – and the kids kept peeking in on us to see what we were creating. It was SO much fun.
I had also brought several cards with me, and we flipped though each others little works of art, don’t you just love doing that? Cards after all look SO much better in real life than in a photo. We took a break, walked through the garden, talked about art, and I became mesmerized with her father’s gorgeous watercolor artwork. Later we enjoyed a fabulous dinner, made by her beautiful family. Shortly thereafter, I moved back to the states, so we didn’t get a chance to stamp together again, but we remained good friends for years.

Melissa was not just an incredible artist, but she was a Christian, a military wife to her high school sweetheart Chris, loved homes educating her four children, avid gardener, cook and photographer. She had a zest for life and lived every day to the fullest. I loved chatting with her, Melissa knew who she was and loved her family fiercely. We will all miss her.

My life is richer for knowing you Melissa, first and foremost as a person, but also as an artist. I loved visiting your blog and seeing your creations on social media always put a smile on my face – especially when you used butterflies – your love for butterflies made such an impression on me that day. You loved color and butterflies.

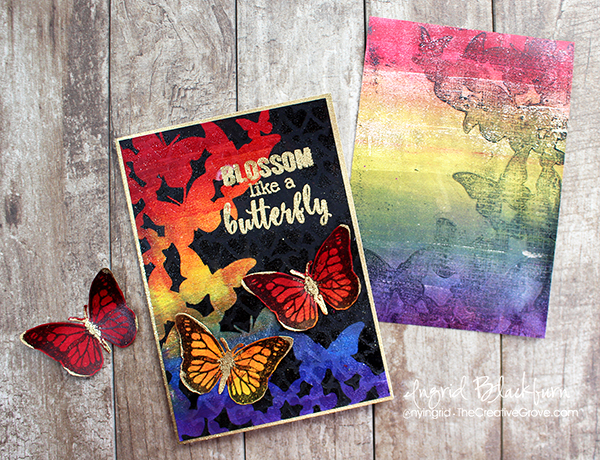
It’s only fitting that I create today in your honor, what else – a rainbow of butterflies. I always thought of you when I saw this stencil, and every butterfly I saw. I don’t think that will ever change.
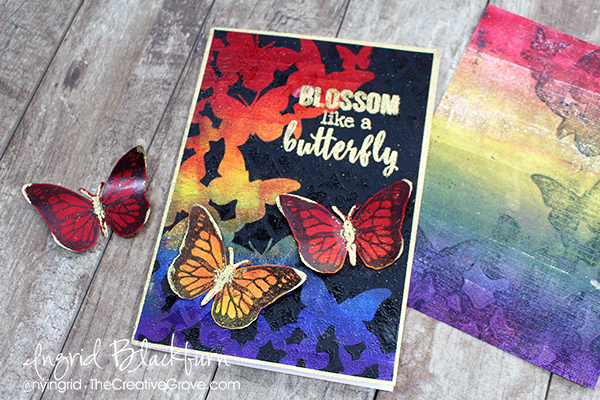
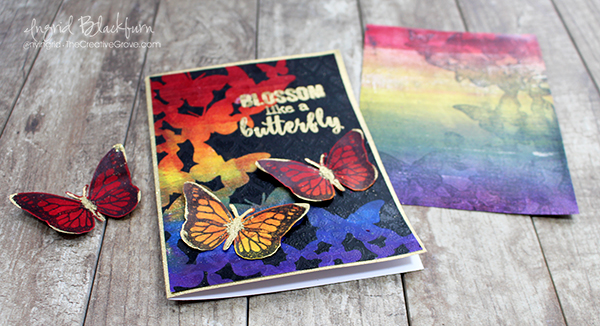
If you’re interested in knowing how I created this piece in Melissa’s honor, brayer a rainbow of acrylic color onto a gel plate, add your Shower of Flutters mask, sponge or brayer over with black paint, take a pull, and trim down. Emboss your greeting in gold, add hearts using the Row of Hearts stencil, embossed in clear embossing powder over your entire card.
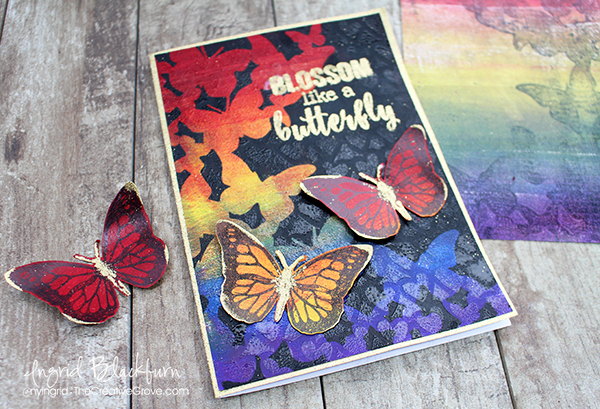
Stamp the butterflies from the set Blossom like a Butterfly in Catherine Pooler Midnight Archival ink onto colorful monoprinted backgrounds (Melissa loved red), fussy cut and add some gold embossing powder details. Pop up the wings, and emboss the edges of your card base. This card is sized 5 x 7″. That’s it!

I know you’re watching over us Melissa, but I miss you all the same. You were an inspiration to so many of us, and we’re better crafters for having known you.

To read more about Melissa, see her artwork and the outpouring of love from our community, visit the Stamplorations blog post here.

Much love my friend,
Ingrid Blackburn - The Creative Grove


Drum Roll Please! Announcing…

Whoop, whoop – it’s a new year, and today it’s official – we can now announce that Catherine Pooler Designs has a new 2018 Creative Team! It’s cram packed with some of the industries crazy talented peeps and I can’t wait to see what they have in store for you over the next several months.

Oh, and did I forget to mention to you that I’m one of the Creative Team coordinators too?!!! I’m really excited to let you all in on that little well, not so secret! But today it’s official…lol!

Catherine Pooler Designs Creative Team

Catherine Pooler Designs Design Team

If you haven’t checked out Catherine’s blog, facebook page or StampNation yet – definitely do so. You’ll find me hanging out in the videos on the facebook page at the Clubhouse, here in blog hops – and in many tutorials over at StampNation.

To check out all the fun products over in the shop – oh did you know that I help with concepts for products for you to use a little too? It’s quite literally the BEST job ever!! I work with an amazing team and together we brainstorm fun products for you to use at your stamp table. Our illustrators are top notch and the process is so much fun.

CLICK HERE to check out all the Stamps, Stencils, Dies and so much more!

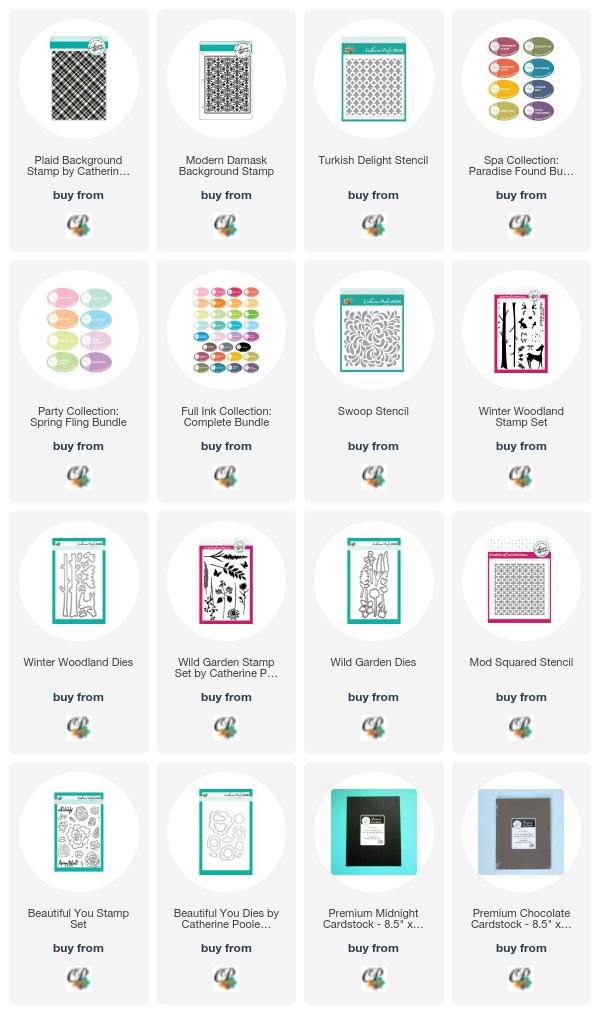
Here are a few of my personal favorite products that I helped work on for you from this past year…

Many others were released in Stamp of Approval collections, and if you haven’t seen those, they’ll be released this year! Get ready – there are some COOL brand new products coming up too!

I hope you are excited for a creative year. I’ll be posting several new projects and videos in the coming weeks…if you want to see anything in particular – let me know in the comments. I’m putting together my video plan in the next few days for the year! 🙂 I can’t wait to get started.

Happy New Year to you! See you very soon –

An exercise in Blueberry Watercolor

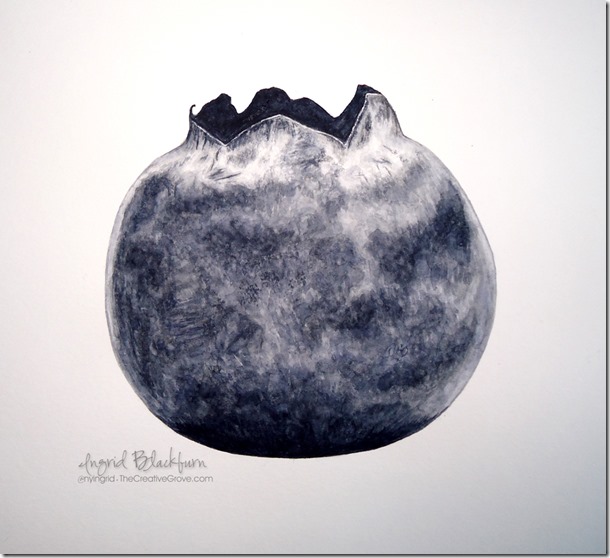
I have been wanting to paint a Blueberry Watercolor for the longest time. I know I just had a week in Tuscany, but I’ll be honest – it was a work-cation!  I know, must be nice, right? Well, I wear two hats in this family – Paper Crafting artist and Travel marketing specialist.  That means for our other business – Elite Travel Planners, I blog, design and maintain websites, socially engage through media and of course – Tech Support!  So, since our week in Tuscany was rather heavy on the travel work…I took a day off when we came home.  It’s rare actually, for me to totally take a day for myself.  So I decided to dust off my watercolor paints and dive into a project I had been wanting to tackle for six months – a blueberry watercolor botanical.

I learned to paint botanicals with a multi layer method I learned from the watercolor artist Anna Mason.  I adapted this style of painting for some of the projects in our online paper crafting class – Watercolor Techniques that Wow!  But that’s cards, and this is full size painting.  For me, I truly get elated seeing a watercolor painting come together.  Keep in mind, I’ve only done four in my life!  To say I’m new to the full sized art is an understatement.  But what I have done is learned the skills and practiced more than you would believe.
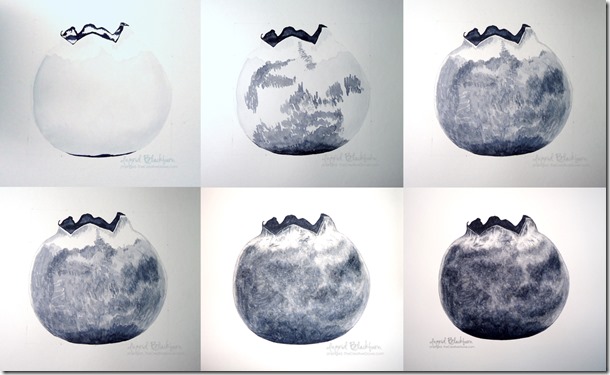
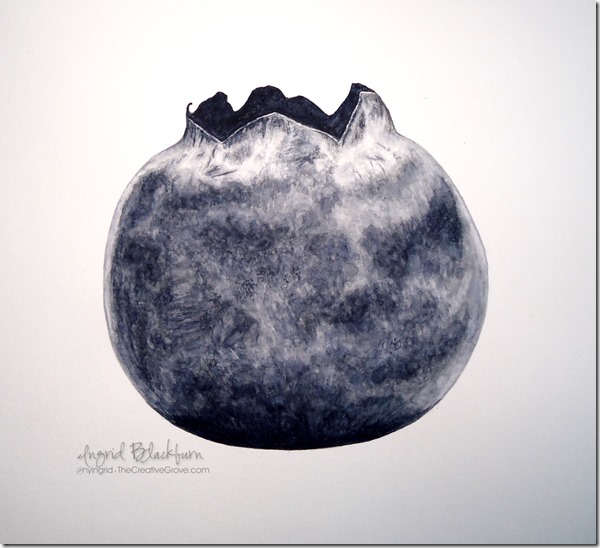
Here are my various stages and final result of my blueberry watercolor.  This painting was based off one of Anna’s.  The blueberry measures 7 1/4” x 7 1/2”.

Blueberry Watercolor Painting Stages

Blueberry Watercolor Botanical Painting 001

Three Key Things to Keep in Mind when Painting in Watercolor

Painting a large painting is VERY different than a 5 1/2” x 4 1/4” card.  It can be a little intimidating.  And the sheer time it takes is much more than card making – that’s for sure. Here are a  few things I learned along the way:

1 – Paint – You get what you pay for

If you are just working on cards, many of the inexpensive sets are just fine.  The size is key here – most cards are small.  Of course, better quality paints are more vibrant and translucent.  But if you’re going to take 1+ days to create a full sized painting – these two factors are key.  You don’t want your painting to look dull, invest in a few artist quality paints.  If cost is a huge factor – start out with student grade paints, but stay away from inexpensive sets.  Basic rule in life applies here – if it looks too good to be true (set of 18 tubes of watercolor paints for $15), than it usually is!

You can find good quality student grade paints for a few dollars a tube.  Artist grade will run you $5 – $20 per pan/tube.  I have some links at the end for great shopping options.

2 – Paper – Block or not?

Paper is the foundation of your project.  There are many options and types of paper out there – chose wisely.  I suggest a block.  Okay – Arches cold pressed artist block may not be in your budget – but there are all sorts of options.  If you’re not sure, buy a few single sheets and cut them down to the size you need.  You’ll need to stretch them first, and by the time you’ve gotten everything you need to do that and spent the time – you may as well have bought a block!  The pluses here are too many.  Time is everything in our lives these days.  And what’s great about an block (four glued sides), beginners can really use too much water and be okay.  But beware – if you are the impatient type and speed dry your work (which I don’t recommend), a block is not for you – tape your pieces down and stretch them instead.

3 – Education

No, you don’t have to go to art school.  But take a class or two.  You’ll be glad you did.  There’s nothing better than being able to ask questions, have someone look at your work, or being able to back up an online video to really review each step.  I’ve learned so much myself!  And it’s all applicable – whether it’s a paper card making watercolor class (we have one right here) or a traditional watercolor class.  Most classes are not that expensive, and it’s great to be able to have somewhere to learn!

Ultimately – watercolor painting is fun, just get started and have a good time.  There are millions of watercolor artists around the world – jump in, the water is great and inspiration lies everywhere.  Take a little time for yourself – I sure am glad I did for my Blueberry Watercolor!

Signature

Creative Cards Watercolor VIP

Some great places to shop:

The USA –

Jerry’s Artarama

Dick Blick

UK –

Jackson’s Art Supplies

Blueberry Watercolor 001

My Blueberry Watercolor – an exercise learned from Anna Mason

Thankful…A very personal post

Germany Unity Day 001

In case you didn’t know, I’m both German and American.  We moved from the USA to the southwest corner of Germany last fall to spend some time with my father who lives here and expand my husband’s business.  We know we’ll head back to the states one day, but for now – we’re enjoying living in Europe and running our businesses virtually.

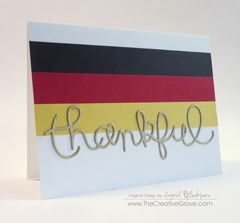
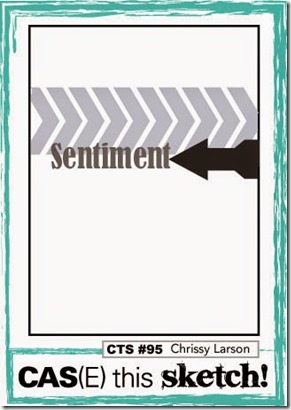
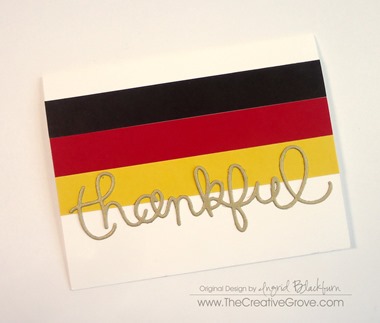
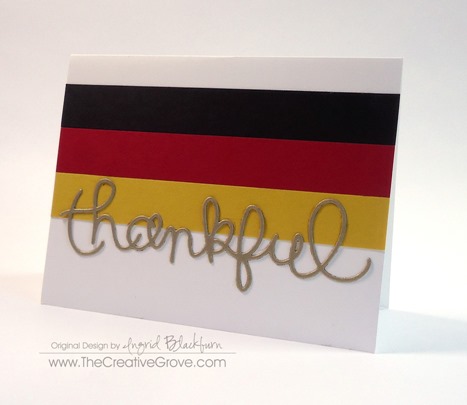
Today’s project is a clean and simple one – but quite personal.  Today, October 3rd, was the inspiration for this project, with a little guidance from the CAS(e) this Sketch challenge.
Case This Sketch BadgeCTS_95

Today is a national holiday here – it’s our July 4th.  The cold war ended on November 9th, 1989 with the fall of the Berlin Wall.  Barely a year later, the two German Countries – East and West, as I had known them growing up, were united into one.  The Unification Treaty, signed on Sept 20th called for October 3rd to be officially know as Tag der Deutschen Einheit, or Day of German Unity.

Germany Unity Day 003

Growing up, we visited Germany practically every summer.  My mother, born in Prussia (then Germany, now Poland) was relocated with her family as a refugee to Dresden after World War II – she was just eight years old and the eldest of five.  She grew up in what was then known as Russian controlled East Germany behind the Iron Curtain  – as the Wall that severed this country was known.

Each summer, we would spend about six weeks here visiting friends in the west, and as a toddler, my family in the East.  Once my parents split, we came here with my Dad, and would visit my Godmother’s family in Eisenach, just over the East German Wall (border).  It was quite an experience to cross – something that took almost a whole day.  Russian soldiers would walk up to us with machine guns and take our passports 6-8 times, we’d have to unload and re-load the car several times – and they were always suspicious as to why Americans were allowed, yet wanted to go into East Germany.

To say it was an experience was putting it mildly.  We weren’t allowed to bring books, newspapers or anything really with us.  We had to register and spend every converted dollar (having receipts to show that we were taking everything with us that we were spending) back with us.

The best way I can describe going into the east was coming from a bright colorful place (it was the 70s and 80s after all) into a black and white greyish suppressed place.  It was surreal.  I’ll never forget those trips.  The buildings were still dilapidated, the streets went from paved in the west to cobblestone in the east and while we played on playgrounds in West Germany, we playing in orchards and with farm animals in the East.

So to say that I was stunned and overcome when the wall fell that 9th day in November, 1989 is an understatement.  My grandmother, cousins, aunts and uncles could finally leave and just move around if they wanted to.  It was just the thought of possibilities and color finally making its way to the East.  It would be many decades before life was somewhat normal there, but today – just 25 years later – the world is finally their oyster.

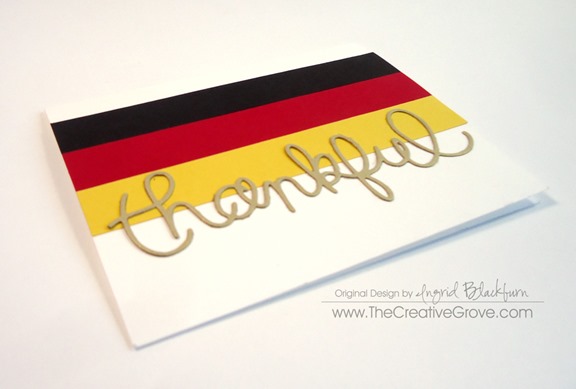
Today’s project is clean and simple, because simply put, I’m thankful for this holiday today.  I’m thankful that my family has choices.  I’m thankful that they have access to food, the bare necessities, and just all that we take for granted on a daily basis. I’m thankful that the east is finally colorful and the land of opportunity.  So this project is just that – simply the German Flag and my brushed gold heartfelt sentiment – thankful.

Germany Unity Day 005

Thank you for reading this very personal blog today, I appreciate you visiting, perusing and being a part of our virtual community.  No matter where you are in the world today, know this country glows a bit brighter on the official 24th German Unity Day.

So grab a beer and celebrate right along side us today.  The party will be big in Berlin – Germans live each day to the fullest – we know how precious freedom and liberty is.  It wasn’t a pretty history, but to be severed for so long and then unified and whole again – that’s something no German takes for granted.  Simply put – we’re thankful for today.

Signature

Germany Unity Day 002

Join me for weekly step by step video tutorials in our Online Community

Not so tropical Birthday

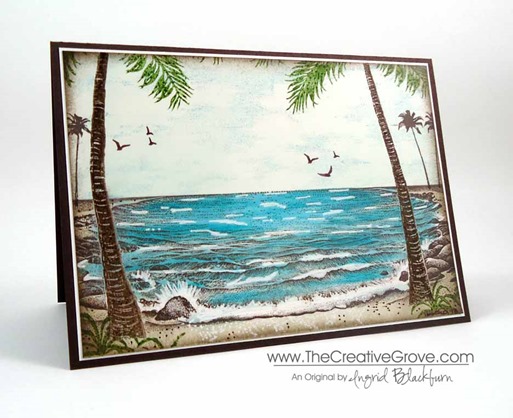
Today is Michael’s birthday!  He usually wants to be out of the country on a beach somewhere (that way the number doesn’t change in his mind…lol), but he’s stuck here in the Black Forest, Germany with me…not a bad place to be!  So this was as close as I could get him today.  I re-created one of my favorite cards from before.  Thought I’d share it with you.  Enjoy!

We’re headed out for some good ‘ol German fun in the forest.  I hope you all have a great day too – and GO Germany in the World Cup today! Smile

Signature-Blog

Farewell, Two Peas…

two peas in a bucket

The scrapbooking industry has seen many doors close over the last 6+ years.  It always breaks my heart to see independent owners close doors to something that changed an industry.  Two Peas in a Bucket is no exception.  This scrapbooking giant was THE place to be in the early days.  It’s where I purchased more paper than I wish to acknowledge!  I have been a Pea since 2000 – the early days.

Back in the day, where I lived, there was only Michaels and AC Moore.  And neither carried anything worthwhile at that time.  As a serious scrapbooker, if I wanted anything of quality I had to shop online.  There just wasn’t any other option for me in New York at the time, or the thousands around me. 

I began my online paper crafting bug in 1999 with The Scrapbooking Network, an online site that developed many friendships I still have to this day!  That led me to 2 Peas, a new online site that came about in ‘99.  It was a cool place to hang out, with an even more impressive array of the trendiest paper crafting supplies.

As will all things, as I grew in a new direction – card making and a stampin’ up demonstrator in 2002, I left a few things behind.  I still frequented the Two Peas garden from time to time, but we all move on.

I’ll never forget this amazing online site.  The amount of inspiration from the products, projects, videos and talented scrapbookers and yes, some stampers too!  It helped nourish my craft, and I’m forever grateful to Kristina and Jeffrey – the husband and wife team that opened and ran this amazing company for 15 years.  They gave me a place to shop, show off my creative juices and find a loving community.

They are closing their doors and taking the inspirational garden site offline July 10th.  There’s a huge sale 30-75% off.  Take a look at the store here, get some great deals while you can and say good bye to a scrapbooking giant.

Thank you Two Peas in a Bucket…you will be greatly missed!

Signature

Watercolor Quaker Marriage Certificate

I’m in northern Vermont this week hanging out at the Smuggler’s Notch Resort.  We are in a two bedroom condo nestled at the top of the hill overlooking three mountains.  Today the wind is howling and the rain is coming down in sheets.  It’s a toasty 41 degrees outside, but I’m inside looking out at all that Vermont has to offer while sitting fireside working on Rachel’s Marriage Certificate. 

We’re in full wedding mode this week.  And this is what I’ve been practicing for.  If you’ve been following along, Rachel asked me earlier this year if I would be able to make a marriage certificate for her wedding.  I had to admit I had no idea what a Quaker Marriage Certificate was, but this journey has transformed me personally.

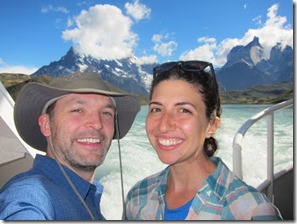
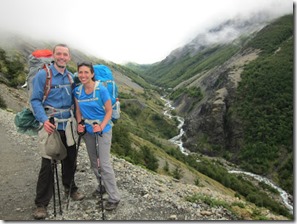
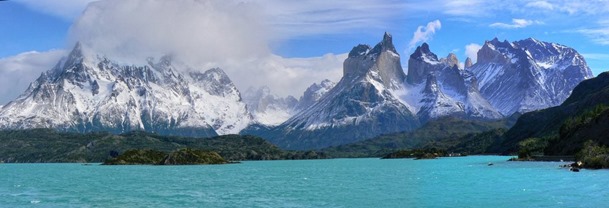
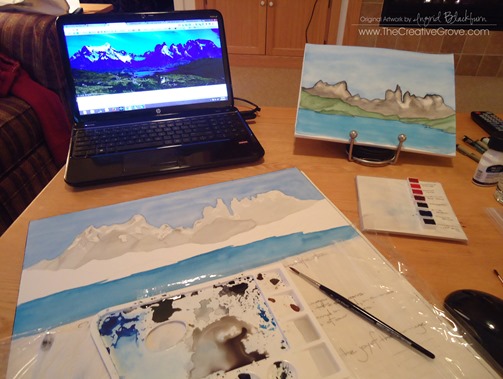
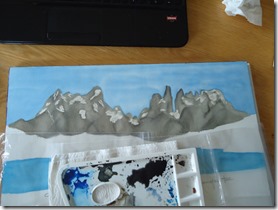
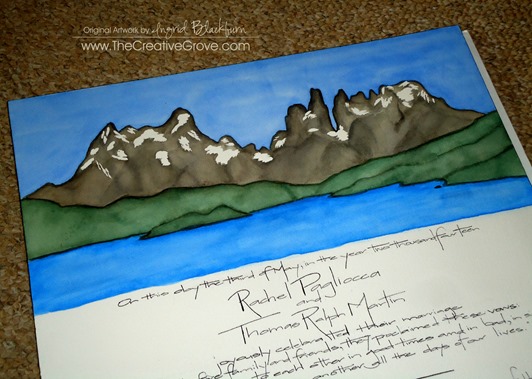
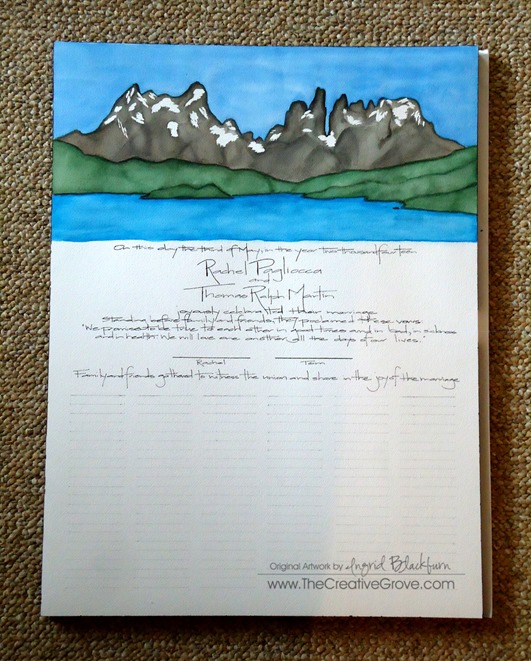
She originally wanted flowers, but if you know Rachel – that’s not her, and certainly not Tom.  Since they traveled around the world last year, I thought I’d create something that had meaning to both of them as a keepsake for their wedding.  Something that was personal – I interviewed Rachel, and poured over their travel blog before deciding to paint the world famous Torres del Paine in Patagonia, Chile.  This mountain range is a symbol of Chile, and their 5 day trek was a must do for them and certainly an experience they treasure.

IMG_0019IMG_0333

I was apprehensive at first, and after a few weeks of research, I decided I’d take on the challenge head on.  You see, these marriage certificates – well the hand painted ones, go for $500.  I thought that was pretty steep, and wanting to save Rachel money, I decided to learn how to watercolor.  That was not on my to do list.  In fact, I’ve been wanting to learn how to paint with oils and acrylics.  But the kids did give me a watercolor set and some brushes for Christmas, so why not?

Several online classes, and even a live one revealed one fact – I love to watercolor – who knew?  And to paint a landscape like this, I won’t say it was easy – hundreds of hours went into prepping for this week.  Michael kept asking me when I would paint it, and if I was over my head.  Well, I was not going to admit that I was, so I just kept saying don’t worry – I have a plan!  Well, I did – but I have to admit (don’t tell him), I was a bit worried.  After all, this is something they’ll have for a lifetime to commemorate the start of their married lives together.  More than 130 are set to sign it on Saturday, so I was really putting myself out there.  No easy task – especially for a perfectionist like me!

I’ve been very hush hush about it to the family, and I can only hope that Rachel and Tom love it.  It truly has been a labor of love on my part.  Now if only I had had enough time to learn and master calligraphy – then that would have been perfect!  Thankfully I have decent handwriting.  You’ll have to leave me a comment and tell me what you think!

I’ve taken to watercolor so much so that I’ve woven it into my j-o-b here at The Creative Grove.  After all, it IS the hottest trend in paper crafting today.  I’ve learned so much that I’m actually teaching a class on how to use everything I’ve learned and making cards with it!  For more info on that click here.  Class starts May 17th and is on sale during the pre-release period.

Torres del Paine – Watercolor Quaker Marriage Certificate

I have to admit, my original plan was to have two complimentary scenes at the bottom corners to round out this piece, but since we need more than 130 people to sign it, that was just not possible without reducing the artwork which was tough since it was such a wide image. 

25899298

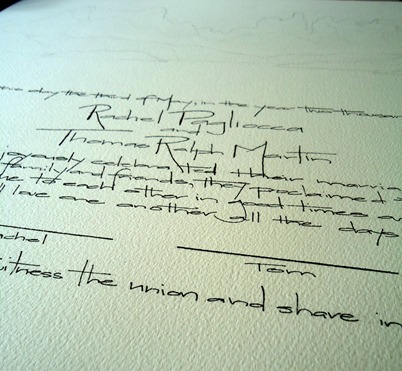
As it is, I painted it so that 3/4” can be hidden for framing if desired.  The spacing was a challenge with so many signatures.  Michael and I didn’t want the writing to be too small so that you couldn’t read it.  I played around with tracing and copying pretty scripts, but I just couldn’t write with confidence and ultimately ended up going with my own handwriting.  It was Michael who encouraged me to do that.  Since I have a way to accentuate it with flair, I think it actually came out okay.  I’ve never been so nervous to write something!  Overall, I’m pleased – it’s not perfect, but then again I’m my worst critic.  As long as Rachel and Tom love it, I’m happy.  Here are the details:

DSC00338DSC00339

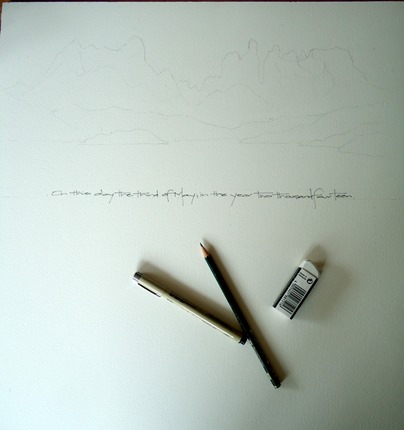
To make sure I had it down, I first did a watercolor scene on a smaller scale.  I had purchased some masking fluid and decided to use that on the actual certificate instead of pure watercolor as I wanted the snow to look like snow and not dirt.  It took me 1 1/2 hours to sketch out the final scene to just get it right.  Then came the writing.  I first did it in pencil and went over it with a micro pen.  Then I needed to add the 132 lines.  We actually have 138 people attending – but I know some will sign as husband and wife or miss it all together, so I didn’t worry about that as I couldn’t fit any more!  DSC00353

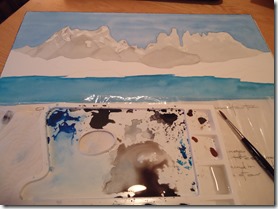
Next, I began with the sky and water.  Go figure I messed it up from the start, but since I watercolor in layers (just the technique I’m most comfortable with), I knew I could work through that.  I actually had several moments where I questioned if I’d have to make a second one!  But I’ve learned from several watercolor projects that the end result always turns out much better than you expected once all the layers are on there.  Patience….

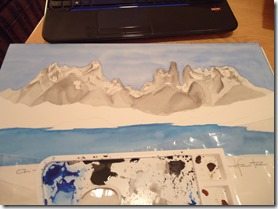
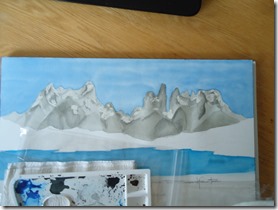
The mountains took the longest time as there are seven layers that were built up to the final scene. 

DSC00350DSC00355DSC00358DSC00359

In overall work time, the watercolor scene took me 13 hours start to finish.  The certificate itself 17 hours.  Now I know why they charge $500!  It’s a time consuming project!  Of course my practice scene took a day and then there was prep time too. 

DSC00366Handpainted Quaker Wedding Certificate

The end result was certainly worth every minute, and dollar!  Best of all, they’ll have it for a lifetime and I have a new skill. Smile

Signature Snowflake 001

Watercolor Narrow

Join me for a fun week of water coloring!  You will learn several techniques that will turn your paper crafting projects into WOW projects!  Class starts May 17th!  Click Here for more information and to save during the pre-registration!

Stenciled Love

DSC00284

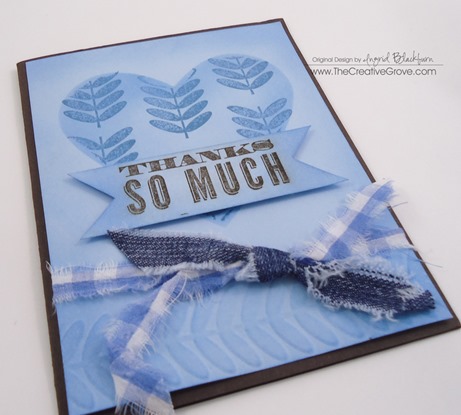
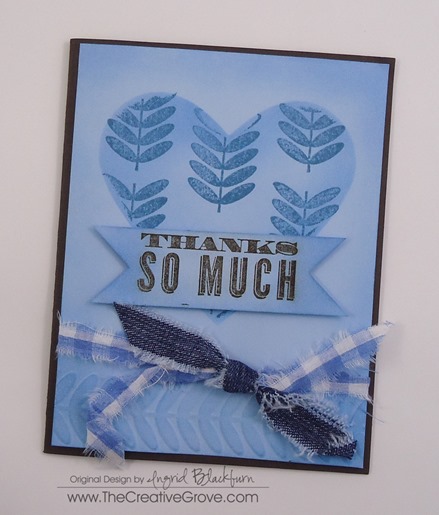
It’s Easter today and I’m spending the weekend with my fun Italian In-laws.  It’s always a memorable weekend when I’m visiting in Canajoharie, New York.  Today I have one of my favorite cards for you – a giant stenciled and stamped heart.  I made this card a while back and have been waiting to share with you.  Since my weekend is busting at the seams with love and laughter, I thought I’d share my special heart with you. 

This weekend has been filled with food, laughter, more food, great stories, more food again, and lots of love – oh…and then more food!  When we sit down at the dinner table –a bout 6 or 7, we don’t get up until 1 or 2am usually!  The kids start to fall asleep (me too – figures, right?) and I roll off to bed thinking…why oh why did have that last dessert!

0320140419_173517DSC0030720140418_131319015001002DSC00295 1

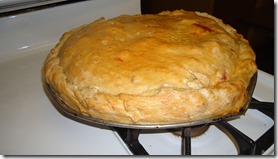
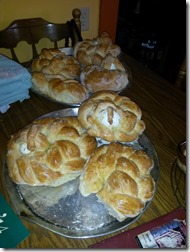
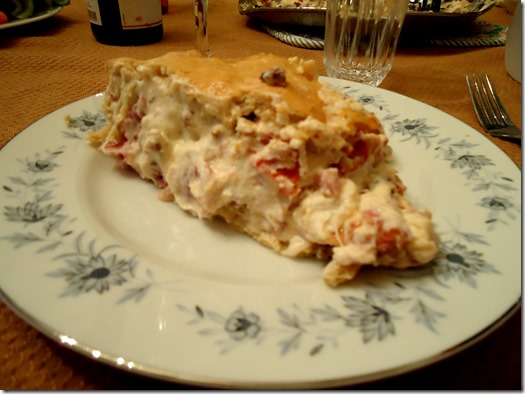
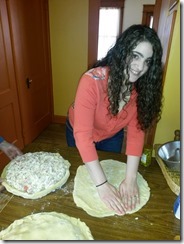
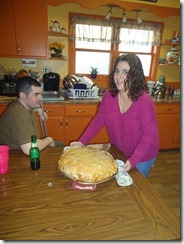
Our weekend is filled with Easter traditions, one of them is on Saturday night  – it’s Grandma Amelia Ritacco’s Pizzagaina recipe which is held tightly under wraps (took me 10 years to get the recipe. And before you ask – since I’m not even allowed to give it to either of my girls – don’t even try and ask!).  And let me tell you – we look forward to this meal ALL year long.  If you aren’t familiar with Pizzagaina (aka Pizza Chena)– it’s stuffed pizza (more like a calzone, but it’s pizza).  It’s stuffed with meats, ricotta, cheeses and has not a pizza crust, but a sweet bread crust to hold all that yumminess in.  Here’s a photo just to make your mouth water.

Pizzagaina

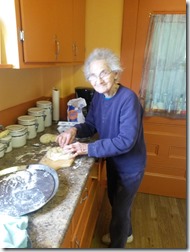
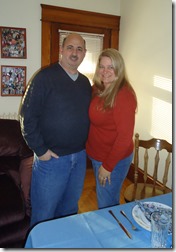
Most of all, I just love hanging in the kitchen, hoping that I get to help in some small way (not usually likely…lol), listening to stories of the old neighborhood, and spending time with my sweet Mother-in-law Vigie, and my Sister-in-laws Claudia and Donna.  There’s laughter from the other rooms as the kids play games, and the house is filled with loud Italian voices and more love than you can imagine.  It’s a great day.

I hope your Easter weekend is filled with love and laughter like mine!

DSC00288

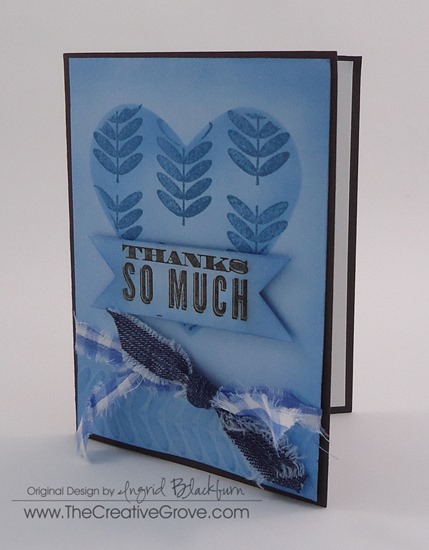
To make this card, I cut a stencil out of a piece of scrap paper using my heart framelits and my big shot.  I sponged the sides so you could see the heart shape on my card stock and added some stamped images.  I sponged the sides of a banner with the greeting to match my heart.  To continue the theme, I had a matching embossing folder for my stamp which I ran just along the bottom edge for a little interest.  I sponged the raised portion as well.DSC00287

Instead of ribbon, I used some fabric scraps to tie across the bottom.  They give it a cool look, right?  How many do YOU have in a drawer somewhere?

I love this card – it really makes me smile every time I look at it, I think I’ll send it to my Mother in Law when we leave.  That way I can leave my heart behind with her.  Have a great weekend!

Watercolor Final2 Edge

Join me for a journey in Watercolor techniques!  This class begins May 17th, but you can save today.  For more information click here.

Signature Snowflake 001

DSC00285