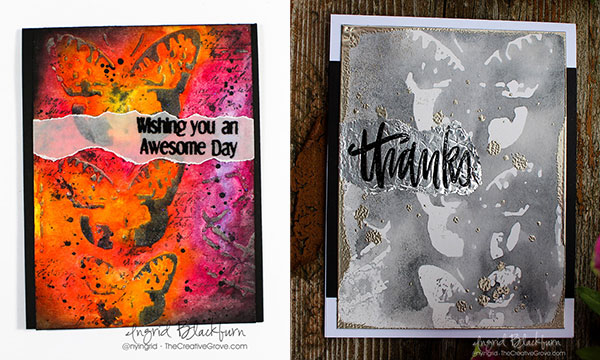
Art Happens – New Craft Stash Blog Hop: Day Three + Giveaways

Art Happens

One thing I’ve learned over the past few years is that Art Happens. It truly does. Today I’m kicking off Day Three of the New Craft Stash Blog Hop with some of my crafty friends. We’ve all collected & hoarded craft supplies…come on – I know you’re one of us! Several of us were chatting a few weeks ago and decided – let’s just hop for fun and made the rule that we had to use something new. Now that means – literally new or just new as in it’s been in the drawer for a bit and it’s finally time to break it out! Today I’m using several products just like that…and I can’t wait to show you what I’ve done.

Be sure to hop on to all three days worth of hops. Get inspired to use your “new” stash, leave a comment and be entered for prizes! You’ll have until the 23rd to leave a comment. I’d love to know what new item you’re going to play with next!

Gorgeous Art Happens Tutorial

It’s no secret that I’m in love with mixed media supplies. I love to create simple mixed media projects, AND real mixed media. Well I have a treat for you today. Today’s projects are the result of a fun little gel printing session I had the other day. I wanted to use some of my newer acrylics and some new Stamplorations masks (Art Happens) and word dies. I’ll post a time lapse video later with my entire printing session, so today’s video just showcases the print I made for these two beauties…enjoy!

Click Here to view video in HD on YouTube

What do you think? It’s actually quite fun. When I first started, I’ll admit…I was quite intimidated. But the more I got into that session, and the more art that just literally poured off the plate…I kept saying things like WOW, I can’t believe I just made that and Ooh that’s gorgeous. Seriously…I was quite impressed with myself! And I think I’ll always keep that first fabulous card – cause it literally is one of those where I still say – I can’t believe I made that! You know that feeling, right?

Well, this gel printing session didn’t disappoint. I ended up with 8 art journal pages and 34 prints. Yup! Gel Printing goes so fast, and more you get into the session – little bits are left behind on the plate – Tip:  do not clean your gel plate in-between. The work you create will do that for you. Today’s print that I used came about 4/5 prints into the session. Some of the beauty on the print is from prior prints. I love the patina kind of feel. That weathered look that you usually only get with time and exposure to the elements.
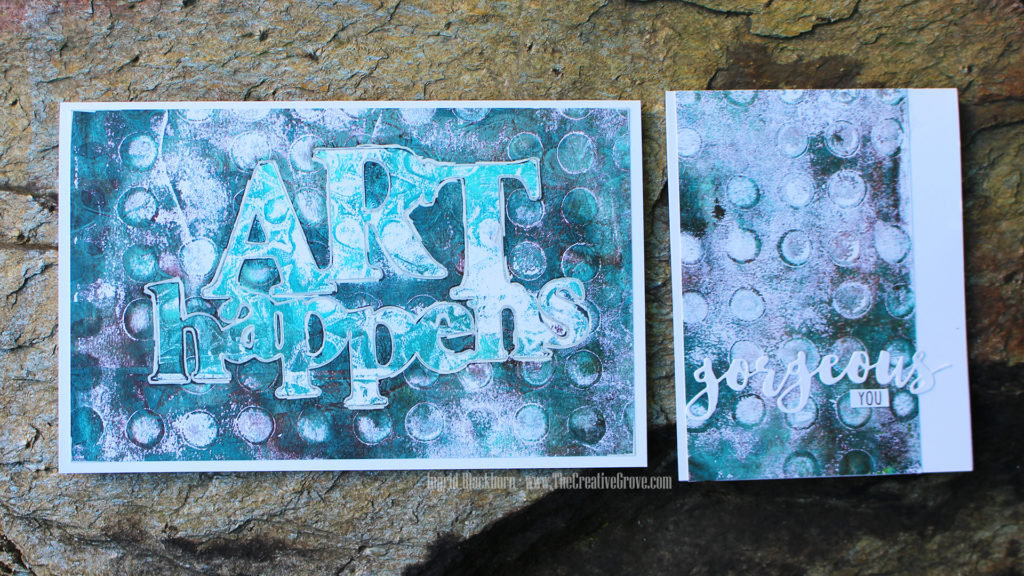
Art Happens by Stamplorations

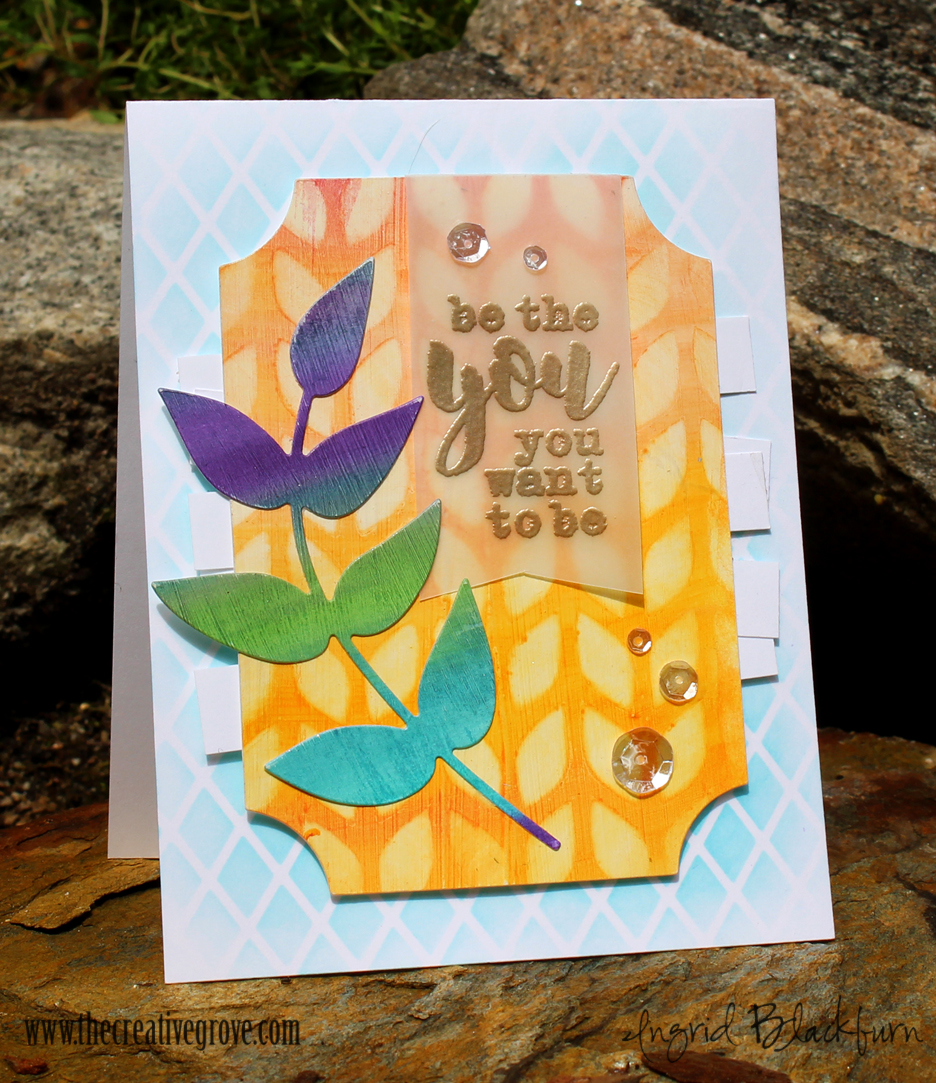
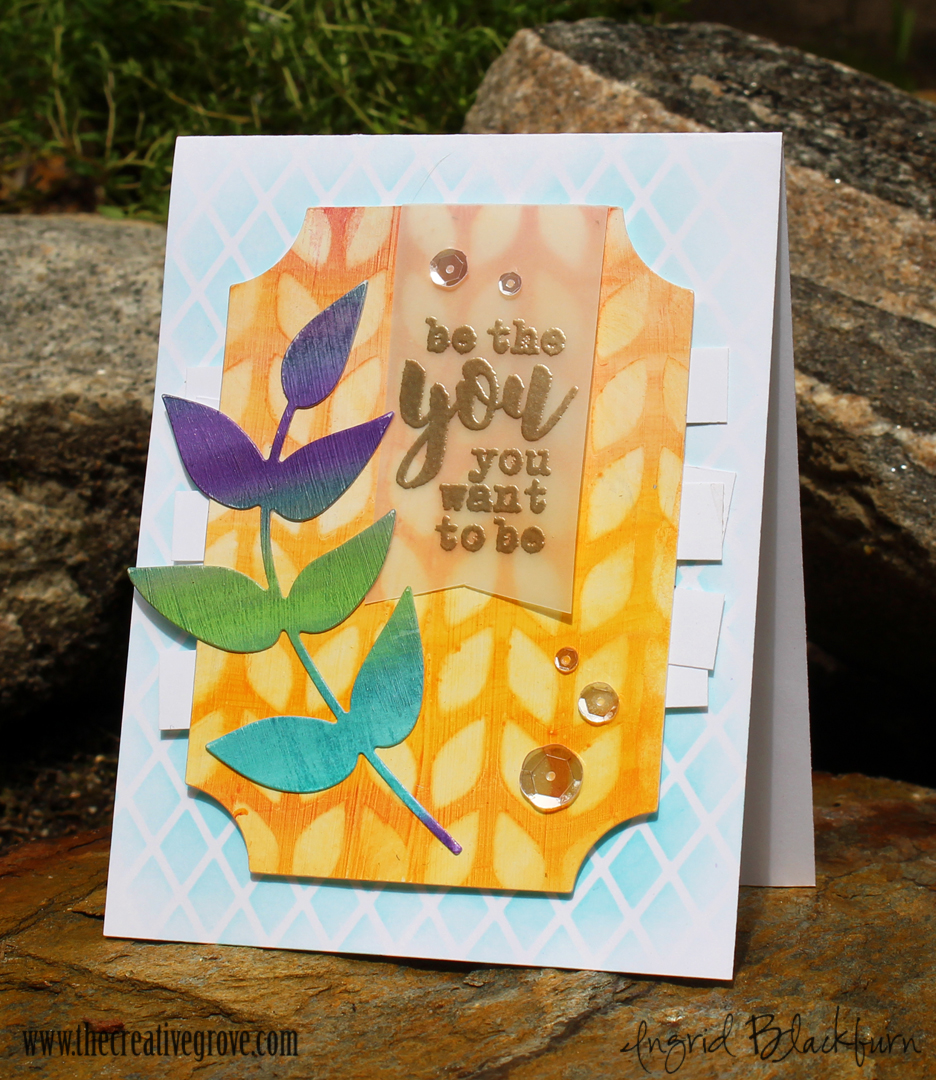
Here are the two cards – one is a traditional A2 sized card – and it needs so little to complete it. Just the Gorgeous die, cause…well hello, it’s gorgeous! And a simple little You to complete the sentiment. The die is one of the MANY fabulous word dies from Stamplorations – I am such an addict of Shery Russ dies and stencils – stamps too! She’s got some ah-mazing stuff. She’s a one woman operation, has phenomenal customer service and I swear the woman doesn’t sleep. Want to see her stuff? Click Here and use the code STAMPINGRID for 20% off orders of $15+. Hey, every little bit helps, right?!
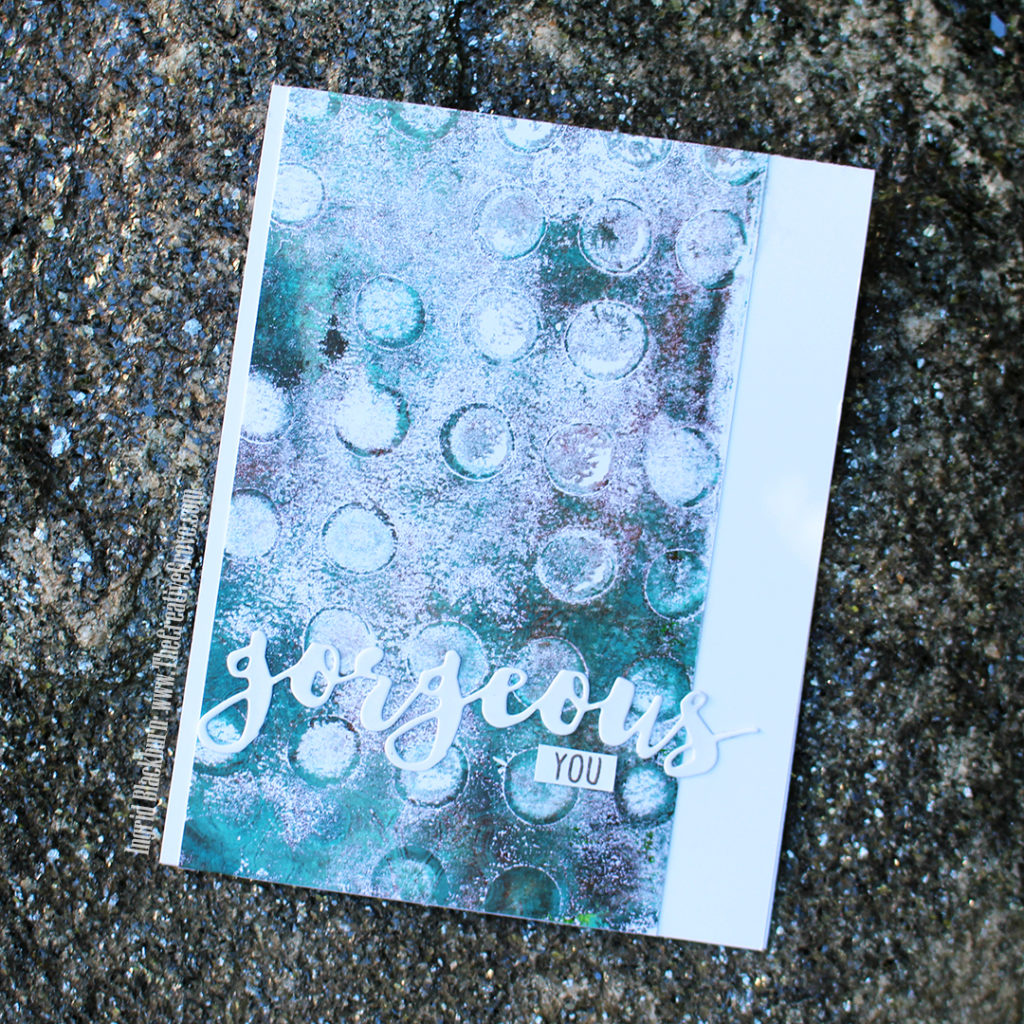
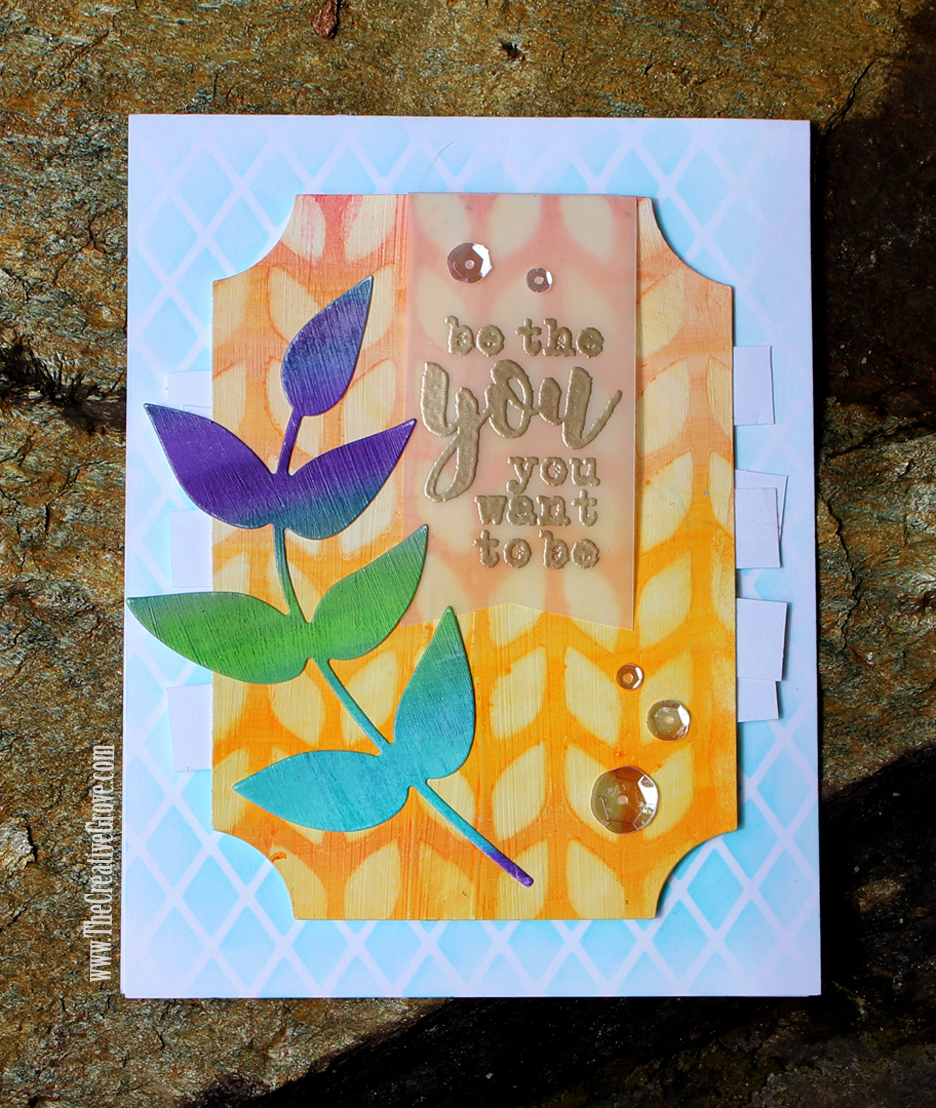
The second project uses the mask Art Happens. I have this same sentiment from Stamplorations in a smaller sized die. WAIT till you see the mixed media project coming up using that – it’s a beauty! Using masks in gel printing is a great way to preserve colors in layers and really allow them to pop as in this project. I wanted to emphasize it a bit more, so I outlined it using a Pitt pen and Posca paint pen. I was going for a sloppy look, cause let’s be honest – there’s nothing perfect about monoprinting.
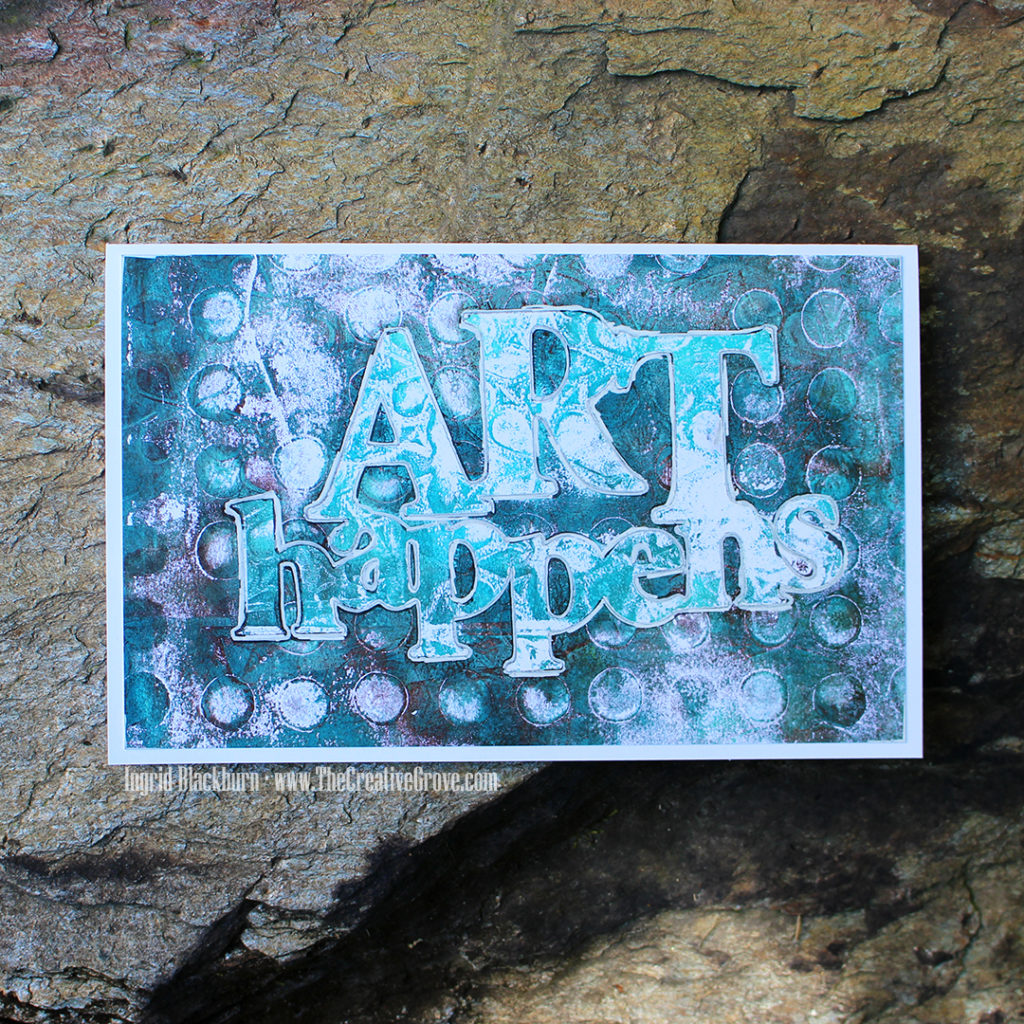
Art Happens Monoprint

Here’s a funny fact – ask any of my crafty friends who really know me – in card making, perfection is kind of one of my OCD things. Everything has to be lined up right, matted properly, etc…so mixed media nearly gave me convulsions at first. I tried to control everything – until I realized that the magic happens when you let go and just let the art actually happen.

So I hope you’re encouraged to give monoprinting a go. It’s SO relaxing, you’ll have a crazy amount of prints to create cards with, and I know you’ll just fall in love with it like I did. Hey, if this OCD papercrafter can become a mixed media artist – there’s hope for all of us, right?

Thanks for stopping by, be sure to visit all my friends’ blogs on today’s hop, and if you missed the first two days – hop on over to those too. I have the full list below. We have incredible prizes and I’m giving away a prize pack myself! Thanks for joining us on this fun little Summer journey. I hope you’re inspired now that you know Art Happens!
Comment to Win Prizes

We have some amazing sponsors & Prizes:

PLUS….

I’m giving away a prize pack to one lucky commenter from one of my blog posts! So be sure to leave comments on all the blogs – all three days for your chance to win!! Just comment on all the blog hop stops by 7/23/18.

So now it’s YOUR turn to hop along and be inspired by some of my crafty friends. Thanks for taking the time to hang a bit with me today. I’ll be back in a few days with a mixed media project for you. And stop by tomorrow as well – I’ll post that hop list too!

Today’s Hop List – Day Three

  1. Ingrid Blackburn <— You are here!
  2. Ardyth Percy-Robb <— Hop here next!!
  3. Josefine Fouarge 
  4. Tracie Pond 
  5. Nanette Tracy 
  6. Lisa Harrolle  
  7. Justine Hovey 
  8. Susan Powell
  9. Jennifer Cerizo

Did you miss Day one or Two? Get caught up here:

Day One Blog Hop List:

  1. Ingrid Blackburn  – Yup that’s me with a different post & project!
  2. Jenny Colacicco
  3. Ashlea Cornell
  4. Karen Baker
  5. Ali Farmer
  6. Catherine Pooler
  7. Allison Cope
  8. Veronica Zalis

Day Two Blog Hop List:

  1. Melissa Miller
  2. Tracey McNeely
  3. Kelly Martin
  4. Amy Seigler
  5. Michelle Wallace
  6. Ilina Crouse
  7. Maureen Merritt
  8. Nance Salkeld
  9. Deepti Stephens

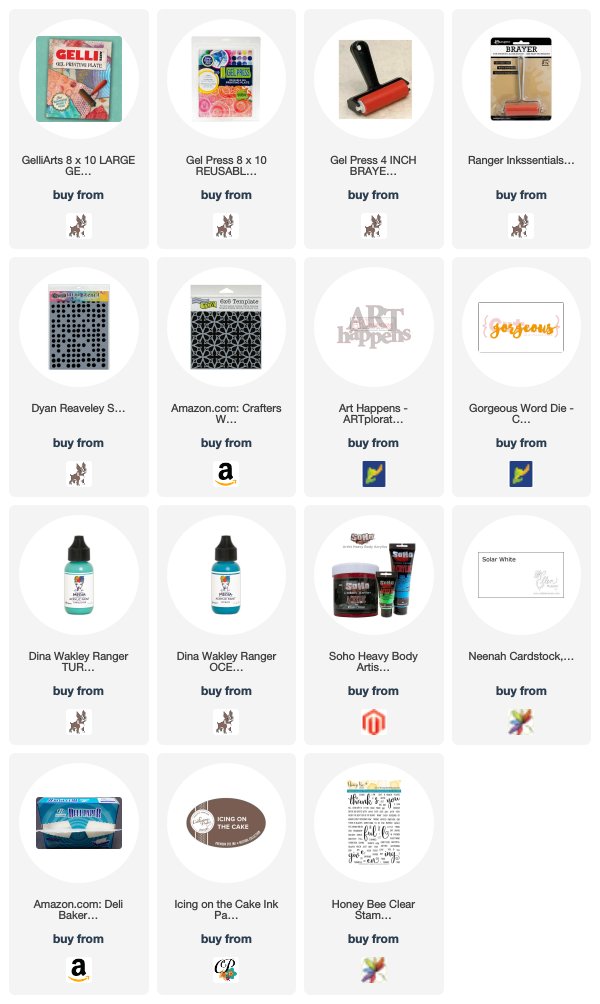
To make finding the supplies I used in these projects a bit easier for you, here are a few clickable links. Compensated Affiliate Links are used when possible. Click here for disclosure. Happy Shopping!

Counting Blessings SOA Blog Hop

Welcome to the Counting Blessings Day 3 Blog Hop! Today I have a treat for you – three projects…so let’s dive right in!

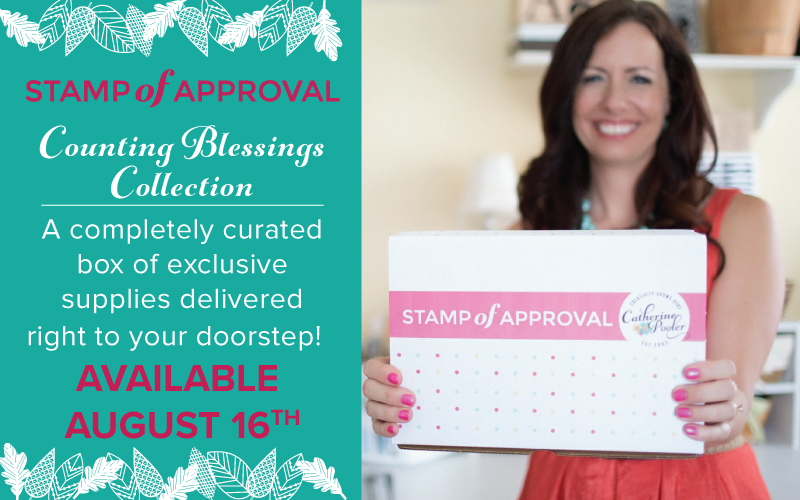
If you are new to Stamp of Approval, Catherine curates a box of stamps/dies/stencils that can be used together for endless hours of fun. This box has a fall theme to it, but I’ll be honest with you – you’ll be able to use the Counting Blessings collection all year long. I’ve seen so many projects in the first two blog hop days that prove that point!

The last collection sold out in just 15 hours, so if you love what you see – do not wait. Make sure you are on the wait list – as you’ll get the chance to grab a collection before anyone else!

The Counting Blessings collection has:

  • Four Stamp Sets
  • Three Dies
  • Two Stencils
  • A free NEW block – seriously – they are my all time favorites (you’ll LOVE the weight, design and feel)
  • A special SURPRISE
  • A Free PDF packed with project ideas ($15 value!)

Be sure to leave comments along the way to get a chance to enter into the drawing for a free Counting Blessings collection yourself.

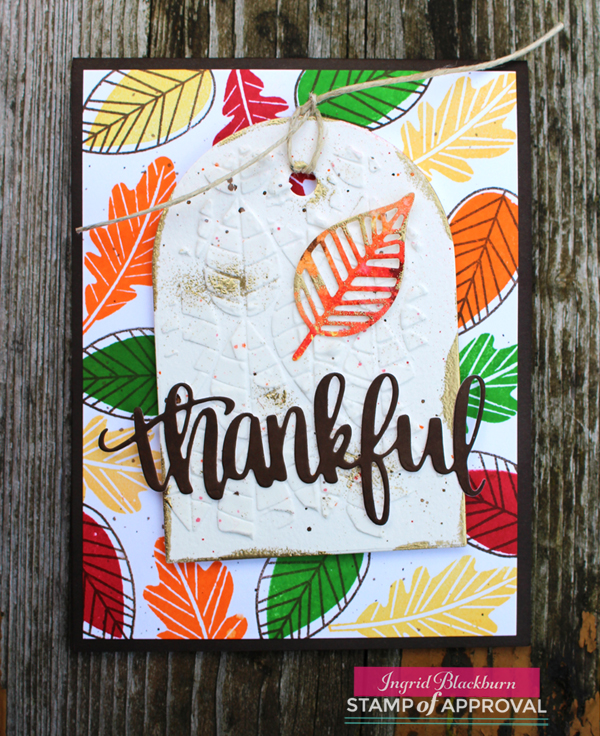
Our first project is a classic take on Fall Foliage. I lived in New York for seven years, and the fall foliage was by far my favorite time of year. I still dream of all those vibrant colors – well, Catherine Pooler Designs Ink is perfect to showcase that! Um, hello Rockin’ Red, Grass Skirt, Tiara, Orange Twist and the new Icing on the Cake!!! You’ll find detailed instructions on this one in the free project packed PDF with the Counting Blessings Collection.

Counting Blessings Stamp of Approval card by Ingrid Blackburn

That background was created with the Leaf Motif stamp set. On the tag – I used a little Whipped Spackle for some texture with the Marching Leaves Stencil on the cool tag using the Tags, Etc. Dies. The fall colored leaf die is one of the two from the Fallen Leaves Dies and how about that Thankful die? I LOVE that hand lettered script by designer and artist Shawna Clingerman. And if you love that one – just wait till you see the next project.

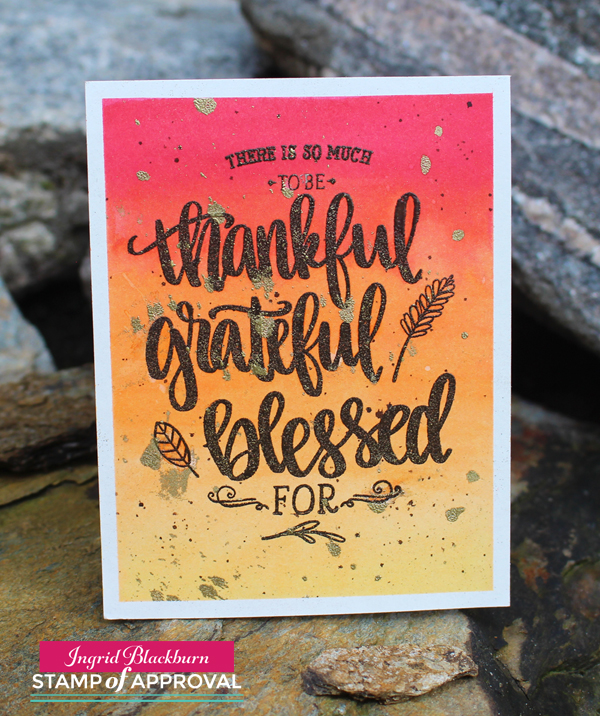
The Autumn Blessings stamp set is beyond fall perfection to me. You’ll get three gorgeous hand lettered sentiments that work for any occasion. Catherine does such an amazing job at making sure there are lots of little extra pieces to really stretch your creativity – that’s one of the reasons I love her projects SO much. It’s the little things that make all the difference.

In this set you’ll find awesome little stamps that give you so much more to just a sentiment set. And how awesome is it that Bless – has two options for endings – LOVE that!

My Personal Favorite – The sentiment add ons in this set that I love the most are the three individual words – You Are Home. How great for military, loved ones, those recovering from a hospital stay, etc… I just love that this set reaches so many more options for card making than just fall and thanksgiving.

Gradient Watercolor Wash by Ingrid Blackburn

Stretch one of the sentiments from the Good Things stamp set by just using the top and bottom of it along with the three main sentiments in the Autumn Blessings set – don’t they just work together flawlessly! Notice all the little bits added – the wheat, leaf and little spray do hickey at the very bottom – don’t you just love my official name for that one. If you know the official name for that one – seriously…tell me in the comments!

A quick little watercolor wash, some flicking and then embossing with water and you’re all set. If you want to learn how to do ALL those techniques – check out StampNation. The library of tutorials there is insane – over 700 to date!

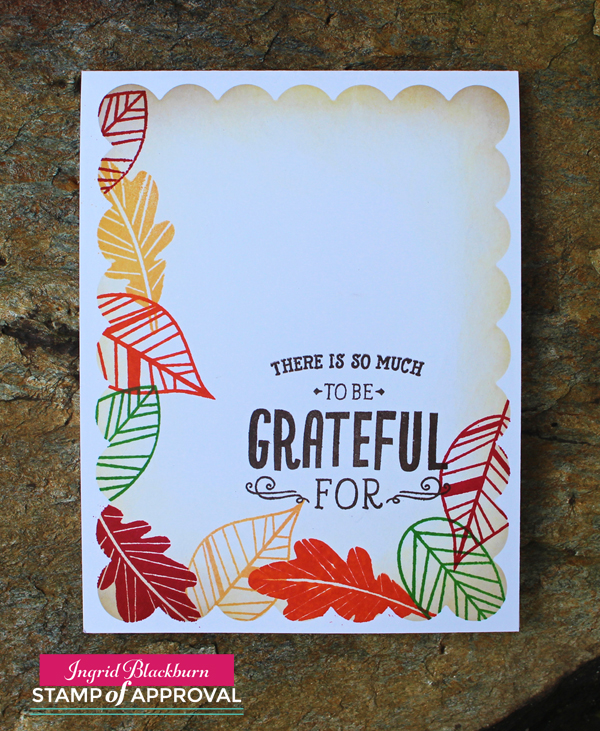
The sentiment in this next project may look familiar – do you recognize the top and bottom from the one above? Pair that up with a simple masked window using the Tags, Etc. Dies set – I LOVE that giant scalloped die – don’t forget to use it as a stencil like here! Stamp the leaves from the Leaf Motif stamp set in those amazing colors using Catherine Pooler inks and you’re all set! A simple one layer card that has amazing interest to it.

Counting Blessings SOA - One Layer by Ingrid Blackburn

Not bad right? Be sure to stop by tomorrow for more – it’s Release Day! Yay! Of course if you are a StampNation member – you can hang with us live in the Pajama Party Release tonight and get your box before everyone on the wait list! Membership has its perks!

Counting Blessings Stamp of Approval

Now hop on along to Kimberly Wiener’s Blog and then everyone else on the Blog Hop today. Leave a comment along with way to be entered in for a free Counting Blessings collection!! And check out Day 1 and 2 as well.

1. Catherine
2. Taheerah 
3. Lydia Evans
4. Ingrid Blackburn – You are Here
5. Kimberly Wiener – Hop here Next!
6. Jill

Supplies: To make finding the supplies I used in these projects a bit easier for you, here are a few clickable links. Compensated Affiliate Links are used when possible. Click here for disclosure. Happy Shopping!

Three videos – Why Use Gesso, How to Seal Paper Stencils & 3 Ways to Use Gelatos

Today I have three videos for you – 3 Gelato techniques, How to Seal Paper Stencils, & a How To & Why use Gesso. It’s a mediums kind of a day today. YAY!

Over at StampNation, we’re right in the middle of a live Masterclass with Faber-Castell. Last week the coverage was all about Gelato techniques – those super richly pigments little sticks of colorful joy. I’ll be honest – I have had Gelatos on my wishlist for three years (a girl can’t buy it all…and Santa kept skipping over them…guess I wasn’t nice enough…lol).

Faber-Castell Gelato Techniques

I finally got my hands on two of the 15 piece sets – Iridescents and Pastels. Plus last week I was showcasing at a Trunk Show over at Betty’s Creative Studio in Greensboro, NC with Catherine Pooler…and Betty had this WHOLE WALL of Faber-Castell goodness. (Insert Heavenly music and cherubs here…okay – no cherubs).

Seriously – all the colors individually, in sets, stencils, mediums, tools – you name it! Well, I had to quickly snap up 8 more colors. There are 68 gorgeous colors available, and I want them all after this last week. I seriously can’t put them down – I have gelato techniques on the brain. I’m surprised I haven’t put them on my lips yet…lol. OKAY – be honest – who has? Tell me in the comments!

Here’s the skinny…Gelato’s are a little chapstick like tube that is super richly pigmented and creamy. They literally (no joke) go on like butter – and yes, I’m saying that in a thick Long Island, NY voice. There are so many quick, simple techniques you can do with these little sticks from heaven. Today I’m teaching you three simple ones.

Faber-Castell Gelato Techniques

But first…a little prep is required for our project and tools. I thought I’d film two 1 minute tool tip videos for you – whoohoo!

How and Why to Use Gesso

Before we can even talk about Gelato techniques, we have to talk about Gesso. To spread like butter – you need to prep your work surface a bit with Gesso. This video talks about how to do this, and WHY:

Click Here to watch in HD on YouTube

Now that your paper is prepped – you can always use watercolor paper too, but regular cardstock works just fine with gesso. I do several full sheets at once and set them aside to dry – it’s great having those cut down and ready to use when I need to!

Gesso also comes in clear and black. I’ve been using Gesso for a while now in Mixed Media projects. Another great use for it is to go right over a mistake – it’s a blank slate…love that! (And I’ll admit…I’ve had to use that before)

How to Seal Paper Stencils

Faber-Castell makes these awesome paper stencil packs. For about $7 you can get TEN 6×6 stencils – seriously!!! When a regular stencil costs $5-$8, I’ll take $.70 any day! Plus the packs are themed – there are some Mixed Media ones, patterns – you have five packets to choose from.

But the dilemma for me was…I like to use wet mediums with my stencils – so why have to replace something? Regular stencils are made out of a plastic material, thus can take wet mediums and abuse. Paper, not so much. SO…seal them! This is where Glaze medium comes in handy. Plus you can use it for other things too (semi gloss look, collages, etc).

Here’s a quick little 1 minute video to show you just how to seal your stencils:

http://https://youtu.be/fDjPgBrBeC4

Click Here to watch on YouTube in HD

Okay – so we’ve got our stencils sealed, and our paper is prepped. Here’s the big tutorial you’ve been waiting for.

Three Gelato Techniques

At its core – a Gelato is a colored medium. Just like an ink pad – it’s a medium you can manipulate in several ways to add vibrant color to your projects. If you think of it like that, it’s not so scary – you use ink pads every day?!!

You’re going to learn how to use gelatos to do three techniques today: Seamless Wet Blending, the Vanishing Stencil Technique, and how to stamp with Gelatos.

Here’s a video to show you exactly how:

Click Here to watch on YouTube in HD

Blending is the most basic Gelato techniques. If you’ve rubbed your gelatos over cardstock that hasn’t be gesso’d, it’s not going to blend well. And forget about using water. To use water – you need watercolor paper or gesso’d cardstock. It’s just frustrating without the proper set up – set yourself up for success!

Regular blending and water blending is a very different look. Try them both and see which one you like more!

Tips for Seamless Wet Blending

  • To get that seamless look, use your finger or a paint brush. I like to use my fingers, as I can really control what and where the medium flows.
  • Control your water – don’t add too much at the start – go gradual, better to need to add, than have to take away
  • Spray a little water onto your craft mat or acrylic block for a quick place to draw just a little H2O
  • Choose colors that blend well – stay away from complimentary colors that will create mud
  • Keep going – if you feel it needs a pop of color – directly add your gelato for a little pop

I’m a stencil addict – and the vanishing stencil is a huge wow for me. Usually I’m always adding color through a stencil – so to remove it is fun.

Tips for the Vanishing Stencil Technique

  • Pull away with a clean part of your baby wipe, twist and rotate it to get a clean piece. You don’t want to transfer right back down
  • Keep your stencil steady – if you aren’t confident you can hold it in place, secure it with tape
  • Your gelato base can’t be set. The best result is to create your background color then remove while still slightly wet even.

Once you’ve removed the color – try adding a new one in the newly blank space! Tip for adding color through a stencil – add it to your stencil and wick it to your project with a tool or fingers. It’s much easier than jamming that creamy stick through the stencil!

Gelato Techniques

Tips for Stamping with Gelatos

While I didn’t end up using that piece in the project – it did turn out super cool. Be sure to properly remove your gelato from your stamp when done. A baby wipe or water should do the trick.

  • Add an even layer of color to your stamp
  • Lightly spritz with a fine mist spritzer. Try not to over water your stamp – you will lose a lot of the crispness in your image the more you add

So how was that? Now it’s YOUR turn! Seriously, don’t be afraid of this medium. It’s super easy to get crafty with.

Do you have Gelatos? Do you have favorite Gelato techniques? If so – tell me what you think in the comments below. If they are in a drawer – get them out and have some colorful fun.

Faber-Castell Masterclass

I’m looking forward to experimenting with more Gelato techniques and if you’re not a StampNation member – be sure to check it out. We had a Gelatos challenge this week (with a prize – still time to enter) Here is a little of the inspiration from the Dream Team:

There are over 700 videos, and several classes. There’s a live chat with Faber-Castell directly answering your questions this Thursday – hope you stop by there!

Till next time –

[optin_box style=”27″ alignment=”center” email_field=”email” email_default=”Enter your email address” email_order=”0″ integration_type=”aweber” double_optin=”Y” list=”3846012″ name_field=”name” name_default=”Enter your first name” name_order=”0″ name_required=”Y” opm_packages=””][optin_box_field name=”headline”]Want to LEARN with more exclusive videos?[/optin_box_field][optin_box_field name=”paragraph”]PHA+UGx1cyB5b3UnbGwgYmUgYWRkZWQgdG8gbXk8c3Ryb25nPsKgRlJFRTwvc3Ryb25nPsKgQ3JlYXRpdmUgVGlwcyBFLWxldHRlciB3aGVyZSBJIHNoYXJlIGV4Y2x1c2l2ZSBwcm9qZWN0cywgdmlkZW9zICZhbXA7IHRoZSAxMiBEYXlzIG9mIENocmlzdG1hczwvcD4K[/optin_box_field][optin_box_field name=”privacy”][/optin_box_field][optin_box_field name=”top_color”]undefined[/optin_box_field][optin_box_button type=”0″ button_below=”Y”]Get Instant Access![/optin_box_button] [/optin_box]


HLS Watercolor Challenge – Mixed Media Butterflies

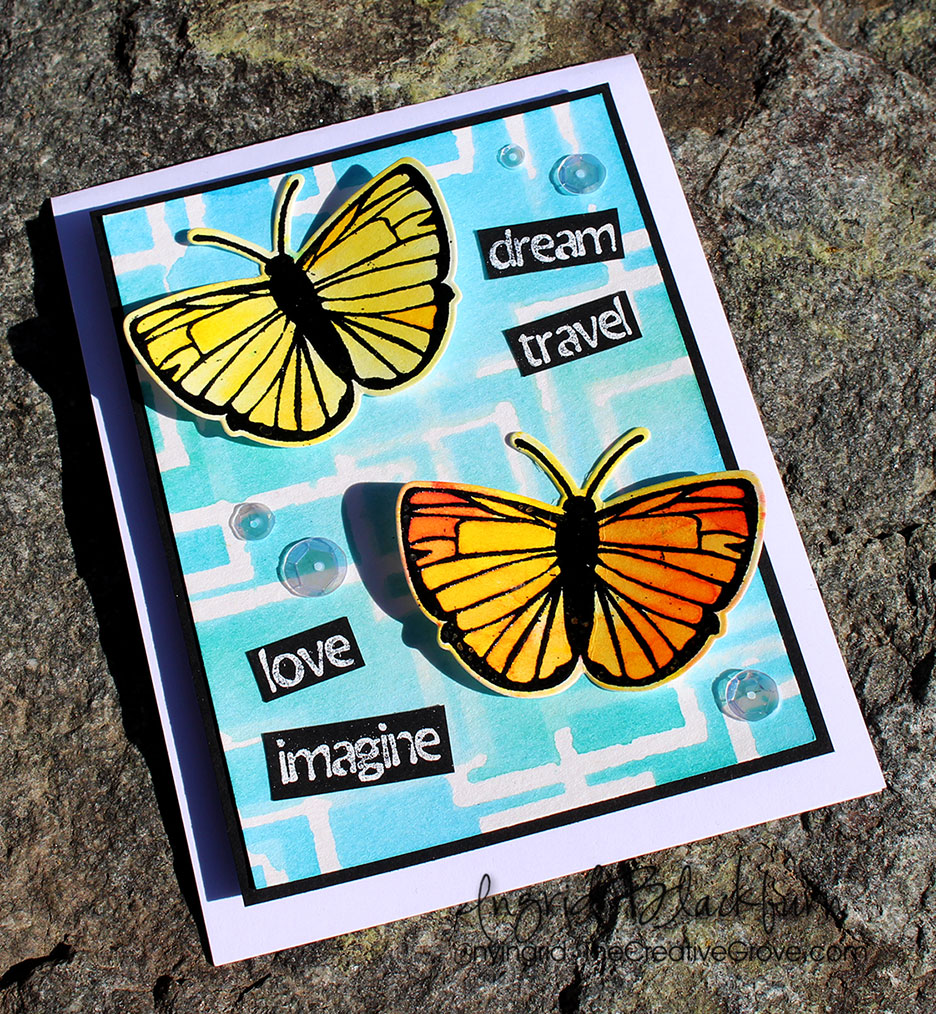
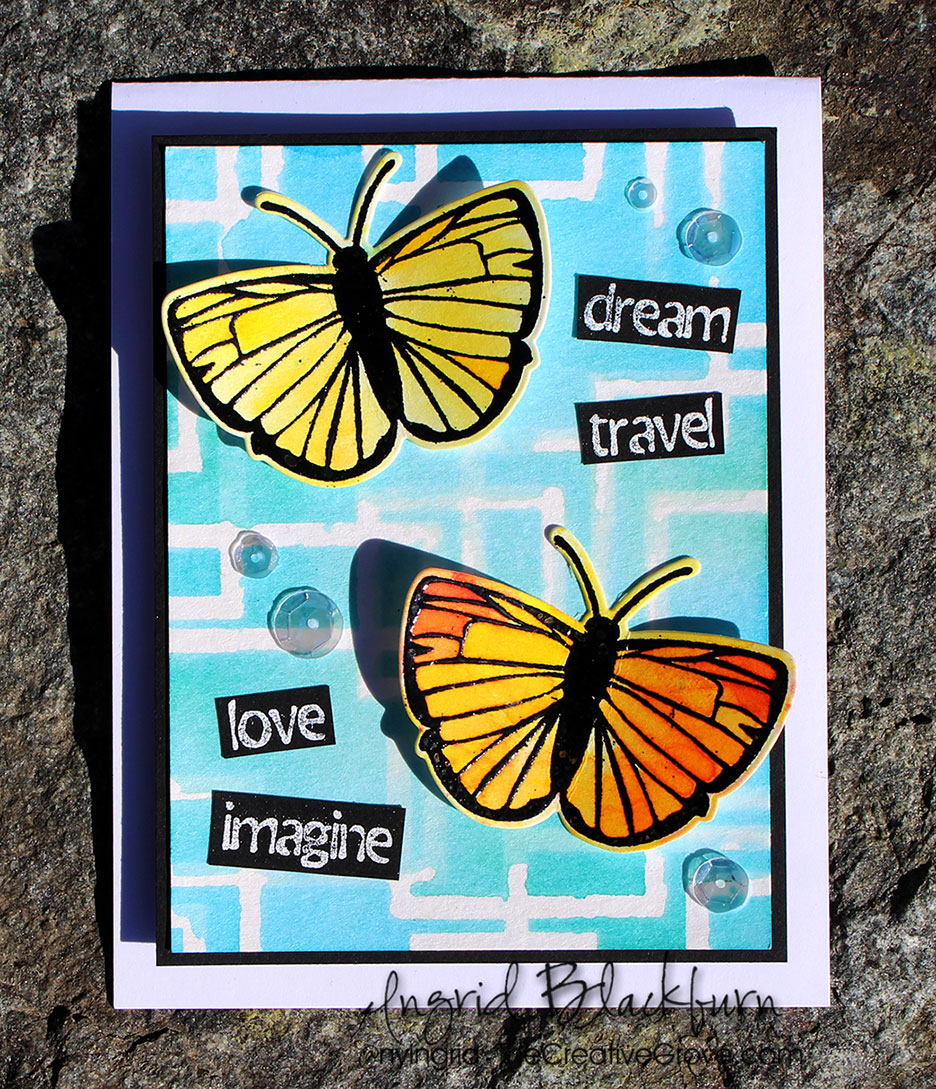
Have you ever watercolored with stencils before? Today I’m guest designing for a new watercolor challenge over at Happy Little Stampers. I don’t know of many watercolor challenges out there, so if watercolor is one of your loves, I encourage you to check it out! The design team is pretty talented over there, and I’m loving what they are creating every month.

I thought you would love a video in addition to a written tutorial, so here you have it. The watercolor challenge is always anything goes, and if you need a little structure – there’s always a little twist. You can play along or not, up to you – this month it’s dies.

Happy Little Stampers Watercolor Challenge

Happy Little Stampers challenges are always a lot of fun, and I encourage you to enter. This month there’s a prize too, you have nothing to lose!

HLS Challenge

I have been undergoing a massive move from Germany back to the US (plus all our things out of storage up from Florida), hunting for a new home, and living in a hotel for three months – yes, it’s been interesting to say the least! So, I haven’t been able to film much the past few months…boy did it feel good to FINALLY get to film in my new stamping studio in my new home. I’m still buried under boxes and the contractor is still doing work in our home (though we’re in the home stretch….finally).

Here’s a video for you of how I created this month’s project – step by step. You’ll learn to watercolor with stencils, and create some fun vibrant die cut embellishments with Brusho Crystals – which I’m totally addicted to!

Click Here to watch the video in HD on YouTube & Subscribe to my Channel

How to Watercolor with Stencils & Brusho

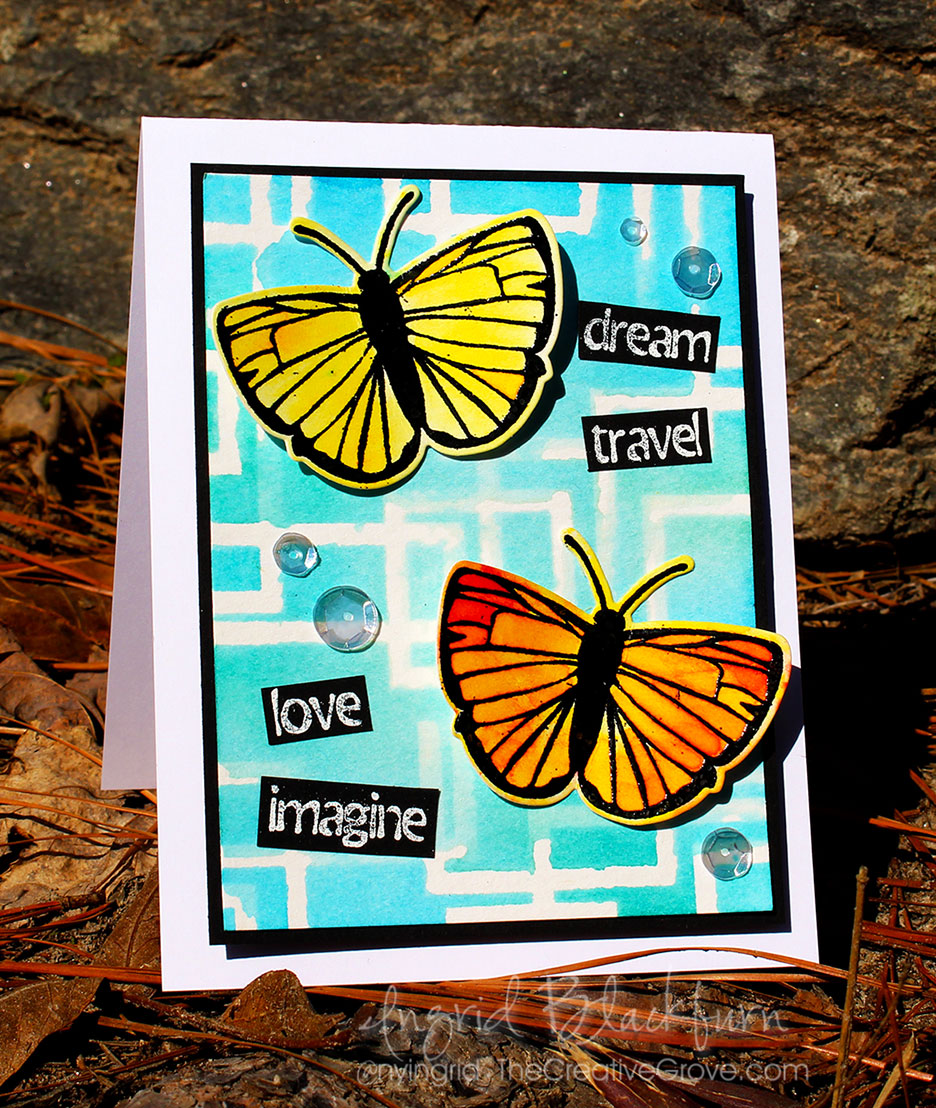
So, my original thought was to create cool watercolored die cuts – enter a little embossing and Brusho for the pop in color. It’s SO easy to watercolor with Brusho and you always look like a watercolor master.

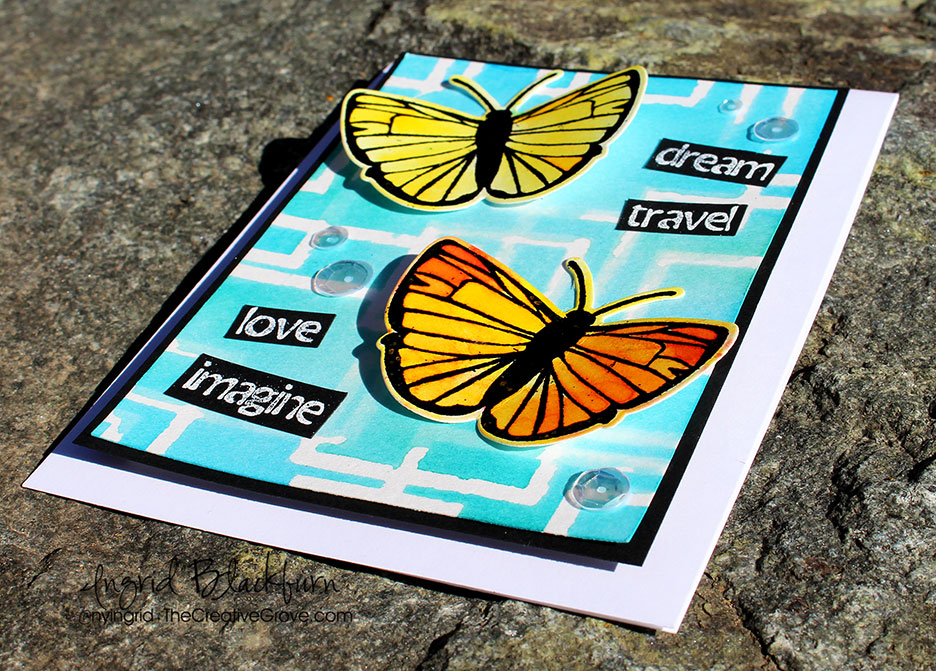
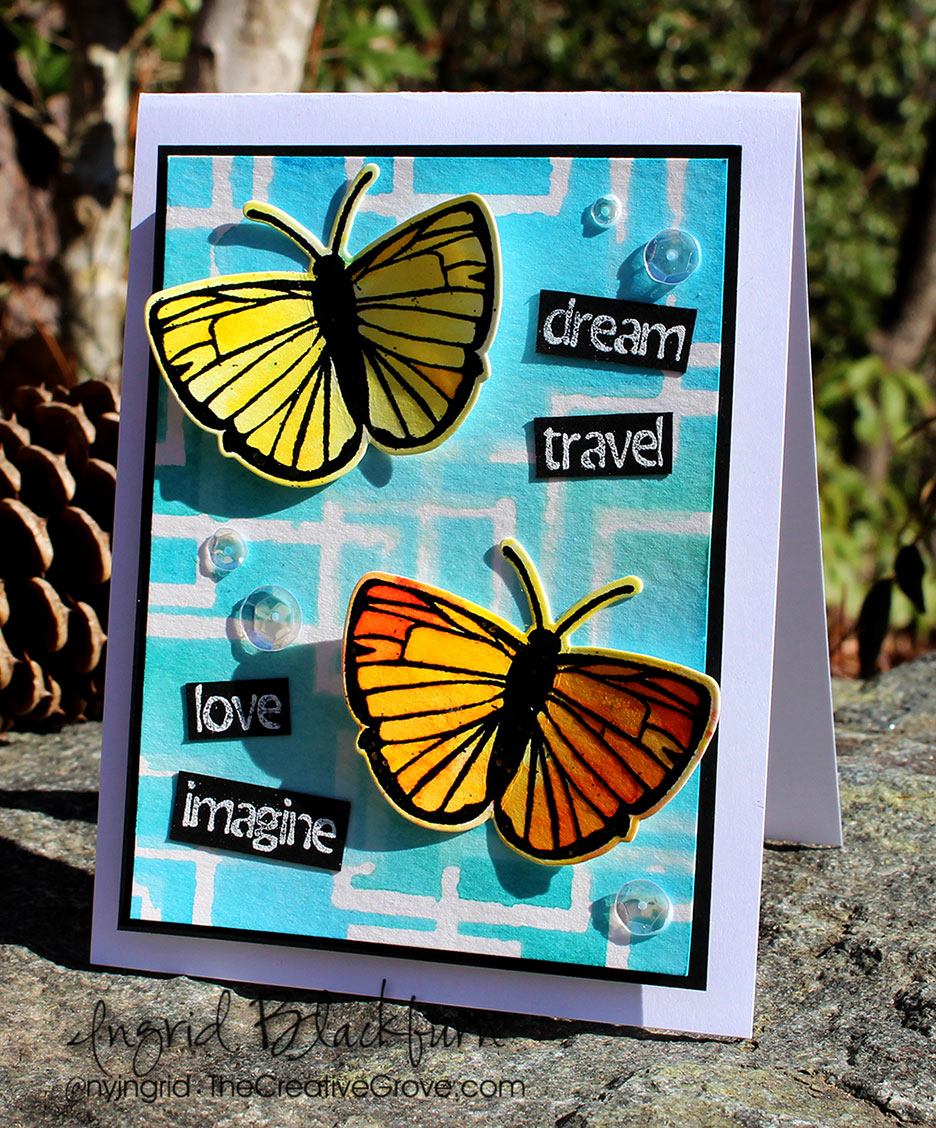
To compliment it, I thought you’d enjoy seeing how I sometimes watercolor with stencils – a not so perfect technique, but it really adds a lot to the background. My thought was to create a cool lattice for the butterflies from the Butterfly Birthday stamp set.

watercolor with stencils

And I’ve been just dying to use my new Mixed Media Fun stamp set – I just love all the components and words – it’s the perfect card for my niece.

  • First – secure your 140# Cold Pressed Watercolor paper to your work surface, and your stencil over that.
  • Apply your color, I used several shades of Distress inks and created a varied Blue background
  • I didn’t do this in the video, but next remove your tape securing your stencil down so you can lift it after the next step a bit easier.

watercolor with stencils - ingrid blackburn

  • To truly get a watercolor with stencils look, spritz with a mini mister and get the water going. Be careful of adding TOO much water. If you overdo it – water will run everywhere – especially under your stencil design.
  • Carefully lift up your stencil – straight up.
  • You can blot off any excess water with a paper towel – but be careful to lift it from your pattern – you’ll pull all the color. I use this mostly for the sides where the water is pooling. Dry immediately with a heat tool or naturally.

Watercoloring with Brusho

  • Next, on another piece of scrap watercolor paper, stamp two butterflies from Butterfly Birthday in Versafine Onyx Black ink. I love this ink to emboss with – it’s a pigment ink and is super crisp and deep in color.
  • Emboss in black and heat set.
  • Sprinkle some brusho powders over your butterflies and spritz as in the video to activate the pigments.
  • Dry with a heat tool or naturally
  • Cut out using the co-ordinating Butterfy Dies & a Die Cut Machine
  • Emboss some of the greetings from Mixed Media Fun in white on Black card stock
  • Cut them out using long handled scissors – this helps to give you a straighter edge.

Watercolor with Stencils & Brusho

  • Adhere your pieces like the card. TIP – use Mono Liquid Glue to adhere the watercolor to the black, bend straight or place something heavy on to help straighten your card stock. You may also want to pop up the main watercolor panel onto fun foam for a little drama.
  • Bend up the sides of your butterflies and pop the sides up with some dimensional foam. I have the tops of the wings higher than the bottom (doubled the foam) and adhered with some glue in the center. This gives the illusion of flight.
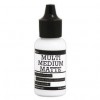
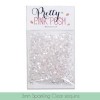
  • Add some sparkling clear sequins from Pretty Pink Posh with Rangers Multi Matte Medium (dries clear).

Watercoloring with Stencils

Ultimately, my watercolor got a little into the pattern, but I don’t let stuff like that get me down anymore. You can cover a lot of it up with the die cuts and words, and it gives it a more organic feel anyway. It’s art, don’t stress over it, have fun!

Let me know what you think in the comment section below. I hope now, you’ll try to watercolor with stencils yourself, and that you enjoyed this tutorial!

Now head on over to the Happy Little Stampers Watercolor Challenge to see what the Design Team whipped up for you. I can’t wait to see what you create – I’ll visit your blog and definitely check it out! 🙂

HLS Watercolor Challenge

And if you liked this tutorial, subscribe to my YouTube channel and newsletter list for more exclusive tutorials. See you very soon!

[optin_box style=”28″ alignment=”center” disable_name=”Y” email_field=”email” email_default=”Enter your email address” email_order=”1″ integration_type=”aweber” double_optin=”Y” list=”3846012″ name_field=”name” name_default=”Enter your first name” name_order=”0″ name_required=”N” extra_field_1_name=”Name” extra_field_1_order=”0″ extra_field_1_required=”Y” extra_field_1_hidden=”N” extra_field_1_title=”Enter Your Name” opm_packages=””][optin_box_field name=”headline”]Learn more with exclusive video tutorials…[/optin_box_field][optin_box_field name=”paragraph”]PHA+UGx1cyB5b3UnbGwgYmUgYWRkZWQgdG8gbXk8c3Ryb25nPiBGUkVFPC9zdHJvbmc+IENyZWF0aXZlIFRpcHMgRS1sZXR0ZXIgd2hlcmUgSSBzaGFyZSBleGNsdXNpdmUgcHJvamVjdHMsIHZpZGVvcyAmYW1wOyB0aGUgMTIgRGF5cyBvZiBDaHJpc3RtYXM8L3A+Cg==[/optin_box_field][optin_box_field name=”privacy”][/optin_box_field][optin_box_field name=”top_color”]undefined[/optin_box_field][optin_box_button type=”1″ text=”Click For Immediate Access” text_size=”24″ text_color=”#ffffff” text_font=”Lato;google” text_bold=”Y” text_letter_spacing=”-1″ text_shadow_panel=”Y” text_shadow_vertical=”1″ text_shadow_horizontal=”0″ text_shadow_color=”#000000″ text_shadow_blur=”0″ styling_width=”75″ styling_height=”20″ styling_border_color=”#666666″ styling_border_size=”1″ styling_border_radius=”8″ styling_border_opacity=”99″ styling_gradient_start_color=”#86c833″ styling_gradient_end_color=”#3f8e30″ drop_shadow_panel=”Y” drop_shadow_vertical=”1″ drop_shadow_horizontal=”0″ drop_shadow_blur=”0″ drop_shadow_spread=”0″ drop_shadow_color=”#000000″ drop_shadow_opacity=”50″ inset_shadow_panel=”Y” inset_shadow_vertical=”1″ inset_shadow_horizontal=”0″ inset_shadow_blur=”0″ inset_shadow_spread=”0″ inset_shadow_color=”#c2ee80″ inset_shadow_opacity=”100″ location=”optin_box_style_28″ button_below=”Y”]Click For Immediate Access[/optin_box_button] [/optin_box]


[op_advanced_headline style=”1″ effect=”type” align=”left” accent=”#244C5E” headline_tag=”h2″ line_height=”” highlight=”” top_margin=”0″ bottom_margin=”0″]U3VwcGxpZXM=[/op_advanced_headline]

To make finding the supplies I used in this project a bit easier for you, here are a few clickable links. Those that have multiple shopping options are indicated with letters – EH – Ellen Hutson, SSS – Simon Says Stamp. Compensated Affiliate Links are used when possible. Click here for disclosure. Happy Shopping!

Nature Mixed Media Challenge

mixed-media-card-woodgrain background

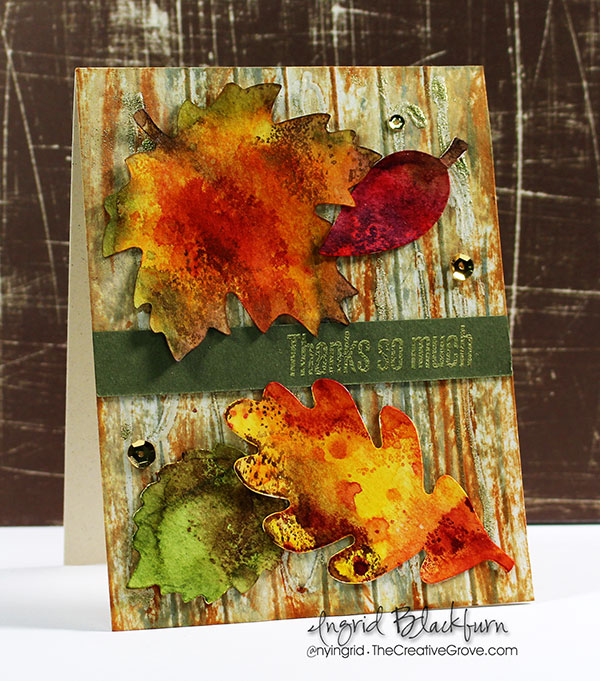
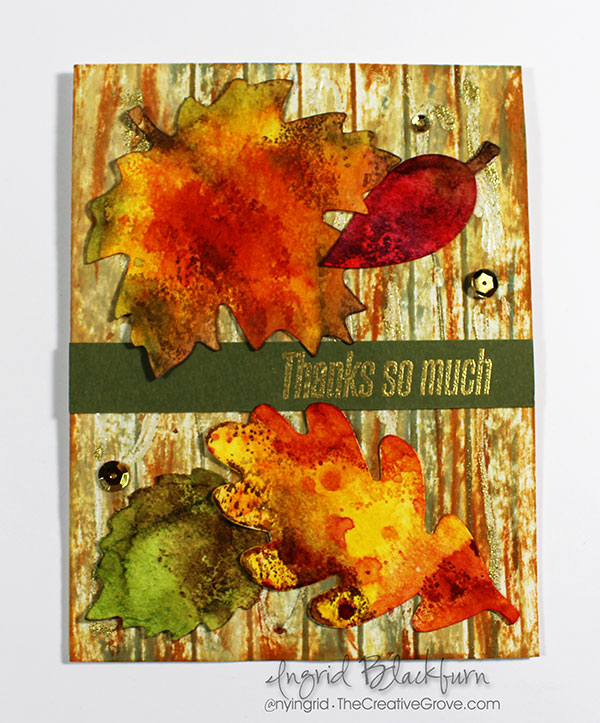
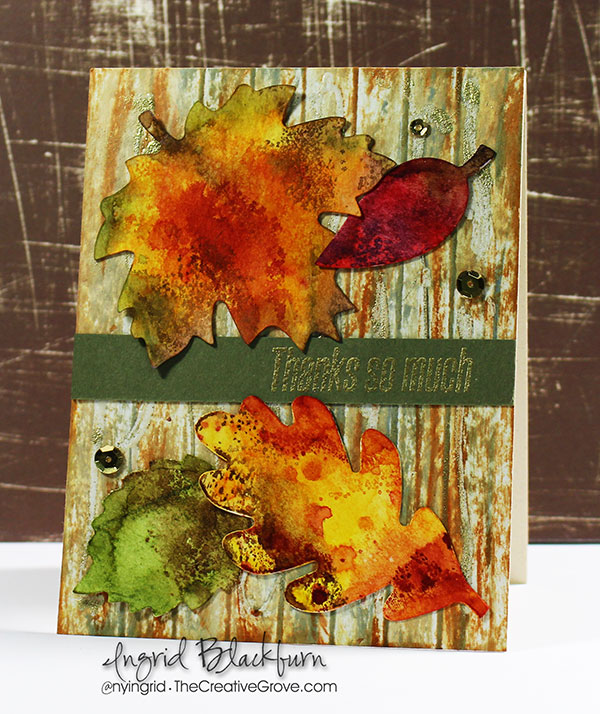
Fall is one of my favorite times of the year. The rich textures and colors that Nature gives us is not only excellent inspiration, but the colors are one of my favorite palette to work with! For today’s project, I have a nature themed card done in a mixed media style. It’s card nature mixed media fun – creative and full of gorgeous textured techniques. Time for the Happy Little Stampers Nature Mixed Media Challenge.
hls-mixed-media-challenge-october-2016

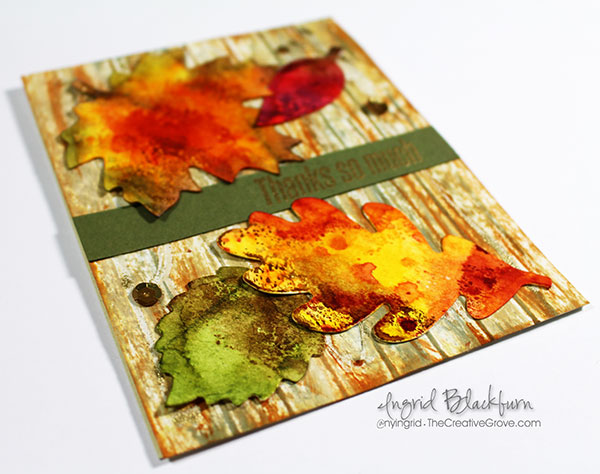
You may be wondering what makes this a nature mixed media card. We have a background that has some glue mixed with direct to paper distress techniques, water & then some embossing over top. Then some added die cuts that use the layered watercolor technique – wrinkle free distress with some stamping & embossing. That’s it!
The ideas were flowing for this project – fern stenciling or monoprinting….I tore off actual bark from some wood headed into our fireplace tonight – it’s 38 degrees outside…yikes! But eventually I settled on some good ole mixed media techniques to give my card texture and interest.

Nature Mixed Media Tutorial

You’ll love this cool technique for a woody background, I’ve been wanting to try it out for a while – Glue Woodgrain Texture. Over on my friend Karen Dunbrook’s blog – Snippets, you’ll find a great tutorial. This technique uses glue to create some great texture for a wood grain look. I’m not sure I nailed it this first time, but since the fence is only peeking out – I figured it would work!

mixed-media-card-nature-ingrid-blackburn-003

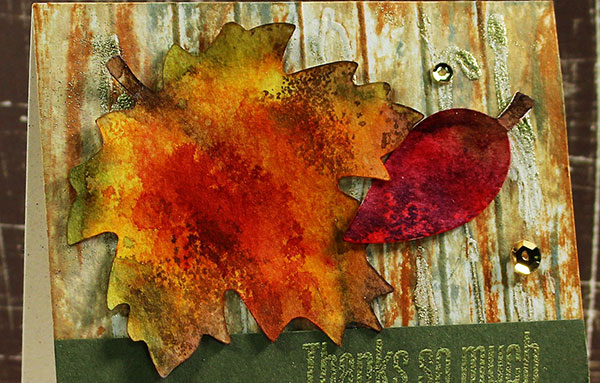
Not straying at all from Karen’s design, I had a gorgeous woody background for this card. In a nutshell, you’ll spread a little glue over a thick piece of card stock. Let it dry, flip over and score some lines – mine were 1/2″ apart. Use direct to paper techniques with Antique Linen, Rusty Hinge and Weathered Wood Distress Inks. Spread them out with a little water – I misted mine then used a water brush. Overall it looks pretty cool.

nature-mixed-media-fall leaves technique

The glue would not dry fast enough on this wood grain background for me. I’m SO not patient enough…so I dried it the best I could, laid it to the side & hit it with a heat tool. Then I chose to spread some Gilded Gold embossing powder by Brutus Monroe over the sticky parts and started embossing – it has an awesome look!

wrinkle free distress technique

Once the background is done and attached to the card base, use the wrinkle free distress technique to add fall colors to some die cut leaves. The leaves are cut from #140 Cold Pressed Watercolor paper to get a smooth look. I can’t decide which leaf is my favorite – the colors are so great together. I just kept playing….and I think some actually look natural, what do you think?

nature mixed-media-card-

Next you’ll want to add a greeting – to get it to pop a bit, emboss it on a strip. I used one from the HLS Mix Mash stamp set in Gilded Gold.  A few gold sequins, and it’s a great fall inspired card.

Your Turn Now

Now it’s your turn….how does Nature and Mixed Media inspire you? For more inspiration, be sure to check out the awesome projects my team mates designed too. Here’s the main Challenge Post for you to post your creation! There’s even a prize….

See you tomorrow for some more creative inspiration!

Signature

[optin_box style=”12″ alignment=”center” email_field=”email” email_default=”Enter your email address” integration_type=”aweber” double_optin=”Y” list=”3846012″ name_field=”name” name_default=”Enter your first name” name_required=”Y” opm_packages=””][optin_box_field name=”headline”]Learn more with our exclusive FREE video series:[/optin_box_field][optin_box_field name=”paragraph”]PHA+UGx1cyB5b3XigJlsbCBiZSBhZGRlZCB0byBteSBGUkVFIENyZWF0aXZlIFRpcHMgRS1sZXR0ZXIgd2hlcmUgSSBzaGFyZSBleGNsdXNpdmUgcHJvamVjdHMsIHZpZGVvcyAmYW1wOyB0aGUgPHN0cm9uZz4xMiBEYXlzIG9mIENocmlzdG1hczwvc3Ryb25nPiBQcm9qZWN0IFNlcmllczwvcD4K[/optin_box_field][optin_box_field name=”privacy”][/optin_box_field][optin_box_field name=”top_color”]undefined[/optin_box_field][optin_box_button type=”0″ button_below=”Y”]Get Instant Access![/optin_box_button] [/optin_box]


Simple Distress Background

Today we’re going to focus on a simple Distress Background that really pack a punch. It’s all part of the Distress Mixed Media challenge going on over at Happy Little Stampers this month.

HLS Mixed Media challenge September 2016 - Distress

Be sure to stop by all the designer blogs for some cool looks with this challenge. And welcome Autumn from Sew Paper Paint for a very cool look. I love her blog – can seriously get lost in her work!

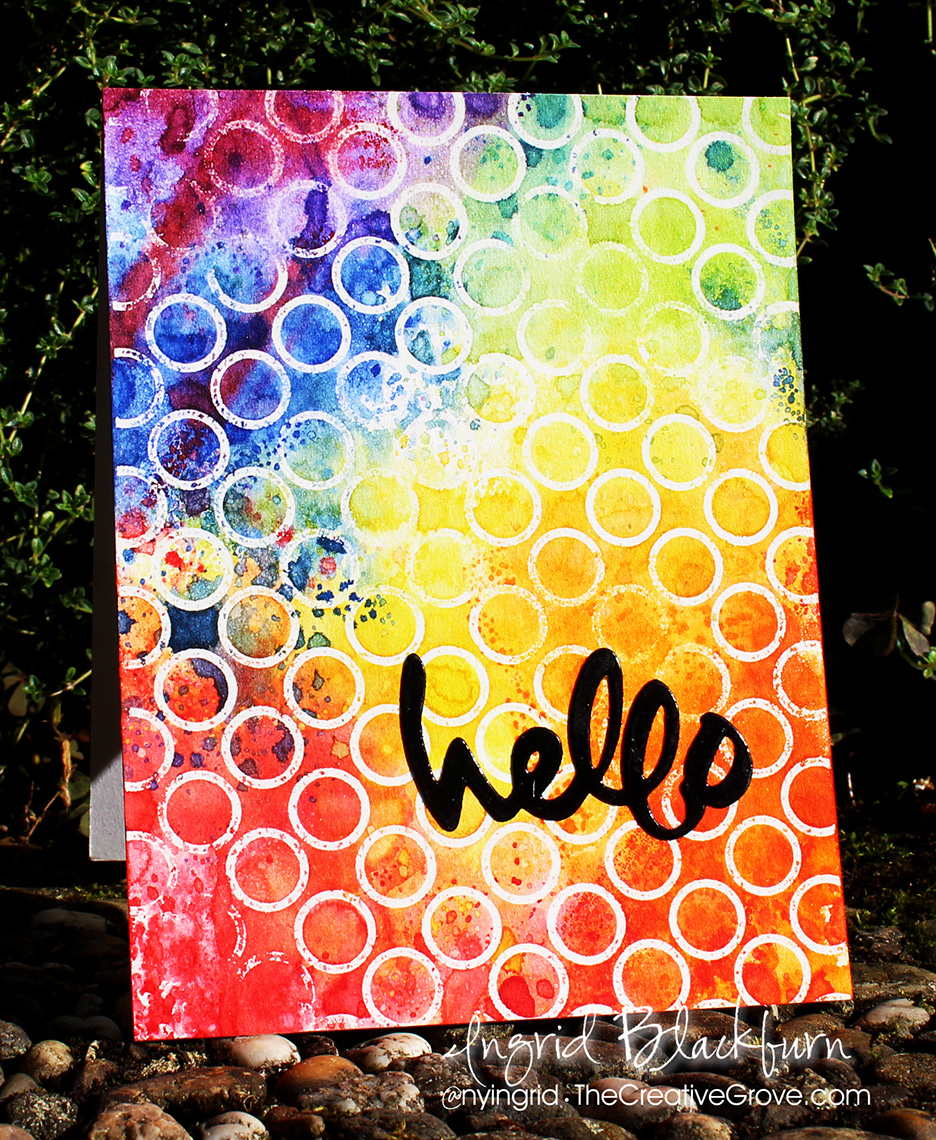
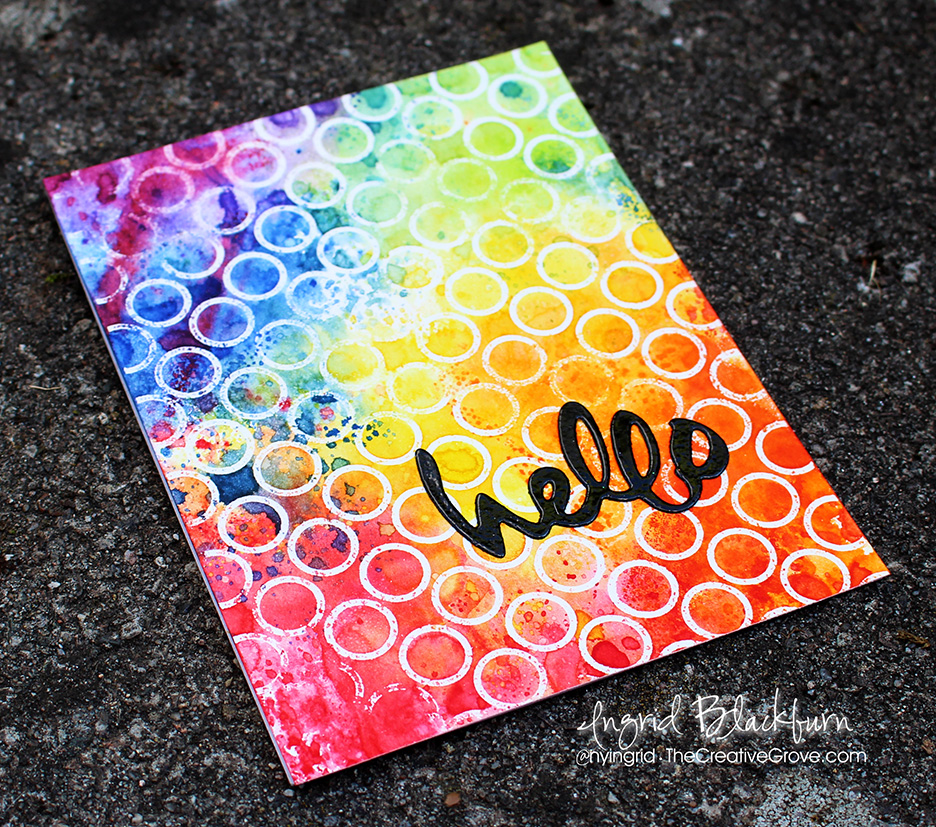
It’s no secret that I love anything distressed – from inks to paper to texture. This project really takes the word distress and not only uses the ink, but gives it a great Mixed Media look with the Winkle Free Distress Technique. The end result is a very cool distress background.

Distress-Mixed-Media---001

Distress Background Tutorial

To get a cool look, emboss a background stamp or series of images in clear on 140# Cold Pressed Watercolor Paper. Don’t worry if you don’t get the whole image – I missed a spot and rubbed off some powder in several spots to get a distressed/grunge look. This will resist the Distress watercolor we’re about to add next.

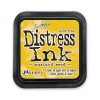
First lay down your lightest color onto your craft mat – Mustard Seed (Yellow) and spritz. You’ll keep it to the center and a little outward. Click here for a video on just how to do this technique. Be sure to mostly dry it inbetween layers to build up the texture and distress look. Then move onto the next color. You’ll do it in this sequence after each color. TIP – keep the color wheel in mind when overlapping colors. You don’t want to overlap complimentary colors – colors that are opposite on the color wheel such as Purple & Yellow. Complimentary colors look awesome together, but when blended turn to mud.

Distress Background

Next add the Carved Pumpkin – overlapping a little with the yellow. Next the Candied Apple overlapping with the Yellow a little and the Orange. The key is to overlap a little, but also preserve some of the original color and keep some pure too.

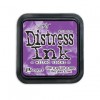
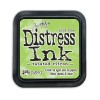
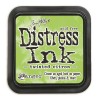
Going counter clockwise, add some Blueprint Sketch in the same manner, skip over the the right and add some Twisted Citron. Fill the remaining spot with Wilted Violet. Add a little Candied Apple to the Wilted Violet to create that cool Blackberry color…and add some spots here and there where you feel you need some texture or an added spot of color.

Distress Inks - Wrinkle Free Technique

Once completely dry, place your dried watercolor paper in-between some old pages of a phone book and iron it on the hottest setting. This will transfer the embossing powder to the phone book page and give you the added bonus of straightening out your watercolor piece! Iron just a few minutes (30 sec to 2 min). The key is that you don’t want to see any shiny – switch to a clean page in the phone book if needed. To see me do this, check out this HLS video (at 15:30). This technique is called Faux Bleaching.

Wrinkle free technique - Distress Background

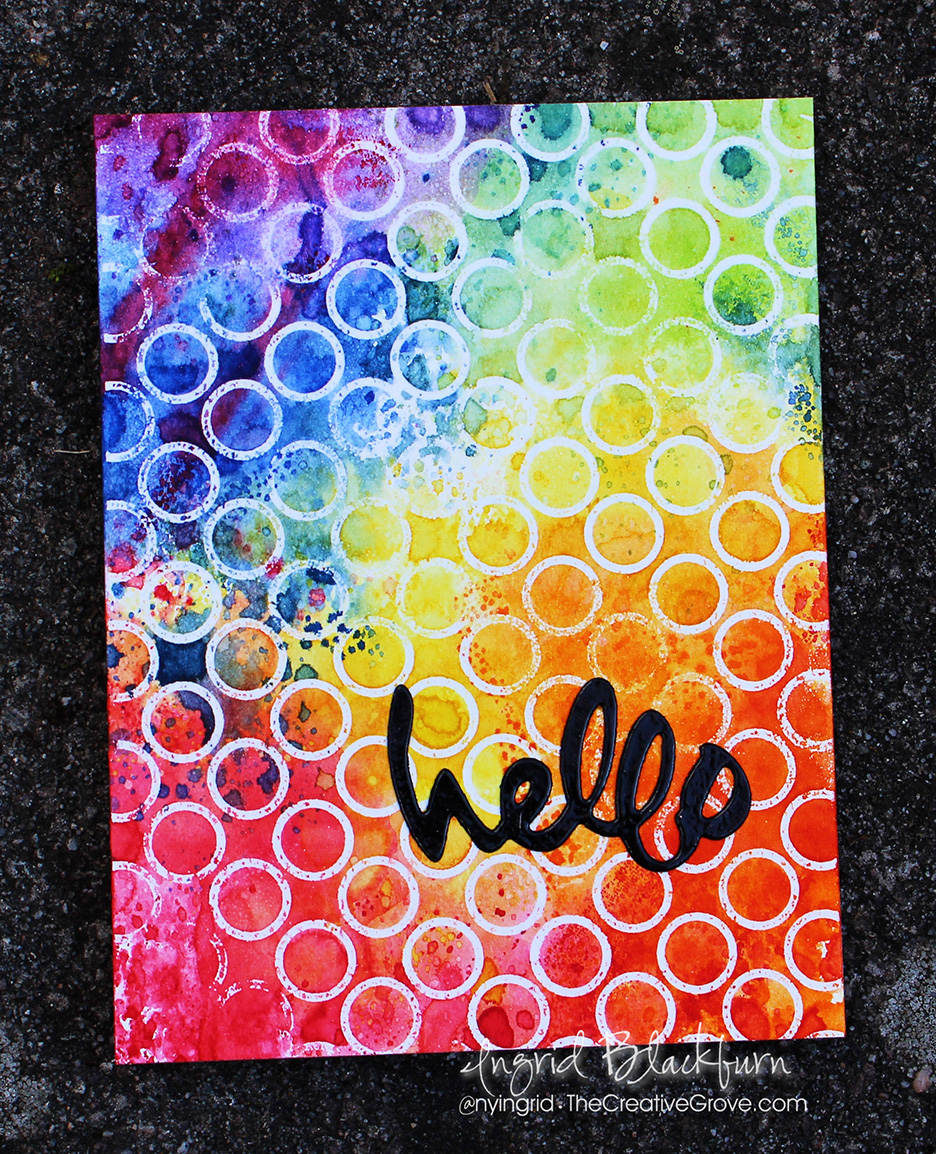
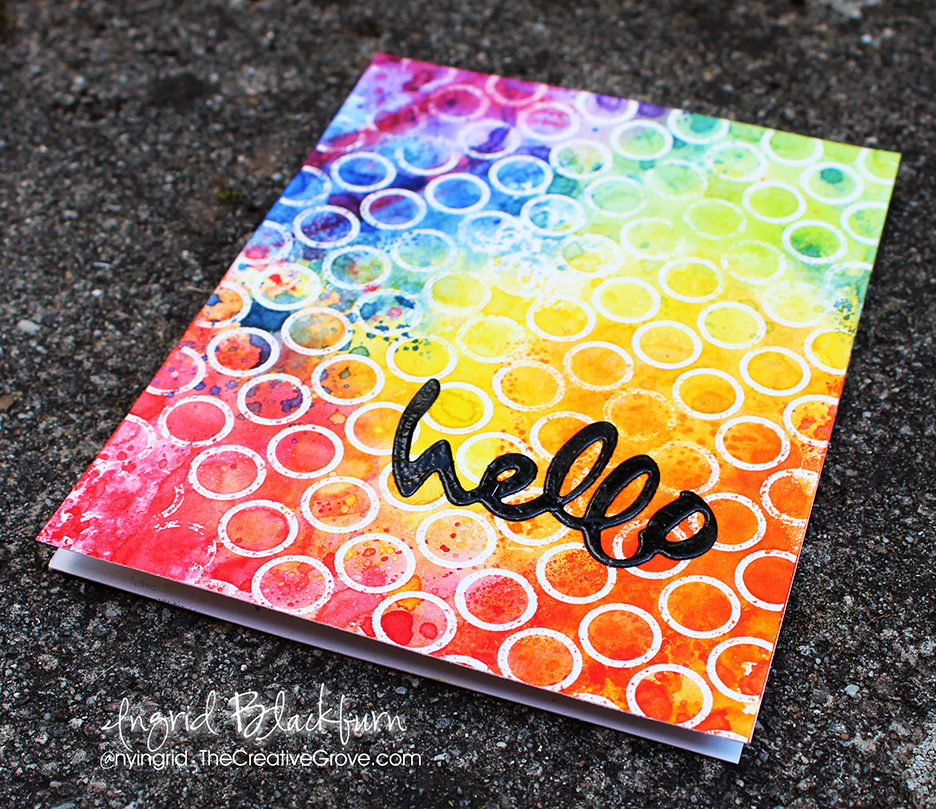
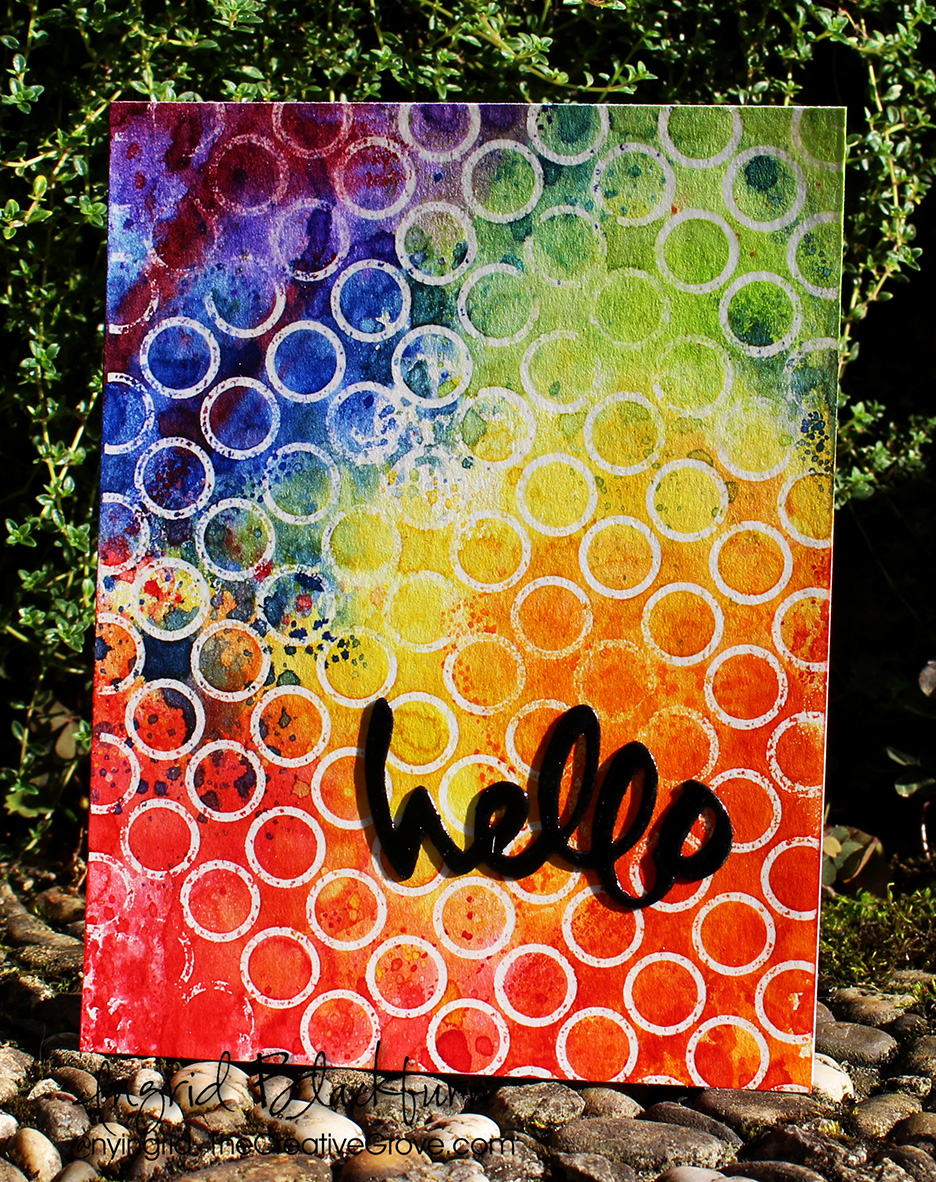
Isn’t it a cool project!!! What’s so awesome about it is that the Mixture of medias used really blend together to create an amazing Distress look. I didn’t want to take away from the cool background, so I kept the greeting simple and didn’t add any sequins (though I was tempted). I embossed the Hello (new die from Stamplorations – isn’t it cute?!!) in clear embossing powder. The shine against the flat distressed background just rocks. I hope you think so too!

Distress-Mixed-Media---005

SO I’m challenging YOU now. It’s my favorite technique/medium….Distress. Jump on into this challenge – leave me a comment that you did and I can’t WAIT to see what you create!

Until next time –

Signature

[optin_box style=”12″ alignment=”center” email_field=”email” email_default=”Enter your email address” integration_type=”aweber” double_optin=”Y” list=”3846012″ name_field=”name” name_default=”Enter your first name” name_required=”Y” opm_packages=””][optin_box_field name=”headline”]Learn more with our exclusive FREE video series:[/optin_box_field][optin_box_field name=”paragraph”]PHA+UGx1cyB5b3XigJlsbCBiZSBhZGRlZCB0byBteSBGUkVFIENyZWF0aXZlIFRpcHMgRS1sZXR0ZXIgd2hlcmUgSSBzaGFyZSBleGNsdXNpdmUgcHJvamVjdHMsIHZpZGVvcyAmYW1wOyB0aGUgMTIgRGF5cyBvZiBDaHJpc3RtYXMgUHJvamVjdCBTZXJpZXM8L3A+Cg==[/optin_box_field][optin_box_field name=”privacy”][/optin_box_field][optin_box_field name=”top_color”]undefined[/optin_box_field][optin_box_button type=”0″ button_below=”Y”]Get Instant Access![/optin_box_button] [/optin_box]

Supplies

I get asked a lot where I get some of my supplies. To make it easier for you, I’ve listed all the supplies below. I myself shop at various places and know you probably have your favorite online stores too! So I included choices where I could or if there is just one – it’s the best price I’ve found. 🙂

The letters below each image are links to stores where you can buy each of the products listed. EH – Ellen Hutson, SSS = Simon Says Stamp, AZ = Amazon, etc. I buy almost all my own supplies. To help support my blog, videos & allow me to keep creating for you, I use compensated affiliate links when possible.


Adding a Simple Metal Look to Your Cards

Mixed-Media-Metal---Ingrid-Blackburn-001

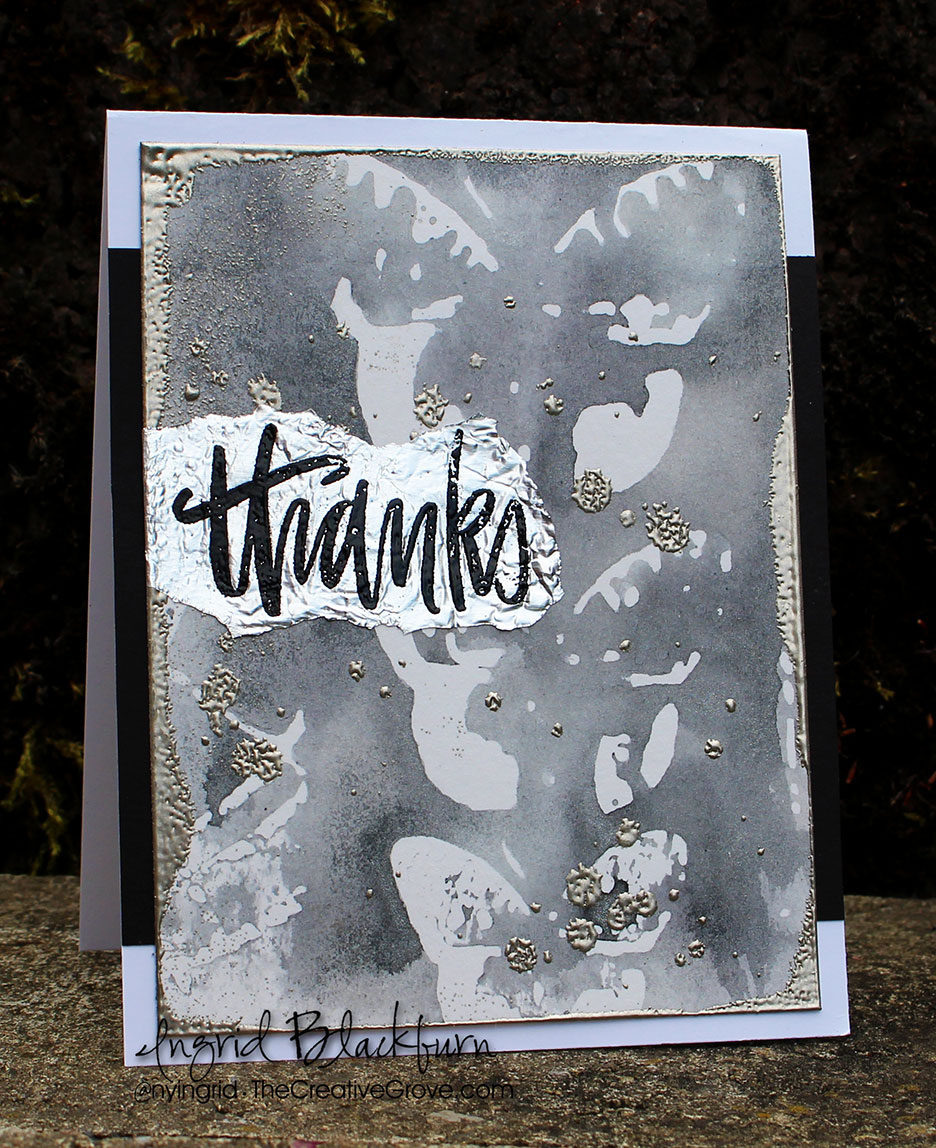
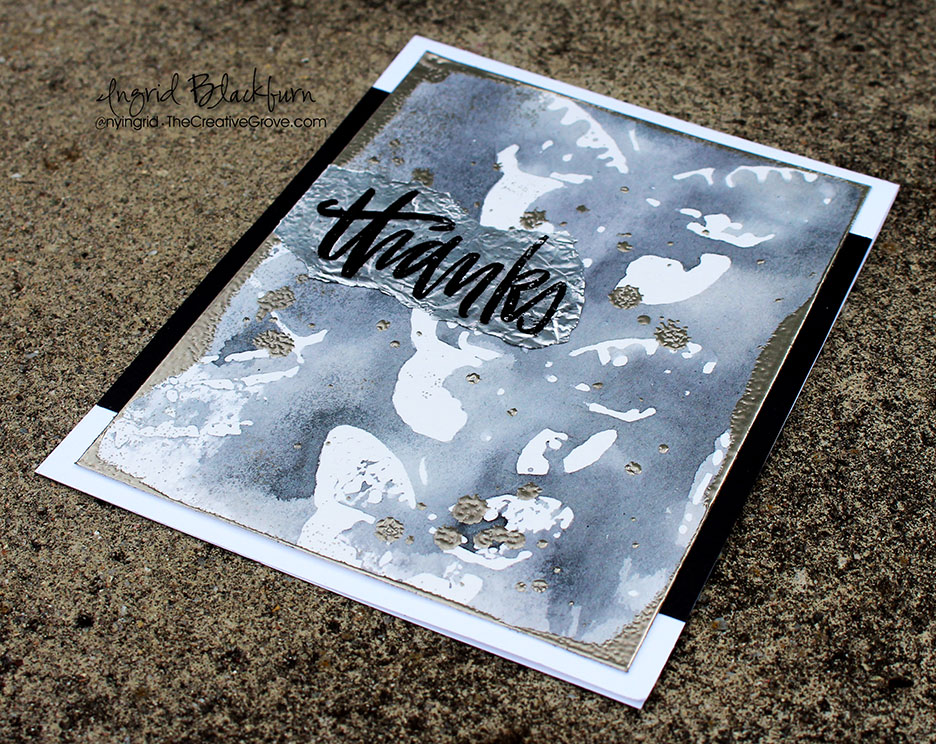
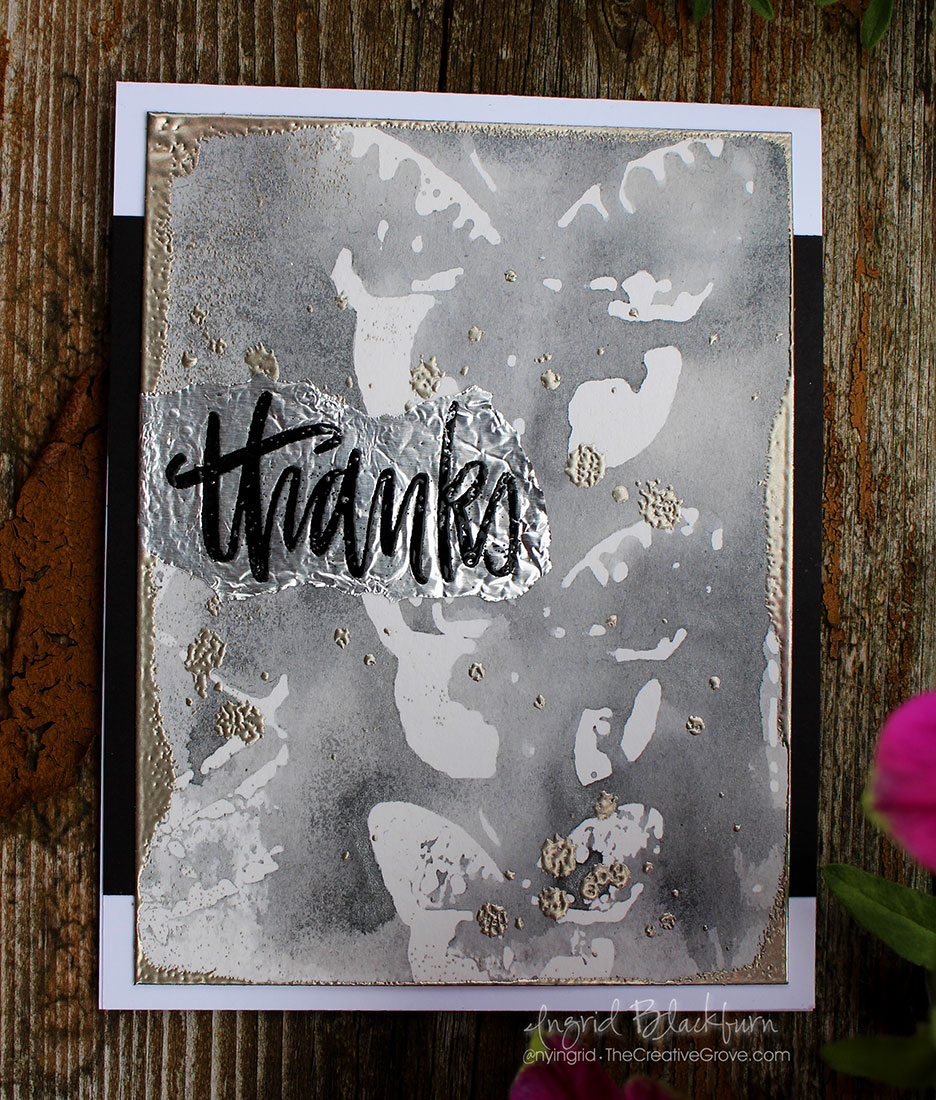
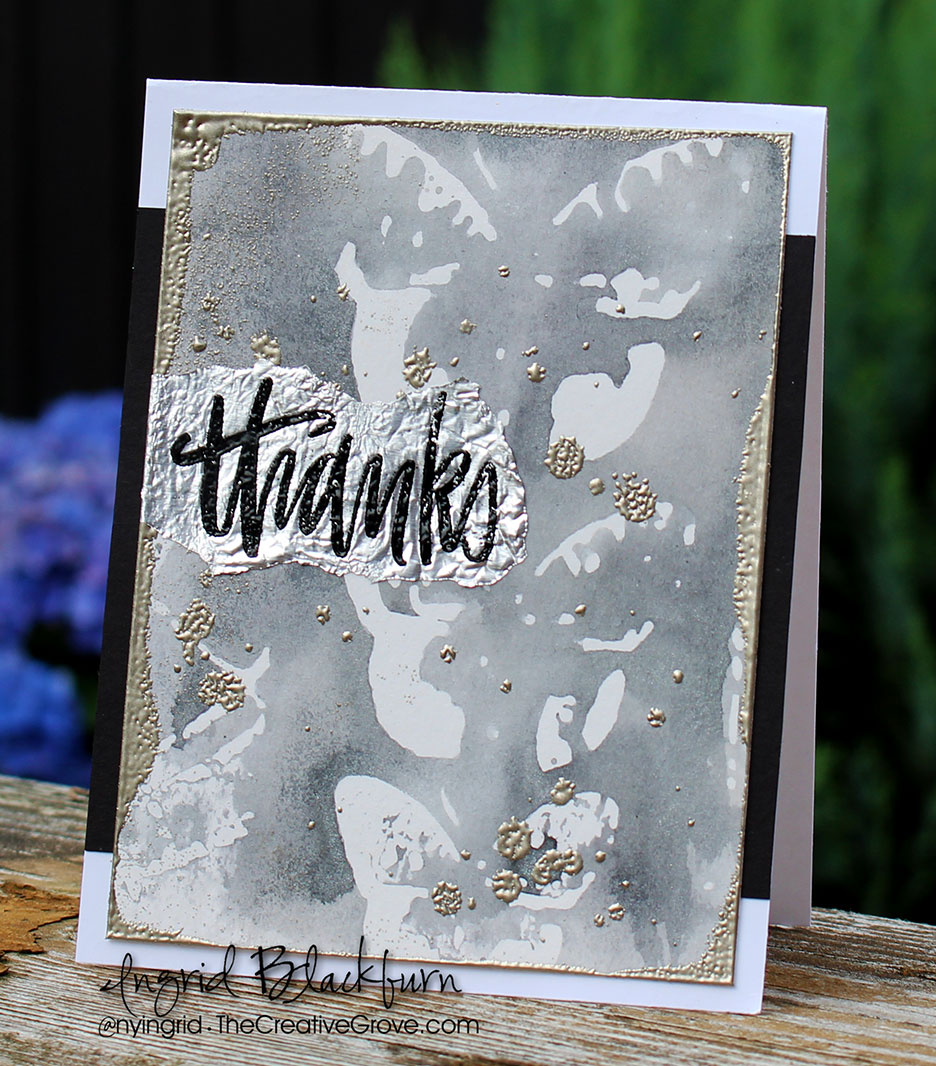
I love adding metal to cards. It’s an unexpected look and it’s always fun playing with textures that I don’t use in my day to day crafting. Metal is something that’s quite easy to add.

It’s time for yet another Mixed Media challenge over at Happy Little Stampers….first up – I have something totally easy that you can immediately implement in your crafting – tin foil and metallic embossing powders – and be sure to read on – I didn’t add them the traditional way!

HLS Mixed Media challenge August 2016

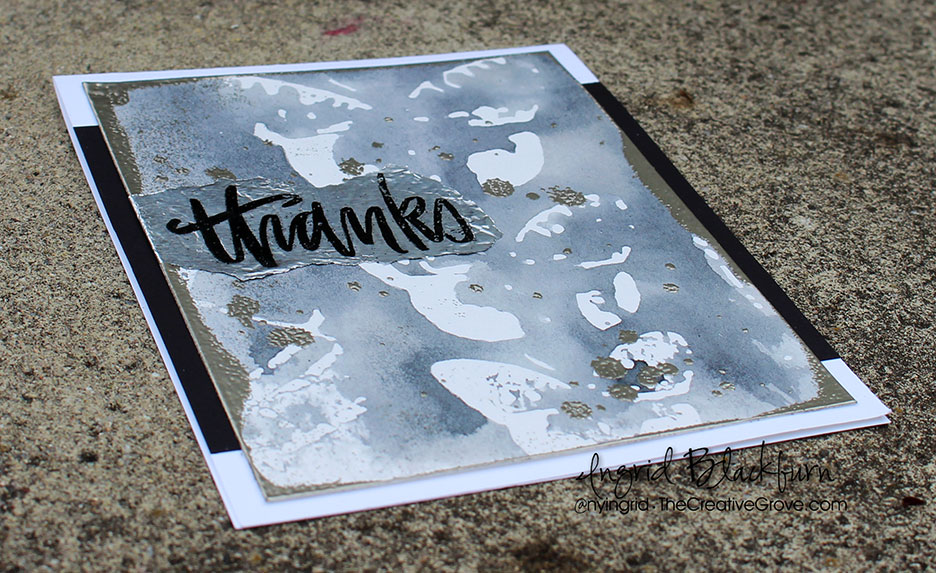
When you think of metal, you may go to the chunky pieces that you can add, but I wanted to keep my mixed media piece a little flatter. So to get a natural look, I used two everyday items we all have in our homes – aluminum foil and water.

Simple ways to add Metal to your Projects:

To get a nicely watercolored look in the project on the right, you’ll want to use a stencil with a solid negative space (the space that doesn’t get used). I chose the Mini Specimens stencil by The Crafters Workshop – I LOVE their stencils.

First, stencil through your positive image onto a project. The excess ink will collect on the negative space of the stencil. The watercolored look in our project today comes from the ink that was left over from the project on the left. I added Hickory Smoke and then some Soot Black on top of some embossing paste in this watercolor mixed media piece – there’s a video for that project (link below):

Mixed-Media-Metal---Ingrid-Blackburn-010

Click Here for the Left Project’s Tutorial & Video

Once you’re done adding color to your positive image (the colorful one on the left), grab a second piece of watercolor paper, spritz your stencil with all the left over ink on it with a mini mister and press into your paper. You’ll then get a watercolored negative space look for your card stock. You basically turned your stencil into a stamp!

Since we’re using the negative of the image – note that when you stamp it – it’s reversed from the positive one (colorful left project above)!

It’s a little hard to see in the photos, but this project has a sparkly sheen to it. To get that look, use pearlized water by adding a little Perfect Pearl (Perfect Pearl shade by Ranger) into my water filled mini mister rather than regular water.

Mixed-Media-Metal---Ingrid-Blackburn-004

Now that we have our mixed media base – stenciling & watercolor, next up is adding some metallic accents. The coolest part is that for the splotches you don’t even use ink – what? Yup….spritz a little water into to palm of your hand and flick it at your project. Keep this a little at a time so you don’t add huge splotches.

Mixed-Media-Metal---Ingrid-Blackburn-002

Add embossing powder – I used Pewter Powder and emboss. Pretty cool, huh? That’s how you get that realistic splotch look.

TIP – when you heat your powder, since there’s no ink to really grab onto it – first heat from underneath. That way your powder will start the melting process, finish from above, but keep your heat tool a little further away so you don’t blow all the powder away.

Mixed-Media-Metal---Ingrid-Blackburn-003

To get that great look to the sides – use water or versamark in a direct to paper manner. Once you have the look you’re going for, grab some heavy duty tin foil. stamp a sentiment in versamark, and emboss in Black. I used a new stamp set Hand painted Thanks by Neat & Tangled.

The black is a nice contrast to the shiny Tin Foil. Tear around it  leaving a longer strip to one side to overlap when you attach. Use glue to attach it to your watercolor paper. If you wrinkle it a bit more than you want – just flatten it out with your finger – or leave them in – it’s texture!

Mixed-Media-Metal---Ingrid-Blackburn-005

I love the shiny mixed with the Pewter – it’s a new/old look. That’s it! Adding a simple metal look to your cards is really that easy! I’m curious…have you ever embossed with water?

So now it’s your turn to add a metal look to your mixed media projects! I can’t wait to see what you come up with, head on over the Mixed Media Challenge and check out everyone’s creations.

Till next time –

Signature

[optin_box style=”12″ alignment=”center” email_field=”email” email_default=”Enter your email address” integration_type=”aweber” double_optin=”Y” list=”3846012″ name_field=”name” name_default=”Enter your first name” name_required=”Y” opm_packages=””][optin_box_field name=”headline”]Learn more with our exclusive FREE video series:[/optin_box_field][optin_box_field name=”paragraph”]PHA+UGx1cyB5b3XigJlsbCBiZSBhZGRlZCB0byBteSBGUkVFIENyZWF0aXZlIFRpcHMgRS1sZXR0ZXIgd2hlcmUgSSBzaGFyZSBleGNsdXNpdmUgcHJvamVjdHMsIHZpZGVvcyAmYW1wOyB0aGUgMTIgRGF5cyBvZiBDaHJpc3RtYXMgUHJvamVjdCBTZXJpZXM8L3A+Cg==[/optin_box_field][optin_box_field name=”privacy”][/optin_box_field][optin_box_field name=”top_color”]undefined[/optin_box_field][optin_box_button type=”0″ button_below=”Y”]Get Instant Access![/optin_box_button] [/optin_box]


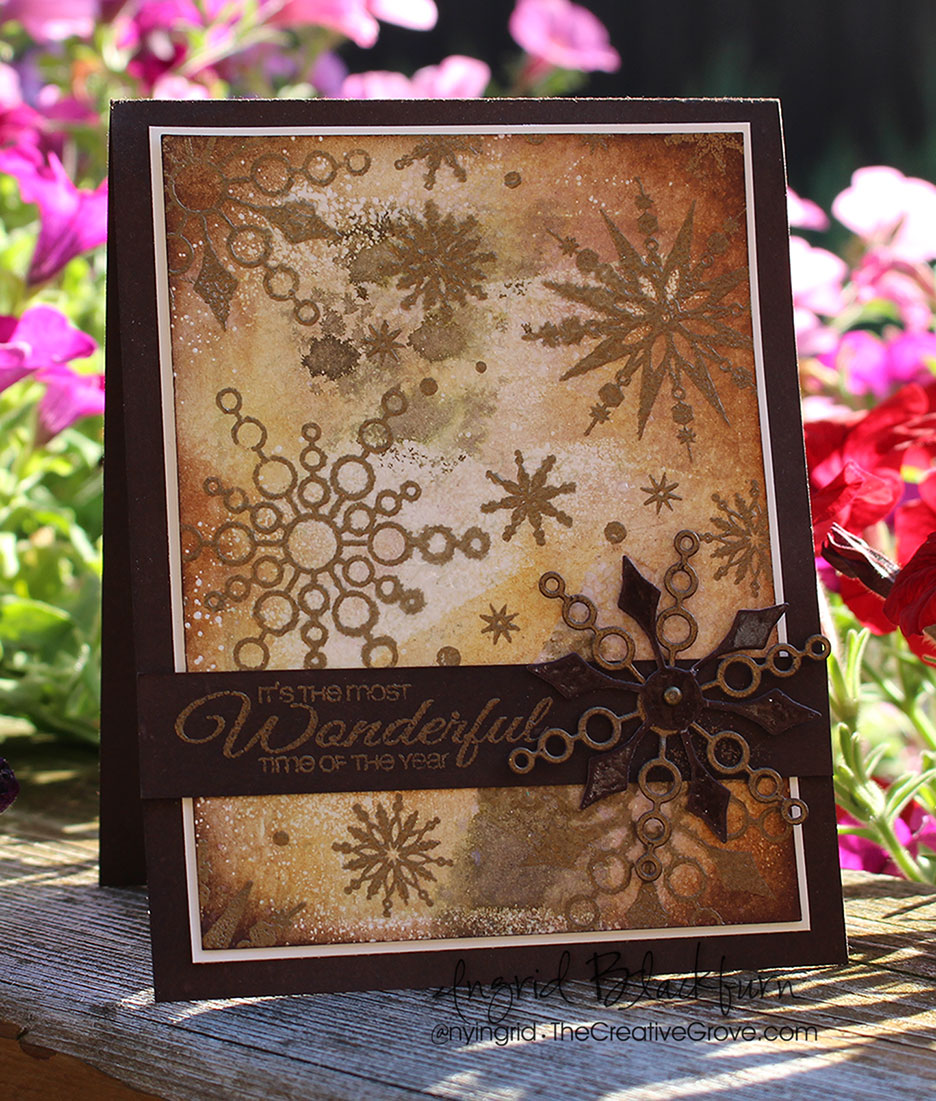
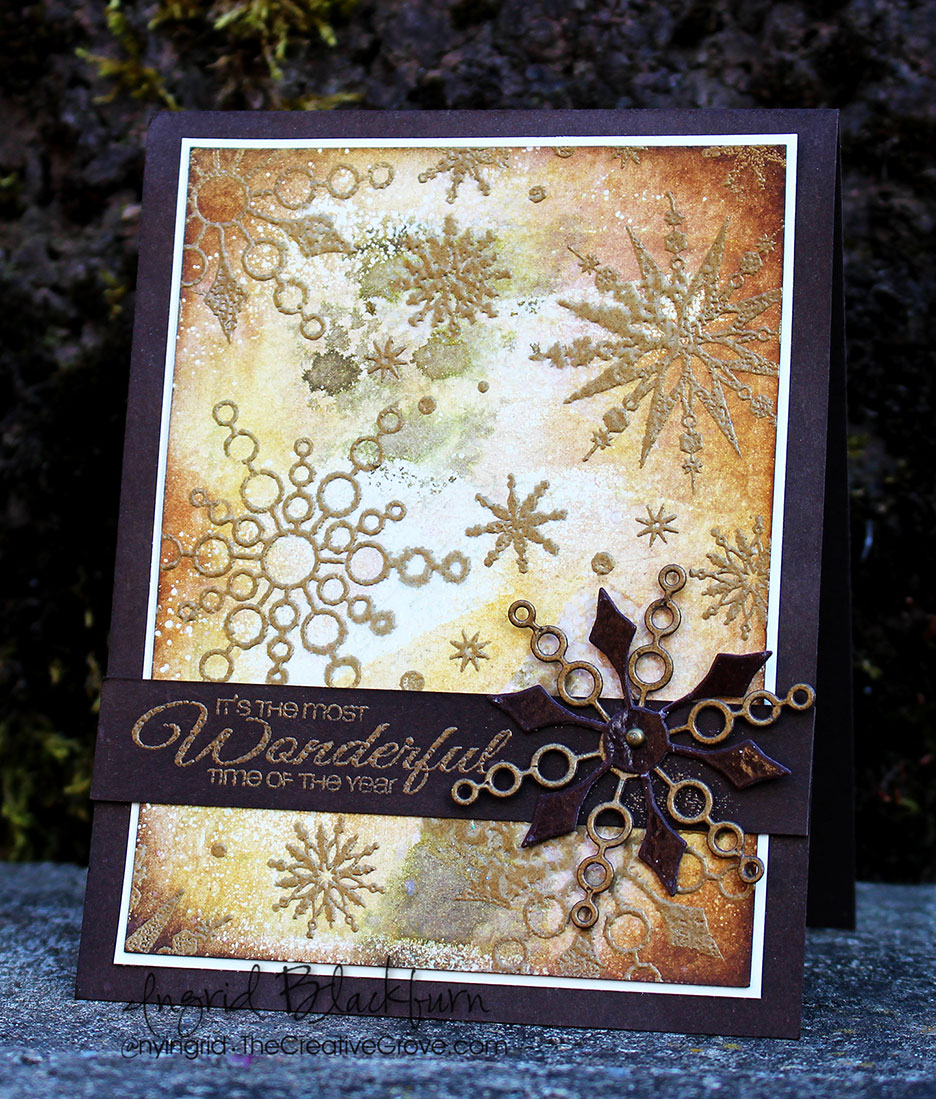
Gold Snowflakes

Gold-Snowflakes---001

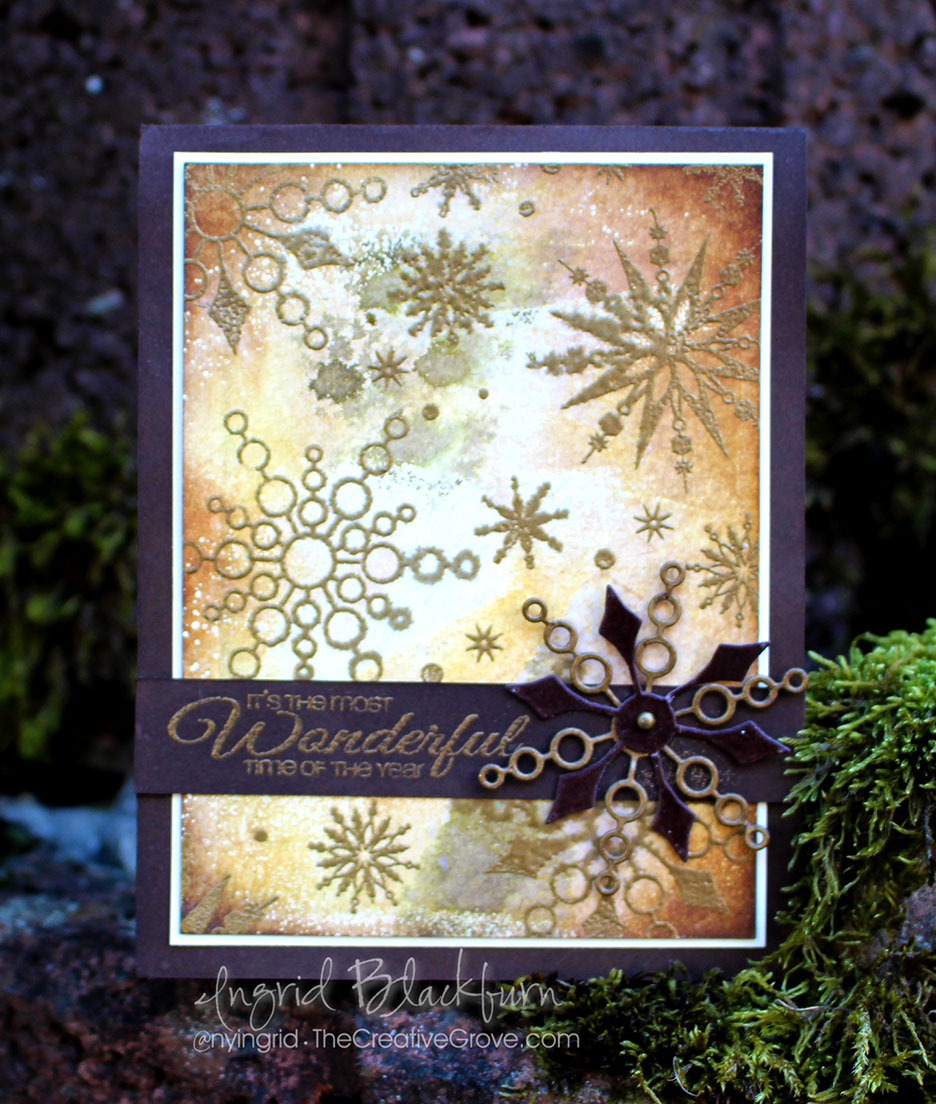
Snowflakes don’t always have to be white. Today’s project features the best in embossed snowflakes. This mixed media piece utilizes the best of emboss resist and sponging for a unique textured look with a flurry of gold snowflakes. Yup, the Christmas Challenge over at Happy Little Stampers is all about Snowflakes this month – so join us in all the fun!

HLS Christmas Challenge August 2016

To get started, stamp and emboss several snowflakes from Bring on the Snowflakes and Snowy Sayings by CAS-ual Fridays. Emboss in gold. I love all the little pieces in the Snowy Sayings set – those little dots and snowflakes are invaluable stamps to have!

Randomly swipe your versamark pad lightly over a few spots and sprinkle some Ulta Thick Embossing Enamel onto your project. Try not to add too much or get it too heavy in spots. Brush away if too thick in areas.  Heat from underneath to get it to start melting and heat set. This will trap the white color of the card base for some light in your project as you darken your project. The UTEE will also give you a little thicker and rough texture giving it a real mixed media feel.

Gold-Snowflakes---002

Add distress colors directly to your project and sponge them as well. Start with your lightest shade and darken on the perimeter always leaving some color exposed. I used Tea Dye, Vintage Photo, Gathered Twigs and Ground Espresso.

Matte it onto a white 1/16th wider base and onto your Espresso card base. A 3/4″ strip of espresso with one of the Snowy Sayings greetings in Gold is perfect.

For a cool effect, I used the Funky Flakes coordinating dies and embossed both snowflakes – one in gold, the other clear on espresso and attached them with a mini brad. TIP – To get your brad to coordinate, heat it with your heat tool, dip it into your embossing powder while hot and heat again.

Gold-Snowflakes-003

See, snowflakes don’t have to be the traditional white! Now it’s your turn – I can’t wait to see what you come up with…Christmas is only 4 1/2 months away – time to get going on those cards!! Every year I put out a free 12 days of Christmas series for the Creative Tips e-letter subscribers…be sure to see that when it begins later this fall – subscribe here for free.

[optin_box style=”12″ alignment=”center” email_field=”email” email_default=”Enter your email address” integration_type=”aweber” double_optin=”Y” list=”3846012″ name_field=”name” name_default=”Enter your first name” name_required=”Y” opm_packages=””][optin_box_field name=”headline”]Learn more with our exclusive FREE video series:[/optin_box_field][optin_box_field name=”paragraph”]PHA+UGx1cyB5b3XigJlsbCBiZSBhZGRlZCB0byBteSBGUkVFIENyZWF0aXZlIFRpcHMgRS1sZXR0ZXIgd2hlcmUgSSBzaGFyZSBleGNsdXNpdmUgcHJvamVjdHMsIHZpZGVvcyAmYW1wOyB0aGUgMTIgRGF5cyBvZiBDaHJpc3RtYXMgUHJvamVjdCBTZXJpZXM8L3A+Cg==[/optin_box_field][optin_box_field name=”privacy”][/optin_box_field][optin_box_field name=”top_color”]undefined[/optin_box_field][optin_box_button type=”0″ button_below=”Y”]Get Instant Access![/optin_box_button] [/optin_box]

Till next time –

Signature