Clean and Simple Birthday Card for LeAnne

Clean and Simple Flower Birthday Card (2)

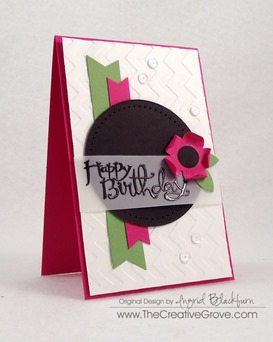
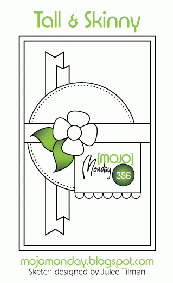
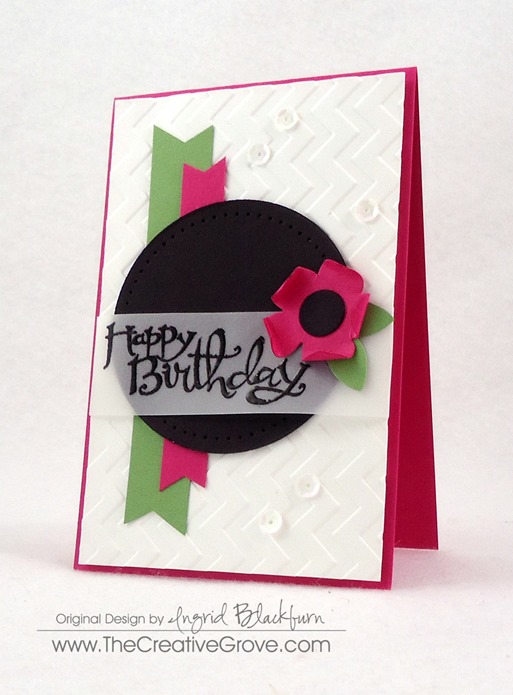
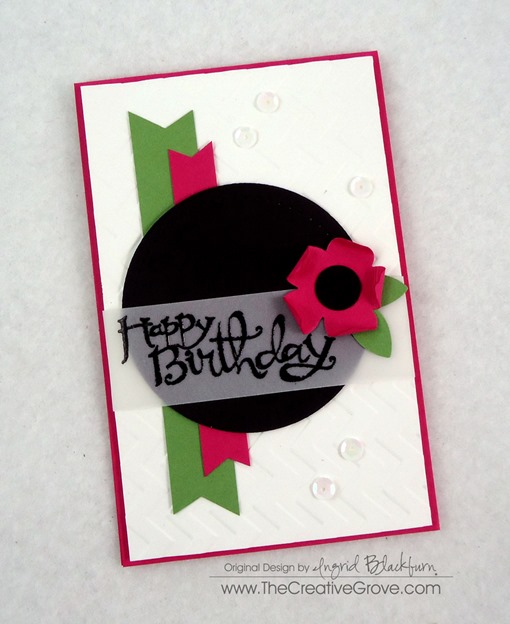
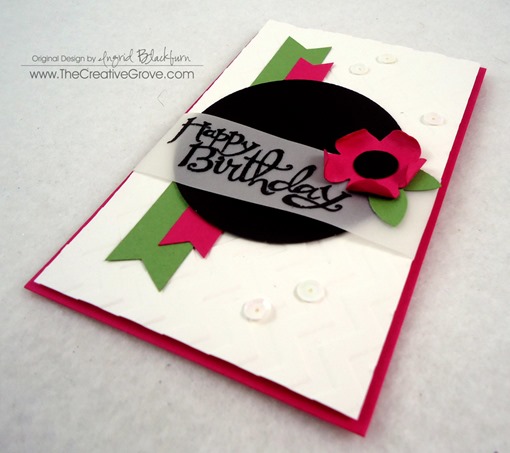
I decided to combine my Monday challenges today and when I saw the Merry Monday challenge today was a Birthday Hop – I was SO excited!  Of course, I went to Mojo Monday first thing at 5 AM East Coast Time…and fell in love with the sketch right away – I mean how could you not – the possibilities were endless!  I was already thinking up all sorts of Christmas ideas…then quickly switched gears and made a fun bright CAS birthday card instead!

Surprise Hop Graphic for LeAnnemojo356Clean and Simple Flower Birthday Card (4)

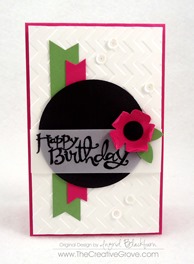
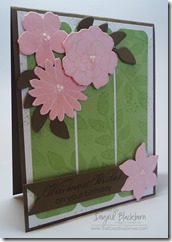
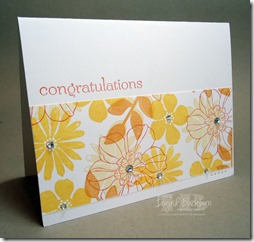
I love LeAnne Pugliese’s cards every time I see them on the Merry Monday Christmas Challenge Blog, so I decided she needed a Birthday card that was fun, sassy, and colorful with no less than my latest little addiction – sequins (thanks Deanne – I have you to blame for these).

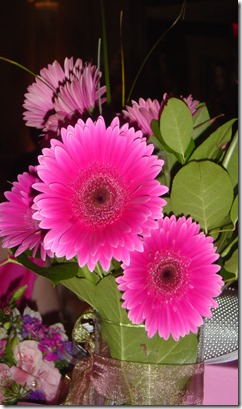
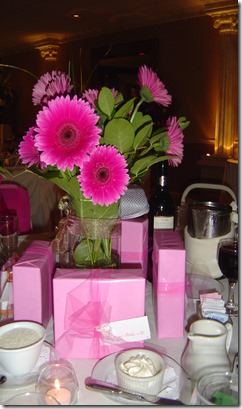
I knew I wanted to use the Sassy Salutations birthday greeting and my mind immediately went to the bright pink Gerber Daisy.  My sister-in-law Claudia had these at her wedding and I couldn’t stop taking photos of them, they were so editorial!

Claudias Wedding 015Claudias Wedding 016

Now I know the middles are mostly yellow, but I left it black so that I didn’t bring another color in.  It’s a fun little card, don’t you think?  My favorite parts – the flower, belly band and of course, I’m a convert – the sequins!  So LeAnne – this card is for you!  I hope you have a FABULOUS birthday!

Clean and Simple Flower Birthday Card (3)Clean and Simple Flower Birthday Card (1)Clean and Simple Flower Birthday Card (5)Clean and Simple Flower Birthday Card (8)

Hope you liked that!  If you’re a TCG VIP Member – you’ll see a video of this project in the Project and Resource Video library. Smile

Have a great start to the week!

Signature

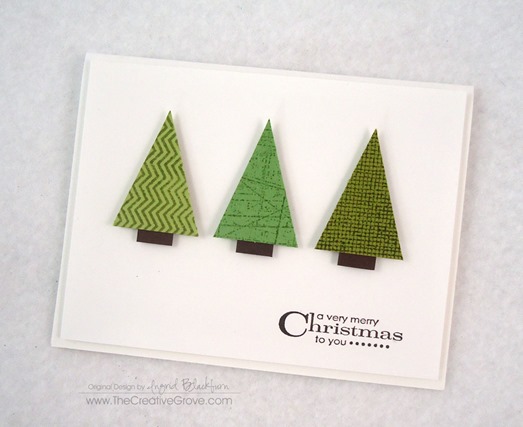
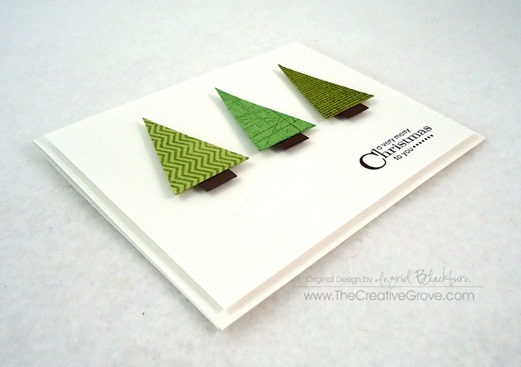
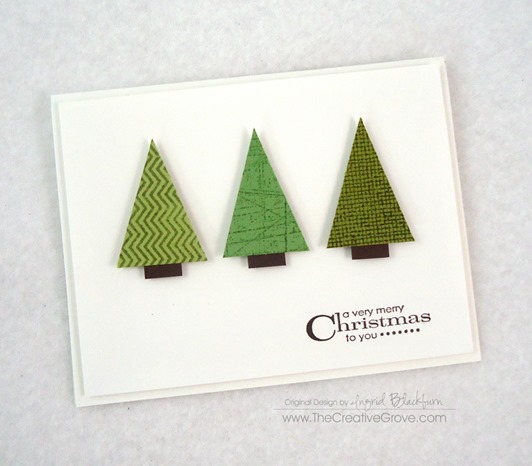
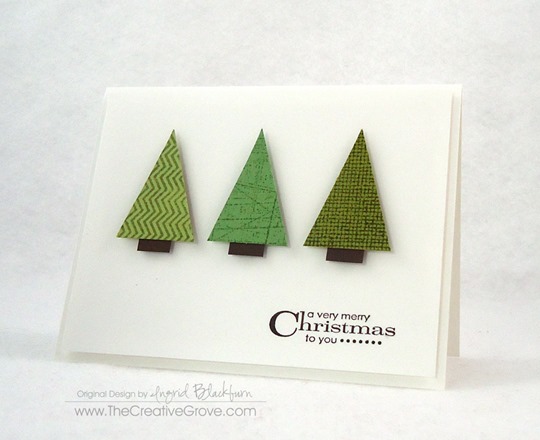
CAS Christmas Trees

CAS Chistmas Cards 001 (2)

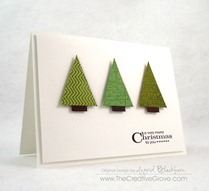
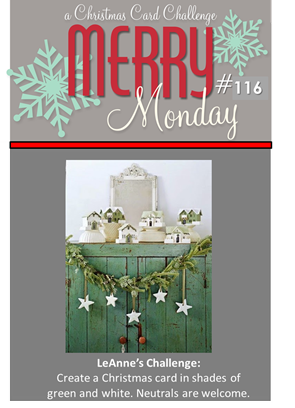
It’s only July 7th…but before you know it, the holiday season will yet once again have crept up on us.  That’s why I’ve started to religiously make a card for the Merry Monday Christmas Card Challenge.  This week the challenge was to create a green and white card.  You were able to incorporate a neutral if you chose to.

116

I kept it completely clean and simple (CAS) this week – just the bare minimum…which can be hard for me.  I usually reach for my paper piercer and add some corner piercing to a card like this, but I wanted to keep it really basic.  What do you think?  Let me know in the comment section – I’d love to know if you think it’s perfect as is, or you think the piercing is the perfect finishing touch.

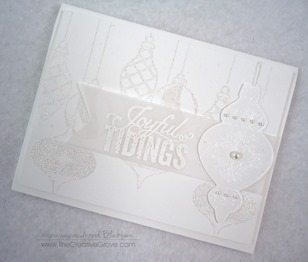
I’m a bit excited today – this challenge really made me smile.  I enter these challenges as a creative mojo booster, and never expect to win.  It honestly is the furthest from my mind…so I nearly fell off my chair when I saw that I WON last week’s challenge! Smile  I mean…really…little ‘ol me?!!  There were some amazing cards in there!  I’m totally honored and can’t wait to be a guest designer in next weeks challenge.  Here’s the card that gave me my first ever win! Smile

MM Winner Badge Ornament Keepsakes Stamp Set (10)

Creative Tips –

  • To make the trees, stamp various background and large image stamps in tone on tone colors onto a 1 3/4” x 1 1/4” piece of coordinating card stock.  I used Pear Pizzazz, Wild Wasabi, and Old Olive.
  • Don’t have any – no problem – use a versamark pad for whatever color you have.  It’s a watermark of that color and a great muted image.

CAS Chistmas Cards 001 (5)

  • On the reverse side of your rectangle at the top – make a mark with a pencil half way across the smaller measurement.  Should be 5/8”.
  • To make your trees, cut from the opposite corners to that middle mark.  Use a Paper Trimmer or just scissors – larger ones help here to get a straight cut.

  • Add a 1/2” piece of scrap Early Espresso for your trunk and pop them up on a  card front of white.
  • Stamp your sentiment in the corner – I used a contemporary looking greeting from More Merry Messages by Stampin’ Up!.

CAS Chistmas Cards 001 (1)CAS Chistmas Cards 001 (4)

  • Pop up your card front and you’re done!

Totally easy, right?  You could quickly make a bunch of these watching a movie.  Hope you enjoyed that this week.  If you did – be sure to sign up for our Creative Tips list.  You’ll get a video series emailed to you with several cool projects and the occasional email about exclusive projects you won’t see here on the blog!

CAS Chistmas Cards 001 (3)

Now off to make your own green and white Christmas Cards.  Join in on the fun over at the Merry Monday Challenge.

Signature

[optin_box style=”14″ alignment=”center” action=”http://www.aweber.com/scripts/addlead.pl” disable_name=”Y” method=”post” email_field=”email” email_default=”Enter your email address” email_order=”1″ integration_type=”custom” double_optin=”Y” name_default=”Enter your first name”][optin_box_hidden][/optin_box_hidden][optin_box_code]

[/optin_box_code][optin_box_field name=”headline”]If you enjoyed this tutorial…[/optin_box_field][optin_box_field name=”paragraph”]PHA+PHNwYW4gc3R5bGU9ImNvbG9yOiAjNjQ2MzVlOyI+TGV04oCZcyBzdGF5IGluIHRvdWNoISBNeSBvY2Nhc2lvbmFswqA8L3NwYW4+PHNwYW4gc3R5bGU9ImNvbG9yOiAjNjY2Njk5OyI+PHN0cm9uZz48ZW0+ZXhjbHVzaXZlPC9lbT48L3N0cm9uZz7CoDwvc3Bhbj48c3BhbiBzdHlsZT0iY29sb3I6ICM2NDYzNWU7Ij5DcmVhdGl2ZSBUaXBzIGUtbGV0dGVyIHdpbGwgdGVhY2ggeW91IHRvIG1ha2UgcHJvamVjdHMgdGhhdCB5b3UgbG92ZeKApjwvc3Bhbj48L3A+Cg==[/optin_box_field][optin_box_field name=”privacy”][/optin_box_field][optin_box_field name=”top_color”]undefined[/optin_box_field][optin_box_button type=”0″ button_below=”Y”]Send me exclusive tips![/optin_box_button] [/optin_box]

Finding Inspiration

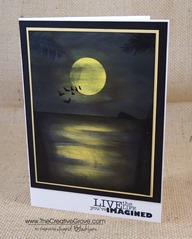
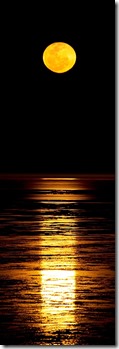
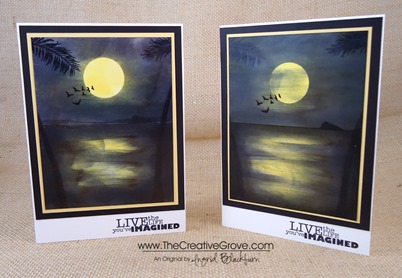
Where do you look for creative inspiration?  For me, I usually head to Pinterest or look in magazines.  I love to look at photographs and generally a color palate or random organization of shapes will strike up an idea.  I thought today I would take you on a journey for a simple CASE (copy and steal everything) of a photo for me. Smile

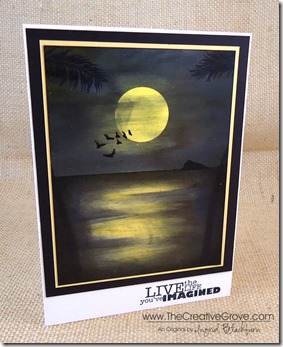
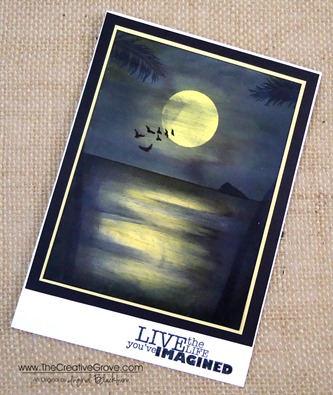
When you see a photo online, do you sometimes shift in your chair, or move your head?  That to me is the sign that I’ve found something.  Here is the photo I found on Pinterest and my final project:

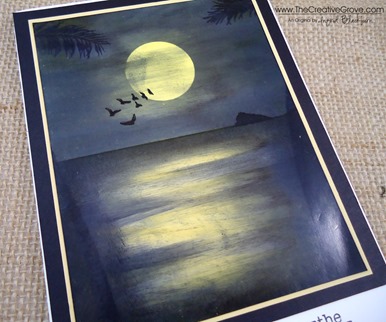
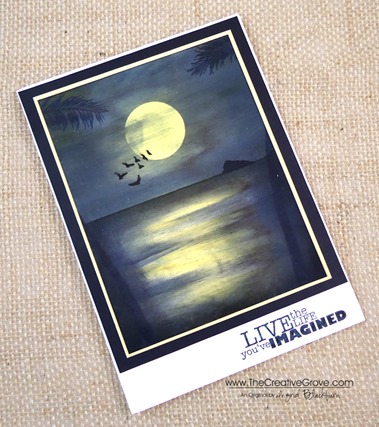
Cable-Beach-Broome-North-Western-Australia Moonlit Waters 004

While it’s not exact, it was my first attempt at making a mostly all black scenery.   I immediately thought, I can do that.  I’ll challenge myself and try something totally new.  I have to admit – it felt all wrong…lol!

Creative Tips –

  • You will want to start by masking a horizon line and beginning with your sky.
  • Give a good coat of various shades of yellow.  Here I used Glossy paper and a stylus tool to layer several coats of ink.Moonlit Waters 007
  • Mask your moon and continue layering ink, switching to Black.  You’ll want to leave a little faint yellow showing through around your moon for the glow.
  • My edge of my mask lifted up, so I got a splotch of black on my moon on the left side.  To cover that mistake up, I lifted my mask completely and dragged my stylus across a little to create whispy clouds.  Here is my friend Amy’s who didn’t get any on hers – see the difference? Moonlit Waters 001
  • When done with your sky, fully dry and switch your mask to reveal the water and cover the sky.
  • Layer color from the sides across your water being careful to leave the middle showing the moonlight reflection.
  • To create the feel of water, you will want to bring in a little black into your yellow.  Do this a little at a time so that you don’t cover up too much at once.  If you feel like you aren’t sure if you want to add more, stop.Moonlit Waters 008
  • Once you have the desired look, stamp your palm trunks and leaves at the top to give the viewer’s perspective.
  • Stamp the birds, layering a few over your moon.
  • Create a mask for the island and add into the horizon opposite your birds with a sponge in black ink.
  • Pick a saying that fits your scene.
  • This card is finished 5 x 7 and the scenery layer is 4 1/4 x 5 1/2”

It’s a fun scene and looks so striking in person.  I can’t wait to try it in purples next!

If you loved this card…

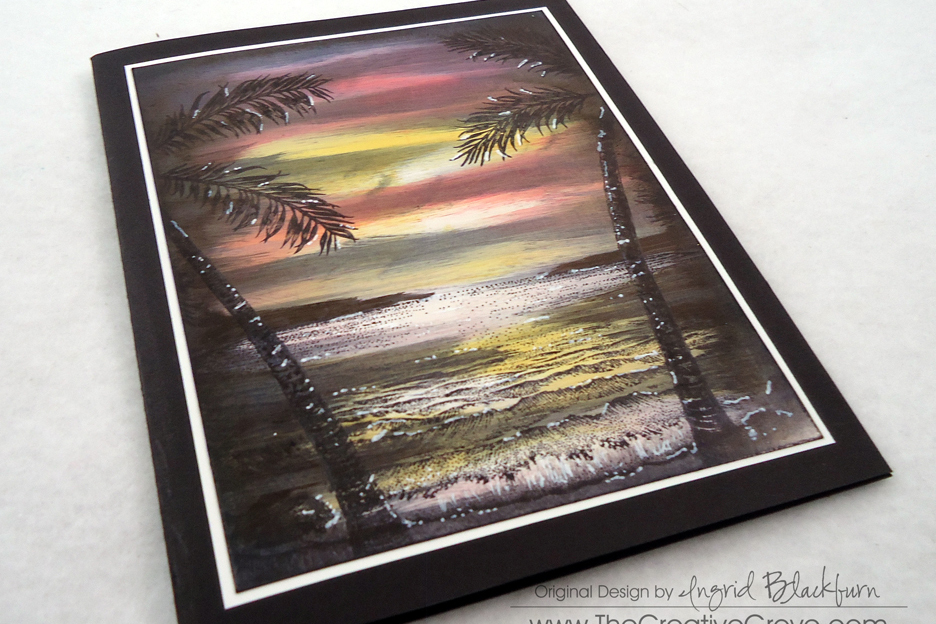
Be sure to subscribe to the creative tips e-letter & FREE video series. There’s a great scenic project in our first video series that I think you’ll love. And if you want to learn more about scenic cards, be sure to check out our Brayer 101 & 102 classes in addition to our upcoming Stampscapes class where we’ll make this similar project: Find out more HERE

Eveing Sunset Palm Cove Thumbnail

Signature_thumb.jpg

[optin_box style=”2″ alignment=”center” email_field=”email” email_default=”Enter your email address” email_order=”2″ integration_type=”aweber” double_optin=”Y” list=”3846012″ name_field=”name” name_default=”Enter your first name” name_order=”1″ name_required=”Y” opm_packages=””][optin_box_field name=”headline”]Learn more with our exclusive FREE video series:[/optin_box_field][optin_box_field name=”paragraph”][/optin_box_field][optin_box_field name=”privacy”]Plus you’ll be added to my FREE Creative Tips E-letter where I share exclusive projects, videos & the 12 Days of Christmas series[/optin_box_field][optin_box_field name=”top_color”]undefined[/optin_box_field][optin_box_button type=”0″ button_below=”Y”]Get Instant Access![/optin_box_button] [/optin_box]

Stamp Sets – Stampscapes Stamps, Really Good Greetings (130333c, 130330w) Ink – Marvy – Black, Yellow, Brilliant Yellow  Adirondack Lights – Sandal Paper –Glossy White, So Saffron, Basic Black Tools – Colorbox Stylus

Moonlit Waters 006

So Long Farewell to the Spring Catalog…Project Parade!

Secret Garden 002 MainOh Hello 001 Main

We’ve had so much fun at The Creative Grove with the Spring Catalog this year.  The CG Crew felt this year’s mini catalog was the best one in 25 years.  So if there is anything that you were holding out on, don’t wait – tomorrow starts the brand new catalog year which means that today is the official LAST day to order from the Spring Catalog.  Some products made it into the new catalog, but most unfortunately did not.  So we bid good bye to several favorites.

Click on any image to see the card details and creative tips.

Ciao Baby 001 Main

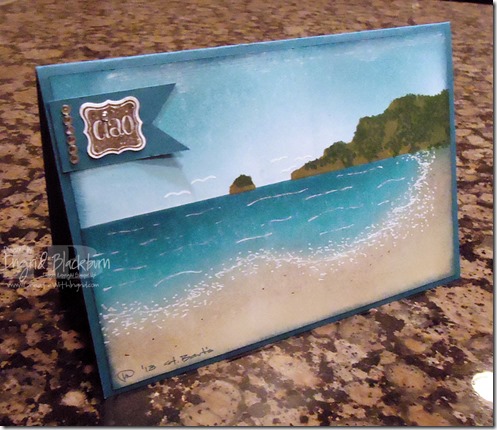
Ciao Baby – I didn’t get to stamp with this set as much as I would like, but here is the first actual creative scenery card I’ve ever made actually based off a real life photo or experience.  It brings back such great memories of a wonderful day in St. Barts. Click Here for card details, creative tips and more photos

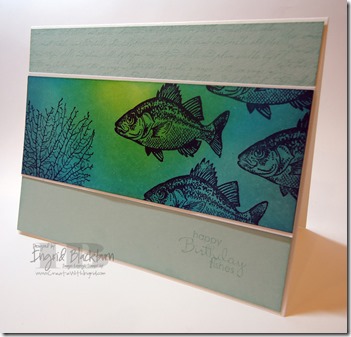
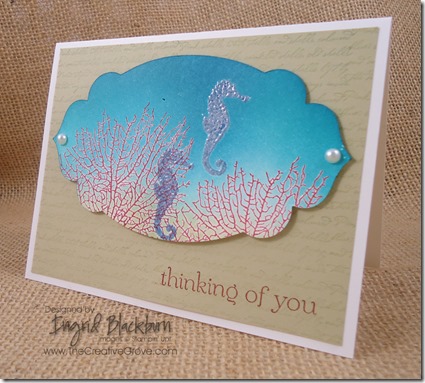
By the Tide – This was by far my most highly anticipated stamp set out of this year’s catalog.  I was dying to do an underwater scene like the one above and below.  The images were just begging to be brayered.  I love all the projects I’ve made with this set, and there were many more, just made as exclusive content for clubs and classes.  The top right one actually was a CG Crew project in January.  Click each photo for card details, creative tips and more photos.

By the Tide 003 Main

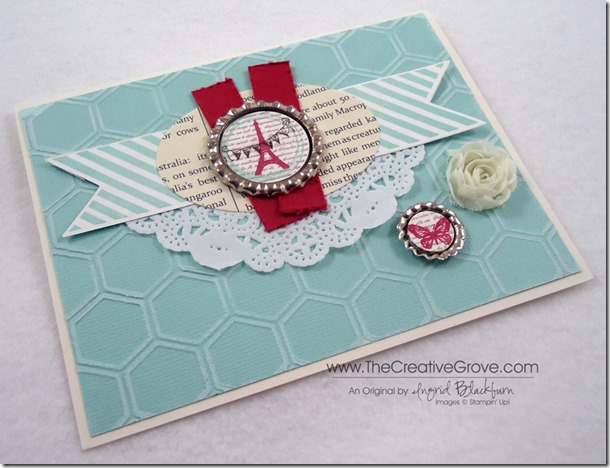
Collage Curios – This is a fun set that I was shocked didn’t make the new Catalog.  Here are a few easy projects that highlight this stamp set in a great way.  This project was acutally a CG Crew project in March.  We loved making this along with a necklace out of Soda Pop Tops.  Those little flowers from our 5/8” Flower Trim and Soda Pop Tops also didn’t make it, which makes me glad I’m stocked up!  The Soda Pop Top card features all the best from the Spring Catalog – Honeycomb Embossing Folder, Pool Party Core’dinations Paper, Paper Doilies, Hearts a Flutter Bundle, Oval Framelits, Collage Curios, Soda Pop Tops and 5/8” Flower Trim. Click each photo for card details, creative tips and more photos.

Collage Curios 002 Side

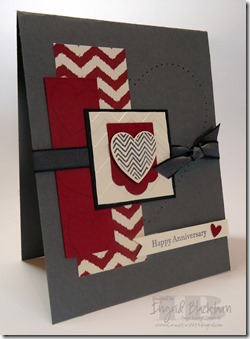
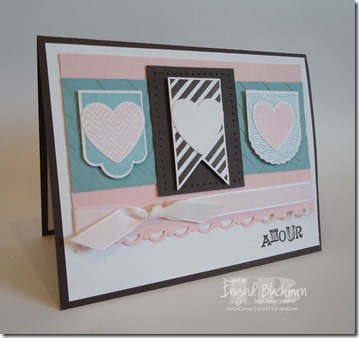
Hearts a Flutter – This set I had a ton of fun with around Valentine’s Day.  I love the coordinating framelits that come along with it as well.  As a bundle you save 15% which I just love!  And the framelit set has a banner flag die in it.  Below you see my use of the new Occasions Paper Piercing Templates in the Spring Mini – I just love all the different sizes of Hearts on the one of three templates.  The first project was my actual Anniversary card for my sweetie Michael and was a Just Cards Class card.  Smile Click each photo for card details, creative tips and more photos.

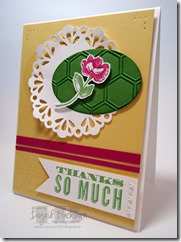
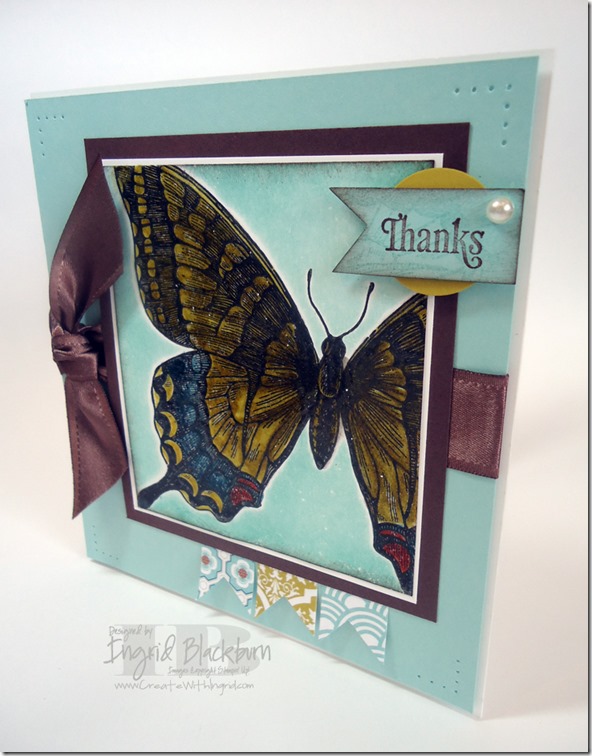
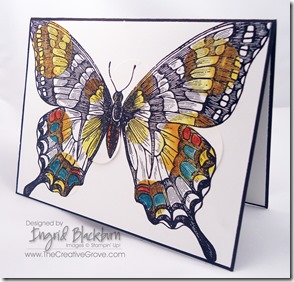
Swallowtail okay, I think we can all agree that this ended up being my surprisingly favorite stamp set out of this years Spring Catalog.  There are so many projects you didn’t even see with this amazing stamp too.  But this is still probably one of my top five cards I’ve made over the past five months.  My favorite detail is the Banner Flag.  Look closely – that’s the butterfly image stamped tone on tone under the Thanks.  I’ll miss that Thanks too – it’s part of the stamp set Kindness Matters which is retiring from the big catalog – and at $8.95 for the clear set is by far the best Stamp Set deal you’ll find.  I think that one stamp has gotten almost as much usage as Thinking of You from Sweet Essentials.  Click each photo for card details, creative tips and more photos.

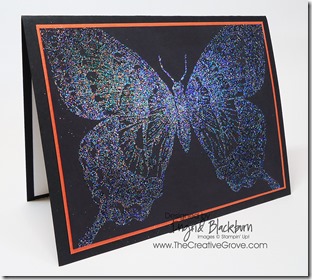
Some more favorites from the Swallowtail Stamp Set.

Swallowtail 007 MainSwallowtail 004 Main

Do you want to get the latest specials and creative tips sent right to your inbox?  Then click here to sign up for my Creative Tips Mailing List!

Signature-Snowflake-001_thumb1_thumb

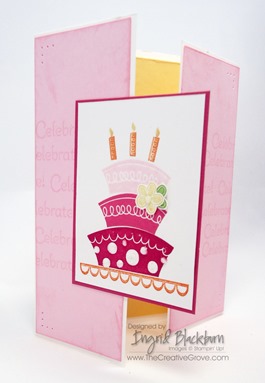
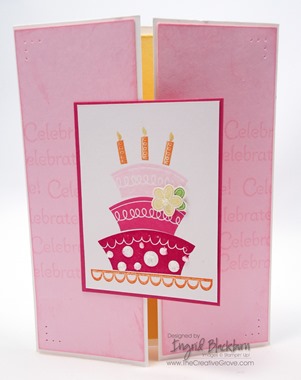
Topsy-Turvey Celebration Case

Topsy-Turvey Celebration 001 Main

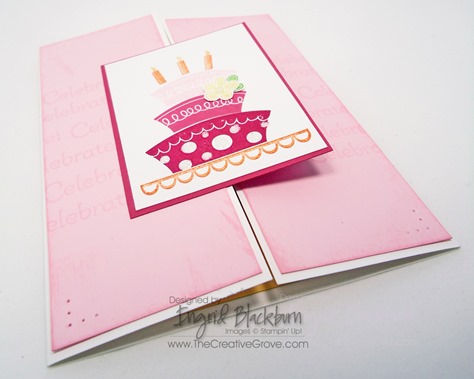
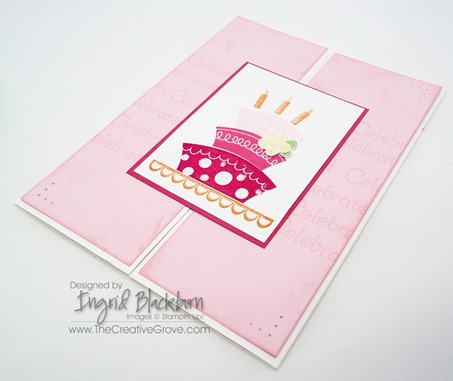
I just love this card from the 2012-2013 Annual Catalog.  I had to recreate it with of course a little twist and flair!  Don’t be afraid to CASE (Copy and Steal Everything) a great project, but turn it into your own!  So what exactly did I do differently, read on to find out.

Topsy-Turvey Celebration 001 Front

Creative Tips:

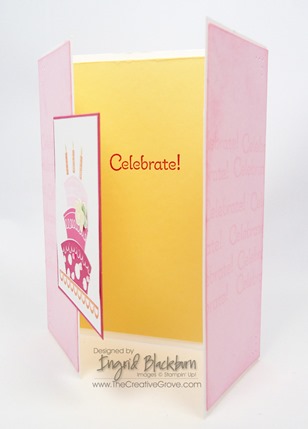
  • I immediately changed the base of the card to a gate fold and threw a So Saffron panel on the inside.  I kept the main image mostly the same because honestly, it rocks!
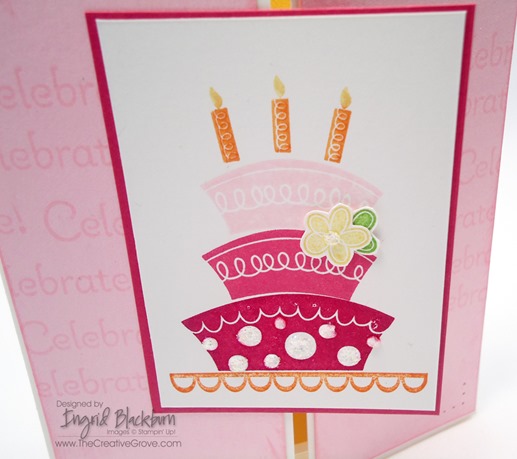
  • The bottom layer is stamped in Raspberry Ripple, the middle in Primrose Petal and the Top in Pink Pirouette.  The candles were colored using a Pumpkin Pie marker and Daffodil Delight Marker.  I stamped each one individually.  Tip – It’s easiest to start with the middle one for spacing purposes.Topsy-Turvey Celebration 001 CU
  • The flower is actually a So Saffron flower and two petals of a Wild Wasabi flower. 
  • I added the cake base in Pumpkin Pie.
  • Instead of Rhinestones, I used Dazzling Details on the circles and the center of the flower.  Dazzling Details go a long way!Topsy-Turvey Celebration 001 Inside
  • I stamped Celebrate on the inside in Raspberry Ripple.
  • The Celebrate panels were stamped tone on tone in Pink Pirouette.  The only real major change is  the gate fold.  So to not take too much away from the beauty of the cake, I kept the panels to a 1/16” border of Whisper White.
  • The card needed a little something, so I edged the Celebrate Panels in Pink Pirouette with the Direct to Paper technique.  I also added a little paper piercing in the corners using the Essentials Paper Piercing Pack. Topsy-Turvey Celebration 001 Side

While I can’t take conceptual credit for the cake center, the rest of the card was a little twist on the original.  I hope this gives you a little inspiration to put your own twist on a good idea yourself!

    Are you getting my Exclusive Video Series?

    Be sure to sign up for my Creative Tips Newsletter and get the latest Creative Grove news in addition to my free Creative Techniques Video Series!  Don’t miss out on our creative community – the only way to get this exclusive content is to sign up in the box on the upper right or click here.

Signature-Snowflake-001_thumb1

To Shop 24/7 in the Creative Store – Click here!

Topsy-Turvey Celebration 001 Angle

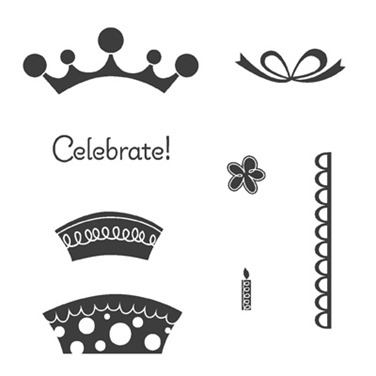
Stamp Sets – Topsy-Turvey Celebration (125822c, 126470w)  Ink –Raspberry Ripple (126859), Primrose Petals (126858), Pumpkin Pie (126945), So Saffron (126957), Pink Pirouette (126956), Wild Wasabi (126959) Paper – Whisper White (100730), Pink Pirouette (111351), Raspberry Ripple (126842), So Saffron (105118) Cool Tools – Paper Piercing Tool (126189), Stampin’ Pierce Mat (126199), Essentials Paper Piercing Pack (126187) Finishing Touch – Dazzling Details (124117)

Untitled-12

Emerald Pool Creative Scenery

In Dominica, we took a tour to the Emerald Pool.  After a short walk through the rain forest, the trail opened up revealing this beauty.  I took some photos from above and then walked down to the pool itself.  As we approached, the water was this amazing turquoise blue with slabs of grey rocks peaking out.  The walls were lush with green foliage and amazing chocolate brown ropes hanging down from above. 

I took several pictures from the grey rock steps, then took a dip into the pool itself.  The water was, shall we say refreshing, but after a few minutes surprisingly comfortable.  I grabbed my camera and took a few shots of the waterfall from the view of the pool and ended up with this shot.  I digitally enhanced the colors to try and capture the vibrant nature of this beautiful spot hidden deep in the rain forest. 

I woke up this morning at 4 am, I know – I’m on a beautiful ship well into the Caribbean Sea and what am I doing up?  Well, I was thinking about this pool and how much I wanted to try to re-create it with my Brayer, Ink and Sponges.  After lying awake for an hour I finally took all my ink pads and tools up to the pool deck to create while watching the sun rise over the ocean.  Here is the final result. 

Creative Tips:

  • I started out creating the pool.  I wasn’t sure which colors would do it justice and finally settled on brayering pure Tempting Turquoise.  I added a little Pacific Point with a sponge and ultimately a little Basic Gray for the underwater rocks in the center and at the waterfall line.
  • I next went to work on the structure of the cavern.  First I created a mask for my rocks.  I then brayered River Rock on an angle from both sides.  I made sure to keep the center top v a little white for my sky.

  • I then tore a little area for my sky.  I left my Bashful Blue at home, so I had to settle for some Baja Breeze.  It seemed to do the job just fine.  I sponged a tiny bit of Tempting Turquoise to brighten it up a bit.
  • I then sponged some more River Rock in my cavern to blend it and darken spots. 
  • Next I sponged Soft Suede along the base of my cavern and in spots along the waterline.  The color was really starting to come together.
  • To add the lush foliage, I lightly sponged Old Olive first and then spotlighted a few areas in Wild Wasabi with a few dabs of Gumball Green.  Once I was happy with how that looked, I moved on to the rocky area.
  • To create the rocks, I brayered Basic Gray lightly from the pool upward.  Be sure to keep your masks in place over the water and at the line of the rocks.  I added a small amount at the mouth of the falls as well.
  • I used both a Basic Black marker and Basic Grey sponge to create the separation of the rocks and shadows. 

  • To create the plants, I used the brush side of an Old Olive Marker.  I worked in sections using a sponge to blend it as I went.  Once happy with the Old Olive, I went over it in sections again using a Garden Green Marker.  I spotlighted a few areas using a Summer Starfruit marker which has a great green tone to it.
  • I added my vines using the pointed part of a Chocolate Chip and Early Espresso Marker.  Start with an Old Olive Marker until you are comfortable – it will blend in underneath and allow you to make a mistake.
  • I added my moss on the rocks using the same colors, but did not blend them with a sponge.
  • To make the waterfall, I used a White Gel Pen.  I had a lot of layers of ink by now on my card, and I think this process would have gone easier had I let my project dry a bit.  I was so excited to get it done though!  The gel pen doesn’t work so great for a complete stream of this length, so I did it in stages. 
  • First I created the pool waterline so I wouldn’t go too far.  If you do, just take a little Tempting Turquoise sponge over it and you can correct that. 

  • Next, I created my two outermost streams and worked to fill it in from there.  I used my finger to blend it a little, and it would have been nice to have my Whisper White Craft Pad, but alas – that’s in Orlando!
  • I took my time with it and when I thought I wanted to keep going, I did what I always advise my students – I stopped.
  • I created a few ripples, didn’t like how they turned out, so I went over them with a Tempting Turquoise Sponge and started over.  I didn’t add too many as I didn’t want to take away from the beauty of the pool.
  • I chose to mat my finished project on Whisper White and then put it on a White Card to let the beauty of it stand alone.

I hope you like my finished card.  I signed it with the location, my initials and year.  I had several guests and crew members stop by to see what I was creating and one even asked if I was selling my work!  I told him no, but what do you think?  If I sold this, how much would you ask for (tell me in the comment section)? 
I bumped into another Stampin’ Up! addict as she put it – Gail from South Carolina.  I certainly enjoyed speaking to her, and it was good to know that I was in good company on board this ship.  Gail saw my card in its beginning stages, be sure to leave me a comment when you see it on the blog Gail!
I’m sure several of you are wondering how long it takes me to create these projects.  Each one differs.  My last one of St. Barts I was able to do in one hour.  I had created beach scenes before, so the basic knowledge and direction I was going was already in my mind.  This project was quite different.  I tested several colors out first on scrap paper as my project is 5” x 7” and I wanted to get it just right.  With some breaks so that I could capture the slate blue sun rise this morning from several points on the ship (look for that project later), this project took me three hours.  Okay – pick yourselves up off the floor!  Yes, you can’t rush art as I told Michael when I came back to the room.  If I were to do this a second time, I know I would cut that down to just over one hour.  It takes time to conceptualize a project initially and break it down into steps.

I’m thrilled with the end result and I know if you venture on to tackle this on your own – you’ll love it too.

If you are in the Orlando, Florida area and would like to take my Creative University Brayering Creative Scenery classes – check out my schedule on the Upcoming Events page or my Events page from my Online Store Website.  If you would like me to travel to you to teach a class, contact me for details. To learn more about my University Class series click here

Signature Snowflake 001

To Shop 24/7 in the Creative Store – Click here!

Stamp – none Ink – Tempting Turquoise (126952), Pacific Point (126951), Old Olive (126953), Wild Wasabi (126959), Basic Gray (126981), River Rock (126977), Soft Suede (126978), Garden Green Marker (119701 – Regals Marker Collection), Old Olive Marker (100079), Summer Starfruit Marker (2012-2014 In Color Marker Collection 126856), Basic Black Marker (100082) Paper – Whisper White (100730) Cool Tools – Stamping Sponges (101610), Brayer (102395), White Gel Pen (105021)

Ciao Baby from St. Barts

St Barts Columbier Point

Ciao from St. Barts!  I’m loving my trip through the Caribbean, and thought I’d pull a little inspiration for this month’s featured RemARKable Stamp Set Blog Tour from my actual surroundings today here on St. Bart’s in the French West Indies.  I’m sure you enjoyed your creative inspiration on Linda’s blog Ink Stamp and Scrap and are ready for a little brayer and sponging creativity.

blogtour-stampmonth-Mar

When I thought about what to do for today’s Blog Tour, the first thing that sprang to mind was the word Ciao.  In Europe that could be hello or goodbye, so it was entirely appropriate for my project today.  I’m saying hello from the French West Indies and goodbye to St. Barts as we’re on our way to St. Maarten.  Here is a little of what I did today.

Gouverneur Beach St Barts

Today, I spent the day on Gouverneur Beach on the south side of St. Barts.  This was the most highly recommended beach by every local we spoke to, and it was quite an experience driving there.  The narrow roads that wound around the island at several steep points was so worth every frightful turn as we ended up here.  This is my inspiration photo for my card today.  I hope you love it as much as I enjoyed making it.

Ciao Baby 001 Main

Creative Tips:

  • I brayered River Rock and Crumb Cake for my sand and used a sponge for the contouring.
  • I brayered Tempting Turqoise and Island Indigo for my Caribbean Sea.  I used a sponge for contouring and spotlighting.
  • My sky was done out of Tempting Turqoise and Baja Breeze.
  • For the land, I masked two islands in Crumb cake, Soft Suede, Old Olive and Gumball Green.

  • I used a Garden Green Marker for the shrubbery.
  • I used a White Gel Pen to create my foam, clouds, seagulls and water movement.

Ciao Baby 001 PortA little St. Barts with some luxury inspiration in the backdrop – mega yachts!

  • St. Barts is a luxury French island with unbelievable white sand beaches, and luxury properties as a playground for the rich and famous – it’s a literal who’s who and who has the biggest yacht here.  To capture that spirit I used the Ciao Stamp and matching punch (a SAB freebie – get yours while you still can!).  I stamped it in Early Espresso and adhered it to an Island Indigo banner.

Ciao Baby 001 CU Banner

  • I blinged up my banner which I cut with a 1” Square punch.

Brayering cards like this are little pieces of artwork.  I encourage you to sign them like I did, with the year and location.  My card is sitting in my stateroom and I’m going to leave it for my Stateroom attendant at the end of my cruise with a tip.

Ciao Baby 001 CU

I hope you enjoyed my brayering piece today.  I loved my inspiration just as much as I do this little work of art.  Enjoy Melissa’s creative inspiration on her blog http://www.stampinup.net/blog/2089191.  See you next week for the 25th Anniversary Blog Tour or next month for another featured stamp set!

blogtour-stampmonth-next

Signature Snowflake 001

Ciao Baby 001 Angle

Ciao Baby 129648S


One Layer Magic

Sometimes you make a card that you just fall in love with.  The idea or technique is magical, and you want to make more but with a twist.  For me that’s the best time to make a one layer card – especially with a brayer!  When I use I brayer, I feel like an artist with a blank canvas.  Here is the result of my fun playtime in the studio.

This card is the result of a full sized layered card I made a week ago.  I kept going back to my card because I just fell in love with the three colors brayered together – Bashful Blue, Pool Party, and Island Indigo. Each color lent a vibrant layer to this masterpiece.  And that’s really the word to use with brayered cards.  The colors begin to blend together forming a new hue.  The end result can never be duplicated as you’ll never remember exactly how many times you rolled each color and exactly which position – truly creating a one of a kind masterpiece with each new card.

For this simple but elegant card, I tore a piece of scrap paper and used Dotto adhesive to temporarily hold it over the white areas of the card.  I left only the area I wanted color deposited on exposed.

  • Start off your paper with your brayer, slowly moving toward the center.  This way you stay in control of the depth of the color you are working with.
  • By stopping a bit short towards the center, you can give the illusion of light by keeping some of the white there and depositing the least amount of color with your brayer.
  • Keep your brayer on the work surface to get that even watercolor effect, do not lift it – that’s how you get start/stop uneven marks. 
  • Begin with your lightest shade working to the darkest.
  • Experiment with two complimenting colors on the brayer like Pool Party and Island Indigo, start with the lighter and then add a little of the darker.

Here you see my original card from my Artistic Snowflakes post and the one layer card I made to compliment it.  It makes a cool set together!

And one layer cards are nothing if not cost effective.  All you need is a half sheet of White cardstock for your card (I recommend a good cardstock though, like Stampin’ Up!’s Whisper White, don’t use a cardstock that is too porous, you won’t like the end result )– the rest I leave up to your imagination.

Creatively yours –

Ingrid

To Shop 24/7 in the Creative Store – Click here!

Stamp Sets – Snowflake Soiree (127925), Sweet Essentials (128315) Paper – Whisper White (100730), Midnight Muse (126843) Ink – Midnight Muse (126860), Island Indigo (126986), Pool Party (126982), Bashful Blue (126961), Not Quite Navy (126971), Night Of Navy (126970) Cool Tools –Brayer (102395), 1” square punch The Perfect Finish – Stampin’ Dimensionals (104430), Rhinestone Basic Jewels (119246)

SnowflakeSoiree127925L_thumb3

SweetEssentials_thumb13