World Card Making Day Blog Hop

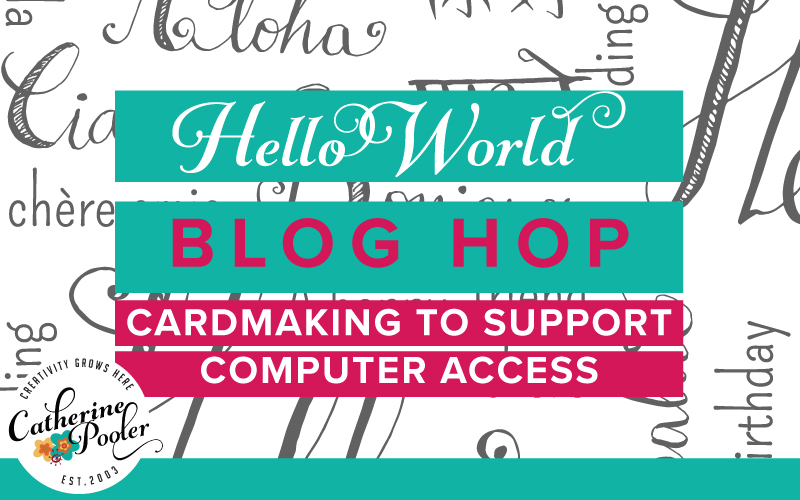
Hello World! Today is World Card Making Day, and what better way to kick off the day than with the Hello World Blog Hop with 22 designers all coming together for one purpose – to inspire you by creating cards using a brand new special stamp & die set designed for a great cause! The best part is that we have a little giving back going on this entire week. AND…guess what – you can participate too!

helloword-bloghop-1-1

My good friend Catherine Pooler, Founder of StampNation – a world wide community of crafters & Catherine Pooler Designs, has been wanting to give back from her business for a while now. But there are so many great organizations and causes – where do you start?

Well, one day this past August, one of her crafty friends (who happens to be a rockin’ stamp designer – that would be Chaitali Narla) contacted her to come together and do a little good in the world. The very next day Catherine saw another crafty friend, Jennifer Ingle,  post about a little cause she and her husband Sean were trying to raise funds for….and the idea for Hello World was born!

Sean Ingle teaches Civics & Government, Geography and Debate to kids in grades 6-8 in the Boston area. Their school does not have the funds for computers, a computer lab or in a library. So these kids, who don’t have computers at home either (they are all on a free or reduced lunch program), don’t get to learn the way most kids do today. Let’s be honest – most kids are exposed to computers from a very young age. Can you imagine not having that exposure for basic life skills as a young teen?

Sean’s goals are to raise enough money to have Chrome notebooks for the classroom so two students can share and get the exposure they need in the classroom setting. Wouldn’t it be great if we could raise enough so that all students had one?!!

So Catherine and the team at Catherine Pooler Designs put their heads together and came up with the stamp set Hello World. Chaitali’s favorite sentiment is Hello or Hi, so this set is illustrated by her, and says Hello or Hi in various languages from around the world. It has great sentiments to go along with that making it a more versatile set. All the profits from this stamp and matching die set from today October 1st through Friday October 7th will be donated to purchase Computers and other supplies in Sean’s classroom in Boston. Now that’s a worthy cause!

Here are the two sets that are giving back:

Be sure to stop by Catherine’s Blog at the beginning of the hop (link below) to get her full story, and if you’d like to donate directly to Click Here for the Go Fund me page – Chromebooks for Urban Education.

Now for a little creative inspiration using the Hello World Stamps & Dies….

Hello World Project Tutorials: 

#1 – Wordy Hello

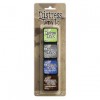
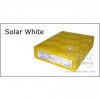
This clean and simple card is pretty easy to put together. You’ll want to line up several of the sentiments from the Hello World Stamp set. I first lined them up with the hello, then removed it to ink and stamp it separately. I wanted to have an ombre feel to it, do I inked it up in light from the middle outward in the following colors: Soft Sky, Baja Breeze, Not Quite Navy – all by Stampin’ Up!.

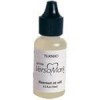
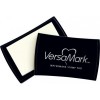
For a darker result, ink up the hello in versamark first, then directly into Midnight Muse by Stampin’ Up!.  Heat set it with clear embossing powder for an added effect. Matte your card front with your darkest shade – here in Midnight Muse.

hello-world-ingrid-blackburn-word-play-001

I wanted the background to show all the fun dots from the new CP Designs stamp set YAY Stripes! For a fun look, ink up the bottom of the dotted stripe in a lighter shade, and the top in a darker one. That way when you stack them – you have dark/light contrasts in color. It helps to make it stand out a little more. I layered mine three times.

A few fun little orange hearts from the Lovely Flowers Stamp Set and some white twine up top and you’re all set!

#2 Elegant Hello

For my second project today, I wanted to do another clean and simple card, but a little elegant – enter embossing! Start out by embossing the solid stripe from YAY Stripes in Black on Black card stock. I LOVE that look!

For a complete contrast, emboss the butterfly from Butterfly Notes by Catherine Pooler Designs in Gilded Gold by Brutus Monroe. I love this butterfly – the detail on the wing and the outline are different and unique. It looks so pretty embossed – almost foiled!

hello-world-stamp-set-ingrid-blackburn-001

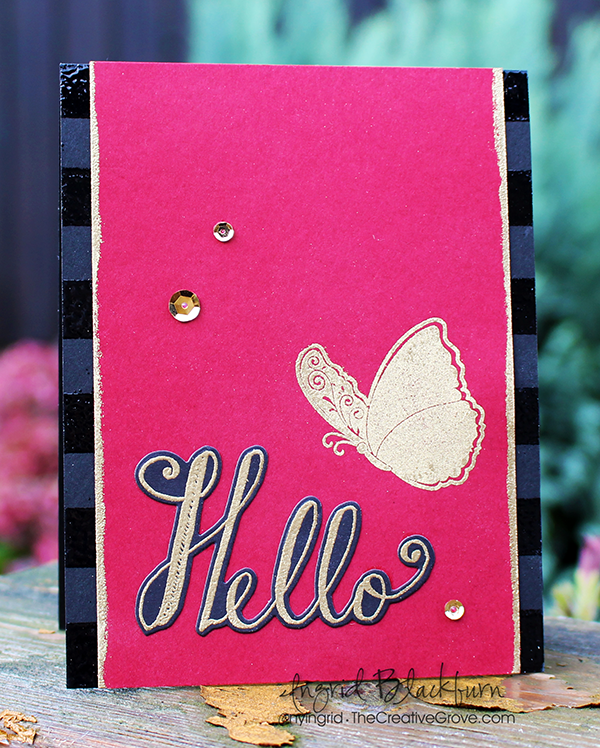
Continue to add some golden touches by dragging your Versamark pad along the edges of your card front and emboss in Guilded Gold. Emboss the Hello greeting from Hello World in gold on black and cut out using the Hello World dies. Adhere to your card front, put your card together and add some sequins – that’s it!

#3 Hello World Word Cluster

This last project is my favorite. I love word clusters, and this set is PERFECT for this technique. Word clusters is simply that – clusters of words. Arrange them first, then drop your acrylic block or Misti on them to secure them.

Here’s the biggest TIP to help you with word clusters – stamp them first on a piece of copy paper and keep as a guide. This way, if you mess anything up, you can easily and quickly re-assemble them and move on.

hello-world-ingrid-blackburn-word-cluster-003

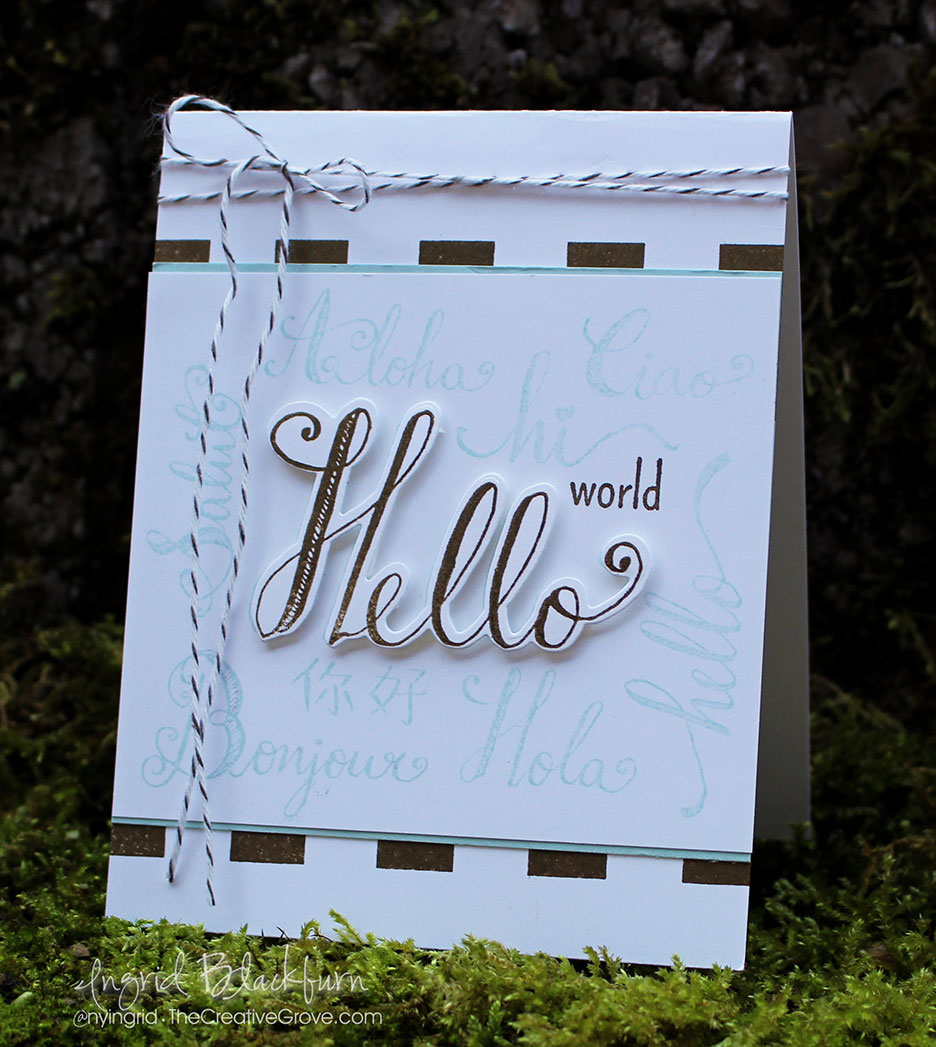
To create this cluster, I removed the large hello, stamped the cluster in Soft Sky by Stampin’ Up!, added the Hello, stamped in Soft Suede, cut out with the Hello World Dies & popped it up for drama. The little word world never made my master – my master was always just the hello greetings. I stamped that in the open space after.

Matte your white card front so you have a 1/16″ border of Soft Sky on the top and bottom. Stamp the bold stripe stamp from YAY Stripes top and bottom so that you have a little peeking out. Adhere together and add a little Brown Bakers Twine up top with a bow – super simple and easy! This is a GREAT mass produced card. Just stamp all your pieces out at once and assemble factory line style.

So what did you think? I know they are easy for me, I was in a Clean and Simple mood the past few days. I have more coming this week with this stamp set, so be sure to stop back by!

Here’s the list of all 22 Hello World Designers to inspire you today. Be sure to stop by everyone’s blog. If you would like to purchase the Hello World Stamp Set & Hello World Die set, please visit the Store over at Catherine Pooler Designs. Here’s a link. Remember that all the profits from this stamp and dies set this entire week are going to fund this classroom – wouldn’t it be great if we could blast through the goal!  And if you want to directly donate, please click here.

Happy Hopping!!

Have a great creative World Card Making Day!!!

Signature

[optin_box style=”12″ alignment=”center” email_field=”email” email_default=”Enter your email address” integration_type=”aweber” double_optin=”Y” list=”3846012″ name_field=”name” name_default=”Enter your first name” name_required=”Y” opm_packages=””][optin_box_field name=”headline”]Learn more with our exclusive FREE video series:[/optin_box_field][optin_box_field name=”paragraph”]PHA+UGx1cyB5b3XigJlsbCBiZSBhZGRlZCB0byBteSBGUkVFIENyZWF0aXZlIFRpcHMgRS1sZXR0ZXIgd2hlcmUgSSBzaGFyZSBleGNsdXNpdmUgcHJvamVjdHMsIHZpZGVvcyAmYW1wOyB0aGUgPHN0cm9uZz4xMiBEYXlzIG9mIENocmlzdG1hczwvc3Ryb25nPiBQcm9qZWN0IFNlcmllczwvcD4K[/optin_box_field][optin_box_field name=”privacy”][/optin_box_field][optin_box_field name=”top_color”]undefined[/optin_box_field][optin_box_button type=”0″ button_below=”Y”]Get Instant Access![/optin_box_button] [/optin_box]


Labor Day Sale, & WE have a Blog Hop Winner

Ellen Hutson is having a Labor Day Sale – whoohoo! I love a good sale, and with this one you can save up to 20% on your purchase! Sounds like a great time to stock up on the essentials & maybe do a little shopping for those fall/holiday cards!?!

EH Labor_Day_Sale

Here are a few items I just can’t craft without – seriously….I use them almost every single day!

Click Here to Shop

Have fun shopping & Definitely have a great weekend!!!


Blog Hop Winners

Wasn’t the Catherine Pooler Shop Grand Opening Blog Hop awesome! Talk about some great projects. WE had a winner on this blog! Isn’t that exciting!!!

There were three winners in all, and if you didn’t win on this one – maybe you did on another!  Congratulations Linda Anderson!!! You won a $25 gift certificate to the new Catherine Pooler Shop! Whoo Hoo! Be sure to stop by Catherine’s blog for all the details on claiming your prize.

That’s all folks – be sure to stop by later today for a new project tutorial!

Keep those fingers inky –

Signature


Back home and a Mojo Monday card for you!

Christmas Messages 002 Main R 2

Welcome home – Oh, that’s me!  In case you’ve been wondering where I’ve been, I’ve spent the last 2 weeks on the road in New York.  We had a fun family wedding, spent quality time with several members of our family in upstate and Western NY, and even had fun in New Jersey too!  Of course, Michael and I had fun driving up and down the eastern coast!  No, seriously, Michael and I love getting on the road together.  We leave late at night and drive all through the night.  We can usually make it to NY in 17 hours, though we took a leisure trip this time.  We’re rather good in the car and love playing games, chatting and just seeing where the road takes us.  We love to hit Farm Stands, go to new places and visit friends or memorable places along the way if we have the time.  Thankfully both our businesses are mostly virtual and we have the freedom to do this – especially since we added 4 extra days while on the road!

After seeing the beginning of the color change all through the northeast, I thought I’d give you a fall-ish card for my Mojo Monday Challenge card today.  I actually made a killer Christmas version that looks nothing like this one, but thought I’d save it for one of my 12 weeks of Christmas cards instead – so if you’re on the Creative Tips list – you’ll see that this week – it’s so cool, that I think I’m going to use it as one of my own Christmas cards this year!  If you’d like to get my 12 weeks of Christmas projects free and more click here to subscribe today.  So far you’ve only missed one week!

Supplies –

  • Stamps – Christmas Wishes, Gorgeous Grunge
  • Ink – Chocolate Chip, Crumb Cake
  • Paper – Chocolate Chip, Tangerine Tango, Sweater Weather Designer Series Paper, Very Vanilla
  • Tools – Circle Collection Framelits, 1 1/4” Square Punch, Bone Folder
  • Finishing Touches – Chocolate Chip Grosgrain Ribbon (retired), Stamping Dimensionals

    Shop 24/7 in the Creative Store – Click Here!Christmas Messages 002 Main L

    Here is the Mojo Monday sketch and my fall version.  Enjoy the tips below!

Mojo314SketchChristmas Messages 002 Front

Creative Tips –

  • I wanted to use this great plaid from the Sweater Weather Designer Series Paper Collection, so the rest of the card kind of fell into place.
  • If you want to add a little something to brighten the card up – try the Gorgeous Grunge stamp set as I did here.  The lines (my all time favorite stamp) are stamped in Tangerine Tango and the splats are stamped in Crumb Cake stamped off to make it more of the background.Christmas Messages 002 Side
  • The greeting is from a Christmas set, but honestly – it works for Thanksgiving too!  Gotta love versatility, right?
  • I wanted a larger ribbon for the knot, so I broke out a retired spool – I miss this collection, try anything you have!
  • To make the Banner Flag, you will want to use a square punch or some paper snips.  To get the end to curl up a bit, lightly curl your DSP upward using your bone folder.  The trick is not to over-work it.  View my video on how to make banner flagsChristmas Messages 002 Height
  • To add a little interest, try popping up the card front and greeting with Stamping Dimensionals.


        I hope you all enjoyed this fun project!

    Signature Snowflake 001Christmas Messages 002 Angle

    Shop 24/7 in the Creative Store – Click Here!

    Gorgeous GrungeChristmas MessagesSweater Weather Designer Series Paper

    48 hours left plus two Sneak Peeks

    Here’s a little sneak peek at one of the super cute 12 weeks of Christmas projects that will hit inboxes in 48 hours!  Do not miss out on 12 weeks of step by step projects, tags, gifts and wrapping ideas!  You will not find any of these projects on the blog, so if you are a blog subscriber and you would like to see these projects, make sure you sign up for the creative tips list in the box below!

    12 Weeks of Christmas banner_small


    And be sure to stop by Wednesday for this super cute clean and simple Christmas card!  Here’s a sneak peak of that!

    Clean and Simple Christmas Sneak

    Have a fun start to the week!

    Signature Snowflake 001

    Shop 24/7 in the creative store – click here!

    Making Everyday Cards

    Everyday Occasions Kit Cards

    Introducing a card making kit for every occasion!  Why go to the store when you have a birthday, graduation, wedding, or even a time for expressing gratitude comes up? The Everyday Occasions Cardmaking Kit gives you cards for all of those events right at your fingertips. And best of all, you will be sending out handmade cards!

    The kit contains everything you need (minus adhesive and scissors) to create 20 beautiful cards for almost any occasion.  It comes in a beautiful box to store your cards and supplies in.

    Everyday Occasions Kit

    The Everyday Occasions kit includes:

    * Cardstock and envelopes for 20 cards
    * Twine, buttons & clips
    * Pre-cut paper embellishments
    * Mini ink pads (Stampin’ Spots)
    * Seven-piece Occasions Stamp Set & clear stamp block
    * Full color Tips & Tricks brochure for making the cards
    * A cool, storable, giftable box

    The Everyday Occasions Cardmaking Kit (134797) $29.95

    Check out the PDF flyer with all 20 cards you’ll make here:

    20 card flyer

    So give it a try!  This is the perfect kit if you are new to stamping and don’t really know where to start or just need a quick card for any and every occasion.

    Signature Snowflake 001

    To shop 24/7 in the creative store – click here

    The Envelope Punch Board is your Answer!

    Envelope Punch Board

    You have been waiting, and the Envelope Punch Board (#133774) is finally here!  This is probably the coolest new tool on the paper crafting market today.  Finally – you can make envelopes of ALL sizes – up to 66 different ones!  Be sure to watch the short 4 minute video below on how this tool can make your life SO much simpler.  And at $19.95 it’s easy on the budget too!

    The Creative Grove Envelope Special

    Everyone who orders an Envelope Punch Board (#133774) using this hostess code – VWCWVJ34 through me by Wednesday September 4th will get a special packet of 20 sheets of – 6×6 Designer Series Paper (that’s a value of $5.50 worth!) mailed to them to use for liners or even your own 3” x 4” card sized envelopes!!  And don’t forget about The Creative Grove Rewards Program for free stamps too!

    • It creates totally customizable envelopes in up to 66 different sizes (not to mention a million different color and pattern options depending on the paper you want to use). Even tried and true envelope sizes will only take you moments to create!
    • It’s super easy to use!  It looks intimidating at first glance, but when they see that all you have to do is measure for the first punch and from there you just turn and score – you’ll be hooked (in a good way).
    • It’s small and lightweight!  This makes it easy for you to store. It’s small and light enough that they could use it while watching a soccer match, at a park, at a friend’s for craft night-anywhere.
    • It even has a slick scoring tool as well as a punch that lets you create rounded corners on your envelopes.
    • It’s easy to keep it all together!  The stylus storage compartment and two punches are designed into the tool so you don’t have a bunch of little pieces to keep track of (even the instructions are printed right on the tool so you won’t lose them!).

    The Creative Grove Envelope Special

    Everyone who orders an Envelope Punch Board (133774) using this hostess code – VWCWVJ34 through me by Wednesday September 4th will get a special packet of 20 sheets of – 6×6 Designer Series Paper (that’s a value of $5.50 worth!) mailed to them to use for liners or even your own 3” x 4” card sized envelopes!!  And don’t forget about The Creative Grove Rewards Program for free stamps too!

    Signature Snowflake 001

    To Shop 24/7 in the Creative Store – Click here!

    Envelope Punch Board

    Did YOU get the video for this card?

    Lovely as a Tree004 Main L

    Did you get the video to make this card?  If not, then you’re not on The Creative Grove Mailing List!

    So what’s the big deal about this special list anyway?

    • You will get exclusive videos and creative tips sent directly to your inbox that are not shared on the blog.
    • Get Creative Grove Specials for list members only.
    • Be in the know of everything that’s happening with Stampin’ Up! products and new releases.

    Lovely as a Tree004 CU

    You can still get this video – it’s one in a series of Creative Tips sent to subscribers.  So when I ask – why would you be on the list?  Why wouldn’t you?

    Subscribe today here or in the box on the upper right.

    Take me to see the original blog post for this card with all the photos and creative tips.

        Signature-Snowflake-001_thumb1

      To Shop 24/7 in the Creative Store – Click here!

      Lovely as a Tree004 Angle

      To view the details or see close ups of any products used in the above project, just click on the green link to view it in my store 24/7.

      Stamp Sets – Lovely as a Tree (127793c, 128655w),  Four You (130538c, 130535w)Ink – Stampin’ Write Markers – Crushed Curry, Old Olive, Real Red, Pumpkin Pie, Early Espresso, Soft Suede;  Early Espresso Paper –Whisper White

    Secret Garden DIY Wedding Invitations

    Secret Garden 004 DIY Wedding Set

    It’s finally a good few days into June, so I’ve been thinking of weddings.  I thought I would showcase a simple but elegant Wedding set that fits every brides budget.  This is great little set that covers the invitation, thank you card and place card.  There is no question, the wedding invitations and paper items that go along with it will run any bride a pretty bundle.  With Stamps, ink and any word processing program you too can make amazing item for your wedding without paying an arm and a leg.

    Secret Garden 004 Wedding Invite

    Creative Tips –

    • Stampin’ Up! colors are great for just this purpose.  The inks are vibrant and rich.  Here I chose Elegant Eggplant and Perfect Plum.
    • My wedding invitation is 8 1/2 x 5 1/2” and fits into an A9 envelope.Secret Garden 004 Invite Front-Back
    • I used my word software to print onto a piece of 8 1/2 x 11 piece of cardstock.  I first created two columns.  One side had my Invitation and the other column had my reception information.  This invitation/reception card is front and back to save on the budget.
    • My Thank You card uses our Notecard and Envelopes package.  They are pre-scored for your ease and makes a quick and simple Thank You card.  The Thank You stamp is from our Lacy & Lovely stamp set, but The Thank You in our new Four You Stamp set would be perfect also.Secret Garden 004 Thank You Card
    • The Place Holder card is also quite simple.  I can get 16 per page printed at 1 1/4” x 3”.  The full size is 3” x 3 1/4” folded so that it’s 1 1/2” x 3 1/4”.Secret Garden 004 Place Holder
    • For a little variety I made the Table Number out of our Island Indigo Paper, but it is stamped with the same stamp set.  I ran 1/2 a sheet through on our Mini Milk Carton Die through the Big Shot for the base.  I filled it with rice and used a small dowel for the stick.  I printed the table number twice and matted it twice.  I adhered them together with Sticky Strip.  It’s a cute little item that does not take up much place.Secret Garden 004 Table Number

    Overall, there are so many ideas out there for weddings.  This set will run you $151 before shipping and tax, and you’ll have an additional $25 to spend from the hostess benefits.  The best part about it – it makes 100 invitations, RSVP Cards/Envelopes, Thank You cards and place cards.  Now that’s not bad for something that’s elegant and full sized.  Here’s what you will need:Secret Garden 004 DIY Wedding Set

    Invitation Kit – 100 Invitations w/reception card, RSVP cards/Envelopes, Thank You cards/Envelopes + Coordinating Place Cards

      • $8.50ea (4) Ultra Smooth Whisper White Cardstock (40 sheets each) (100730)
      • $6.95ea (3) 8 ½” x 11” Colored Cardstock (24 sheets each) (105126)
      • $5.95 (5) Note Cards & Envelopes (20 each) (131527)
      • $6.50 (3) White Envelopes (40 each) (107301)
      • $6.95 Snail Adhesive (104332)
      • $4.50 (2) Snail Refill (104331)
      • $25.95 Secret Garden Stamp Set Wood (129144c, 131940)
      • $5.95 (2) Coordinating Classic Ink Pads (126963, 126969)

    * Additional items – Kit price is based on a wood stamp set, if you order the clear, you will need the Starter Kit bundle Acrylic Blocks.  You will also need A9 envelopes and a paper trimmer.

      Signature Snowflake 001

    To Shop 24/7 in the Creative Store – Click here!

    Secret Garden