Secret Garden DIY Wedding Invitations

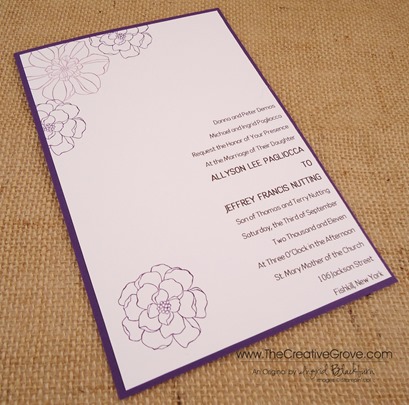
Secret Garden 004 DIY Wedding Set

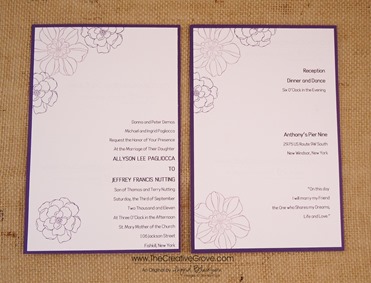
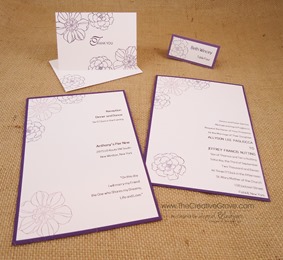
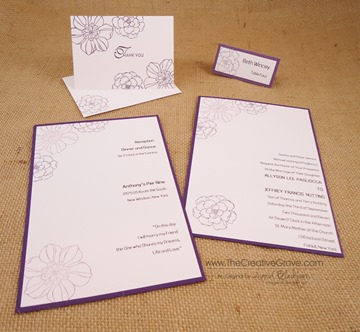
It’s finally a good few days into June, so I’ve been thinking of weddings.  I thought I would showcase a simple but elegant Wedding set that fits every brides budget.  This is great little set that covers the invitation, thank you card and place card.  There is no question, the wedding invitations and paper items that go along with it will run any bride a pretty bundle.  With Stamps, ink and any word processing program you too can make amazing item for your wedding without paying an arm and a leg.

Secret Garden 004 Wedding Invite

Creative Tips –

  • Stampin’ Up! colors are great for just this purpose.  The inks are vibrant and rich.  Here I chose Elegant Eggplant and Perfect Plum.
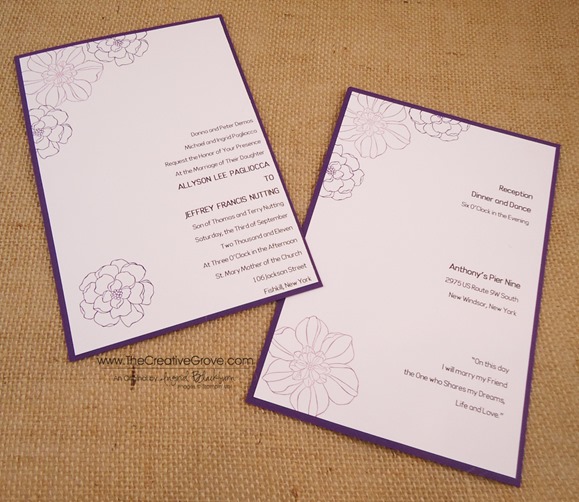
  • My wedding invitation is 8 1/2 x 5 1/2” and fits into an A9 envelope.Secret Garden 004 Invite Front-Back
  • I used my word software to print onto a piece of 8 1/2 x 11 piece of cardstock.  I first created two columns.  One side had my Invitation and the other column had my reception information.  This invitation/reception card is front and back to save on the budget.
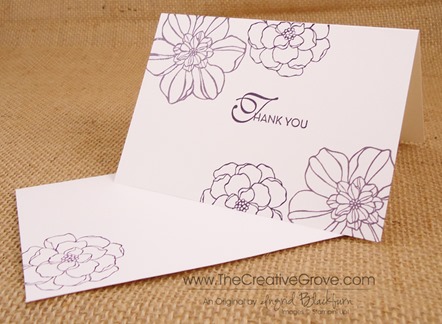
  • My Thank You card uses our Notecard and Envelopes package.  They are pre-scored for your ease and makes a quick and simple Thank You card.  The Thank You stamp is from our Lacy & Lovely stamp set, but The Thank You in our new Four You Stamp set would be perfect also.Secret Garden 004 Thank You Card
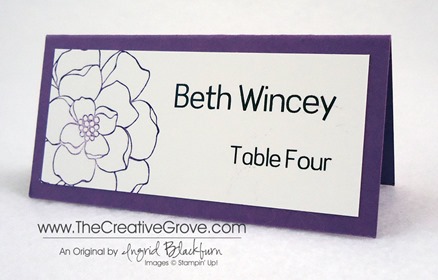
  • The Place Holder card is also quite simple.  I can get 16 per page printed at 1 1/4” x 3”.  The full size is 3” x 3 1/4” folded so that it’s 1 1/2” x 3 1/4”.Secret Garden 004 Place Holder
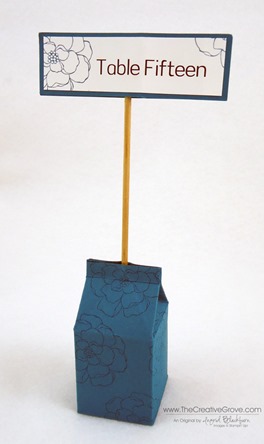
  • For a little variety I made the Table Number out of our Island Indigo Paper, but it is stamped with the same stamp set.  I ran 1/2 a sheet through on our Mini Milk Carton Die through the Big Shot for the base.  I filled it with rice and used a small dowel for the stick.  I printed the table number twice and matted it twice.  I adhered them together with Sticky Strip.  It’s a cute little item that does not take up much place.Secret Garden 004 Table Number

Overall, there are so many ideas out there for weddings.  This set will run you $151 before shipping and tax, and you’ll have an additional $25 to spend from the hostess benefits.  The best part about it – it makes 100 invitations, RSVP Cards/Envelopes, Thank You cards and place cards.  Now that’s not bad for something that’s elegant and full sized.  Here’s what you will need:Secret Garden 004 DIY Wedding Set
Invitation Kit – 100 Invitations w/reception card, RSVP cards/Envelopes, Thank You cards/Envelopes + Coordinating Place Cards

    • $8.50ea (4) Ultra Smooth Whisper White Cardstock (40 sheets each) (100730)
    • $6.95ea (3) 8 ½” x 11” Colored Cardstock (24 sheets each) (105126)
    • $5.95 (5) Note Cards & Envelopes (20 each) (131527)
    • $6.50 (3) White Envelopes (40 each) (107301)
    • $6.95 Snail Adhesive (104332)
    • $4.50 (2) Snail Refill (104331)
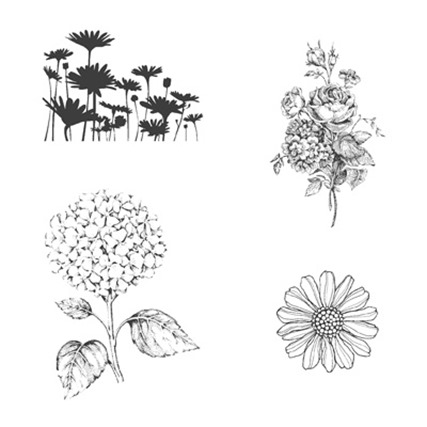
    • $25.95 Secret Garden Stamp Set Wood (129144c, 131940)
    • $5.95 (2) Coordinating Classic Ink Pads (126963, 126969)

* Additional items – Kit price is based on a wood stamp set, if you order the clear, you will need the Starter Kit bundle Acrylic Blocks.  You will also need A9 envelopes and a paper trimmer.

    Signature Snowflake 001

To Shop 24/7 in the Creative Store – Click here!
Secret Garden

Creative Notebook Covers

Notebook Cover 001 Main

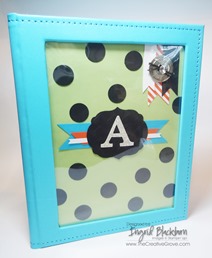
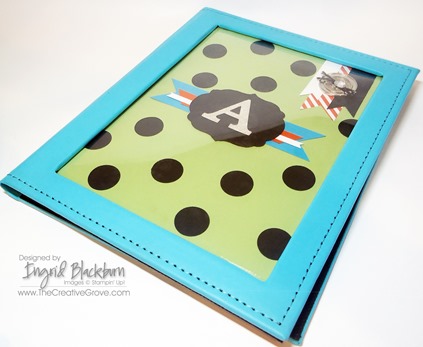
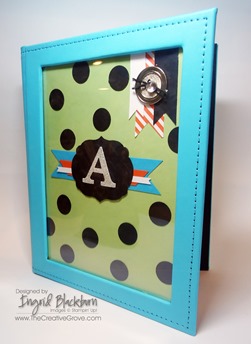
Who doesn’t love a great notebook and a handmade gift?  I had the privilege to help a good friend and fellow CG Crew team mate out with a fun little project she was doing – personalized notebooks for Admin Day this past week as one of their gifts.  Isn’t she a cool boss?  I’ve never had a boss make me something before – if that doesn’t say “I value you”, I don’t know what does!  Here is one of the notebooks that were made that day.

Notebook Cover 001 Front Notebook Cover 001 Inside

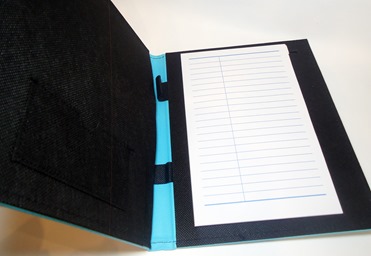
Amy got these cool Notebook covers that had a place to do something fun and creative in the cover. They came in a cute box and were just screaming to be personalized.  She had to make a few, so I just let the creative juices start flowing and this is what we ended up with for one of them.

Creative Tips:

  • We was going to make polka dots using sponge daubers, but then decided on a cleaner look and punched out polka dots with the 1” circle punch instead.
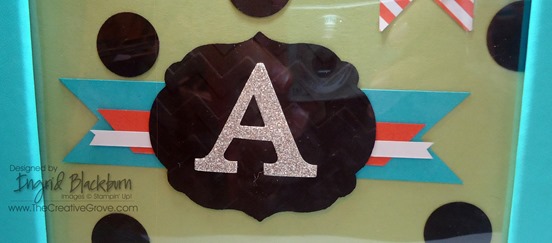
  • To give a little more emphasis to the name plate – we ran the Basic Black card stock through the big shot first with the Labels Framelits Collection and then through the Chevron TIEF folder.Notebook Cover 001 Name CU2
  • To really make it pop – we created a banner display behind it in the Tempting Turquoise, Tangerine Tango and Whisper White. 
  • The initial was made using the Typeset Alphabet Bigz dies and the Silver Glimmer Paper.
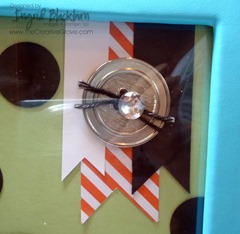
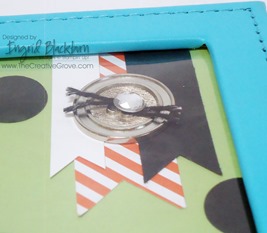
  • We wanted to add a little flair, so we created hanging banners in the corner with Basic Black and Whisper White cardstock.  We added a Tangerine Tango striped Designer Series Paper from the Sycamore Street DSP Collection that was available during Sale-a-bration (now Retired). 
  • To make the hanging banners we used a 1” Square punch.  It make the larger banner, we used a 1 3/8” Square Punch.
  •               Notebook Cover 001 Button CU Notebook Cover 001 Button Height

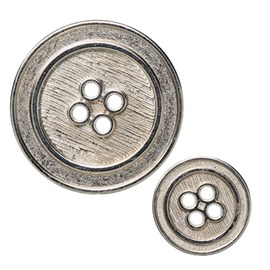
  • We added a little flair to the banners by putting one of the Silver Basic Designer Buttons from the Spring Catalog. 
  • We threaded it with some Basic Black Baker’s Twine.  You might be asking  – wait Stampin’ Up! doesn’t carry that?  You would be correct – we made it from the Whisper White Baker’s twine – something that everyone should have.  What we did was run my Classic Basic Black ink pad over it on our Grid Paper and voila, Basic Black Baker’s Twine!
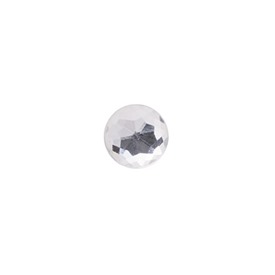
  • We then popped one of our Large Rhinestone Basic Jewels to the top for a little bling!
  • This project turned out super cute and I know the recipient will love it.  According to Amy, it totally fits her personality, and the fact that it was handmade will certainly make her feel appreciated.

Signature Snowflake 001

Be sure to check out the Retired Lists!  Get all your favorites while you still can.

Retired Stamp Sets                      Retired Accessories List

To Shop 24/7 in the Creative Store – Click here!
Notebook Cover 001 Angle

Stamp Sets – none! Paper – Whisper White (100730), Certainly Celery (105125), Tempting Turquoise (102067), Tangerine Tango (111349), Basic Black (121045), Silver Glimmer Paper (124005), Sycamore Street DSP (retired) Ink – Basic Black (126980) Cool Tools – Big Shot (103954), Chevron Embossing Folder (127749), 1 3/8” Square Punch (119877), 1” Circle Punch (119868)  The Perfect Finish – Silver Basics Designer Buttons (129325), Large Rhinestone Basic Jewels (129324), Whisper White Baker’s Twine (124262)

    Large Rhinestone Silver Basics Buttons

Best of Flowers Candle

Best Of Flowers 002 Main

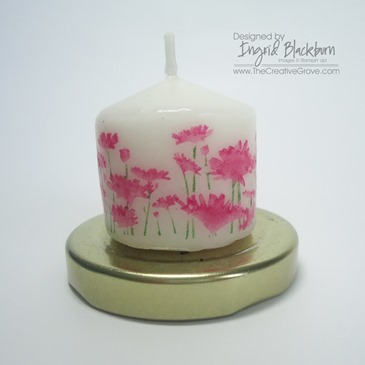
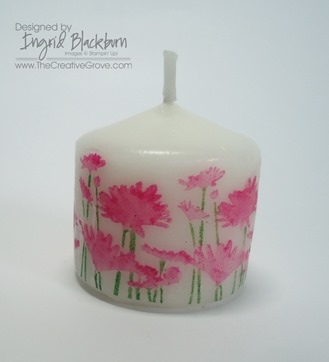
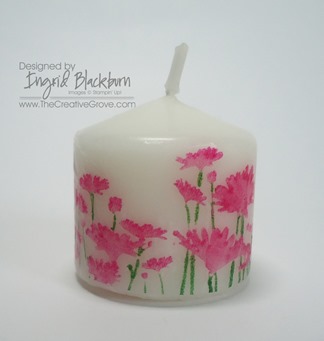
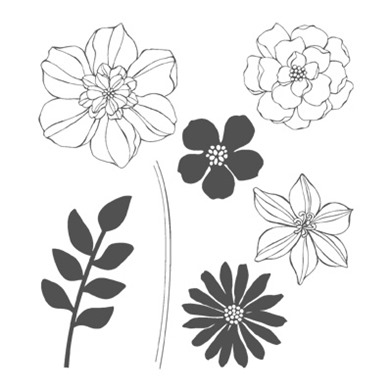
Stampin’ Up!’s 25th Anniversary exclusive stamp set Best Of Flowers can be used in many versatile ways – don’t just think in 2D for cards!  I wanted a little pop for these cute flowers on this stamp which is quite smaller than it’s original.  But the change is worth it – at least for my cute little votive candles!

Creative Tips:

  • Normally I would stamp with the ink pads, but since this stamp is so detailed, I used Stampin’ Write Markers – Melon Mambo and Garden Green. 
  • I took my time to color in my stamp and then huffed it – remoistened the ink with the warmth of my breath by huffing of my stamp.
  • I stamped several images on white tissue paper, and then cut around the whole image leaving a little space for my glue.
  • I glued each image directly to my candle using the two way glue stick.   I had to trim a few flowers off since they were taller than my candle.

Best Of Flowers 002 Angle 3

  • I wrapped the candle tightly with wax paper, leaving an excess amount for me to hold on to.
  • I used my Heat Tool to carefully melt the wax from the candle through the tissue paper and wax paper.  I then quickly roll it onto a hard surface covered with grid paper so not to get any wax on the surface.  This rolls the candle flat again. 
  • Once my image is translucent and I can’t see any of the white tissue paper, I knew it was done.  TIP – don’t over do it as your candle will be bumpy then.  It goes quick.
  • Be patient, pull your wax paper off slowly…let me say that again – Slowly!  Check it and spot melt any other sections with new wax paper. 
  • I get my wax paper at the $1 store – that way I’m not skimpy with it!
  • Best Of Flowers 002 Angle 1

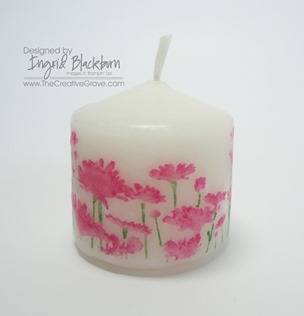
The end result is a fun personable candle that dresses up any occasion!  Have fun using this versatile stamp set for so much more than just cards!

Tune in tomorrow for the RemARKable Stampers Blog Tour!  Have a great Saturday!!

Signature Snowflake 001

To Shop 24/7 in the Creative Store – Click here!

Best Of Flowers 002 Angle 2

Stamp Sets – Best of Flowers (133342c) Ink – Melon Mambo Stampin’ Write Marker – Brights Collection (119702),  Garden Green Stampin’ Write Marker – Regal Collection (119701)  Paper – White Tissue Paper, Wax Paper  Cool Tools – Heat Tool (129053), 2 way glue (100425) 

Best of Flowers 133342L

Ornament Elegance Kit and Class

Ornamental_Elegance_Banner(1)

You’ve been admiring it for months now and have wanted to make it, but didn’t have the time or materials – well here’s your chance!

The ornament on the cover of our holiday catalog is such a hit that Stampin’ Up! has made it available–just in time to deck the halls with terrific trimmings you’ve made yourself! We’ve simplified this fun project so that you can quickly and easily achieve the same results.

In addition to the kit, all you need is a glue gun, scissors, and adhesive. (Our Anywhere Glue Sticks [104045] are perfect for assembly.) Want greeting or place cards to go with those ornaments? The Ornament Keepsakes stamp set (W 128048 C 128051) gives you perfect coordination. Fancy a little sparkle and shine? Sprinkle on our Dazzling Diamonds Stampin’ Glitter (102023)!

Take advantage of this amazing offer–just in time to create 10 heirloom ornaments–or stunning tags to attach to a special neighbor gift. Click here to order

The Ornamental Elegance Kit (132832) includes:

  • Die-Cut Cardstock Elements
  • Cherry Cobbler 3-1/2" Scalloped Tulle Ribbon
  • Natural Linen Thread
  • Vintage Faceted Designer Buttons 
  • Large Pearl Basic Jewels

Order these now so you will have plenty of time to make them for Christmas gifting–or for your family tree! Available while supplies last.

Want to just make one and get the hang of how to do it?  Join me for a new class – Holiday Gifts and Tags on Monday December 17th.  Choose from either day or night class! Click here to register

Signature Snowflake 001

To Shop 24/7 in the Creative Store Click here!

Mini Scrapbook Album

Paper Flowers 204

National Scrapbooking Month begins tomorrow.  I thought I would jump right on in this week and start with one of my favorite ways to scrapbook – mini albums.  I just love making mini albums.  I always find it so cool that I can take 1-2 pieces of paper and make something that gets cherished a lifetime.  This project is definitely one of those.

It’s quite easy actually – I cut two strips of Pink Pirouette Paper lengthwise at 3.5 x 10.5 inches long.  Next score and fold them into thirds and attach them together.  I next cut two 3.625 squares of Early Espresso for the front and back of the album.  I decided to add some of our Whisper White Taffeta Ribbon through the rear piece before I adhered the back Espresso square which gives me a simple way to close my album.  You will want to stamp both pieces of Pink Pirouette in whichever stamp set you’d like, and sponge each edge of folded square in Early Espresso.  I used Artistic Etchings in Pink Pirouette.

Paper Flowers 216

For the front piece, I ran a piece of Whisper White cardstock through the Big Shot with the Vintage Wallpaper Embossing Folder (my personal favorite!) and sponged the edges in Early Espresso.  I added a little Certainly Celery strip punched with the Scallop Trim Punch and added a little tag with the Decorative Label Punch.  I made a paper flower with the Fancy Flower Punch (look for my upcoming tutorial on Paper Roses).

Paper Flowers 211

For that perfect finishing touch, I added some Basic Pearl Jewels – I just love our multi-sized packages, they’re great! And lastly, my title Mom is done with the Timeless Type Junior Alphabet Sizzlits Dies and my Big Shot.  It’s hard to tell in these pictures, but the Cherry Cobbler Mom is sprayed with Gold Glow Smooch Spritz for the perfect final touch.

Paper Flowers 206

The best part of this mini album is that you can fit 8 pictures in it.  Ultimately it’s a great gift or keepsake.  Enjoy making them yourself!

Create Away –

Ingrid

To Shop 24/7 in the Creative Store – Click here!
Be sure to check out the Retired Lists and Clearance Rack!

Stamp Sets – Perfect Words (122472 – Hostess Set), Artistic Etchings (120573) Paper – Whisper White (100730), Certainly Celery (105125), Pink Pirouette (111358), Early Espresso (119686) Cherry Cobbler (119685)  Ink – Gold Glow Smooch Spritz (118770), Pink Pirouette (111838), Early Espresso (119670) Cool Tools – Scallop Trim Border Punch (118402), Big Shot (113439), Vintage Wallpaper Embossing Folder (120175), Fancy Flower Punch (118073), Decorative Label Punch (120907), 5 Petal Flower (119880) The Perfect Finish – Basic Pearl Jewel Accents (119247), Whisper White Taffeta Ribbon (109070)

120573 Artistic Etchings

Beautiful Butterflies and Flower Fusion

I just love my Big Shot.  Since it is officially Spring – I decided to make a cute name frame for my Sister-in-law’s baby shower.  I thought, let me personalize a gift for my new niece Aubrey.

I pulled out my Big Shot, Beautiful Butterflies, Lattice, Floral Fusion and Timeless Type Junior Alphabet dies and went to work.  Since Spring has officially begun – it seemed appropriate!

For the base, I decided that I didn’t want to stay too “Pink”, so I chose So Saffron, Certainly Celery with a highlight of Rose Red.  I pulled in some blues – Island Indigo, Baja Breeze and Marina Mist.  I wanted a something else soft, so I chose Wisteria Wonder and a darker pop of Elegant Eggplant to round it all out.  I know that’s a lot of colors, but I wanted it colorful for my new niece’s room.

I needed a frame with a spacer to get a shadow box effect.  This way my butterflies and flowers can have depth.  I used my fingers to curl up the sides of the flowers and butterflies.  I didn’t want to overdo the name, so I decided to go simple and elegant with a few Basic Pearls for a little pop.  I matted them onto some DSP for a little variation and distressed the edges.

Here is the final result.  I needed a little something up top, so I used textured paper as the So Saffron background and the Lattice needed a little pop too, so I inked up a background stamp for a little pop.  I made sure to sponge the butterflies in their colors for a little depth.

I love the final result!  Since this is meant to stand the test of time, I adhered my butterflies and flowers with Sticky Strip to make sure they would stay attached.  I can’t wait to make a new frame now geared towards Friends for my next 3D class – if you’re interested, be sure to RSVP!

Create Away –

Ingrid

To Shop 24/7 in the Creative Store – Click here!
Stamp Sets – Sanded (Retired background stamp) Paper – Island Indigo (122923), Certainly Celery (105125), Rose Red (102544), Wisteria Wonder (122922), Elegant Eggplant (105126), Baja Breeze (111352), Marina Mist (119682), Patterns Designer Series Papers (117152), and So Saffron Textured Paper (121075) Ink –Wisteria Wonder (122936), Rose Red (101778), So Saffron (105213), and Certainly Celery (105217) Cool Tools – Scallop Trim Border Punch (118402), Cutter Kit (106958), Big Shot (113439), BigZ Dies – Lattice (115958), Beautiful Butterflies (114507), Floral Fusion (115969) and Timeless Type Junior Alphabet (115951) The Perfect Finish – Stampin’ Sponges (101610), Basic Pearls Jewels (119247)

Technique Tuesday – Simply Scored

It’s Technique Tuesday!  This week I’d like to highlight a simple technique that makes all the difference in your projects – scoring. 

Stamping, scrapbooking and I go way back.  I remember when I had to hunt to find any products to use in my crafting.  Today – there are more than you can possibly imagine.  Simply Scored is one of those new tools that not only make my life easier – it just makes me happy! Simply Scored is simply the best.

One of my all time favorite tools (That’s saying something), Simply Scored is a must have for every stamper and scrapbooker.  You can easily make cards, boxes, envelopes quickly and easily – but more importantly you can customize so much with this tool. 

Before we always used a scoring blade, stylus with templates, or a bone folder to get those grooves.  Now – Simply Scored takes the think out of my project – which is always a good thing.  I can quickly and easily add texture (simple lines to the card below) to backgrounds, in addition to creating cute 3 dimensional projects which would have otherwise taken a while to score just right. 

Imagine making your own matching envelopes!  Check out this quick video tutorial on what the additional diagonal plate added to the Simply Scored tool can do for you!


[youtube=http://www.youtube.com/watch?v=vkNFzMa1azw]


The Simply Scored tool is available through our Spring Occasions mini catalog, and the additional Diagonal Plate (125586, $11.95) is available March 1st. You won’t want to forget to add this to your existing Simply Scored tool – the possibilities are endless with it.

Create away…

Ingrid

To Shop 24/7 in the Creative Store – Click here!
Stamp Sets – Kindness Matters (122902) Flower Fest (122280) Paper –Whisper White (100730), Island Indigo (122923), Certainly Celery (105125) Ink –Island Indigo (122937), Certainly Celery (105217) Cool Tools – 5 Petal Punch (119880), Simply Scored Scoring Tool (122334), Simply Scored Place Markers (125625), Simply Scored Stylus (125624), Modern Label Punch (1199849) The Perfect Finish – Paper Piercing Tool (116631), Mat Pack (105826), Stampin’ Sponges (101610), Silver Brads (104336), Stampin Dimensionals (104430)

Playing with Others

One of the benefits of being a demonstrator is the relationships.  I love that I don’t have to come up with everything myself.  I have great relationships not only with my customers, but with so many stamping sisters all across the world!  Here are a few projects that my good friend Karen Mickel made.  She is truly an incredibly talented scrapbooker and stamper.  And to think I remember the day her hands shook because she was afraid she would ruin the stamped image. 

I just LOVE this little box Karen made.  She put a few candy treats in there when she made it originally – but I would never want to open it – it’s TOO pretty!  The leaves are made with felt.

A card she cased (duplicated).  The detail on it is unbelievable.  I loved the way she dusted the pink with brown.  It creates a beautiful antique look.

The cutest little valentine tag ever!  I just love this little guy – Imagine the holiday and occasion possibilities!

So my hat’s off to you Karen.  Your work always takes my breath away.  I’m so glad that the world of Stamping and Scrapbooking has brought us together.  But even more – I’m proud to call you friend!  Thanks for a great day of crafting!

Create away…

Ingrid

To Shop 24/7 in the Creative Store – Click here!