1+2=3 Gold Silver & Black Project Three

Ornament Keepsakes Thumbnail

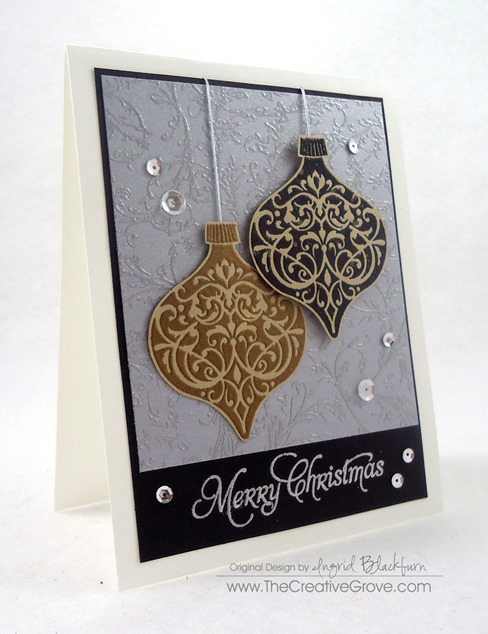
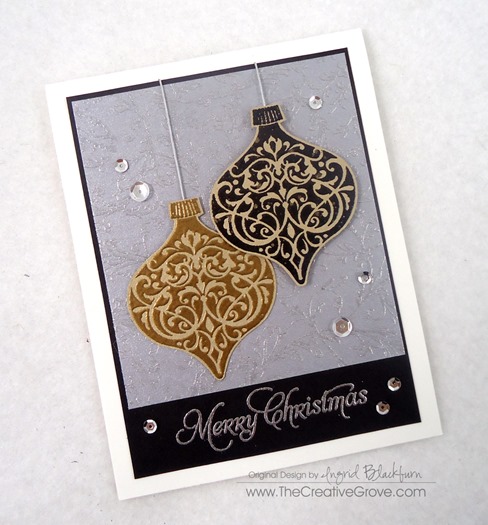
If you’ve followed along this week for this awesome color combination for Christmas Cards inspired by the Merry Monday Christmas Card Challenge this past week, then you’ll love this final project.  To say I loved this challenge is an understatement.  I made seven cards in all, and really loved switching around the combinations and playing with some new elements in each.  Although the main theme is similar, they are each different and have their own personality.

Ornament Keepsakes 003

Ornament Keepsakes 007

Here’s my third, and if you’re on the creative tips list I shared a fourth and VIP Community Members got another in a video form.  Have a great holiday weekend – see you in September!
Signature

1+2=3 Black, Silver and Gold

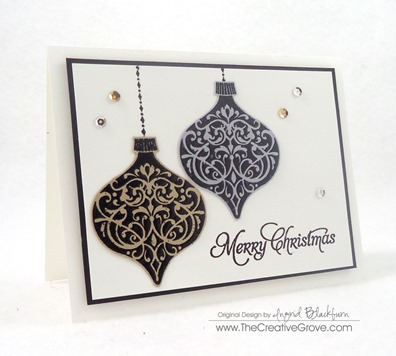
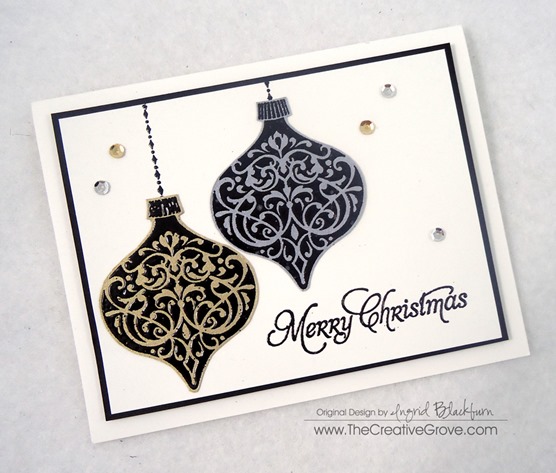
If you joined me the other day for my Merry Monday Challenge entry, then you saw this card.  Have you ever had a stamp just get under your skin and you can’t stop working with it?  Well, seven cards later, that was me yesterday!

Today will be day two of this month’s 1+2=3 Series. Remember this?  Back in June I started this series with the classic stamp set Lovely as a Tree.  This month, it’s the stamp from Ornament Keepsakes (1 stamp set) + the two colors Silver and Gold (Black and White as my neutrals) = three looks (or in my case…seven…lol). 

Of course, if you’re on the Creative Tips E-letter List, then you’ll see a bonus fourth project…and VIP Community members have a video behind the embossing science of it all and how I designed all the cards.

So enough talk…here’s todays card:

Ornament Keepsakes 003

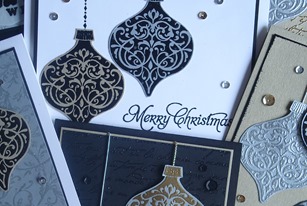
As you can see, I went for a complete Clean and Simple look.  Each item is embossed, including the string for the ornaments. 

Ornament Keepsakes 004

The most exciting part of this little experiment…I have seven more Christmas cards done.  Stay tuned tomorrow for the third in this series!

To see the first card in this series, click here.  To see the Lovely as a Tree 1+2=3 series, click here.

Happy Stamping…

Signature

To get exclusive content emailed to you – get on the Creative Tips List!

1+2=3 Stamp Series #001: part 3

So what did you think so far?  We’ve had some great feedback from this series!  I hope you’ve enjoyed the simplicity of it.  And if you were on the Creative Tips list, then you saw the bonus 4th project too!  Don’t fret – get on the list by tomorrow (6/21/14) and I’ll send it out to you.  For the bonus project I broke from the rules a bit set forth from the challenge, but figured since it was a bonus it was okay!  Smile

So, just to review, here are the rules for this challenge:

1 Stamp – For this series I thought I’d choose a stamp set that has been available for over 20 years and is still on the market…the ever popular Stampin’ Up! set Lovely as A Tree.  This works with any large tree stamp.  Since there aren’t any greeting stamps in this set, I used one from the retired set Perfect Words.

+ 2 Colors – Two colors were used in all three projects: Sahara Sand and Soft Suede by Stampin Up.  For the cardstock in later projects, I only used Soft Suede along with Whisper White. =

= 3 Projects – while a few are a bit similar, they are vastly different.  Enjoy!

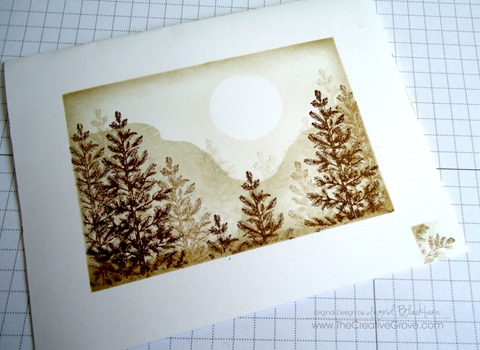
If you remember from yesterday’s post, I messed up my first and second try at this project.  Rather than let that get me down, I turned them into two totally different looks!  And a series was born.  Okay, corny enough for you – Michael is rolling his eyes…lol!  Here is my messed up version of this project – it was intended as a one layer card, but instead I turned it into the beauty you see further below.  Here is my original card – miss-masked (note the lower right corner).

DSC01406

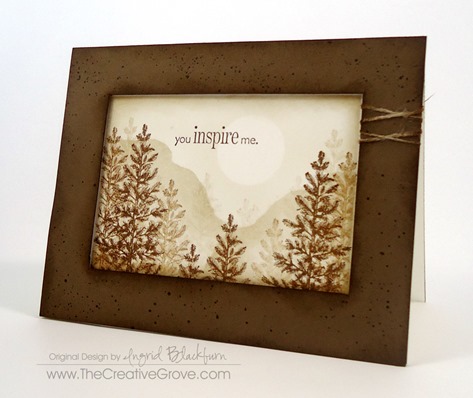
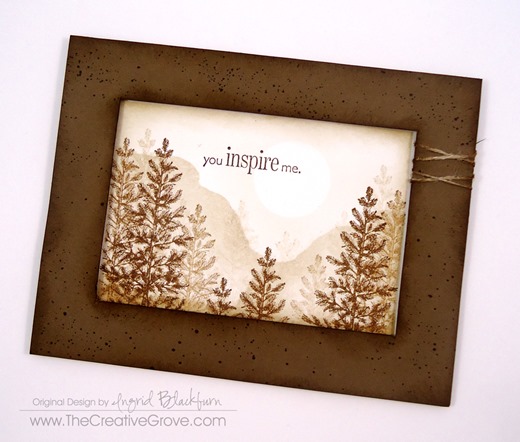
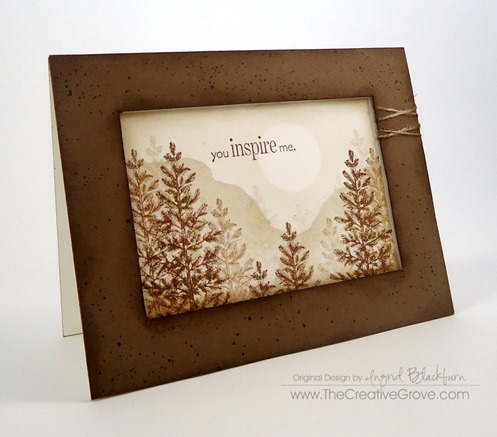
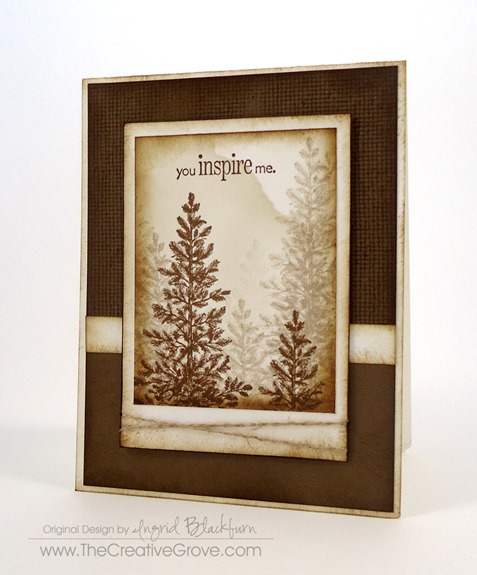
And here is the final result:

DSC01421

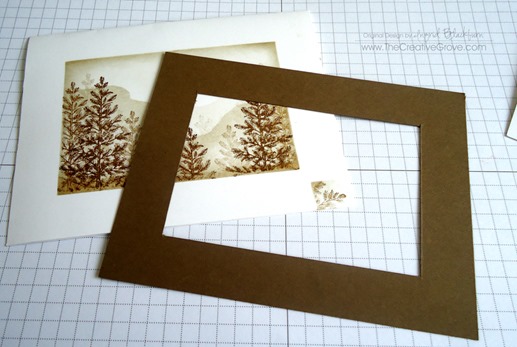
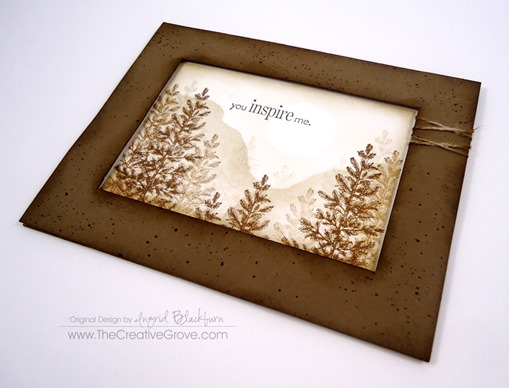
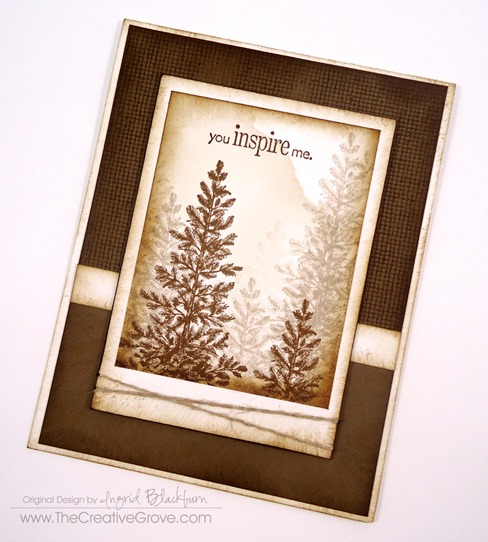
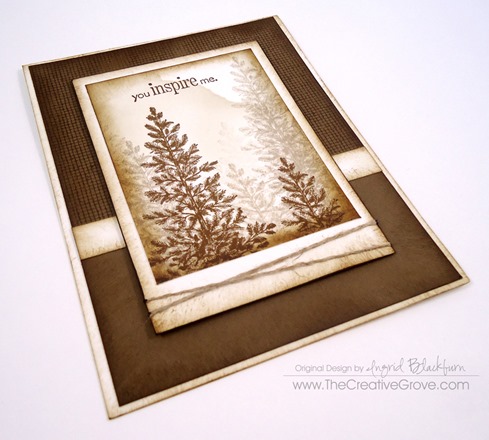
To make this card – I used the exact one layer card as a base, and added a popped up frame.  Here are a few tricks to make this seem flawless and intended.

  • The cut out frame is just slightly smaller than the original masked off window.  The original window was 3/4”, my cut out frame measures 1/16” larger – that’s the width of the frame (13/16ths) , producing a smaller visible area.  This will help to hide the white area that was masked off originally.

DSC01408

  • Add some interest to the frame.  Here you see random spritzed dots in Soft Suede using a color spritzer and a marker.  To keep with the outdoor theme, sponge both the interior and exterior of your frame.
  • Add some criss-crossed thread to one side.

DSC01442

  • Sponge the complete exterior of your one layer card first before adding the frame.  Use the same color of your frame.  This way, should your frame be slightly off, if the white shows, it blends flawlessly with your frame.  Can you see the entire top of my card?  It shows as my frame was slightly smaller.

DSC01443DSC01444

  • Finally, pop the entire frame up using foam tape or dimensionals.  Keep your tape and dimensionals closer to the inside of the frame giving it more of a shadowbox look.

To learn how I sponged, masked and created this card, check out the first and second cards in this series here:

Project One                               Project Two

DSC01420

I hope you enjoyed this series!  Thanks for joining me and be sure to stop by tomorrow for another project with this stamp set… why, just because!!  It’s completely different and used a totally different color combination, but turned out fabulous!  Just thought I’d keep the theme going this week.

Have a creative day and see you around the grove!

Signature-Blog

[optin_box style=”14″ alignment=”center” action=”http://www.aweber.com/scripts/addlead.pl” disable_name=”Y” method=”post” email_field=”email” email_default=”Enter your email address” email_order=”1″ integration_type=”custom” double_optin=”Y” name_default=”Enter your first name”][optin_box_hidden][/optin_box_hidden][optin_box_code]

[/optin_box_code][optin_box_field name=”headline”]If you enjoyed this tutorial…[/optin_box_field][optin_box_field name=”paragraph”]PHA+PHNwYW4gc3R5bGU9ImNvbG9yOiAjNjQ2MzVlOyI+TGV04oCZcyBzdGF5IGluIHRvdWNoISBNeSBvY2Nhc2lvbmFswqA8L3NwYW4+PHNwYW4gc3R5bGU9ImNvbG9yOiAjNjY2Njk5OyI+PHN0cm9uZz48ZW0+ZXhjbHVzaXZlPC9lbT48L3N0cm9uZz7CoDwvc3Bhbj48c3BhbiBzdHlsZT0iY29sb3I6ICM2NDYzNWU7Ij5DcmVhdGl2ZSBUaXBzIGUtbGV0dGVyIHdpbGwgdGVhY2ggeW91IHRvIG1ha2UgcHJvamVjdHMgdGhhdCB5b3UgbG92ZeKApjwvc3Bhbj48L3A+Cg==[/optin_box_field][optin_box_field name=”privacy”][/optin_box_field][optin_box_field name=”top_color”]undefined[/optin_box_field][optin_box_button type=”0″ button_below=”Y”]Send me exclusive tips![/optin_box_button] [/optin_box]


1+2=3 Stamp Series #001: Part 2

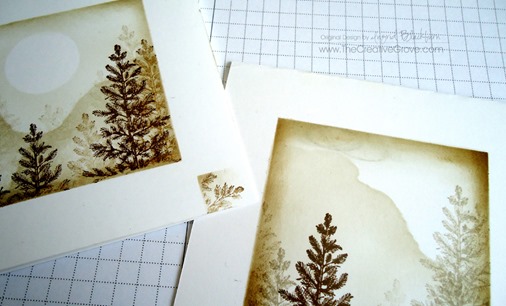
Yesterday we talked about masking and creating a scene.  But what happens when your masks or worse, sponging fails you?  Today’s and tomorrow’s projects, are the result of un-recoverable mistakes.  I’ll confess.  The project to the left below was supposed to be project 1 and the one on the right was the second.  Of course it was, I had to keep going because I wanted a one layer card as one of the projects and I kept messing up!  Can you relate?

Today is all about turning failure into a winning strategy!  I’m sure you can relate – we’ve all had this happen at some point, no?  If you missed yesterday’s project Click Here to read all about it.

Of course, it seems like when there is a mistake, it usually happens at the very end.  It’s Murphy’s Law – who is this Murphy person anyway?  If you know – tell me in the comments – I’ve always wanted to know…lol!

Here you see what was supposed to be two one layer cards.  I went the easy way out on one by using a few post it notes moving them around rather than putting my full mask back down which required more steps.  Well, the joke was on me as now I had to think outside the box to try and save my hard work!

DSC01407

And the other – on my very last pass in the upper left corner, I grabbed my sponging tool too hard and my nails left three marks…argh!  I couldn’t believe it!  There was no saving it.  So my only option was to cut.  So this project ended up as #2.  Here are the series details:

1 – Stamp – For this series I thought I’d choose a stamp set that has been available for over 20 years and is still on the market…the ever popular Stampin’ Up! set Lovely as A Tree.  This works with any large tree stamp.  Since there aren’t any greeting stamps in this set, I used one from the retired set Perfect Words.

2 – Colors – Two colors were used in all three projects: Sahara Sand and Soft Suede by Stampin Up.  For the cardstock in later projects, I only used Soft Suede along with Whisper White.

3 – Projects – while a few are a bit similar, they are vastly different.  Enjoy!

DSC01418

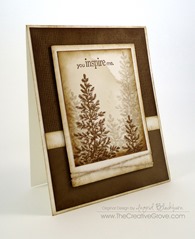
Series #001 – Project 2: In the Shadow of the Mountain

  • Once I cut the top off, I re-sponged it in both Sahara Sand and Soft Suede.
  • I created this one just like yesterday’s project.  I even used the same mountain mask – I just shifted it to give it a different look by creating a much larger mountain.

DSC01447

  • In this project, you see more of the trees in the distance and only two up close.
  • The actual scene measures 2 5/8” x 3 1/2” with the White Matte measuring 3” x 4 1/4”.  This gives a small space at the bottom where you can criss-cross some linen thread.  By popping up your scene you add a little emphasis to your creation.

DSC01448

    • Rather than leaving the white space so plain in the background, choose to add a background stamp.  Here you see Canvas (retired) by Stampin’ Up!.  But several companies have stamps just like this one.  It’s a great go to design!
    • By only using the background stamp on 2/3 of the card it doesn’t overpower the card.  Leaving some pure white space on the bottom helps to keep the focal point on the scene.  Use a small strip that your probably have in your scrap bin to cover up the end of the stamping leading into the white space.  Or use another mask when you stamp it that’s torn for an easy blend.


  • DSC01419

Although the scene is similar to the first, the card is a completely different look.  I hope you liked my turn lemons into lemonade card – tomorrow’s is even better!  See you then.

Signature-Blog

[optin_box style=”14″ alignment=”center” action=”http://www.aweber.com/scripts/addlead.pl” disable_name=”Y” method=”post” email_field=”email” email_default=”Enter your email address” email_order=”1″ integration_type=”custom” double_optin=”Y” name_default=”Enter your first name”][optin_box_hidden][/optin_box_hidden][optin_box_code]

[/optin_box_code][optin_box_field name=”headline”]If you enjoyed this tutorial…[/optin_box_field][optin_box_field name=”paragraph”]PHA+PHNwYW4gc3R5bGU9ImNvbG9yOiAjNjQ2MzVlOyI+TGV04oCZcyBzdGF5IGluIHRvdWNoISBNeSBvY2Nhc2lvbmFswqA8L3NwYW4+PHNwYW4gc3R5bGU9ImNvbG9yOiAjNjY2Njk5OyI+PHN0cm9uZz48ZW0+ZXhjbHVzaXZlPC9lbT48L3N0cm9uZz7CoDwvc3Bhbj48c3BhbiBzdHlsZT0iY29sb3I6ICM2NDYzNWU7Ij5DcmVhdGl2ZSBUaXBzIGUtbGV0dGVyIHdpbGwgdGVhY2ggeW91IHRvIG1ha2UgcHJvamVjdHMgdGhhdCB5b3UgbG92ZeKApjwvc3Bhbj48L3A+Cg==[/optin_box_field][optin_box_field name=”privacy”][/optin_box_field][optin_box_field name=”top_color”]undefined[/optin_box_field][optin_box_button type=”0″ button_below=”Y”]Send me exclusive tips![/optin_box_button] [/optin_box]


1+2=3 Stamp Series #001

Do you remember what it’s like to just start a hobby out?  You didn’t have a lot of stamps or colors did you?  I thought it might be fun to think like a first day stamper.  Back when I had a REALLY limited number of supplies – two stamp sets, a few ink pads, one package of matching colors and only my creativity to guide me.  Which let’s be honest – my creativity back then was bare minimal!

So I thought it would be fun to an ongoing series called 1+2=3 or, One stamp set + two ink pads = three looks. 

Now the official rules are going to be the following:

  • Primarily use the images from one stamp set.  Use a greeting from another set if not supplied in the set.
  • You can use a background stamp in your cards – but only one amongst the three projects. (I gave myself this leeway, since that’s what I started with!)
  • You may only use two colors of ink plus a neutral or versamark.
  • Your card stock colors must include either of your the two colors plus white, vanilla or black.
  • You can use basic accessories such as paper piercing, sponges, embossing, pearls, rhinestones, dimensionals and ribbon to accessorize your cards.

Sounds pretty easy, right?  We’ll see about that!  Here goes – I kept project one pretty simple – a one layer card.  Today I’m going to post the first project and reveal the next two over the next few days.  And of course if you’re subscribed to the Creative Tips list – you’ll be sent an extra project tomorrow (June 19th) – so be sure to sign up today!  Hope you enjoy them!

1 – Stamp – For this series I thought I’d choose a stamp set that has been available for over 20 years and is still on the market…the ever popular Stampin’ Up! set Lovely as A Tree.  This works with any large tree stamp.  Since there aren’t any greeting stamps in this set, I used one from the retired set Perfect Words.

2 – Colors – Two colors were used in all three projects: Sahara Sand and Soft Suede by Stampin Up.  For the cardstock in later projects, I only used Soft Suede along with Whisper White.

3 – Projects – while a few are a bit similar, they are vastly different.  Enjoy!

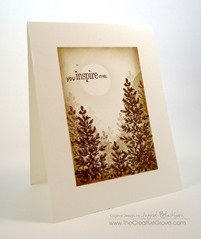
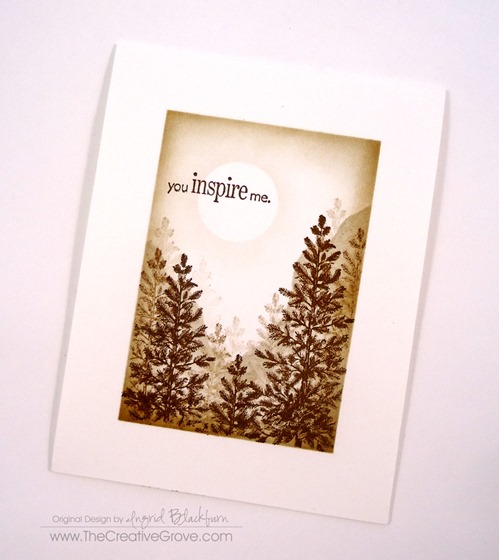
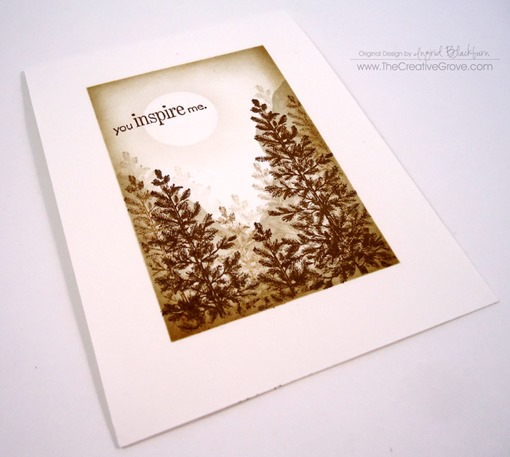
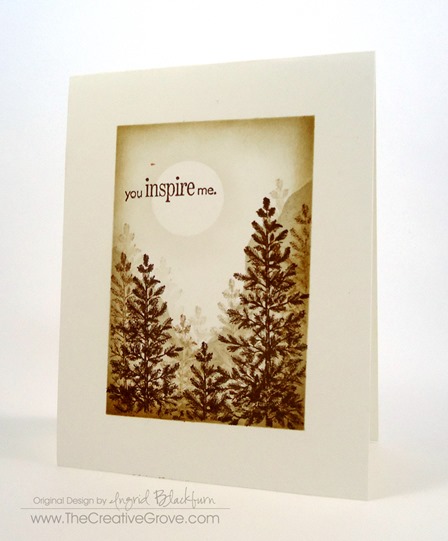
Series #001 – Project 1: One Sheet Mystical Forest:

DSC01414

  • Fold a piece of 4 1/2” x 11” piece of Whisper White card stock in half.
  • Mask off 3/4” around the border.  To see a great step by step video tutorial on how to do this, join the Creative Tips List for free – your first video will show this exact technique.  To see it – sign up to the right!

DSC01440

  • Sponge Sahara Sand around the perimeter and then a smaller soft suede.
  • Mask off mountains to the left and right, sponging in Sahara Sand.
  • Mask off a Moon.

DSC01445


  • Stamp several images of the main Pine Tree image in multi-generational Sahara Sand.  Stamp three images of alternating heights in Soft Suede in the front.
  • Add your greeting and remove your mask!

It’s a rather simple project – has a few steps, and I won’t lie – if you don’t mask it off properly, you can really mess it up…check out how you can turn two glaring mistakes that I made and learn how to avoid them!  Check out the second project here!

Signature-Blog

[optin_box style=”14″ alignment=”center” action=”http://www.aweber.com/scripts/addlead.pl” disable_name=”Y” method=”post” email_field=”email” email_default=”Enter your email address” email_order=”1″ integration_type=”custom” double_optin=”Y” name_default=”Enter your first name”][optin_box_hidden][/optin_box_hidden][optin_box_code]

[/optin_box_code][optin_box_field name=”headline”]If you enjoyed this tutorial…[/optin_box_field][optin_box_field name=”paragraph”]PHA+PHNwYW4gc3R5bGU9ImNvbG9yOiAjNjQ2MzVlOyI+TGV04oCZcyBzdGF5IGluIHRvdWNoISBNeSBvY2Nhc2lvbmFswqA8L3NwYW4+PHNwYW4gc3R5bGU9ImNvbG9yOiAjNjY2Njk5OyI+PHN0cm9uZz48ZW0+ZXhjbHVzaXZlPC9lbT48L3N0cm9uZz7CoDwvc3Bhbj48c3BhbiBzdHlsZT0iY29sb3I6ICM2NDYzNWU7Ij5DcmVhdGl2ZSBUaXBzIGUtbGV0dGVyIHdpbGwgdGVhY2ggeW91IHRvIG1ha2UgcHJvamVjdHMgdGhhdCB5b3UgbG92ZeKApjwvc3Bhbj48L3A+Cg==[/optin_box_field][optin_box_field name=”privacy”][/optin_box_field][optin_box_field name=”top_color”]undefined[/optin_box_field][optin_box_button type=”0″ button_below=”Y”]Send me exclusive tips![/optin_box_button] [/optin_box]


DSC01417