So what did you think so far? We’ve had some great feedback from this series! I hope you’ve enjoyed the simplicity of it. And if you were on the Creative Tips list, then you saw the bonus 4th project too! Don’t fret – get on the list by tomorrow (6/21/14) and I’ll send it out to you. For the bonus project I broke from the rules a bit set forth from the challenge, but figured since it was a bonus it was okay! ![]()
So, just to review, here are the rules for this challenge:
1 Stamp – For this series I thought I’d choose a stamp set that has been available for over 20 years and is still on the market…the ever popular Stampin’ Up! set Lovely as A Tree. This works with any large tree stamp. Since there aren’t any greeting stamps in this set, I used one from the retired set Perfect Words.
+ 2 Colors – Two colors were used in all three projects: Sahara Sand and Soft Suede by Stampin Up. For the cardstock in later projects, I only used Soft Suede along with Whisper White. =
= 3 Projects – while a few are a bit similar, they are vastly different. Enjoy!
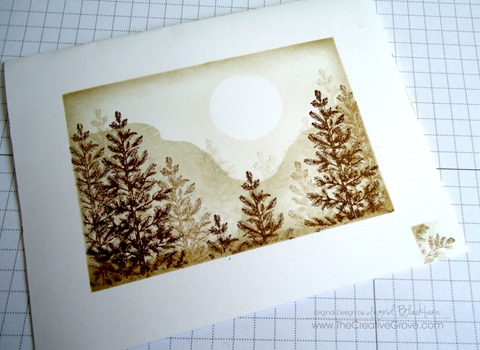
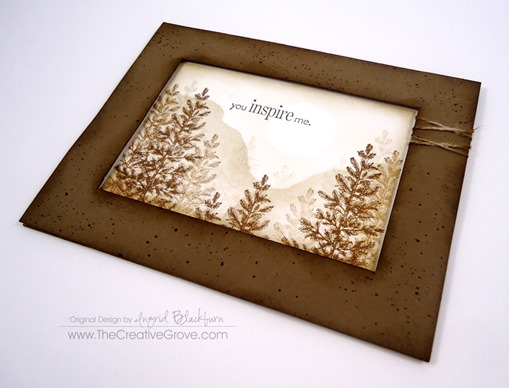
If you remember from yesterday’s post, I messed up my first and second try at this project. Rather than let that get me down, I turned them into two totally different looks! And a series was born. Okay, corny enough for you – Michael is rolling his eyes…lol! Here is my messed up version of this project – it was intended as a one layer card, but instead I turned it into the beauty you see further below. Here is my original card – miss-masked (note the lower right corner).
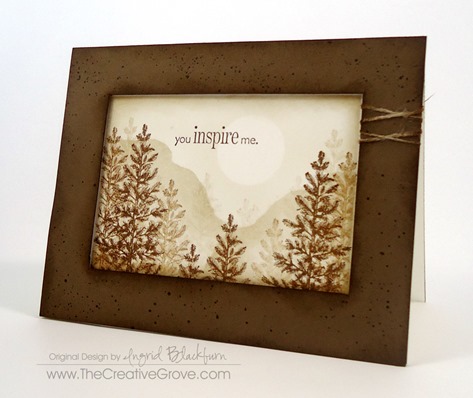
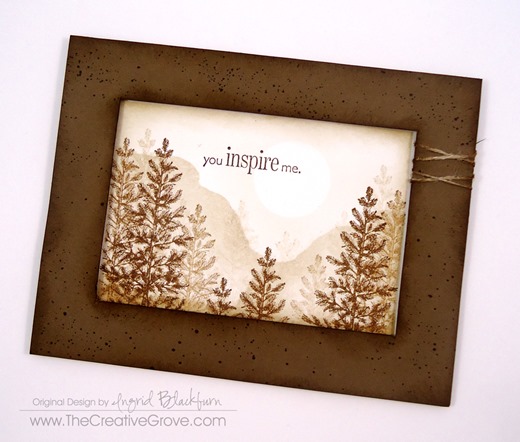
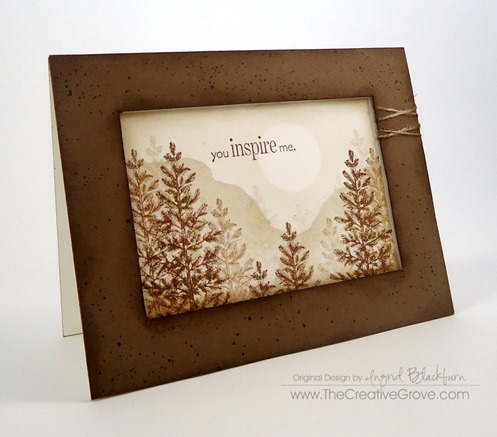
And here is the final result:
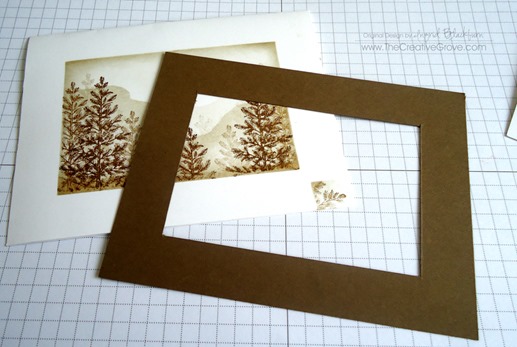
To make this card – I used the exact one layer card as a base, and added a popped up frame. Here are a few tricks to make this seem flawless and intended.
- The cut out frame is just slightly smaller than the original masked off window. The original window was 3/4”, my cut out frame measures 1/16” larger – that’s the width of the frame (13/16ths) , producing a smaller visible area. This will help to hide the white area that was masked off originally.
- Add some interest to the frame. Here you see random spritzed dots in Soft Suede using a color spritzer and a marker. To keep with the outdoor theme, sponge both the interior and exterior of your frame.
- Add some criss-crossed thread to one side.
- Sponge the complete exterior of your one layer card first before adding the frame. Use the same color of your frame. This way, should your frame be slightly off, if the white shows, it blends flawlessly with your frame. Can you see the entire top of my card? It shows as my frame was slightly smaller.
- Finally, pop the entire frame up using foam tape or dimensionals. Keep your tape and dimensionals closer to the inside of the frame giving it more of a shadowbox look.
To learn how I sponged, masked and created this card, check out the first and second cards in this series here:
I hope you enjoyed this series! Thanks for joining me and be sure to stop by tomorrow for another project with this stamp set… why, just because!! It’s completely different and used a totally different color combination, but turned out fabulous! Just thought I’d keep the theme going this week.
Have a creative day and see you around the grove!
[optin_box style=”14″ alignment=”center” action=”http://www.aweber.com/scripts/addlead.pl” disable_name=”Y” method=”post” email_field=”email” email_default=”Enter your email address” email_order=”1″ integration_type=”custom” double_optin=”Y” name_default=”Enter your first name”][optin_box_hidden][/optin_box_hidden][optin_box_code]
[/optin_box_code][optin_box_field name=”headline”]If you enjoyed this tutorial…[/optin_box_field][optin_box_field name=”paragraph”]PHA+PHNwYW4gc3R5bGU9ImNvbG9yOiAjNjQ2MzVlOyI+TGV04oCZcyBzdGF5IGluIHRvdWNoISBNeSBvY2Nhc2lvbmFswqA8L3NwYW4+PHNwYW4gc3R5bGU9ImNvbG9yOiAjNjY2Njk5OyI+PHN0cm9uZz48ZW0+ZXhjbHVzaXZlPC9lbT48L3N0cm9uZz7CoDwvc3Bhbj48c3BhbiBzdHlsZT0iY29sb3I6ICM2NDYzNWU7Ij5DcmVhdGl2ZSBUaXBzIGUtbGV0dGVyIHdpbGwgdGVhY2ggeW91IHRvIG1ha2UgcHJvamVjdHMgdGhhdCB5b3UgbG92ZeKApjwvc3Bhbj48L3A+Cg==[/optin_box_field][optin_box_field name=”privacy”][/optin_box_field][optin_box_field name=”top_color”]undefined[/optin_box_field][optin_box_button type=”0″ button_below=”Y”]Send me exclusive tips![/optin_box_button] [/optin_box]

It’s beautiful !!
So glad you love it Doris! Thanks so much for stopping by today. 🙂
LOVE this, Ingrid! SO simple yet striking with just a few colors! You are so amazing! Thanks for the terrific ideas!
Thanks Jennifer! I’m glad you love it. You are very welcome – thanks for stopping by today. 🙂
Another beautiful save. Like the shadowbox look and the addition of the crossed threads on side. This frames your picture beautifully.
.
Thanks Carol! They turned out pretty okay. I love it when a project comes together. 🙂 Hope you’re stamping today.